A Comprehensive Guide to Leveling an Above Ground Pool: Steps, Tips, and Tools
An above ground pool is an excellent addition to any backyard, providing a fun and refreshing way to cool off during the hot summer months. However, proper installation is crucial to ensure the pool’s stability, longevity, and safety. One of the essential aspects of pool installation is ensuring the pool is level. In this article, we’ll provide a detailed guide on how to level an above ground pool, including the steps, tips, tools, and materials you’ll need.
Quick answer
A Comprehensive Guide to Leveling an Above Ground Pool: Steps, Tips, and Tools: An above ground pool is an excellent addition to any backyard, providing a fun and refreshing way to cool off during the hot summer months. However, proper installation is crucial to ensure the pool’s stability.
Tools and Materials
- Long wooden stake or metal rebar
- String
- Line level
- Shovel
- Tamper or plate compactor (can be rented)
- Carpenter’s level
- Builder’s sand (optional)
- Landscape fabric (optional)
Step-by-Step Guide to Leveling an Above Ground Pool
Step 1: Choose the pool site
Select a flat, open area for your pool, free of rocks, roots, or other obstructions. Consider factors such as sunlight exposure, proximity to electrical outlets, and distance from your house for easy access.
Step 2: Mark the pool’s perimeter
Using the wooden stake or metal rebar, mark the center of your pool area. Attach a string to the stake, and measure out half the pool’s diameter. Walk around the stake, marking the pool’s perimeter with spray paint or by driving small stakes into the ground.
Step 3: Remove sod and level the ground
Using a shovel, remove the sod within the marked pool area. Begin leveling the ground by removing soil from the high areas and adding it to the low areas. It’s essential to level the entire pool area, not just the perimeter.
Step 4: Check the level
Attach a line level to the string and walk around the pool perimeter, making sure the string remains level. If you notice any low or high areas, adjust the soil accordingly. Use a carpenter’s level to verify the ground is level in both the X and Y axes.
Step 5: Compact the ground
Use a tamper or rent a plate compactor to compact the soil firmly. This step is crucial to prevent the ground from settling unevenly once the pool is filled with water.
Step 6: Add a layer of sand (optional)
Although not necessary, some pool owners prefer to add a 1-2 inch layer of builder’s sand to provide a smoother and more forgiving surface for the pool liner. Spread the sand evenly and compact it with the tamper or plate compactor.
Step 7: Install landscape fabric (optional)
To prevent weeds or grass from growing beneath the pool, you may choose to install landscape fabric on the leveled ground. Secure the fabric with landscape staples to prevent shifting.
Step 8: Assemble the pool
Follow the manufacturer’s instructions to assemble your above ground pool on the leveled site.
Step 9: Final level check
Before filling your pool with water, perform a final check to ensure the pool is level. Place a carpenter’s level on the top rail of the pool in multiple locations to verify that it is level.
Tips for Leveling an Above Ground Pool
- Take your time: Leveling the ground can be a time-consuming process. Be patient, and make sure you’re thorough in your efforts to ensure a level and stable pool foundation.
- Do not build up low areas with sand: Adding sand to low areas can lead to an unstable foundation as the sand shifts over time. Instead, remove soil from high areas to create a level surface.
- Consult your pool’s installation manual: Be sure to follow any specific leveling instructions provided by your pool’s manufacturer.
Leveling an above ground pool is a crucial step in the installation process. A level pool ensures a stable foundation, prolongs the pool’s lifespan, and promotes safety. By following this comprehensive guide, you can successfully level your pool site and enjoy a fun and refreshing backyard oasis. Remember, it’s essential to be patient and thorough during the leveling process, as this will pay off in the long run, ensuring many enjoyable seasons with your above ground pool.
Recommended Products
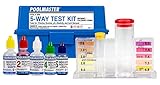
- Taylor K-2006 Complete Test Kit
- AquaChek 7-Way Test Strips
- In The Swim 3-Inch Chlorine Tablets
- Dolphin Nautilus CC Plus Robotic Cleaner
As an Amazon Associate, we earn from qualifying purchases.
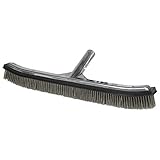
As an Amazon Associate, Pool Chemical Calculator earns from qualifying purchases. Accurate readings make every chlorine, pH, alkalinity, calcium, and CYA dose safer. Slow-dissolving tablets help keep routine free chlorine steady. Brushing breaks up algae films, dead spots, and wall buildup so chemicals and filtration work.
Recommended pool supplies

Get exact pool chemical doses
Pool Chemical Calculator turns your test readings, pool volume, and target levels into exact treatment amounts for chlorine, pH, alkalinity, calcium, stabilizer, salt, and more.
Open the Pool Chemical Calculator app or download it from the App Store and Google Play.
Related posts:
 A DIY Guide to Changing the Sand in Your Pool’s Sand Filter
 Understanding Chlorine Levels in Swimming Pools and Spas: The Ultimate Guide
 Inground vs. Above Ground Pools: Comparing Costs and Considerations for a 10,000-Gallon Pool
 Fiberglass Pools: Weighing the Pros and Cons for First-Time Pool Owners