Pool Water Testing at Home: The Complete Guide
Quick Reference: Pool Testing Schedule & Parameters
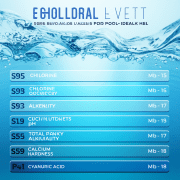
| Parameter | Ideal Range | Test Frequency | Tool |
|---|---|---|---|
| pH | 7.4 – 7.6 | 2-3x per week | Test strips or liquid kit |
| Free Chlorine | 1-3 ppm | 2-3x per week | DPD test or strips |
| Total Alkalinity | 80-120 ppm | Weekly | Liquid drop test |
| Calcium Hardness | 200-400 ppm | Monthly | Liquid test or pool store |
| CYA (Stabilizer) | 30-50 ppm | Monthly | Turbidity test or strips |
| Total Dissolved Solids | < 1500 ppm | 2-3x per season | TDS meter |
Why Home Pool Testing Matters
Professional pool store testing is valuable, but waiting days for results or making weekly trips isn’t practical. Home testing gives you real-time data so you can fix problems immediately—before cloudy water, algae blooms, or equipment damage occurs.
Benefits of regular home testing:
- Catch chemistry issues within hours, not days
- Save money by preventing major problems
- Optimize chemical usage—stop guessing, start measuring
- Keep your pool safe for swimmers 24/7
- Extend equipment lifespan by maintaining proper balance
Testing isn’t complicated. With the right tools and a 5-minute routine, anyone can maintain perfect pool chemistry.
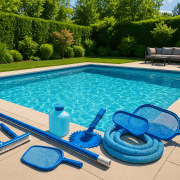
Essential Pool Testing Tools
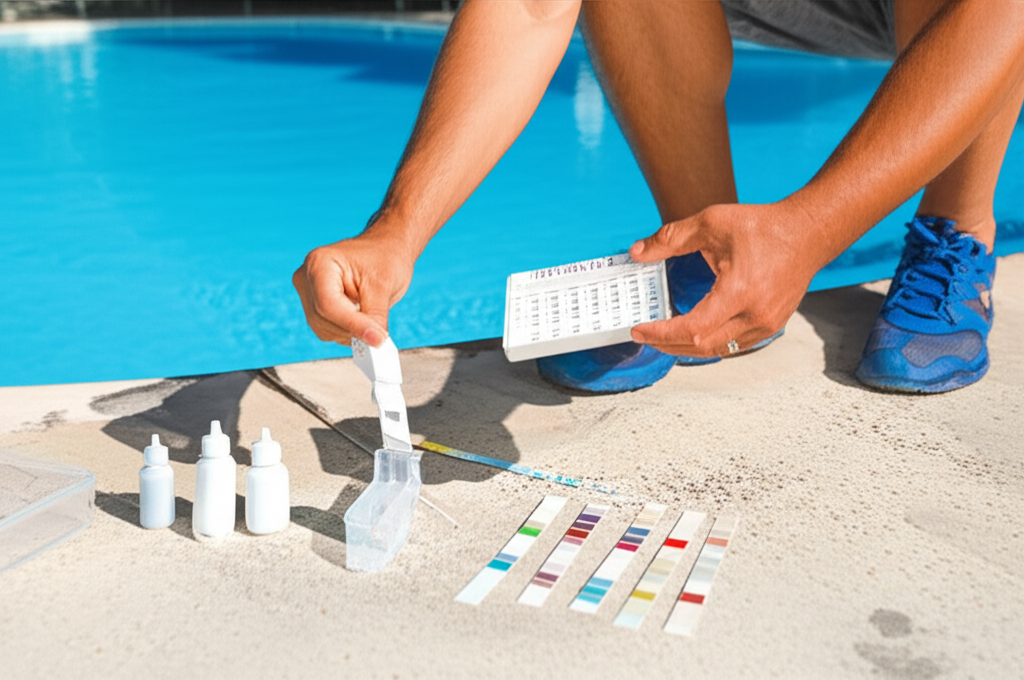
1. Test Strips (Best for Daily Quick Checks)
Cost: $10-25 for 50-100 strips
Accuracy: ±0.2-0.5 pH units, ±0.5 ppm chlorine
Tests: pH, chlorine, alkalinity, hardness, CYA (some models)
How to use:
- Dip strip 1-2 seconds elbow-deep in pool (away from returns)
- Remove immediately—don’t swish or leave submerged
- Hold level for 15 seconds (check package for exact time)
- Compare to color chart in natural daylight
- Read within 30 seconds before colors fade
Pros: Fast, easy, cheap, no mixing
Cons: Less accurate, colors fade quickly, humidity ruins unused strips
Best for: Daily monitoring between precise liquid tests
2. Liquid Drop Test Kits (Most Accurate Home Option)
Cost: $20-60 for 100+ tests
Accuracy: ±0.1 pH units, ±0.2 ppm chlorine
Tests: pH, free/total chlorine, alkalinity, acid demand
How to use:
- Rinse test vials with pool water 2-3 times
- Fill to the line with pool water from elbow depth
- Add drops according to instructions (usually 4-5 drops)
- Cap vial, shake 10-15 seconds
- Hold against white background in natural light
- Match color to chart—not between colors, pick closest match
Pros: Very accurate, reliable, long shelf life
Cons: Slightly slower than strips, requires mixing
Best for: Weekly testing and before making chemical adjustments
Popular kits: Taylor K-2006 (professional grade), LaMotte ColorQ (digital color matching)
3. Digital Testers (Maximum Precision)
Cost: $30-300 depending on features
Accuracy: ±0.01 pH, ±0.1 ppm chlorine
Types: pH meters, ORP meters, photometers, all-in-one smart testers
How to use (pH meter example):
- Calibrate monthly using pH 7.0 and pH 10.0 buffer solutions
- Rinse probe with distilled water
- Submerge probe in pool water (elbow depth)
- Wait for reading to stabilize (10-30 seconds)
- Record result
- Rinse probe, store in storage solution (not water!)
Pros: Extremely accurate, eliminates color-matching errors
Cons: Requires calibration, higher cost, probe replacement needed
Best for: Serious pool owners, saltwater pools, commercial pools
4. Specialty Tests
CYA (Stabilizer) Test:
Use turbidity vial test—fill with pool water, add powder, look down through tube at black dot. When dot disappears, read CYA level on tube. Test monthly.
Calcium Hardness Test:
Requires liquid test kit with titration (drop counting). Add drops until color changes from red to blue. Count drops to calculate ppm. Test monthly.
TDS Meter:
Digital meter measures total dissolved solids. Dip probe, read instantly. When TDS exceeds 1500 ppm above fill water, partial drain needed. Test 2-3x per season.
Step-by-Step: Perfect Pool Testing Routine
Daily Quick Check (2 minutes)
- Visual inspection: Look for debris, algae spots, cloudy areas
- Test strip check: pH and chlorine only
- Record results: Use app or notebook to track trends
If both pH and chlorine are in range, you’re done. If either is off, do a full liquid test before adjusting.
Weekly Full Test (5-7 minutes)
- pH – Liquid test for accuracy
- Free chlorine – DPD liquid test
- Total chlorine – Compare to free chlorine (difference = combined chlorine)
- Total alkalinity – Titration test (drop counting)
- Shock level check – If combined chlorine > 0.5 ppm, shock needed
Monthly Deep Test (10 minutes)
- All weekly tests above
- Calcium hardness – Titration test
- CYA (stabilizer) – Turbidity test
- TDS – Digital meter (optional but recommended)
- Salt level – For saltwater pools, test with salt meter
???? Get Accurate Pool Chemical Dosing Instantly
Pool Chemical Calculator takes the guesswork out of pool maintenance. Just enter your pool size and current readings — get exact amounts of chemicals needed.
Available on:
How to Test Each Parameter Correctly
pH Testing (Most Critical)
pH affects everything—chlorine effectiveness, swimmer comfort, equipment longevity. Test 2-3 times per week, more often during heat waves.
Common mistakes:
- Testing near return jets (freshly added chemicals skew results)
- Reading test in indoor light (use natural daylight)
- Using old reagents (replace annually)
- Comparing between color blocks instead of matching closest
Fix pH before testing chlorine. Chlorine test accuracy depends on proper pH. Always test pH first.
Read our complete pH guide for adjustment strategies.
Chlorine Testing (Safety Critical)
Test both free chlorine (active sanitizer) and total chlorine (free + combined). The difference tells you if shocking is needed.
Ideal readings:
- Free chlorine: 1-3 ppm
- Total chlorine: Same as free chlorine (or max 0.5 ppm higher)
- Combined chlorine: < 0.5 ppm (if higher, shock immediately)
DPD liquid test method:
- Fill vial to line with pool water
- Add DPD #1 tablet, cap, shake until dissolved
- Read color = free chlorine
- Add DPD #3 tablet, shake
- Read color = total chlorine
- Subtract free from total = combined chlorine
Calculate exact chlorine dosing based on your results.
Total Alkalinity Testing
Alkalinity stabilizes pH. Low alkalinity causes pH to bounce wildly. High alkalinity makes pH hard to adjust.
Target: 80-120 ppm
Titration test method:
- Fill vial to line (usually 25 mL)
- Add alkalinity indicator drops (turns water green)
- Add titrant drops one at a time, swirl after each
- Count drops until color changes from green to red
- Multiply drop count by factor (usually 10) = ppm alkalinity
Example: 9 drops × 10 = 90 ppm alkalinity
Adjust alkalinity with our alkalinity calculator.
Calcium Hardness Testing
Calcium prevents corrosive water (too low) and scaling (too high). Plaster pools need higher calcium than vinyl.
Target: 200-400 ppm (plaster: 250-350, vinyl: 175-250)
Similar titration method to alkalinity: Drop counting until color change, multiply by factor.
When to adjust:
- Too low: Add calcium chloride (increases 10 ppm per oz per 1,000 gallons)
- Too high: Partial drain and refill (only way to lower calcium)
CYA (Cyanuric Acid / Stabilizer) Testing
CYA protects chlorine from UV degradation. Too little = chlorine burns off in hours. Too much = chlorine becomes ineffective.
Target: 30-50 ppm (traditional chlorine), 70-80 ppm (saltwater pools)
Turbidity test method:
- Fill CYA vial to top line
- Add CYA reagent powder, cap, shake 30 seconds
- Look down through vial at black dot on bottom
- Pour out water slowly until black dot just disappears
- Read CYA level on vial graduations
Note: Test in shade, not direct sunlight. Bright light makes dot harder to see.
When to Test Your Pool
Best Time of Day
Test in late afternoon or early evening (4-6 PM) for most accurate readings. This is when:
- Sun has degraded chlorine to daily low
- pH has stabilized from morning additions
- Water temperature is typical for the day
- You have time to add chemicals before nighttime close
Avoid testing:
- Within 4 hours of adding chemicals
- Directly after shocking
- During or immediately after rainstorms
- Near return jets or skimmers
Test More Frequently When:
- Heat waves: Daily testing—heat accelerates chemical consumption
- Heavy use: Test before and after pool parties
- After rain: Rain dilutes chemicals and adds contaminants
- Opening/closing pool: Test every other day for first 2 weeks
- Algae treatment: Daily until clear
- Equipment changes: New pump, filter, or heater affects chemistry
Common Testing Mistakes to Avoid
1. Testing Too Close to Jets or Skimmers
Problem: Recently added chemicals haven’t fully mixed yet.
Solution: Test from middle of pool, elbow-deep, away from returns.
2. Using Expired Reagents
Problem: Test chemicals degrade over time, especially in heat/humidity.
Solution: Write purchase date on bottles. Replace liquid reagents annually, tablets every 2 years. Store in cool, dark place.
3. Not Rinsing Test Vials
Problem: Residue from previous tests contaminates new samples.
Solution: Rinse vials 2-3 times with pool water before each test. Dry thoroughly between uses.
4. Reading Tests in Poor Light
Problem: Indoor lighting changes color perception.
Solution: Always read tests in natural daylight. Hold against white background for best color matching.
5. Ignoring Total Chlorine
Problem: Free chlorine might look fine, but combined chlorine is high (chloramines = cloudy water, eye irritation).
Solution: Test both free and total chlorine weekly. If total > free by more than 0.5 ppm, shock immediately.
6. Testing Immediately After Adding Chemicals
Problem: Chemicals need time to circulate and react.
Solution: Wait at least 4-6 hours after additions before retesting. Run pump continuously during this time.
Interpreting Your Test Results
Perfect Chemistry (All Parameters in Range)
pH: 7.4-7.6
Free Chlorine: 1-3 ppm
Total Alkalinity: 80-120 ppm
Calcium Hardness: 200-400 ppm
CYA: 30-50 ppm
Action: None needed! Maintain current routine.
Cloudy Water Despite Good Chlorine
Likely causes:
- High pH (reduces chlorine effectiveness)
- High calcium (scaling/precipitation)
- Combined chlorine >0.5 ppm (chloramines)
- Poor filtration
Action: Lower pH to 7.4, shock if combined chlorine is high, run filter 24 hours, backwash if pressure is high.
Green Water (Algae)
Test shows: Low free chlorine, possibly high pH
Action:
- Lower pH to 7.2-7.4 first
- Shock at 3-5x normal dose (30 ppm for severe algae)
- Brush all surfaces
- Run filter continuously
- Test daily, maintain 10+ ppm chlorine until clear
- Vacuum to waste, not through filter
Eye Irritation Despite “Normal” Chlorine
Test shows: High combined chlorine (total > free by 0.5+ ppm)
What it means: Chloramines (used-up chlorine bound to contaminants) are causing irritation, not chlorine itself.
Action: Shock pool to break chloramine bond. Use non-chlorine shock (MPS) or super-chlorinate to 10× normal level.
Maintaining a Test Log
Track your results to spot trends before they become problems.
What to Record
- Date and time of test
- All parameter readings
- Weather (temp, rain, sun exposure)
- Chemicals added (type, amount)
- Pool usage (hours, number of swimmers)
- Issues observed (cloudiness, algae spots, staining)
Use an App or Spreadsheet
Digital logs let you graph trends over time. The Pool Chemical Calculator app includes built-in test logging and trending.
Benefits of logging:
- Predict when shock is needed based on usage patterns
- Identify recurring pH drift issues
- Optimize chemical purchasing (avoid over-buying)
- Provide history for pool professionals during service
Pool Testing for Different Pool Types
Saltwater Pools
All standard tests plus:
- Salt level: 2700-3400 ppm (test monthly with salt meter or test strips)
- pH drift: Salt chlorine generators raise pH constantly—test pH 3x per week
- Higher CYA target: 70-80 ppm (vs 30-50 for traditional chlorine)
Read our saltwater pool guide.
Above Ground Pools
Smaller water volume = faster chemistry changes.
- Test 3-4x per week (vs 2-3x for inground)
- Use smaller chemical doses
- Retest 1-2 hours after adjustments (vs 4-6 hours for larger pools)
See our above ground pool maintenance guide.
Indoor Pools
- No UV degradation = chlorine lasts longer, less CYA needed (20-30 ppm)
- Higher risk of chloramine buildup = test combined chlorine weekly
- Consistent temperature = more stable chemistry, test 1-2x per week
When to Use Professional Pool Store Testing
Home testing handles 95% of pool maintenance. Bring a sample to a pool store when:
- Opening/closing pool: Get comprehensive 10+ parameter analysis
- Persistent problems: Can’t get water balanced despite correct readings
- Home tests don’t match pool appearance: Water looks bad but tests fine
- Quarterly check: Verify your home test kit accuracy
- Unusual staining or scaling: May need metal/phosphate testing
How to collect a good sample:
- Use clean plastic bottle (not glass)
- Rinse bottle 3x with pool water
- Collect from elbow depth, middle of pool
- Fill bottle to top (minimizes air contact)
- Cap tightly
- Test within 2 hours (same day is best)
- Keep out of direct sunlight during transport
FAQ: Pool Water Testing Questions
How often should I test my pool water?
Test pH and chlorine 2-3 times per week during normal use. Test daily during heat waves, after heavy rain, or during pool parties. Test total alkalinity weekly, and calcium hardness plus CYA monthly. The more you test, the earlier you catch problems—preventing expensive fixes later.
What should I test first in my pool?
Always test pH first. pH affects the accuracy of chlorine tests and determines how effectively your chlorine works. After pH, test free chlorine and total chlorine. Once weekly, add total alkalinity to your test routine. Monthly, test calcium hardness and CYA (stabilizer).
Can I trust test strips for pool maintenance?
Test strips are reliable for daily quick checks but less accurate than liquid tests (±0.2-0.5 pH units vs ±0.1). Use strips for routine monitoring, but switch to liquid drop tests before adding chemicals or when troubleshooting problems. Replace test strips annually and store in a cool, dry place to maintain accuracy.
Why do my pool test results vary from the pool store?
Differences occur due to sample age (test within 2 hours of collection), reagent freshness (replace home kits annually), testing conditions (use natural light), and technique. Pool stores use fresh reagents and calibrated equipment. If home tests consistently differ by >0.3 pH or >1 ppm chlorine, replace your reagents or upgrade your test kit.
What time of day should I test pool water?
Test between 4-6 PM for most accurate results. This timing captures daily chlorine low point after UV degradation, stabilized pH from morning adjustments, and typical water temperature. Avoid testing within 4 hours of adding chemicals, during rainstorms, or near return jets where chemicals haven’t fully mixed.
How do I know if my pool test kit is still good?
Check reagent expiration dates—replace liquid reagents annually and test strips every 1-2 years. Signs of expired reagents: faded colors, crystallized powders, separated liquids, or test results that don’t match pool appearance. Store test kits in cool, dark, dry places. Never use reagents more than 2 years old, regardless of appearance.
Should I test before or after adding pool chemicals?
Always test before adding chemicals to get accurate baseline readings. After adding chemicals, wait 4-6 hours with the pump running before retesting. This allows chemicals to fully circulate and react. Testing too soon shows artificially high or low readings near the addition point, leading to incorrect adjustments.