Caring for Your Chlorine Generator Cell: Essential Tips for Optimal Performance and Longevity
Keep Your Salt Water Pool Clean and Clear by Properly Maintaining Your Chlorine Generator Cell
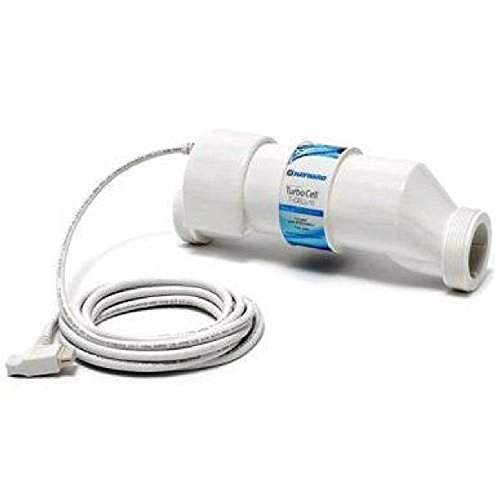
Chlorine generator cells, also known as salt cells, are a critical component of a salt water pool’s sanitation system. They use electrolysis to convert salt into chlorine, providing continuous sanitization to keep pool water clean and clear. Proper care and maintenance of the chlorine generator cell are crucial to ensure optimal performance and extend the lifespan of the cell. In this article, we will discuss the proper way to care for your chlorine generator cell to keep your salt water pool in top shape.
Quick answer
Caring for Your Chlorine Generator Cell: Essential Tips for Optimal Performance and Longevity: Keep Your Salt Water Pool Clean and Clear by Properly Maintaining Your Chlorine Generator Cell Chlorine generator cells, also known as salt cells, are a critical component of a salt water pool’s sanitation system. They.
Step 1: Inspect the Cell Regularly
Regularly inspect the chlorine generator cell to identify any issues or signs of wear. Check for buildup, scaling, or damage to the cell’s plates or other components. Monitoring the cell’s performance and keeping an eye on the salt chlorine generator’s output settings will help you determine when it’s time for cleaning or replacement.
Step 2: Clean the Cell as Needed
Over time, mineral deposits and calcium buildup can accumulate on the cell plates, reducing the cell’s efficiency and its ability to produce chlorine. Clean the cell as needed, typically every 3-6 months, or according to the manufacturer’s recommendations. Follow these steps to clean your chlorine generator cell:
- Turn off the pool pump and salt chlorine generator.
- Disconnect the cell from the generator’s control unit and remove it from the plumbing.
- Visually inspect the cell for buildup or scaling. If significant buildup is present, proceed with cleaning.
- Mix a cleaning solution of equal parts water and muriatic acid in a plastic container. Always add acid to water, not water to acid, to avoid a dangerous chemical reaction.
- Submerge the cell in the cleaning solution and let it soak for 15-30 minutes, or until the buildup has dissolved. Do not leave the cell in the cleaning solution for too long, as excessive exposure to acid can damage the cell.
- Use a soft brush or sponge to gently remove any remaining deposits from the cell plates. Avoid using abrasive tools that can damage the cell’s surface.
- Thoroughly rinse the cell with fresh water to remove any residual acid.
- Reinstall the cell, making sure all connections are secure and watertight.
Step 3: Maintain Proper Water Chemistry
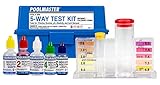
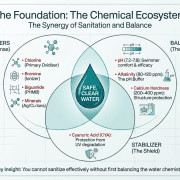
Maintaining balanced water chemistry in your salt water pool is crucial for the health of your chlorine generator cell. Test your pool water regularly and adjust the levels of pH, alkalinity, and salt concentration as needed to keep them within the recommended ranges. Proper water chemistry will help prevent excessive scaling and extend the life of the cell.
Step 4: Monitor the Salt Chlorine Generator’s Output
Regularly check the output settings on your salt chlorine generator to ensure it’s producing the correct amount of chlorine. Adjust the output settings as needed to maintain proper chlorine levels (1-3 ppm) in your pool. This will help prevent excessive wear on the cell and keep your pool water clean and clear.
Step 5: Replace the Cell When Necessary
Chlorine generator cells have a limited lifespan, typically ranging from 3-7 years, depending on usage and maintenance. As the cell reaches the end of its life, it may become less efficient and require more frequent cleaning or higher output settings to maintain proper chlorine levels. When the cell can no longer produce adequate chlorine, it’s time to replace it with a new one.
Proper care and maintenance of your chlorine generator cell are crucial for maintaining optimal performance and extending its lifespan. By regularly inspecting and cleaning the cell, maintaining balanced water chemistry, and monitoring the salt chlorine
As an Amazon Associate, Pool Chemical Calculator earns from qualifying purchases. Keeps saltwater chlorine generators in range without unnecessary additives. Accurate readings make every chlorine, pH, alkalinity, calcium, and CYA dose safer. Lowers high pH and helps bring alkalinity down when used carefully.
Recommended pool supplies

Get exact pool chemical doses
Pool Chemical Calculator turns your test readings, pool volume, and target levels into exact treatment amounts for chlorine, pH, alkalinity, calcium, stabilizer, salt, and more.
Open the Pool Chemical Calculator app or download it from the App Store and Google Play.
Related posts:
 The Saltron Mini Chlorine Generator: Revolutionizing Spa Sanitation and the Benefits of a Salt Water Spa
 How to Identify and Resolve Pool pH and Alkalinity Problems
 Mastering Pool Chemistry: The Ultimate 2026 Guide to Perfect Water Balance