The Ultimate Guide to Safely Shocking Your Above Ground Pool Like a Pro
Hey there, new pool owner! Congratulations on your fabulous above ground pool – it’s time to dive into the wonderful world of pool maintenance. One essential task you’ll need to master is shocking your pool, a process that keeps the water crystal clear and free from harmful bacteria. But don’t worry; with our easy-to-follow guide, you’ll be shocking your pool like a pro in no time. So, grab your safety goggles and let’s get started!
-
- Understand Why Shocking is Necessary Before we get into the nitty-gritty of how to shock your pool, it’s essential to understand why this process is so crucial. Shocking your pool means adding a high dose of chlorine or other sanitizing chemicals to eliminate contaminants, break down chloramines (combined chlorine), and restore the proper balance of free chlorine. Regular shocking prevents algae growth, keeps the water safe for swimmers, and ensures a pleasant pool experience.
- Choose the Right Shock Product There are several types of pool shock products on the market, including calcium hypochlorite, sodium dichlor, and non-chlorine shock. Read the labels carefully, and choose a product compatible with your pool type and sanitizing system. If you’re unsure which product to choose, consult your pool retailer or maintenance professional for guidance.
- Safety First! Shocking your pool involves handling strong chemicals, so always prioritize safety. Wear protective gloves, goggles, and clothes you don’t mind getting dirty. Also, make sure the area is well-ventilated, and never mix different types of pool chemicals together.
- Timing is Everything The best time to shock your pool is in the evening or at night when the sun isn’t blazing. This allows the chemicals to work effectively without being broken down by sunlight. Additionally, shocking your pool at night gives the chemicals time to work their magic before anyone takes a dip the next day.
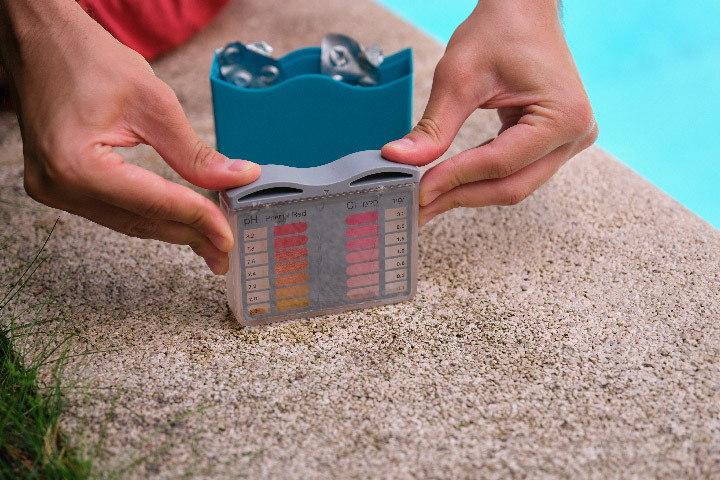
- Test and Balance Your Pool Water Before shocking, test your pool water with a reliable test kit or test strips. Ensure the pH level is between 7.2 and 7.6, and the water is balanced. If necessary, adjust the water chemistry before proceeding.
- Follow the Manufacturer’s Instructions Carefully read and follow the instructions on your shock product’s label. This will typically include information on the proper dosage, application method, and any necessary precautions. Remember that more isn’t always better – using too much shock can cause damage to your pool liner and equipment.
- Pre-Dissolve the Shock Never pour shock directly into your pool, as this can damage the liner. Instead, pre-dissolve the shock in a large bucket of water, stirring it gently with a plastic or wooden spoon. This helps distribute the chemicals evenly and reduces the risk of damage.
- Add the Shock to Your Pool Pour the dissolved shock solution slowly and evenly around the perimeter of your pool. Aim for the edges where the water meets the pool walls to ensure proper circulation.
- Keep Your Pump Running After adding the shock, keep your pool pump and filter running for at least 24 hours to circulate the chemicals effectively. This helps to distribute the shock evenly and clean the water more thoroughly.
- Test and Swim Once the shocking process is complete, test your pool water again to ensure the chlorine levels have returned to a safe range (1-3 ppm) before anyone goes for a swim. If the levels are still too high, wait a little longer and test again.
Conclusion: Now that you’ve mastered the art of shocking your above ground pool, you can enjoy crystal-clear water and a safe swimming environment all season long. Remember, practice makes perfect, so don’t be afraid to shock your pool regularly to keep it in tip-top shape. With this newfound knowledge, you’ll be the envy of your neighbors and the go-to pool expert in no time. So, grab your floaties, sunscreen, and swimsuit – it’s time to dive into your sparkling oasis and show off your pool-maintenance prowess! Happy swimming!
Recommended Products
As an Amazon Associate, we earn from qualifying purchases.
- In The Swim Cal-Hypo Pool Shock (24 x 1 lb bags) ($62) — 68% calcium hypochlorite shock in individually wrapped 1-lb bags for precise dosing. One bag per 10,000 gallons for routine weekly shocking.
- DryTec Calcium Hypochlorite Pool Shock (24 x 1 lb) ($67) — 73% available chlorine — the strongest cal-hypo shock on the market. Ideal for fighting stubborn algae blooms and heavy contamination.
- Taylor K-2006 Complete Pool Water Test Kit ($90) — The gold standard of pool test kits. Tests for free/combined chlorine, pH, alkalinity, calcium hardness, and CYA with professional-grade accuracy.
- AquaChek 7-Way Pool & Spa Test Strips (100 count) ($17) — Quick and easy 7-way test strips for chlorine, bromine, pH, alkalinity, hardness, and CYA. Great for daily spot checks between comprehensive testing.
- DryTec Non-Chlorine Pool Shock (6 x 1 lb) ($35) — Potassium monopersulfate oxidizer — swim in just 15 minutes after treatment. Perfect for routine oxidation without raising chlorine levels.


