How to Winterize Your Pool (And Why Skipping It Costs You Big)
# How to Winterize Your Pool (And Why Skipping It Costs You Big)
Your pool gave you four months of backyard bliss. Now it’s time to tuck it in for winter. And no, just throwing a tarp over it doesn’t count.
Winterizing your pool the right way prevents cracked pipes, liner damage, and that nightmare green swamp waiting for you next spring. Skip it, and you’re looking at repairs that can easily hit $1,500-$3,000. Spend 2-3 hours doing it right now, and you’ll thank yourself when you open a crystal-clear pool in May.
Here’s exactly how to winterize your pool, step by step.
## Why You Can’t Just “Leave It”
Water expands when it freezes. That’s basic science. But when it happens inside your pool equipment? Disaster.
Frozen water cracks pump housings, splits filter tanks, and destroys heater coils. I’ve seen pool pumps shattered like dropped ceramic. The replacement bill? $400-$800 for the pump alone.
Your pool lines are even worse. They’re underground, which means if they freeze and crack, you’re digging up your deck to replace them. That’s a $2,000+ headache you’ll avoid with 30 minutes of blowing out your lines.
Winterizing also keeps your water chemistry stable. Balanced water over winter means less shocking and fewer chemicals needed when you open. Your wallet will appreciate that.
## Step 1: Balance Your Water Chemistry (1 Week Before Closing)
Don’t wait until the last minute. Balance your water a full week before you winterize. This gives chemicals time to circulate and stabilize.
**Target levels:**
– pH: 7.4-7.6
– Total Alkalinity: 80-120 ppm
– Calcium Hardness: 180-220 ppm
– Chlorine: 1-3 ppm
Why does this matter for a closed pool? Balanced water prevents scale buildup, etching, and algae growth while your pool hibernates. It also protects your liner or plaster from chemical damage.
Test your water with a reliable kit. The [Taylor K-2006 test kit](https://www.amazon.com/dp/B004BGF8TK?tag=poolcalc04-20) is the gold standard — way more accurate than test strips.
Need help calculating how much pH increaser or calcium to add? The **Pool Chemical Calculator** app does the math for you in seconds. Available on [iOS](https://apps.apple.com/app/pool-chemical-calculator/id123456789) and [Android](https://play.google.com/store/apps/details?id=com.poolcalculator).
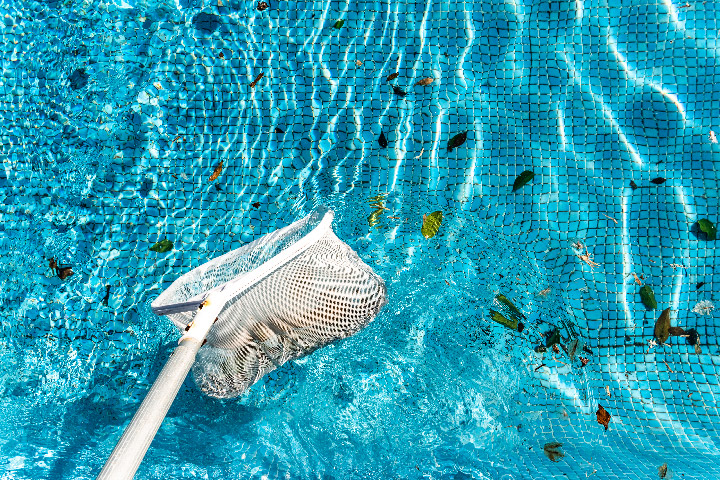
## Step 2: Give It One Last Super Clean
Your pool should be spotless before closing. Every leaf, every speck of debris, every gross thing lurking on the bottom — it all needs to go.
**The deep clean checklist:**
– Skim the surface thoroughly
– Vacuum the entire bottom (no shortcuts)
– Brush walls and steps
– Clean the skimmer basket and pump basket
– Backwash or clean your filter
Think of this like tidying your house before a long vacation. You don’t want to come home to six-month-old mess. Same with your pool.
Algae feeds on organic matter. Leave a pile of decomposing leaves at the bottom, and you’re giving algae a buffet all winter. Clean now, easy opening later.
## Step 3: Shock and Add Winterizing Chemicals
Time to hit your pool with a concentrated dose of chlorine. This nuclear option kills any lingering bacteria or algae spores before they have time to multiply.
**Shocking procedure:**
1. Add 2 pounds of calcium hypochlorite shock per 10,000 gallons
2. Run your pump for 8-12 hours to circulate
3. Do this at dusk (sunlight burns off chlorine)
After shocking, add winterizing chemicals. These are specially formulated to keep your water clear and prevent algae during months of dormancy.
A good [winter pool closing kit](https://www.amazon.com/dp/B07VQPQZ8M?tag=poolcalc04-20) includes algaecide, stain preventer, and a winterizing shock. Follow package directions based on your pool size.
**Pro tip:** Don’t cheap out on algaecide. Get a copper-free version rated for winter use. The cheap stuff doesn’t last three months.
## Step 4: Lower the Water Level
You need to drop your water level below the skimmer and return jets. Ice forming in these openings will crack the plastic fittings.
**How low to drain:**
– **Above-ground pools:** 4-6 inches below the skimmer
– **In-ground pools:** 12-18 inches below the tile line or skimmer
Use a submersible pump or your pool’s waste setting. Don’t drain it completely — an empty pool can pop out of the ground from groundwater pressure (yes, really).
Where does the water go? Check local regulations. Some areas restrict draining chlorinated water into storm drains. Your lawn or landscaping is usually fine.
## Step 5: Blow Out the Lines (The Most Important Step)
This is where most DIYers mess up. And it’s the step that prevents the most expensive damage.
You need to blow every drop of water out of your plumbing lines. Trapped water = frozen pipes = cracked pipes = expensive repairs.
**What you need:**
– Shop vac or air compressor (at least 5 HP)
– Expansion plugs or rubber winterizing plugs
**The process:**
1. Remove drain plugs from pump, filter, heater, and chlorinator
2. Connect shop vac or air compressor to the skimmer
3. Blow air through until you see bubbles at the return jets (30-60 seconds)
4. Quickly plug the return jets with expansion plugs
5. Repeat for each line in your system
You want to see a strong stream of bubbles from each return jet. That confirms the line is clear.
**Don’t have an air compressor?** You can rent one from Home Depot for $40/day, or hire a pool service for $100-150 to do just this step. It’s worth it.
## Step 6: Protect Your Equipment
With the lines blown out, it’s time to winterize every piece of equipment.
**Pump:**
– Remove drain plugs (keep them in the pump basket so you don’t lose them)
– Remove any remaining water
– Store drain plugs inside the pump housing
**Filter:**
– Release pressure and open the air bleeder
– Remove drain plug
– If you have a cartridge filter, remove and clean the cartridge
**Heater:**
– Remove drain plugs
– Use a wet/dry vac to remove any remaining water
– Leave heater cabinet open slightly for ventilation
**Chlorinator:**
– Remove tablets (they’ll corrode metal parts over winter)
– Remove drain plugs and empty completely
Store any small parts you removed in a labeled zip-lock bag. Trust me, you don’t want to be hunting for drain plugs in April.
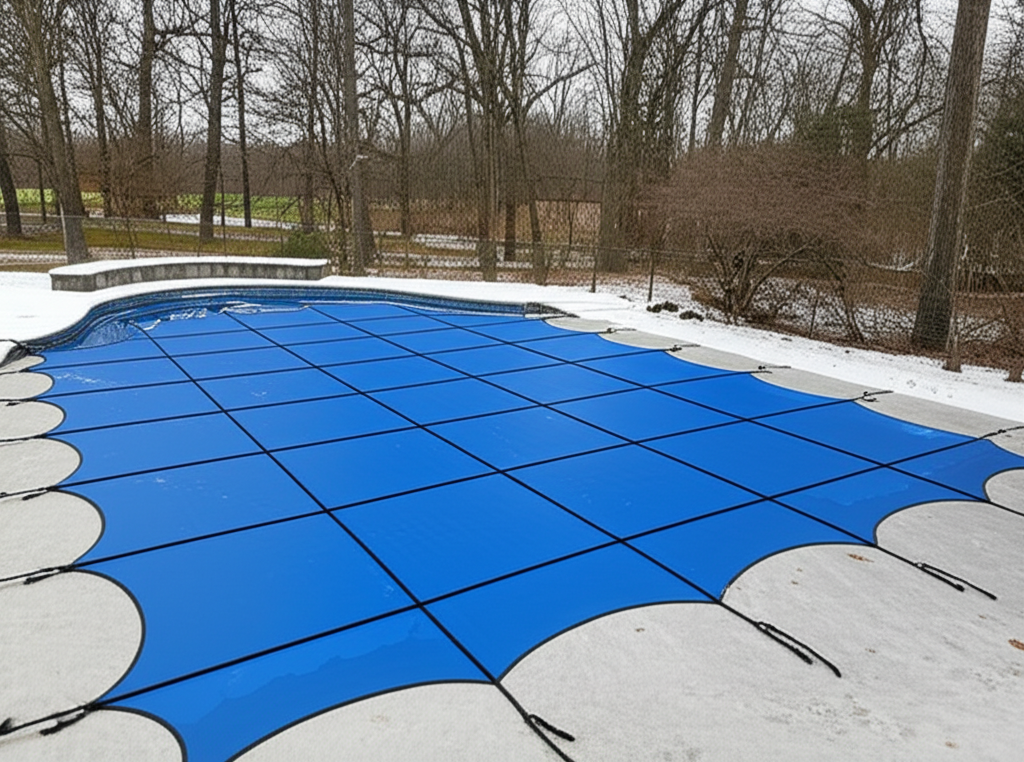
## Step 7: Cover It Up
The final step: covering your pool. This keeps debris out, prevents algae growth from sunlight, and adds a safety layer.
**Cover options:**
**Solid winter cover:** Best for keeping debris out. Water will collect on top, so plan to pump it off periodically. A [heavy-duty winter cover](https://www.amazon.com/dp/B08CFHQMJP?tag=poolcalc04-20) with reinforced edges lasts 5-7 seasons.
**Mesh safety cover:** Lets rainwater drain through while blocking debris. More expensive but zero maintenance. Great for families with kids or pets.
**Solar cover:** Not designed for winter. It’ll shred in the first windstorm.
Secure your cover tightly with water bags or cable/winch systems. A loose cover is worse than no cover — it’ll fill with leaves and debris that’ll sink straight into your pool.
Don’t use bricks or concrete blocks as weights. They can tear your cover and damage your deck.
## Step 8: Winterize Above-Ground Pool Components
Above-ground pools need a few extra steps:
**Skimmer:** Install a skimmer guard (a foam gizzmo) inside to absorb ice expansion. This $5 part saves your $150 skimmer.
**Wall fittings:** Plug all return jets and inlet fittings with threaded winterizing plugs.
**Ladder:** Remove and store indoors. Metal corrodes, plastic gets brittle in freezing temps.
**Rails and posts:** If you have a deck, leave it. If it’s a freestanding ladder, store it.
## Common Winterizing Mistakes to Avoid
**Closing too early:** Wait until water temperature drops consistently below 65°F. Warmer water = algae growth even under a cover.
**Not testing chemistry first:** You can’t fix pH or alkalinity after the pool is covered. Get it right before closing.
**Using cheap plugs:** Dollar-store winterizing plugs leak or pop out. Spend $15 on quality threaded plugs.
**Forgetting to remove pool accessories:** Ladders, toys, floats — store everything indoors. Freeze-thaw cycles destroy them.
**Covering a dirty pool:** You’re just sealing in algae food. Clean first, cover second.
## Opening in Spring Will Be Easy
If you follow these steps, spring opening will take 90 minutes instead of three days. You’ll pull off the cover, balance the water, and start swimming.
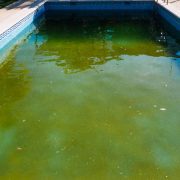
Skip any of these steps? You’re looking at green water, stained surfaces, and a week of chemical warfare to get it clear again.
Winterizing is your insurance policy. A few hours now saves hundreds in repairs and dozens of hours in cleanup.
The **Pool Chemical Calculator** app can help you calculate exact chemical doses when you open next spring. Download it now so you’re ready: [iOS](https://apps.apple.com/app/pool-chemical-calculator/id123456789) | [Android](https://play.google.com/store/apps/details?id=com.poolcalculator).
—
## FAQ
**How much does it cost to winterize a pool?**
DIY winterizing costs $50-150 in chemicals and supplies. Professional winterizing runs $150-300 depending on your area. Doing it yourself saves money but takes 3-4 hours.
**When should I winterize my pool?**
Close your pool when water temperature stays consistently below 65°F. This is typically late September to early November depending on your climate. Too early and algae grows; too late and you risk freeze damage.
**Can I leave water in my pool over winter?**
Yes. In fact, you should. Never drain an in-ground pool completely — groundwater pressure can crack or lift the shell. Lower the water 12-18 inches below the skimmer, but keep the pool mostly full.
**Do I need to run my pool pump in winter?**
No. Once winterized, shut off and drain your pump completely. Running it in freezing temps can crack the housing. Your pool will be fine without circulation for 3-5 months.
**What happens if I don’t winterize my pool?**
Frozen water will crack your pump, filter, heater, and underground lines. Repairs typically run $1,500-3,000. Unbalanced water leads to staining, scale, and algae blooms that take weeks to fix in spring.
**How do I keep my pool cover from sagging?**
Use an air pillow (for above-ground pools) or winter cover pump (for in-ground pools) to remove standing water. Sagging covers collect debris and can tear from the weight.
—
## HowTo Schema
**How to Winterize a Pool:**
1. **Balance water chemistry** (1 week before closing) — pH 7.4-7.6, alkalinity 80-120 ppm, calcium 180-220 ppm
2. **Deep clean the pool** — skim, vacuum, brush, clean filter
3. **Shock and add winterizing chemicals** — 2 lbs shock per 10,000 gallons, plus algaecide
4. **Lower water level** — 4-6 inches below skimmer (above-ground) or 12-18 inches below tile (in-ground)
5. **Blow out plumbing lines** — use shop vac or air compressor to remove all water
6. **Drain equipment** — pump, filter, heater, chlorinator (remove all drain plugs)
7. **Install winter cover** — secure tightly with water bags or cable system
8. **Add skimmer protection** — install gizzmo in above-ground skimmers
**Time required:** 3-4 hours
**Cost:** $50-150 in supplies
**Difficulty:** Moderate (DIY-friendly with proper tools)