Understanding the Swimming Pool Saturation Index: A Comprehensive Guide to Maintaining Water Balance

The Importance of the Saturation Index, Its Influencing Factors, and How to Correct Imbalances for a Healthy Swimming Environment

The swimming pool saturation index, also known as the Langelier Saturation Index (LSI), is a crucial aspect of pool water chemistry that helps maintain water balance and prevent potential damage to pool surfaces and equipment. In this article, we will discuss what the saturation index is, why it’s important, the chemicals that impact it, the negative consequences of imbalances, and how to correct and maintain a proper saturation index.

What is the Saturation Index?

The saturation index is a calculated value that helps determine the water’s balance by considering various factors such as pH, total alkalinity, calcium hardness, and water temperature. The index measures the water’s tendency to be either corrosive (negative values) or scaling (positive values). A saturation index close to zero indicates balanced water, minimizing the risk of damage to pool surfaces and equipment.


Why is the Saturation Index Important?

  1. Protecting Pool Surfaces: Maintaining a balanced saturation index helps protect pool surfaces from etching, staining, or scaling, preserving their appearance and longevity.
  2. Preventing Equipment Damage: A proper saturation index prevents damage to pool equipment and plumbing systems by minimizing the risk of corrosion or scaling.
  3. Water Quality: A balanced saturation index contributes to overall water quality, ensuring a safe and comfortable swimming environment.

Chemicals Impacting the Saturation Index

  1. pH: The acidity or alkalinity of the water directly influences the saturation index. Ideal pH levels for a swimming pool are between 7.4 and 7.6.
  2. Total Alkalinity: Total alkalinity measures the water’s buffering capacity, which helps maintain stable pH levels. The recommended range for total alkalinity is between 80 and 120 ppm.
  3. Calcium Hardness: Calcium hardness refers to the concentration of calcium ions in the water. Ideal calcium hardness levels for a swimming pool are between 200 and 400 ppm.
  4. Water Temperature: The water’s temperature can also affect the saturation index, with warmer water typically being more susceptible to scaling.

Negative Consequences of Imbalances

  1. Corrosive Water: A negative saturation index indicates corrosive water, which can lead to etching and staining of pool surfaces, as well as damage to metal fixtures and equipment.
  2. Scaling Water: A positive saturation index signifies scaling water, which can cause calcium deposits to form on pool surfaces, clog filters, and reduce circulation.


How to Correct and Maintain a Proper Saturation Index

  1. Test the Water: Regularly test your pool water for pH, total alkalinity, calcium hardness, and temperature to determine the current saturation index.
  2. Adjust pH Levels: If the pH is too high or too low, adjust it using either an acid (e.g., muriatic acid) or a base (e.g., soda ash) according to the manufacturer’s instructions.
  3. Balance Total Alkalinity: If total alkalinity is out of range, use sodium bicarbonate to raise it or muriatic acid to lower it, following the product guidelines.
  4. Manage Calcium Hardness: To adjust calcium hardness, use calcium chloride to raise it or dilute the pool water with fresh water to lower it.
  5. Monitor Temperature: Be aware of how temperature fluctuations may impact the saturation index and adjust other factors accordingly to maintain balance.
  6. Regular Maintenance: Consistently test and adjust water chemistry, maintain the filtration system, and clean the pool surfaces to preserve a balanced saturation index.

The swimming pool saturation index is a critical component of pool water chemistry, helping to maintain water balance and prevent potential damage to pool surfaces and equipment. Understanding the saturation index, its importance, and the chemicals that influence it is essential for pool owners to maintain a safe and healthy swimming environment.

By regularly testing and adjusting pool water parameters, such as pH, total alkalinity, calcium hardness, and temperature, pool owners can correct and, a well-balanced saturation index is key to ensuring the longevity of your pool surfaces and equipment, as well as providing an enjoyable and comfortable swimming experience. By monitoring and maintaining the saturation index, pool owners can enjoy the benefits of a well-maintained swimming pool and avoid costly damage or repairs.

How to Raise pH in a Swimming Pool: A Comprehensive Guide for Pool Owners

Maintain the Perfect pH Balance for a Healthy and Enjoyable Swimming Experience

Introduction

Maintaining the ideal pH level in your swimming pool is crucial to ensuring a comfortable swimming experience, protecting your pool equipment, and promoting effective sanitization. The pH scale ranges from 0 to 14, with 7 being neutral. The optimal pH level for a swimming pool is typically between 7.2 and 7.8. If your pool’s pH is too low, it can lead to corrosion of pool equipment, skin and eye irritation, and reduced effectiveness of sanitizing chemicals. This article will provide you with a comprehensive guide on how to raise the pH level in your swimming pool to achieve a well-balanced and healthy swimming environment.

Step 1: Test Your Pool Water

Begin by testing your pool water to determine the current pH level. You can use a pool test kit or test strips, which are readily available at most pool supply stores. Follow the instructions provided with your testing method to obtain accurate results.

Step 2: Calculate the Required pH Increaser Amount

If your pH level is below 7.2, you will need to add a pH increaser (also known as a pH up or pH plus) to raise the pH. Sodium carbonate (soda ash) and sodium bicarbonate (baking soda) are two common chemicals used as pH increasers.

To calculate the amount of pH increaser required, consult the product label or use an online pool calculator. You will need to know your pool’s volume, the current pH level, and the target pH level.

Step 3: Pre-dissolve the pH Increaser

To ensure even distribution and prevent cloudiness or damage to your pool surfaces, pre-dissolve the pH increaser in a bucket of water before adding it to your pool. Fill a large plastic bucket with water, and gradually add the required amount of pH increaser, stirring continuously until it’s fully dissolved.

Step 4: Add the pH Increaser to Your Pool

Slowly pour the dissolved pH increaser solution into the pool, spreading it evenly around the perimeter. Avoid pouring the solution directly onto pool surfaces or fittings, as this may cause damage.

Step 5: Circulate the Pool Water

Turn on your pool pump and allow it to circulate the water for at least 2-4 hours. This will help to distribute the pH increaser evenly throughout the pool, ensuring the pH level is raised consistently.

Step 6: Retest and Adjust as Needed

After the pool water has circulated for a sufficient time, retest the pH level using your pool test kit or test strips. If the pH level is still below the ideal range, repeat Steps 2-5, adding more pH increaser as necessary. Keep in mind that it’s better to make gradual adjustments to avoid overshooting the target pH level.

Conclusion

Maintaining the optimal pH level in your swimming pool is essential for a healthy and enjoyable swimming environment. By following this comprehensive guide on how to raise the pH in your swimming pool, you can ensure the comfort of swimmers, protect your pool equipment, and maximize the effectiveness of your sanitizing chemicals. Regular testing and adjustments are key to maintaining a well-balanced and inviting pool for you and your family to enjoy.


Recommended Products

As an Amazon Associate, we earn from qualifying purchases.

Reviving a Green Salt Water Pool: Steps to Restore Crystal Clear Water

Turn Your Salt Water Pool from Green to Pristine with These Effective Strategies

Introduction

A green salt water pool can be an unwelcome sight for any pool owner. It is often caused by an algae bloom, imbalanced water chemistry, or improper pool maintenance. This article will guide you through the process of fixing a green salt water pool and restoring crystal clear water for a safe and enjoyable swimming experience.


Step 1: Test and Balance Water Chemistry

The first step in addressing a green salt water pool is to test the water chemistry. Use a reliable test kit to check the levels of pH, alkalinity, and salt concentration. Adjust the levels as necessary:

  1. pH: The ideal pH range for a salt water pool is 7.2-7.6. If the pH is too high or too low, it can reduce the effectiveness of the salt chlorine generator and contribute to algae growth. Use a pH increaser or decreaser to bring the pH within the optimal range.
  2. Alkalinity: The recommended alkalinity level for a salt water pool is between 80 and 120 ppm. If the alkalinity is too low, add a total alkalinity increaser. If it’s too high, use muriatic acid or dry acid to lower it.
  3. Salt Concentration: The ideal salt concentration for a salt water pool typically ranges from 2,500 to 4,500 ppm. If the salt level is too low, add the appropriate amount of pool salt to achieve the recommended concentration. If the salt level is too high, partially drain the pool and refill it with fresh water to dilute the salt concentration.

Step 2: Check the Salt Chlorine Generator

Ensure that the salt chlorine generator is functioning properly and producing the required amount of chlorine to keep your pool algae-free. Check the generator’s cell for any buildup or scaling, and clean it as needed following the manufacturer’s instructions. Adjust the generator’s output settings if necessary to produce an adequate amount of chlorine (1-3 ppm).


Step 3: Shock the Pool

Shocking a salt water pool helps to kill algae and break down organic contaminants. Use a powerful pool shock product, such as calcium hypochlorite or a non-chlorine shock, following the manufacturer’s instructions. Make sure that the pool pump is running during this process to distribute the shock evenly.

Step 4: Run the Filter

After shocking the pool, run the pool filter continuously for at least 24 hours to remove dead algae and other particles that contribute to the green color. Make sure to clean or replace the filter cartridge, sand, or DE (diatomaceous earth) media if it’s dirty or clogged.

Step 5: Brush and Vacuum the Pool

Once the pool water starts to clear, use a pool brush to scrub the pool walls, floor, and steps, removing any remaining algae and debris. Then, manually vacuum the pool to remove dead algae and any other debris that may have settled at the bottom.

Step 6: Use an Algaecide

As a preventive measure, consider using an algaecide specifically formulated for salt water pools. This will help to inhibit algae growth and keep your pool water clear. Follow the manufacturer’s instructions for proper application and dosage.

Step 7: Regular Maintenance and Monitoring

To maintain clear pool water and prevent future algae blooms, establish a regular maintenance routine:

  1. Test water chemistry at least once a week to ensure that pH, alkalinity, and salt levels remain within the recommended ranges.
  2. Clean the salt chlorine generator cell as needed to ensure optimal chlorine production.
  3. Shock the pool periodically, especially after heavy usage or severe weather.
  1. Clean the pool filter regularly to ensure optimal filtration performance.
  2. Brush and vacuum the pool surfaces at least once a week to remove dirt, debris, and algae.
  3. Use an algaecide as a preventive measure to inhibit algae growth.
  4. Keep the pool area clean by regularly removing leaves, dirt, and debris that can enter the pool and contribute to algae growth.


Conclusion

Fixing a green salt water pool may seem like a daunting task, but with the right approach and consistent maintenance, you can restore crystal clear water and enjoy a clean, healthy swimming environment. By following the steps outlined in this article and establishing a regular maintenance routine, you can prevent future algae blooms and keep your salt water pool in pristine condition for swimmers to enjoy.

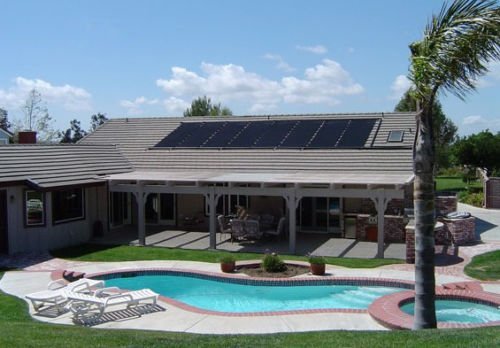
Opening Your Above Ground Swimming Pool for the Season: A Comprehensive Guide

Uncover the Best Date, Detailed Steps, and Tips for a Smooth and Successful Pool Opening

As the warmer months approach, it’s time to think about opening your above ground swimming pool for the season. A well-planned and executed pool opening ensures a safe, clean, and enjoyable swimming environment for you and your family. This article provides guidance on the best date to open your pool, detailed steps for a successful opening, and tips and tricks to make the process smoother and more efficient.

Best Date to Open Your Above Ground Swimming Pool

While the ideal date for opening your pool may vary depending on your location and local climate, a general rule of thumb is to open the pool when the daytime temperatures consistently stay above 70°F (21°C). Opening the pool too early could result in cold water temperatures and increased energy costs, while opening too late can lead to the growth of algae and other contaminants.

Detailed Steps for Opening Your Above Ground Swimming Pool

Step 1: Clean the Pool Area Start by removing any leaves, debris, and trash from around your pool. This will help prevent dirt and debris from entering the water during the opening process.

Step 2: Remove the Pool Cover Carefully remove your winter pool cover, being mindful of any accumulated water or debris. Clean and dry the cover thoroughly before storing it for the season.

Step 3: Inspect the Pool for Damage Check your pool for any signs of damage, such as tears or punctures in the liner, rust, or loose fittings. Address any issues before proceeding with the opening process.

Step 4: Reinstall Pool Equipment Reinstall any pool equipment that was removed or winterized during the off-season, including the ladder, skimmer, filter, pump, and any other accessories.

Step 5: Fill the Pool Using a garden hose, fill your pool to the appropriate water level, typically halfway up the skimmer opening.


Step 6: Prime and Start the Pump Prime your pool pump by filling the pump basket with water and ensuring all valves are open. Turn on the pump and check for proper water flow and circulation.

Step 7: Test and Balance the Water Chemistry Using a pool test kit or test strips, check the levels of pH, chlorine, total alkalinity, and calcium hardness in your pool water. Adjust the chemical levels as needed to achieve optimal balance:

  • pH: 7.2-7.8
  • Chlorine: 1-3 ppm (parts per million) for traditional chlorine pools or 2-4 ppm for saltwater pools
  • Total Alkalinity: 80-120 ppm
  • Calcium Hardness: 200-400 ppm

Step 8: Shock the Pool Shocking your pool involves adding a high dose of chlorine or other sanitizer to eliminate any bacteria, algae, and other contaminants that may have developed during the off-season. Follow the manufacturer’s instructions for the proper dosage and application procedure.

Step 9: Clean the Pool Skim the surface of your pool to remove any debris, brush the pool walls and floor, and vacuum the pool thoroughly to ensure a clean and inviting swimming environment.

Tips and Tricks for a Smooth Pool Opening

  1. Plan ahead: Set a date for your pool opening and gather all necessary supplies, including chemicals, test kits, and cleaning equipment, well in advance.
  2. Enlist help: Pool opening can be a time-consuming process. Recruit family members or friends to assist with tasks such as removing the pool cover and cleaning the pool area.
  3. Be patient: Allow the pool water to circulate for at least 24 hours before testing and adjusting the water chemistry. This will ensure accurate readings and more effective chemical adjustments.
  4. Keep a maintenance log: Document the chemical levels, equipment settings, and any issues encountered during the pool opening process. This information can be helpful for future reference and to track changes in your pool’s condition over time.
  5. Monitor water chemistry closely: In the first few weeks after opening your pool, test the water chemistry more frequently (every 2-3 days) to ensure proper balance and sanitization. As the season progresses and the water stabilizes, you can reduce testing frequency to once per week.
  6. Run the pump and filter longer initially: Running your pool pump and filter for longer periods (12-24 hours) immediately after opening your pool can help clear any cloudiness, debris, or contaminants more quickly.
  7. Consider a professional pool opening service: If you are unsure about the pool opening process or prefer to have an expert handle the task, many pool service companies offer pool opening packages that include equipment installation, water testing, and chemical balancing.


Opening your above ground swimming pool for the season is an essential task that sets the stage for a summer of fun and relaxation. By choosing the best date to open, following the detailed steps outlined in this guide, and applying the tips and tricks for a smooth pool opening, you can ensure a safe, clean, and enjoyable swimming environment for you and your family. With proper planning and attention to detail, your pool will be ready to provide endless hours of entertainment and relaxation all season long.

Borate in Swimming Pools: An Alternative Approach to Pool Maintenance

Understanding Borates, Their Benefits, and How to Balance and Use Them in Your Pool

Introduction

Borates have gained popularity in recent years as an alternative or supplement to traditional chlorine-based pool maintenance. As a versatile and efficient pool additive, borates can provide various benefits, such as improved water balance, algae control, and enhanced swimmer comfort. In this article, we will discuss what borates are, their uses, how to balance them in your pool, and their pros and cons compared to chlorine.

What are Borates?

Borates are chemical compounds derived from boron, a naturally occurring element found in rocks, soil, and water. In swimming pools, borates are typically used in the form of sodium borate, boric acid, or borax. They function as a pH buffer and an algaecide, helping to maintain water balance and prevent algae growth.

Uses of Borates in Swimming Pools

  1. pH Buffer: Borates help stabilize the pool’s pH levels, reducing the need for frequent pH adjustments and resulting in more stable water chemistry.
  2. Algae Control: By inhibiting the growth of algae, borates reduce the need for high levels of chlorine or other sanitizers to keep the pool clean and clear.
  3. Water Clarity: Borates can improve water clarity by enhancing the effectiveness of pool sanitizers and reducing the formation of chloramines.
  4. Swimmer Comfort: With borates in the pool water, swimmers may experience reduced eye and skin irritation, as well as softer-feeling water.


Balancing Borates in Your Pool

  1. Test the Water: Before adding borates to your pool, test the water to determine its current borate levels. This can be done using a borate test kit or test strips.
  2. Determine the Target Level: The recommended borate concentration for swimming pools is between 30 and 50 ppm. Consult your pool professional or the product manufacturer for guidance on the appropriate level for your specific pool.
  3. Choose a Borate Product: Select a borate product, such as sodium borate, boric acid, or borax, that is suitable for your pool type and compatible with your existing pool chemicals.
  4. Follow the Manufacturer’s Instructions: Carefully follow the manufacturer’s instructions for adding the borate product to your pool. This may involve dissolving the product in water before adding it to the pool or broadcasting it directly into the pool water.
  5. Monitor and Maintain: Regularly test your pool’s borate levels and make adjustments as needed to maintain the recommended concentration.

Pros and Cons of Borates vs. Chlorine

Pros:

  1. Improved Water Balance: Borates help stabilize pH levels, reducing the need for frequent pH adjustments and resulting in more stable water chemistry.
  2. Reduced Algae Growth: Borates inhibit algae growth, decreasing the reliance on high levels of chlorine or other sanitizers.
  3. Enhanced Swimmer Comfort: Borates can reduce eye and skin irritation and provide a softer feel to the water.
  4. Lower Chlorine Demand: With improved water balance and algae control, borates can reduce the overall demand for chlorine, potentially saving on chemical costs.


Cons:

  1. Not a Complete Sanitizer: Borates are not a standalone sanitizer and must be used in conjunction with a primary sanitizer, such as chlorine or bromine, to ensure proper pool disinfection.
  2. Additional Cost: The use of borates adds an extra cost to pool maintenance, as you will need to purchase borate products in addition to your primary sanitizer.
  3. Handling and Storage: As with any pool chemical, proper handling and storage of borate products are required to ensure safety and effectiveness.

Borates offer an alternative approach to pool maintenance that can complement traditional chlorine-based methods. By improving water balance, inhibiting algae growth, and enhancing swimmer comfort, borates can provide a range of benefits for pool owners. However, it is essential to remember that borates are not a standalone sanitizer and must be used alongside a primary sanitizer to ensure a safe and healthy swimming environment.

To properly balance borates in your pool, it is crucial to test the water, determine the target borate level, choose an appropriate borate product, and follow the manufacturer’s instructions for application. Regular monitoring and maintenance of borate levels are necessary to maintain the recommended concentration.

When considering the use of borates in your pool, it is essential to weigh the pros and cons against traditional chlorine-based methods. While borates can offer improved water balance, reduced algae growth, and enhanced swimmer comfort, they do require additional costs and cannot function as a complete sanitizer. By understanding the benefits and limitations of borates, pool owners can make an informed decision about the most suitable pool maintenance approach for their specific needs and preferences.

Mastering Calcium Hardness in Pool Water

Understanding the Importance and Management of Calcium Hardness for a Healthy Swimming Environment

Calcium hardness is a crucial aspect of pool water chemistry that is often overlooked. It refers to the amount of calcium dissolved in the pool water and plays a significant role in maintaining the overall water balance. In this article, we will discuss what calcium hardness is, why it’s important, and how to manage it effectively to ensure a safe and enjoyable swimming experience.

What is Calcium Hardness?

Calcium hardness is a measure of the concentration of calcium ions (Ca2+) in the pool water. It is typically expressed in parts per million (ppm) and is an essential component of the water’s overall mineral content. Calcium is a naturally occurring element that can be found in most water sources, including tap water and groundwater. In swimming pools, calcium hardness can be affected by various factors, such as the water source, the pool’s construction materials, and the chemicals used for maintenance.


Why is Calcium Hardness Important?

  1. Protecting Pool Surfaces and Equipment: Maintaining proper calcium hardness levels helps protect the pool’s surfaces, equipment, and plumbing system from damage. Low calcium hardness can cause the water to become corrosive, potentially leading to etching and staining of pool surfaces, as well as damage to metal fixtures and equipment. Conversely, high calcium hardness can cause scaling, which can clog filters, reduce circulation, and lead to unsightly deposits on pool surfaces.
  2. Water Balance: Calcium hardness plays a crucial role in the overall water balance of the pool. It is directly related to the pool’s pH and alkalinity levels, and maintaining appropriate calcium hardness levels is necessary to prevent fluctuations in these parameters.
  3. Swimmer Comfort: Proper calcium hardness levels contribute to a more comfortable swimming environment by helping to prevent eye and skin irritation.

Managing Calcium Hardness

  1. Test the Water: Regularly test your pool water for calcium hardness using a reliable test kit. The ideal calcium hardness level for a swimming pool is between 200 and 400 ppm. However, some pool finishes may require slightly different levels, so consult your pool manufacturer’s guidelines for specific recommendations.
  2. Adjust Calcium Hardness Levels: If your pool’s calcium hardness is too low, you can raise it by adding calcium chloride, following the manufacturer’s instructions. If the calcium hardness is too high, you can lower it by diluting the pool water with fresh water, using a flocculant to help remove excess calcium, or using a specialized calcium-reducing product.
  3. Maintain Water Balance: To prevent calcium hardness fluctuations, it is essential to maintain proper water balance. Test and adjust the pool’s pH, alkalinity, and sanitizer levels regularly.
  4. Prevent Scaling and Staining: To minimize the risk of scaling and staining, avoid using calcium-based pool chemicals, such as calcium hypochlorite, if your pool’s calcium hardness is already high. Use a sequestering agent or stain inhibitor to help prevent calcium deposits and protect pool surfaces.
  5. Regular Maintenance: Regularly brush and vacuum your pool to remove any buildup of calcium deposits, and maintain your pool’s filtration system to ensure efficient circulation and water balance.

Calcium hardness is a vital aspect of pool water chemistry that is crucial for protecting pool surfaces, equipment, and ensuring a comfortable swimming environment. By understanding what calcium hardness is, its importance, and how to manage it effectively, pool owners can maintain a well-balanced and healthy swimming pool. Regular testing and adjustments, as well as preventative measures, are the keys to success in mastering calcium hardness in your pool.


Recommended Products

As an Amazon Associate, we earn from qualifying purchases.

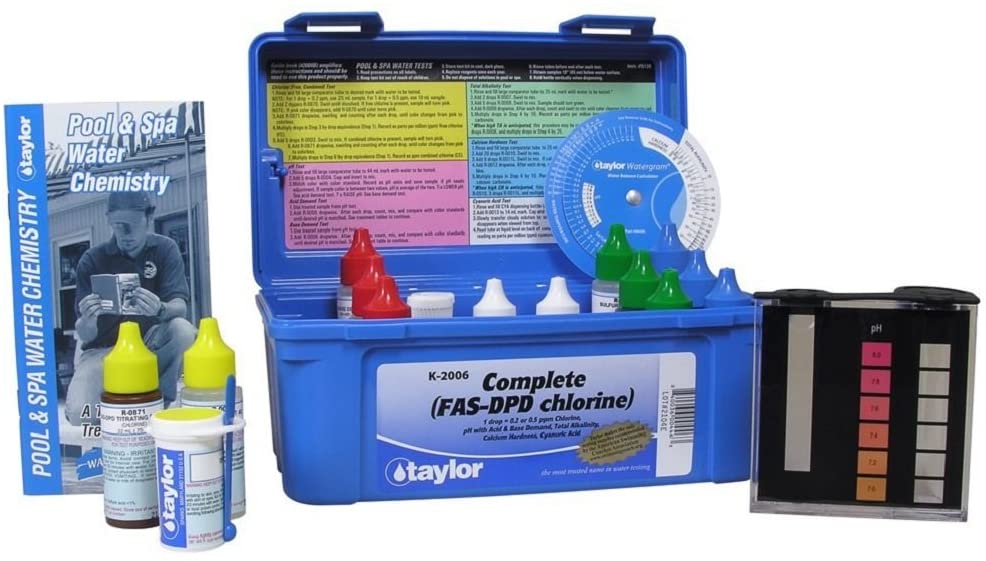
Pool Stabilizer 101: Understanding the Importance, Testing Options, and Chemicals for Balanced Pool Water

A crystal-clear, well-maintained swimming pool not only looks inviting but also ensures the safety and comfort of swimmers. An essential yet often overlooked aspect of pool maintenance is the use of pool stabilizers. This article will explore the importance of pool stabilizers, testing options, and the types of chemicals used to balance them for maintaining pristine pool water.

  1. The Importance of Pool Stabilizers

Pool stabilizers, also known as cyanuric acid or conditioner, play a vital role in protecting the effectiveness of chlorine sanitizers in swimming pools. They perform the following functions:

  • Protect chlorine from UV degradation: Sunlight’s UV rays can rapidly break down free chlorine, reducing its effectiveness as a sanitizer. Pool stabilizers shield chlorine molecules from UV radiation, prolonging their sanitizing capabilities.
  • Reduce chlorine consumption: By protecting chlorine from UV degradation, pool stabilizers help reduce the amount of chlorine needed to maintain proper sanitizer levels, ultimately saving money on pool chemicals.
  • Maintain water balance: Pool stabilizers contribute to the overall water balance by interacting with chlorine, pH, and alkalinity levels, helping to create a stable and comfortable swimming environment.
  1. Ideal Cyanuric Acid Levels for Swimming Pools

The recommended cyanuric acid level for outdoor swimming pools is between 30 and 50 parts per million (ppm). Indoor pools typically do not require stabilizers since they are not exposed to direct sunlight.

  1. Testing Options for Cyanuric Acid Levels

Regularly testing cyanuric acid levels is essential for maintaining balanced pool water. The following testing options can help you monitor your pool’s stabilizer levels:

a. Test Strips

Cyanuric acid test strips are a quick and easy way to measure stabilizer levels in your pool. Simply dip the test strip into the pool water, wait for the specified time, and compare the color change to the provided chart.

b. Liquid Test Kits

Liquid test kits for cyanuric acid use a turbidity test method, where a reagent is added to a water sample, causing cloudiness. The level of cloudiness corresponds to the stabilizer concentration in the water.

c. Digital Test Kits

Some digital test kits, like the LaMotte ColorQ Pro 7, include a test for cyanuric acid. These test kits offer a user-friendly interface and digital readings, making it easy to monitor stabilizer levels.

  1. Chemicals Used to Balance Cyanuric Acid Levels


a. Adding Cyanuric Acid

If your pool’s cyanuric acid levels are too low, you will need to add a stabilizer to protect the chlorine from UV degradation. Granular cyanuric acid is the most common type of stabilizer used in swimming pools. Follow the manufacturer’s instructions to determine the appropriate amount to add based on your pool’s volume.

b. Lowering Cyanuric Acid

If cyanuric acid levels are too high, the only effective way to lower them is by diluting the pool water. This can be done by partially draining the pool and refilling it with fresh water. Be sure to test the water again after refilling to ensure the stabilizer levels are within the recommended range.

  1. Tips for Maintaining Balanced Cyanuric Acid Levels
      • Test your pool water regularly: Monitoring cyanuric acid levels at least once a month can help you maintain the recommended stabilizer range.
      • Add stabilizer gradually: When adding cyanuric acid, it’s better to add smaller amounts and test the water again, rather than adding too much at once.
      • Avoid over-stabilization: Over-stabilized pools can reduce the effectiveness of chlorine, leading
      • Avoid over-stabilization: Over-stabilized pools can reduce the effectiveness of chlorine, leading to issues such as algae growth and cloudy water. It is essential to maintain the recommended cyanuric acid levels to prevent these problems.
      • Use stabilized chlorine products cautiously: Stabilized chlorine products, such as trichlor tablets and dichlor granules, contain cyanuric acid. While they can help maintain appropriate stabilizer levels, overuse can lead to over-stabilization. Monitor your cyanuric acid levels closely when using these products and adjust your usage accordingly.
      • Maintain overall water balance: In addition to cyanuric acid levels, it’s crucial to monitor and maintain appropriate levels of other water balance parameters, such as pH, alkalinity, and sanitizer levels, to ensure a comfortable and safe swimming environment.


    Pool stabilizers, or cyanuric acid, play a vital role in maintaining the effectiveness of chlorine sanitizers and preserving the overall water balance in swimming pools. By understanding the importance of pool stabilizers, using reliable testing options, and employing the proper chemicals to balance cyanuric acid levels, you can ensure a safe, comfortable, and enjoyable swimming experience for all pool users. Regular testing and maintenance will not only extend the life of your pool equipment but also contribute to the health and well-being of swimmers


Recommended Products

As an Amazon Associate, we earn from qualifying purchases.

???? Calculate Perfect Pool Chemistry Instantly

Stop guessing — use our free Pool Chemical Calculator to get exact dosing for your pool size.

▶ Google Play
???? App Store
???? Web Calculator


Pool Alkalinity: The Unsung Hero of Pool Chemistry

The Crucial Role of Alkalinity in Maintaining a Healthy and Safe Swimming Environment

Pool maintenance is essential for a safe and enjoyable swimming experience. One of the most critical aspects of pool maintenance is managing the water’s alkalinity levels. Pool alkalinity is a measure of the water’s ability to neutralize acids, and it plays a significant role in maintaining the proper balance of pool chemicals. In this article, we will discuss the importance of pool alkalinity, how it impacts other chemicals, what is used to balance it, and how to maintain it at the optimum level.

The Importance of Pool Alkalinity

  1. pH Stability: Alkalinity acts as a pH buffer, preventing rapid changes in the water’s pH level. A stable pH is essential for maintaining an ideal swimming environment, as pH fluctuations can cause discomfort to swimmers and damage pool equipment.
  2. Sanitizer Efficiency: Proper alkalinity levels help ensure that sanitizers, like chlorine, work effectively. When alkalinity is too low, sanitizers break down rapidly, making it difficult to maintain a safe and clean swimming environment.
  3. Protection of Pool Surfaces and Equipment: Balanced alkalinity levels prevent the pool water from becoming corrosive or scaling, which can damage the pool surfaces, equipment, and plumbing system.

How Alkalinity Impacts Other Chemicals

Pool alkalinity is directly related to the pH level in the water. When the alkalinity level is too high, it can cause the pH to rise, making the water more basic. High pH levels reduce the efficiency of chlorine, leading to cloudy water and potential algae growth. On the other hand, low alkalinity levels can cause the pH to drop, making the water more acidic. Acidic water can cause eye and skin irritation, corrode metal surfaces, and damage pool equipment.

Balancing Alkalinity: What to Use

The ideal alkalinity level for a swimming pool is between 80 and 120 parts per million (ppm). To raise alkalinity levels, you can use sodium bicarbonate (baking soda) or a commercial alkalinity increaser. To lower alkalinity, you can use muriatic acid or sodium bisulfate, which are both commonly used as pH decreasers.


How to Balance Pool Alkalinity

  1. Test the water: Use a reliable pool test kit to measure the alkalinity and pH levels in your pool.
  2. Adjust alkalinity levels: If the alkalinity level is too low, add sodium bicarbonate or a commercial alkalinity increaser, following the manufacturer’s instructions. If the alkalinity level is too high, add muriatic acid or sodium bisulfate as per the manufacturer’s instructions.
  3. Re-test the water: Wait at least 4 hours for the chemicals to circulate, and then test the water again. If the alkalinity is still not within the ideal range, repeat the process until it is balanced.
  4. Adjust pH levels: Once the alkalinity is balanced, test the pH level and adjust it accordingly. The ideal pH level for a swimming pool is between 7.4 and 7.6.
  5. Maintain balance: Regularly test the pool water to monitor the alkalinity and pH levels, and make necessary adjustments to maintain the ideal balance.

Understanding and managing pool alkalinity is an essential aspect of pool maintenance. By maintaining the proper alkalinity levels, you can ensure a safe and comfortable swimming environment while protecting your pool surfaces and equipment. Regular testing and prompt adjustments are the keys to achieving and maintaining the perfect balance in your pool’s water chemistry.

Unraveling the Mystery of Phosphates in Swimming Pools: Understanding Their Impact on Algae Growth, Chlorine Demand, and Treatment Options

Maintaining sparkling clean swimming pool water requires consistent attention to several chemical factors, one of which is phosphate levels. Phosphates can contribute to issues such as algae growth and increased chlorine demand, making their management crucial for a healthy and enjoyable swimming experience. This article will explore the role of phosphates in swimming pool water, their sources, and the chemicals needed to treat and remove them.

  1. What are Phosphates?

Phosphates are chemical compounds containing the element phosphorus. They occur naturally in the environment and are commonly found in soil, plants, and water sources. In swimming pools, phosphates serve as a nutrient source for algae, promoting their growth and reproduction.

  1. How do Phosphates Get into Pool Water?

Phosphates can enter pool water through various sources, including:

  • Tap water: Many municipal water supplies contain phosphates as a byproduct of water treatment processes.
  • Fertilizers: Lawn and garden fertilizers containing phosphates can inadvertently enter the pool water through runoff, rainwater, or wind.
  • Organic debris: Leaves, grass clippings, and other organic debris can introduce phosphates into the pool as they decompose.
  • Swimmers: Sunscreen, body lotions, and other personal care products used by swimmers can contain phosphates and contribute to their presence in pool water.
  • Pool chemicals: Some pool cleaning and maintenance chemicals may contain small amounts of phosphates.
  1. The Impact of Phosphates on Algae Growth and Chlorine Demand

Phosphates play a significant role in promoting algae growth in swimming pools. As a primary nutrient source for algae, high phosphate levels can lead to persistent algae blooms, even when chlorine and other sanitizer levels are appropriately maintained.

This article will help you understand the different kinds of swimming pool chlorine and their pros and cons so you can make an informed decision for your pool sanitation needs.
Increased algae growth can also result in a higher chlorine demand, as the sanitizer is consumed more rapidly in an attempt to eliminate the algae. Consequently, pool owners may need to use more chlorine to maintain proper sanitizer levels, increasing the cost of pool maintenance.

  1. Treating and Removing Phosphates from Pool Water

To control phosphate levels and prevent algae growth, several chemicals and treatment options are available:

a. Phosphate Removers

Phosphate removers, or sequestrants, are chemicals specifically designed to bind with phosphates and remove them from pool water. These chemicals are typically formulated with lanthanum, aluminum, or other metal salts that react with phosphates, forming insoluble compounds that can be filtered out or vacuumed from the pool. Examples of phosphate removers include Natural Chemistry’s PHOSfree and SeaKlear’s Phosphate Remover.

b. Algaecides

While algaecides do not remove phosphates directly, they can help control algae growth in pools with high phosphate levels. Regular use of algaecides, in conjunction with phosphate removers, can provide an additional layer of protection against algae blooms.

  1. Monitoring and Maintaining Phosphate Levels


Regularly testing and monitoring phosphate levels is essential for maintaining a healthy and algae-free swimming pool. Phosphate test kits or test strips are available to measure phosphate concentrations in pool water. The ideal phosphate level for swimming pools is below 100 parts per billion (ppb). If phosphate levels exceed this threshold, consider using a phosphate remover or other treatment options to lower concentrations and prevent algae growth.

Phosphates can have a significant impact on swimming pool water quality, contributing to algae growth and increased chlorine demand. By understanding the role of phosphates, identifying their sources, and using the appropriate chemicals and treatments to maintain proper levels, pool owners can prevent algae blooms and reduce the cost of pool maintenance. Regular testing and monitoring of phosphate levels, along with maintaining overall water balance, will ensure a safe, comfortable, and enjoyable swimming environment for all pool users. By staying vigilant and addressing phosphate-related issues promptly, you can protect your investment in pool equipment and provide a clean, crystal-clear haven for swimmers to enjoy.

Mastering the Art of pH Balance: A Comprehensive Guide to Maintaining Optimal pH Levels in Swimming Pools

A well-maintained swimming pool not only looks inviting but also ensures the safety and comfort of swimmers. One crucial aspect of pool maintenance is maintaining a balanced pH level. This article will delve into the importance of balanced pH in swimming pool water, the types of chemicals used to adjust pH, and the best test kits for measuring pH levels.

  1. The Importance of Balanced pH in Swimming Pool Water

Maintaining a balanced pH is essential for a variety of reasons:

  • Swimmer Comfort: Unbalanced pH levels can cause skin and eye irritation, making the swimming experience uncomfortable for swimmers.
  • Chemical Efficiency: A balanced pH ensures that chlorine and other sanitizers work effectively to eliminate bacteria, algae, and other contaminants.
  • Equipment Longevity: Unbalanced pH levels can lead to corrosion of pool equipment, fixtures, and surfaces, reducing their lifespan and causing costly repairs.
  • Water Clarity: Balanced pH levels contribute to crystal-clear water by preventing the formation of scale and minimizing the risk of algae growth.
  1. Ideal pH Range for Swimming Pools

The ideal pH range for swimming pool water is between 7.4 and 7.6. This range not only provides a comfortable swimming environment but also ensures optimal chemical efficiency.

  1. Types of Chemicals to Adjust pH Levels

There are two primary chemicals used to adjust pH levels in swimming pools:

a. pH Increasers (pH Up)

pH increasers, also known as pH up or alkaline additives, are used to raise the pH level of pool water. The most common pH increaser is sodium carbonate (soda ash).

b. pH Reducers (pH Down)

pH reducers, also known as pH down or acid additives, are used to lower the pH level of pool water. The most common pH reducer is sodium bisulfate, although muriatic acid can also be used.

  1. Best Test Kits for Measuring pH Levels

Regularly testing the pH level of your pool is crucial for maintaining balanced water chemistry. Here are some of the top test kits for measuring pH levels:

a. Taylor Technologies K-2006 Complete Swimming Pool Water Test Kit

This liquid test kit provides accurate readings for pH, free and total chlorine, bromine, alkalinity, calcium hardness, and cyanuric acid, making it a comprehensive choice for maintaining balanced pool water.

b. LaMotte ColorQ Pro 7 Digital Pool Test Kit

The LaMotte ColorQ Pro 7 is a digital test kit that offers precise readings for pH, free chlorine, total chlorine, bromine, alkalinity, calcium hardness, and cyanuric acid. Its user-friendly interface and digital results eliminate the guesswork associated with color-matching.

c. AquaChek Select 7-in-1 Pool and Spa Test Strips

For a more affordable option, the AquaChek Select 7-in-1 test strips offer accurate readings for pH, free chlorine, total chlorine, bromine, alkalinity, calcium hardness, and cyanuric acid. These test strips are easy to use and provide quick results.

  1. How to Adjust pH Levels in Swimming Pools

To adjust the pH level in your swimming pool, follow these steps:

  1. Test the pool water using a reliable test kit to determine the current pH level.
  2. If the pH is below 7.4, add a pH increaser (soda ash) according to the manufacturer’s instructions.
  3. If the pH is above 7.6, add a pH reducer (sodium bisulfate or muriatic acid) according to the manufacturer’s instructions.
  4. Allow the pool water to circulate for at least 2-4 hours to distribute the chemicals evenly.
  5. Retest the pH level after the circulation period to ensure it has reached the desired range (7.4 to 7.6). If necessary, repeat the process of adding pH increaser or reducer until the ideal pH is achieved.
  6. Test your pool water regularly (at least once a week) and make adjustments as needed to maintain a balanced pH.
  7. Additional Tips for Maintaining Balanced pH Levels

In addition to adjusting pH levels, consider the following tips to maintain balanced pool water chemistry:

  • Monitor total alkalinity: Total alkalinity (TA) acts as a buffer for pH levels, so it’s essential to maintain the recommended TA range of 80-120 ppm. An imbalanced TA can cause pH levels to fluctuate.
  • Maintain sanitizer levels: Ensure that the sanitizer (chlorine or bromine) levels are within the recommended range to keep the water clean and prevent algae growth.
  • Regularly clean and backwash the pool filter: A clean and well-functioning filter helps maintain water clarity and balanced water chemistry.
  • Shock your pool as needed: Regular pool shocking, usually once a week, can help break down organic contaminants and maintain water quality.

Maintaining balanced pH levels in your swimming pool is essential for ensuring a comfortable and safe swimming environment, protecting pool equipment, and maintaining water clarity. By using the appropriate chemicals, reliable test kits, and adhering to best practices, you can easily achieve and maintain optimal pH levels in your pool, ensuring a delightful swimming experience for everyone.


Recommended Products

As an Amazon Associate, we earn from qualifying purchases.