Demystifying Pool Flocculant: Understanding Its Purpose, Benefits, and Drawbacks

A Comprehensive Guide to Pool Flocculant, Its Applications, and Factors to Consider Before Using It

Introduction

Pool flocculant is a chemical treatment that plays a vital role in maintaining crystal-clear swimming pool water. By promoting the clumping of suspended particles, it allows for easier removal of debris, organic matter, and other contaminants. In this article, we will discuss what pool flocculant is, its applications, and the pros and cons of using it in your swimming pool.

What is Pool Flocculant?

Pool flocculant, also known as a coagulant or floc, is a chemical agent that encourages the agglomeration of fine suspended particles in the pool water. These particles, which can include dirt, organic matter, and various contaminants, can cause water to appear cloudy or discolored. The flocculant works by neutralizing the electrical charge on these particles, causing them to clump together and form larger, heavier masses. This process makes it easier to remove the particles from the water through vacuuming or filtration.


What is Pool Flocculant Used For?

  1. Clarifying Cloudy Water: Flocculants are commonly used to treat cloudy pool water, which can result from an imbalance in water chemistry, excessive debris, or poor filtration. By clumping the suspended particles together, flocculants can help improve water clarity and restore a sparkling appearance.
  2. Algae Treatment: In some cases, pool flocculant can be used as a part of an algae treatment regimen. When combined with an algaecide, the flocculant can help remove dead algae cells from the water, improving the effectiveness of the treatment.
  3. Post-Storm Cleanup: After a storm or heavy rainfall, pool water can become contaminated with debris, dirt, and other pollutants. Flocculant can help expedite the cleanup process by clumping these contaminants together for easy removal.

Pros and Cons of Using Pool Flocculant

Pros:

  1. Rapid Water Clarity Improvement: Pool flocculant can quickly improve water clarity, making it an ideal solution for dealing with sudden cloudiness or discoloration.
  2. Enhanced Filtration Efficiency: By clumping particles together, flocculant can improve the efficiency of the pool’s filtration system, as larger particles are more easily trapped and removed by the filter.
  3. Versatility: Flocculants are compatible with various pool types and water chemistry levels, making them a versatile option for maintaining water clarity.


Cons:

  1. Additional Vacuuming Required: After using pool flocculant, it is necessary to vacuum the pool to remove the clumped particles. This can be a time-consuming and labor-intensive process.
  2. Temporary Fix: While pool flocculant can quickly improve water clarity, it does not address the underlying issues that caused the cloudiness in the first place. Pool owners must also address imbalances in water chemistry and ensure that their filtration system is functioning properly to maintain long-term water clarity.
  3. Potential Overuse: Excessive use of flocculant can lead to clogged filters and reduced filtration efficiency. It’s essential to follow the manufacturer’s guidelines for dosing and application to avoid potential issues.

Conclusion

Pool flocculant is a valuable tool for maintaining clear and inviting swimming pool water. By understanding its purpose, applications, and the pros and cons of its use, pool owners can make informed decisions about whether to incorporate flocculant into their pool maintenance routine. While flocculant can provide rapid improvements in water clarity, it’s essential to remember that it should be used in conjunction with proper water chemistry management and filtration maintenance to ensure long-lasting results.

Conquering Black Algae in Your Home Swimming Pool: Causes, Solutions, and Products

Learn How to Identify, Eliminate, and Prevent the Stubborn Invader That Is Black Algae

Introduction

Black algae can be a persistent and challenging issue for many homeowners with swimming pools. This tenacious invader is known for its strong roots and resistance to conventional pool treatments. In this article, we’ll explore the causes of black algae, effective solutions for eliminating it, and the products needed to ensure your pool stays pristine and inviting.


Causes of Black Algae in Swimming Pools

  1. Insufficient Sanitation: Low levels of chlorine or other sanitizing agents in the pool can allow black algae to thrive.
  2. Poor Circulation and Filtration: Inadequate water circulation and filtration can create stagnant areas in the pool, creating a hospitable environment for black algae growth.
  3. Introduction via Contamination: Swimmers, pool equipment, or debris can inadvertently introduce black algae spores into the pool.

Solutions for Eliminating Black Algae

  1. Scrub the Affected Areas: Begin by using a stiff pool brush to vigorously scrub the black algae spots. This will help break up the protective layer and expose the algae to the pool chemicals.
  2. Shock the Pool: Raise the chlorine level in your pool to 10-30 ppm by shocking the water. This will help kill the black algae and sanitize the pool.
  3. Use an Algaecide: Apply a strong algaecide specifically formulated to target black algae. Follow the manufacturer’s instructions for the proper dosage and application method.
  4. Brush and Vacuum: Regularly brush and vacuum the pool to remove dead algae and debris. This will prevent the algae from re-establishing itself in the pool.
  5. Clean the Filter: Thoroughly clean or replace the pool filter to remove any trapped algae spores, ensuring that they do not re-enter the pool.


Products Needed to Remove Black Algae and How to Use Them

  1. Stiff Pool Brush: A stiff-bristled pool brush is essential for breaking up the protective layer of black algae. Use it to vigorously scrub the affected areas before applying chemicals.
  2. Chlorine Shock: Chlorine shock treatment is a concentrated form of chlorine used to raise the sanitizer level quickly. Follow the manufacturer’s guidelines for the proper amount of shock to use based on your pool’s volume and existing chlorine levels.
  3. Black Algae-specific Algaecide: Not all algaecides are effective against black algae, so choose one specifically formulated to combat this stubborn invader. Follow the manufacturer’s instructions for dosage and application.
  4. Pool Vacuum: Use a pool vacuum to remove dead algae and debris from the bottom and walls of the pool. This will help prevent the algae from re-establishing itself.
  5. Filter Cleaner or Replacement Cartridge: Clean your pool filter with a filter cleaner or replace the cartridge to ensure that any trapped algae spores are removed and do not re-enter the pool.

Conclusion

Eliminating black algae from your home swimming pool can be a daunting task, but with the right solutions and products, you can successfully conquer this stubborn invader. By understanding the causes of black algae, implementing effective treatment strategies, and using the appropriate products, you can restore your pool to a pristine and inviting state. Regular pool maintenance, proper sanitation, and diligent water testing will help prevent future black algae outbreaks and keep your pool looking its best.


Recommended Products

As an Amazon Associate, we earn from qualifying purchases.

How to Fix Constantly Low Chlorine in Your Backyard Swimming Pool: Causes, Troubleshooting, and Solutions

Keep Your Pool Safe and Crystal Clear by Understanding and Addressing Low Chlorine Levels

Introduction

Chlorine is an essential chemical for maintaining a clean, safe, and healthy swimming pool. It acts as a sanitizer, killing bacteria, algae, and other harmful microorganisms. However, constantly low chlorine levels can result in an unclean pool and various problems. This article will explore the causes of low chlorine levels, the role of stabilizers, chlorine lock, and combined chlorine, and provide troubleshooting steps and solutions to address this issue.

Causes of High Chlorine Demand

Several factors can contribute to high chlorine demand and low chlorine levels in your pool:

  1. High pool usage: An increase in swimmers can deplete chlorine levels more rapidly.
  2. Excessive organic debris: Leaves, grass, and other organic material can increase chlorine demand.
  3. Algae growth: Algae consume chlorine, leading to a decrease in sanitizer levels.
  4. Improper water balance: Incorrect pH, alkalinity, or calcium hardness levels can affect chlorine’s effectiveness.
  5. Insufficient sunlight protection: Sunlight can break down chlorine, reducing its effectiveness as a sanitizer.


The Role of Stabilizer, Chlorine Lock, and Combined Chlorine

  1. Stabilizer: Also known as cyanuric acid, stabilizers protect chlorine from sunlight degradation, extending its lifespan in the pool. However, high levels of stabilizer can reduce chlorine’s effectiveness.
  2. Chlorine lock: This occurs when high levels of stabilizer prevent free chlorine from sanitizing the pool effectively, resulting in low chlorine levels despite regular dosing.
  3. Combined chlorine: When chlorine binds with contaminants, it forms combined chlorine, which is less effective as a sanitizer. High levels of combined chlorine can contribute to low free chlorine levels.

Problems Resulting from Constantly Low Chlorine

Constantly low chlorine levels can lead to several issues in your pool, such as:

  1. Algae growth: Without sufficient chlorine, algae can thrive, turning your pool water green and murky.
  2. Bacterial growth: Low chlorine levels can result in the proliferation of harmful bacteria, posing health risks to swimmers.
  3. Cloudy water: Insufficient chlorine can cause pool water to become cloudy and uninviting.
  4. Foul odors: Combined chlorine can produce a strong, unpleasant chlorine smell.

Troubleshooting Steps

  1. Test your pool water: Regularly test your pool water for chlorine levels, pH, alkalinity, and stabilizer levels. This will help you identify the cause of low chlorine levels.
  2. Inspect your pool equipment: Ensure your pool pump, filter, and chlorinator are functioning correctly.

Solutions for Fixing Low Chlorine Levels

  1. Shock the pool: Perform a pool shock treatment with a high dose of chlorine to address algae growth, bacteria, and combined chlorine.
  2. Adjust the stabilizer levels: Lower high stabilizer levels by partially draining and refilling your pool with fresh water. Maintain the recommended stabilizer levels to prevent chlorine lock.
  3. Balance your pool water: Ensure your pool water is balanced by adjusting the pH, alkalinity, and calcium hardness levels as needed.
  4. Optimize your chlorinator settings: Adjust your chlorinator settings to increase the rate of chlorine production or dosing.
  5. Remove organic debris: Regularly skim, vacuum, and brush your pool to remove leaves, grass, and other debris that can contribute to high chlorine demand.
  6. Use an algaecide: Regularly use an algaecide to prevent algae growth and maintain optimal chlorine levels.


Conclusion

Constantly low chlorine levels in your backyard swimming pool can lead to several problems, including algae growth, bacterial contamination, and cloudy water. Understanding the causes of low chlorine levels, such as high chlorine demand, the role of stabilizers, chlorine lock, and combined chlorine, is essential in maintaining a clean and safe pool environment.

By implementing proper troubleshooting steps and solutions, such as shocking the pool, adjusting stabilizer levels, balancing pool water, optimizing chlorinator settings, removing organic debris, and using algaecides, you can effectively address and prevent low chlorine levels. Regular pool maintenance and water testing will help you keep your pool crystal clear and ready for swimming all season long.


Recommended Products

As an Amazon Associate, we earn from qualifying purchases.

???? Calculate Perfect Pool Chemistry Instantly

Stop guessing — use our free Pool Chemical Calculator to get exact dosing for your pool size.

▶ Google Play
???? App Store
???? Web Calculator


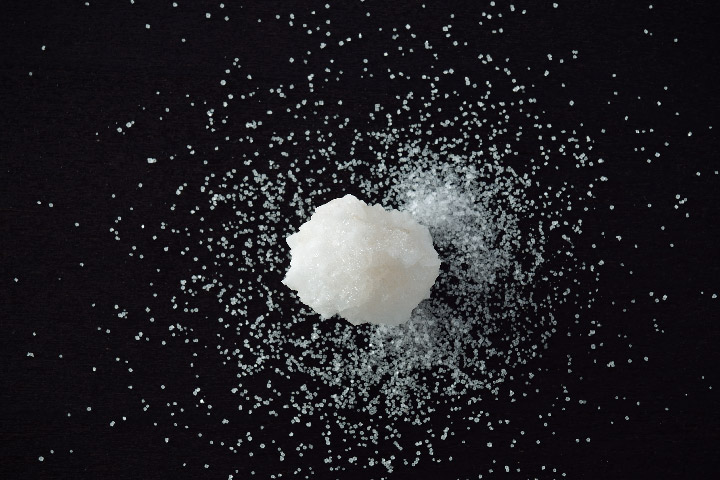
A Comprehensive Guide to Swimming Pool Salt

Understanding the Importance, Usage, and Optimal Range of Salt in Saltwater Pools

Introduction

Saltwater pools have gained popularity among pool owners due to their numerous benefits, such as reduced chemical usage, softer water, and less skin and eye irritation. Salt is a crucial component in saltwater pools, as it facilitates the production of chlorine to sanitize the pool water. In this article, we’ll discuss why salt is used in swimming pools, its importance, the optimal range, and other essential tips for maintaining a healthy saltwater pool.

  1. Why is Salt Used in Swimming Pools?

Salt is used in saltwater pools to create chlorine through a process called electrolysis. The saltwater pool system consists of a chlorine generator, also known as a salt chlorine generator or salt cell, which uses electricity to convert salt (sodium chloride) into chlorine (hypochlorous acid) and sodium hypochlorite. This chlorine production process helps keep the pool water clean and safe for swimming.

  1. Importance of Salt in Saltwater Pools


Salt plays a crucial role in maintaining the cleanliness and safety of saltwater pools. Some key benefits of using salt in swimming pools include:

a) Reduced Chemical Usage: Saltwater pools require less added chlorine, as the chlorine generator continually produces chlorine from the salt. This reduces the need for frequent manual chlorine application.

b) Softer Water: Saltwater pools are known for their soft, silky water, which can be gentler on skin, hair, and eyes.

c) Less Chlorine Odor: Saltwater pools have a lower concentration of combined chlorine, which is responsible for the strong chlorine smell often associated with traditional chlorinated pools.

d) Eco-friendly: Saltwater pools require fewer chemicals, making them a more environmentally friendly option.

  1. Optimal Salt Range for Saltwater Pools

The optimal salt level in a saltwater pool typically ranges from 2,500 to 3,500 parts per million (ppm). Maintaining the correct salt level is essential for the efficient operation of the chlorine generator and overall pool health. It is vital to follow the manufacturer’s recommendations for your specific salt chlorine generator.

  1. Tips for Maintaining Salt Levels in Your Saltwater Pool

a) Test Regularly: Regularly test the salt level in your pool using a salt test kit or digital salt meter to ensure it stays within the optimal range.

b) Add Salt as Needed: If your pool’s salt level falls below the recommended range, add the appropriate amount of pool-grade salt to bring it back to the proper level.

c) Monitor Chlorine Production: Keep an eye on your chlorine generator’s performance and make adjustments to the system settings as needed to maintain the appropriate chlorine levels.

d) Check for Salt Cell Buildup: Inspect the salt cell for calcium deposits or scale buildup, as this can impede the electrolysis process. Clean the cell according to the manufacturer’s instructions to ensure optimal performance.

e) Maintain Proper Water Balance: In addition to monitoring salt levels, it’s essential to maintain the correct water balance in your pool, including pH, total alkalinity, and calcium hardness. This will help prevent issues such as scaling, corrosion, and algae growth.

Conclusion

Salt is a vital component in saltwater pools, providing an efficient and eco-friendly way to sanitize the pool water. Understanding the importance of salt, its usage, and the optimal salt range will help you maintain a clean, safe, and enjoyable swimming environment. By regularly monitoring and adjusting your pool’s salt levels and water balance, you can enjoy the benefits of a saltwater pool for years to come.

Comparing Pool Sanitation Options: Pros and Cons of Saltwater, Chlorine, UV, Ozone and Other Alternatives

A Comprehensive Guide to the Pros and Cons of Different Pool Sanitation Options

Introduction

Maintaining a clean and safe swimming environment is a top priority for every pool owner. With various pool sanitation options available, choosing the best one for your needs can be challenging. In this article, we will discuss the pros and cons of different pool sanitation options, including chlorine, saltwater systems, Baquacil, ozone, and UV systems, to help you make an informed decision.

  1. Chlorine

Chlorine is the most commonly used pool sanitizer, acting as both a disinfectant and an oxidizer to remove bacteria, algae, and organic contaminants from the pool water.

Pros:

  • Widely available and affordable
  • Proven and effective sanitation method
  • Easy to use and control

Cons:

  • Can cause eye and skin irritation for some swimmers
  • Strong chemical odor
  • Requires regular testing and maintenance
  • Can damage pool equipment and surfaces if not properly balanced
  1. Saltwater Systems

Saltwater systems use a chlorine generator to convert salt into chlorine, providing continuous sanitization without the need for manual chlorine addition.

Pros:

  • Less chemical odor and reduced eye and skin irritation compared to traditional chlorine
  • Lower long-term maintenance costs
  • More environmentally friendly

Cons:

  • Initial installation cost can be high
  • Requires occasional replacement of the salt cell
  • Still relies on chlorine as the primary sanitizer
  1. Baquacil

Baquacil is a non-chlorine sanitizer that uses hydrogen peroxide and polyhexamethylene biguanide (PHMB) to sanitize pool water.

Pros:

  • Gentle on eyes and skin
  • No strong chemical odor
  • Does not bleach or fade swimsuits

Cons:

  • More expensive than chlorine
  • Requires regular testing and maintenance
  • Can be less effective against algae and certain bacteria
  1. Ozone Systems

Ozone systems use an ozone generator to produce ozone gas, which is then injected into the pool water to oxidize and destroy contaminants.

Pros:

  • Reduces the amount of chlorine needed for pool sanitation
  • Highly effective against bacteria, viruses, and other contaminants
  • Reduces chemical odor and irritation

Cons:

  • Initial installation cost can be high
  • Requires regular maintenance and replacement of the ozone generator
  • Ozone gas can be harmful if inhaled in high concentrations
  1. UV Systems


UV systems use ultraviolet light to inactivate bacteria, viruses, and other microorganisms in pool water.

Pros:

  • Environmentally friendly and non-toxic
  • Reduces the need for chlorine and other chemicals
  • Effective against chlorine-resistant microorganisms

Cons:

  • Initial installation cost can be high
  • Requires electricity to operate, which can increase energy costs
  • Does not provide residual sanitation, so additional sanitizers may still be necessary

Conclusion

Choosing the best pool sanitation option for your needs depends on various factors, such as budget, maintenance requirements, and personal preferences. By understanding the pros and cons of different pool sanitation methods, you can make an informed decision that suits your unique situation. Keep in mind that no single sanitation method is perfect, and many pool owners opt for a combination of systems to achieve optimal water quality and safety. With proper research and consideration, you can select the right sanitation system for your pool and enjoy a clean, safe, and enjoyable swimming experience.


Recommended Products

As an Amazon Associate, we earn from qualifying purchases.

The Link Between Swimming Pool pH and Alkalinity: A Guide for New Pool Owners

Understanding the Importance of pH and Alkalinity Balance in Your Swimming Pool

Introduction

As a new pool owner, it is essential to understand the importance of maintaining proper water chemistry to ensure a clean, safe, and enjoyable swimming environment. Two critical aspects of pool water chemistry are pH and alkalinity. In this article, we will explore the link between swimming pool pH and alkalinity and provide guidelines on how to maintain an ideal balance.

pH and Alkalinity Explained

  1. pH: The pH level of your pool water measures how acidic or alkaline it is on a scale of 0 to 14, with 7 being neutral. A pH level below 7 indicates acidic water, while a pH level above 7 indicates alkaline water. The ideal pH range for swimming pool water is between 7.2 and 7.6.
  2. Alkalinity: Alkalinity, also known as total alkalinity, refers to the concentration of alkaline substances in your pool water, primarily bicarbonates, carbonates, and hydroxides. These substances act as a buffer, helping to stabilize the pH level and resist sudden fluctuations. The recommended alkalinity range for swimming pool water is between 80 and 120 parts per million (ppm).

The Link Between pH and Alkalinity

pH and alkalinity are closely linked, as alkalinity acts as a buffer to stabilize the pH level in your pool. When the alkalinity level is within the recommended range, it helps prevent significant pH fluctuations caused by factors such as rain, swimmers, or pool chemicals. On the other hand, if the alkalinity is too low, the pH level becomes unstable and prone to drastic changes, which can lead to various problems, including:

  • Corrosion of pool equipment
  • Staining of pool surfaces
  • Eye and skin irritation for swimmers
  • Reduced effectiveness of sanitizers


Similarly, if the alkalinity is too high, it can cause:

  • Cloudy water
  • Scaling and staining of pool surfaces
  • Reduced sanitizer effectiveness

Maintaining a Balanced pH and Alkalinity

To maintain a balanced pH and alkalinity in your swimming pool, follow these guidelines:

  1. Test Regularly: Regularly test your pool water, at least once a week, using a reliable test kit or test strips. Check both the pH and alkalinity levels to ensure they are within the recommended ranges.
  2. Adjust Alkalinity First: If your alkalinity is outside the recommended range, address it before adjusting the pH. To increase alkalinity, add a product like sodium bicarbonate (baking soda). To decrease alkalinity, add an acid like muriatic acid or sodium bisulfate.
  3. Adjust pH: Once the alkalinity is balanced, you can adjust the pH level if necessary. To raise the pH, use a pH increaser like soda ash or borax. To lower the pH, use a pH decreaser like muriatic acid or sodium bisulfate.
  4. Re-test and Repeat: After adjusting the alkalinity and pH, allow the pool water to circulate for several hours, then re-test the water. If needed, repeat the adjustment process until both levels are within the recommended ranges.

Conclusion

Understanding the link between swimming pool pH and alkalinity is crucial for maintaining a clean, safe, and enjoyable swimming environment. By regularly testing and adjusting your pool water’s pH and alkalinity levels, you can prevent common pool problems and protect both your pool equipment and swimmers’ health. With a little knowledge and regular maintenance, you can keep your pool in optimal condition and enjoy a refreshing swim all season long.

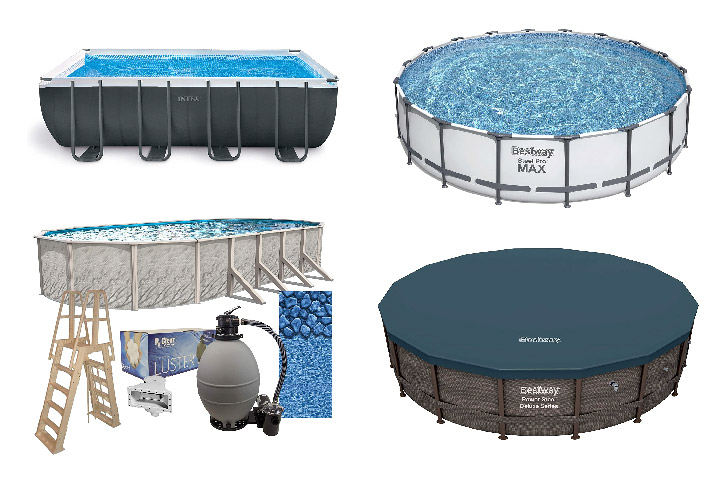
Common Mistakes to Avoid When Buying an Above Ground Pool

Don’t let these pitfalls ruin your pool-buying experience when getting a new above ground pool.

An above ground pool can provide endless hours of fun, relaxation, and family bonding. However, choosing the right pool requires careful consideration and planning. To help you make an informed decision, we’ve compiled a list of common mistakes to avoid when buying an above ground pool.

  1. Not Considering the Pool’s Size and Shape

One of the most common mistakes when buying an above ground pool is not taking into account the size and shape of the pool. Before making a purchase, measure your backyard to ensure that the pool will fit comfortably and still allow for enough space for other activities. Additionally, think about the shape of the pool and how it will affect the layout of your backyard. Round and oval pools are the most popular shapes, but rectangular and square options are also available.

  1. Overlooking Local Regulations and Permits

Before installing an above ground pool, it’s essential to research local regulations and obtain any necessary permits. Failing to do so can result in fines, or you may be required to remove the pool altogether. Check with your local municipality and homeowners’ association to understand the rules and restrictions surrounding pool installations.

  1. Choosing the Wrong Pool Material


Above ground pools are available in a variety of materials, including steel, aluminum, and resin. Each material has its pros and cons, so it’s crucial to choose the right one for your needs. Steel pools are typically the most affordable option but are more prone to rust and corrosion. Aluminum pools are more lightweight and resistant to corrosion, but they can be susceptible to denting. Resin pools are the most durable and resistant to corrosion, but they can be more expensive.

  1. Ignoring Pool Installation Costs

Many people focus solely on the cost of the pool itself, neglecting to consider the installation costs. The installation process can be complex and time-consuming, and hiring a professional installer may be necessary. Make sure to factor in the cost of installation when budgeting for your above ground pool.

  1. Disregarding Maintenance Requirements

Owning a pool requires regular maintenance, including chemical balancing, cleaning, and filter maintenance. Before purchasing an above ground pool, make sure you understand the maintenance requirements and are prepared to invest the time and money necessary to keep your pool in top condition.

  1. Forgetting About Pool Accessories

When budgeting for an above ground pool, don’t forget to account for the cost of necessary accessories, such as a pool ladder, filter system, pool cover, and pool toys. These items can add up quickly and significantly impact the overall cost of your pool.

  1. Focusing Solely on Price


While it’s essential to stick to a budget, focusing solely on price can lead to disappointment in the long run. Cheaper pools may be made from lower-quality materials and may not last as long as more expensive options. Instead of solely focusing on price, consider the pool’s durability, materials, and overall value.

Conclusion

By avoiding these common mistakes, you can make an informed decision when purchasing an above ground pool. Remember to consider factors such as size, shape, materials, and maintenance requirements to ensure you choose the perfect pool for your family and backyard space. By doing your research and understanding the potential pitfalls, you’ll be well on your way to enjoying your new above ground pool for years to come.

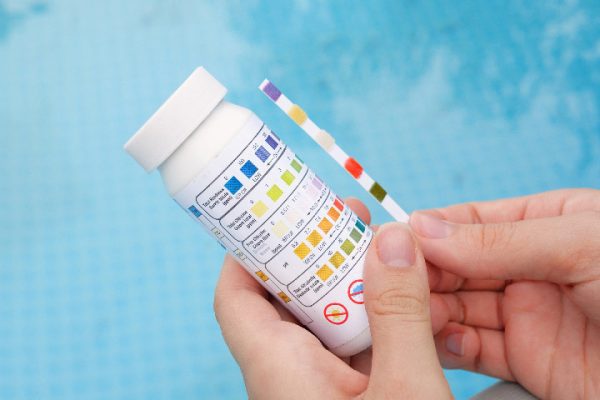
Cyanuric Acid and Its Role in Swimming Pool Maintenance: A Comprehensive Guide for Pool Owners

Understanding the Importance and Proper Usage of Cyanuric Acid for a Well-Maintained Pool

Cyanuric acid, also known as pool stabilizer or conditioner, plays a vital role in maintaining a healthy and enjoyable swimming pool environment. It helps protect chlorine from rapid degradation caused by the sun’s ultraviolet (UV) rays, ensuring effective sanitization and reducing the need for frequent chlorine additions. This article will provide you with a comprehensive guide on the role of cyanuric acid in swimming pool maintenance, its different uses, how to use it, and when to use it for optimal pool care.

Role of Cyanuric Acid in Swimming Pools

Cyanuric acid is a chemical that forms a protective bond with free chlorine in the pool water, shielding it from the sun’s UV rays. Without cyanuric acid, chlorine can be quickly broken down by sunlight, reducing its effectiveness and requiring frequent additions to maintain proper sanitation. By using cyanuric acid, pool owners can maintain a more consistent chlorine level, save on sanitizer costs, and ensure a safer, cleaner pool.


Different Uses of Cyanuric Acid

Cyanuric acid is primarily used in two forms:

  1. Stabilized Chlorine Products: Cyanuric acid is often combined with chlorine in stabilized chlorine products, such as dichlor and trichlor tablets. These products slowly release both chlorine and cyanuric acid into the pool water, providing simultaneous sanitization and stabilization.
  2. Separate Cyanuric Acid Additives: Cyanuric acid is also available as a separate additive, often in granular or liquid form. This allows pool owners to adjust the cyanuric acid level independently of chlorine levels, providing more precise control over pool water chemistry.


How to Use Cyanuric Acid

Follow these steps to use cyanuric acid effectively in your swimming pool:

  1. Test the Cyanuric Acid Level: Before adding cyanuric acid, test the current level in your pool using a test kit or test strips designed for this purpose. The ideal cyanuric acid level for outdoor pools is typically between 30 and 50 ppm (parts per million).
  2. Calculate the Required Amount: Based on your pool’s volume and the desired cyanuric acid level, calculate the amount of cyanuric acid needed. Consult the product label or use an online pool calculator to determine the appropriate amount.
  3. Add Cyanuric Acid: If using granular cyanuric acid, pre-dissolve it in a bucket of water to ensure even distribution and prevent damage to pool surfaces. Slowly pour the dissolved solution into the pool, spreading it evenly around the perimeter. If using a liquid cyanuric acid product, follow the manufacturer’s instructions for proper application.
  4. Circulate the Pool Water: Run your pool pump for at least 24 hours to ensure proper distribution and mixing of the cyanuric acid.

When to Use Cyanuric Acid

Cyanuric acid should be added to your pool whenever the level falls below the recommended range of 30 to 50 ppm. This may occur when:

  1. Filling a new pool or refilling after draining: Add cyanuric acid to establish the proper level for effective chlorine protection.
  2. After heavy rainfall or significant water replacement: Large water replacements can dilute cyanuric acid levels, necessitating adjustment.
  3. Seasonal maintenance: Regularly test and adjust cyanuric acid levels throughout the swimming season to maintain optimal pool water chemistry.

Cyanuric acid plays a crucial role in maintaining a healthy and enjoyable swimming pool environment by protecting chlorine from rapid degradation caused by the sun’s UV rays.


Recommended Products

As an Amazon Associate, we earn from qualifying purchases.

Free Chlorine vs. Combined Chlorine: A Guide for New Pool Owners

Understanding the Differences and Importance of Free and Combined Chlorine in Your Swimming Pool

As a new pool owner, you’ll soon discover that maintaining proper water chemistry is crucial for ensuring a clean, safe, and enjoyable swimming environment. One of the essential components of pool water chemistry is chlorine, which acts as a sanitizer to kill bacteria, algae, and other contaminants. However, not all chlorine in your pool is equal. In this article, we will explain the differences between free chlorine and combined chlorine, why they matter, and how to balance them effectively.

Free Chlorine vs. Combined Chlorine

  1. Free Chlorine: Free chlorine is the active and available form of chlorine in your pool water that can kill bacteria, algae, and other contaminants. It is responsible for the sanitizing and oxidizing power that keeps your pool clean and safe for swimmers. The ideal free chlorine level in a swimming pool should be between 1 and 3 parts per million (ppm).
  2. Combined Chlorine: Combined chlorine, also known as chloramines, is the result of free chlorine reacting with ammonia and other nitrogen-containing contaminants introduced into the pool by swimmers (such as sweat and urine) or environmental factors (like rain or debris). Combined chlorine is less effective as a sanitizer and can cause issues such as:
  • Strong chlorine odor
  • Eye and skin irritation for swimmers
  • Cloudy pool water
  • Reduced sanitizer effectiveness


To maintain a healthy pool environment, it’s essential to minimize combined chlorine levels.

Why It Matters

Understanding the difference between free chlorine and combined chlorine is crucial because it directly impacts the cleanliness and safety of your pool water. A pool with a high level of combined chlorine indicates that the sanitizing capacity of the free chlorine is being compromised, leading to an increased risk of contamination and discomfort for swimmers. By maintaining an optimal balance between free and combined chlorine, you can ensure that your pool remains clean, safe, and enjoyable for everyone.

Balancing Free and Combined Chlorine

To balance free and combined chlorine levels in your swimming pool, follow these guidelines:

  1. Test Regularly: Regularly test your pool water, at least once a week, using a reliable test kit or test strips that measure both free and combined chlorine levels.
  2. Maintain Optimal Free Chlorine Levels: Ensure that your free chlorine level is within the recommended range of 1 to 3 ppm. You can add chlorine to your pool using various methods, such as liquid chlorine, granular chlorine, chlorine tablets, or a saltwater chlorine generator.
  3. Break Down Combined Chlorine: If your combined chlorine level is above 0.5 ppm, you should perform a process called breakpoint chlorination or shock treatment to eliminate the chloramines. This process involves adding a large dose of chlorine (usually in the form of calcium hypochlorite or sodium dichlor) to raise the free chlorine level to 10 times the combined chlorine level. This high concentration of free chlorine breaks down the chloramines and restores your pool’s sanitizing capacity.
  4. Monitor and Adjust: After performing breakpoint chlorination, allow the pool water to circulate for several hours or overnight, then re-test the water. If needed, repeat the breakpoint chlorination process until the combined chlorine level is below 0.5 ppm.

Conclusion


Understanding the differences between free chlorine and combined chlorine is essential for maintaining a clean, safe, and enjoyable swimming environment. By regularly testing and balancing your pool water’s chlorine levels, you can prevent common pool problems and protect both your pool equipment and swimmers’ health. With a little knowledge and regular maintenance, you can keep your pool in optimal condition and enjoy a refreshing swim all season long


Recommended Products

As an Amazon Associate, we earn from qualifying purchases.

???? Calculate Perfect Pool Chemistry Instantly

Stop guessing — use our free Pool Chemical Calculator to get exact dosing for your pool size.

▶ Google Play
???? App Store
???? Web Calculator


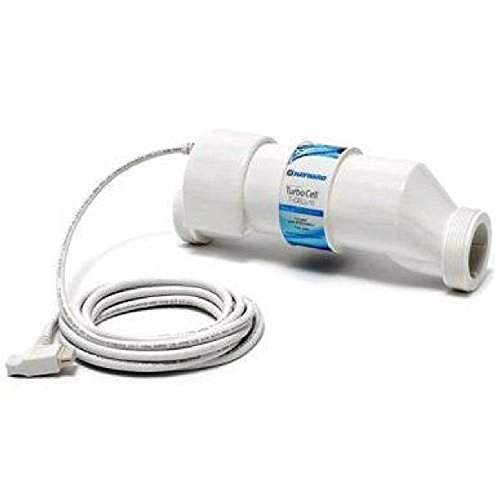
Caring for Your Chlorine Generator Cell: Essential Tips for Optimal Performance and Longevity

Keep Your Salt Water Pool Clean and Clear by Properly Maintaining Your Chlorine Generator Cell

Chlorine generator cells, also known as salt cells, are a critical component of a salt water pool’s sanitation system. They use electrolysis to convert salt into chlorine, providing continuous sanitization to keep pool water clean and clear. Proper care and maintenance of the chlorine generator cell are crucial to ensure optimal performance and extend the lifespan of the cell. In this article, we will discuss the proper way to care for your chlorine generator cell to keep your salt water pool in top shape.

Step 1: Inspect the Cell Regularly

Regularly inspect the chlorine generator cell to identify any issues or signs of wear. Check for buildup, scaling, or damage to the cell’s plates or other components. Monitoring the cell’s performance and keeping an eye on the salt chlorine generator’s output settings will help you determine when it’s time for cleaning or replacement.


Step 2: Clean the Cell as Needed

Over time, mineral deposits and calcium buildup can accumulate on the cell plates, reducing the cell’s efficiency and its ability to produce chlorine. Clean the cell as needed, typically every 3-6 months, or according to the manufacturer’s recommendations. Follow these steps to clean your chlorine generator cell:

  1. Turn off the pool pump and salt chlorine generator.
  2. Disconnect the cell from the generator’s control unit and remove it from the plumbing.
  3. Visually inspect the cell for buildup or scaling. If significant buildup is present, proceed with cleaning.
  4. Mix a cleaning solution of equal parts water and muriatic acid in a plastic container. Always add acid to water, not water to acid, to avoid a dangerous chemical reaction.
  5. Submerge the cell in the cleaning solution and let it soak for 15-30 minutes, or until the buildup has dissolved. Do not leave the cell in the cleaning solution for too long, as excessive exposure to acid can damage the cell.
  6. Use a soft brush or sponge to gently remove any remaining deposits from the cell plates. Avoid using abrasive tools that can damage the cell’s surface.
  7. Thoroughly rinse the cell with fresh water to remove any residual acid.
  8. Reinstall the cell, making sure all connections are secure and watertight.


Step 3: Maintain Proper Water Chemistry

Maintaining balanced water chemistry in your salt water pool is crucial for the health of your chlorine generator cell. Test your pool water regularly and adjust the levels of pH, alkalinity, and salt concentration as needed to keep them within the recommended ranges. Proper water chemistry will help prevent excessive scaling and extend the life of the cell.

Step 4: Monitor the Salt Chlorine Generator’s Output

Regularly check the output settings on your salt chlorine generator to ensure it’s producing the correct amount of chlorine. Adjust the output settings as needed to maintain proper chlorine levels (1-3 ppm) in your pool. This will help prevent excessive wear on the cell and keep your pool water clean and clear.


Step 5: Replace the Cell When Necessary

Chlorine generator cells have a limited lifespan, typically ranging from 3-7 years, depending on usage and maintenance. As the cell reaches the end of its life, it may become less efficient and require more frequent cleaning or higher output settings to maintain proper chlorine levels. When the cell can no longer produce adequate chlorine, it’s time to replace it with a new one.

Proper care and maintenance of your chlorine generator cell are crucial for maintaining optimal performance and extending its lifespan. By regularly inspecting and cleaning the cell, maintaining balanced water chemistry, and monitoring the salt chlorine