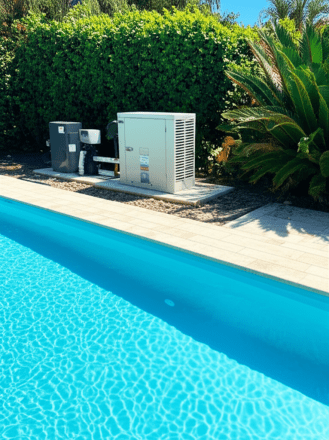
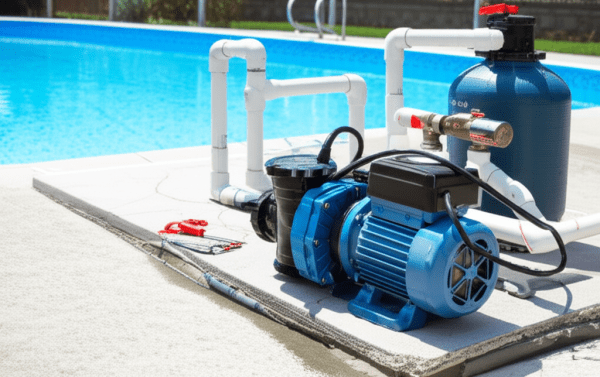
10 Creative and Fun Activities to Enjoy with a Pool Noodle

Pool noodles are versatile and colorful flotation devices that add endless fun and excitement to pool time. While they’re commonly used for floating and lounging, pool noodles can also be repurposed for a variety of entertaining activities both in and out of the water. In this article, we’ll explore 10 creative and fun things to do with a pool noodle, guaranteed to enhance your poolside experience and keep everyone entertained for hours on end.

1. Noodle Jousting:

Challenge your friends or family to a friendly game of noodle jousting. Each participant sits on a pool noodle and tries to knock their opponent off their noodle using another noodle as a jousting lance. The last one remaining on their noodle wins!

2. Pool Noodle Limbo:

Set up a pool noodle limbo station by holding two pool noodles horizontally at different heights. Participants take turns bending backward and attempting to pass under the noodles without touching them. Lower the noodles after each round to increase the difficulty.

3. Noodle Races:

Organize noodle races by dividing participants into teams or individuals and having them race across the pool while balancing on pool noodles. The first one to reach the other side wins the race. Add obstacles or challenges for an extra twist!

4. Noodle Basketball:

Create a makeshift basketball hoop using a poolside railing or anchored pool noodles. Use a pool noodle as the basketball hoop and have participants take turns shooting pool noodle basketballs into the hoop from various distances.

5. Noodle Sculptures:

Unleash your creativity by building elaborate sculptures and structures using pool noodles. Challenge participants to construct the tallest tower, the most intricate maze, or the most imaginative creature using only pool noodles and other poolside accessories.

6. Noodle Raft Building:

Work together with friends or family to build a floating raft or platform using interconnected pool noodles. Once assembled, test the stability and buoyancy of the noodle raft by having everyone climb aboard and see how long it can stay afloat.

7. Noodle Tic-Tac-Toe:

Draw a large tic-tac-toe grid on the pool deck using chalk or tape. Use different colored pool noodles as X’s and O’s, and take turns placing them on the grid to form three in a row vertically, horizontally, or diagonally.

8. Noodle Obstacle Course:

Design a challenging obstacle course around the pool area using pool noodles as obstacles, hurdles, and markers. Participants must navigate through the course while overcoming various noodle-based challenges, such as crawling under noodles, jumping over hurdles, or balancing on floating noodles.

9. Noodle Fishing:

Turn pool noodle pieces into DIY fishing rods by attaching string or fishing line to one end and a clothespin or paper clip to the other end as a hook. Scatter floating objects or pool toys in the water and challenge participants to “fish” them out using their noodle fishing rods.

10. Noodle Ninja Warrior:

Create a ninja warrior-inspired obstacle course using pool noodles as swinging bars, balance beams, and hanging ropes. Participants must navigate through the course while avoiding falling into the water or touching the ground, testing their agility and balance.

Conclusion: From friendly competitions and creative challenges to imaginative games and team-building activities, there are endless possibilities for fun and entertainment with pool noodles. Whether you’re enjoying a leisurely day by the pool or hosting a poolside party, incorporating these 10 creative ideas will surely elevate the excitement and enjoyment for everyone involved. So grab your pool noodles and get ready for a splashing good time!

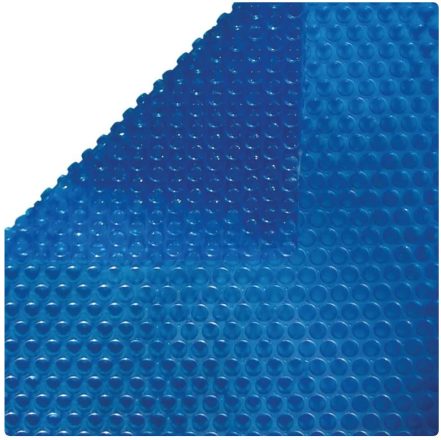
Solar Pool Cover: Bubbles Up or Down? The Ultimate Guide to Maximizing Pool Heating Efficiency

Solar pool covers are an essential accessory for pool owners looking to extend their swimming season and reduce heating costs. However, there is often confusion about whether the bubbles on the cover should face up or down for optimal performance. In this blog post, we’ll explore the debate of bubbles up or down on a solar pool cover and provide insights into maximizing heating efficiency to keep your pool warm and inviting all season long.

Understanding Solar Pool Covers:

Solar pool covers, also known as solar blankets or thermal covers, are made from durable materials that harness the sun’s energy to heat the pool water. These covers typically feature thousands of tiny bubbles that trap heat from the sun and transfer it to the water below. Additionally, solar pool covers help reduce evaporation, retain heat, and prevent debris from entering the pool, making them an essential investment for pool owners.

Bubbles Up or Down: The Debate:

  1. Bubbles Up: Advocates of placing the bubbles facing up argue that this configuration allows the bubbles to trap more heat from the sun and transfer it to the pool water. They believe that the bubbles act as insulators, creating an additional barrier between the water and the cover, which helps retain heat more effectively.
  2. Bubbles Down: Conversely, proponents of placing the bubbles facing down argue that this configuration creates a tighter seal between the cover and the water surface, minimizing heat loss through evaporation. They believe that placing the bubbles down maximizes the contact between the cover and the water, ensuring better heat transfer and retention.

The Verdict: Bubbles Down

While the debate continues among pool owners and experts, the consensus leans toward placing the bubbles facing down for optimal heating efficiency. Here’s why:

  • Increased Contact Area: Placing the bubbles down maximizes the contact area between the cover and the water surface, allowing for better heat transfer and retention.
  • Reduced Evaporation: By creating a tighter seal between the cover and the water, bubbles facing down help minimize heat loss through evaporation, maximizing heating efficiency.
  • Prevention of Debris Accumulation: Placing the bubbles down can also help prevent debris from accumulating on the cover, ensuring clearer water and easier maintenance.

Additional Tips for Maximizing Solar Pool Cover Efficiency:

  1. Ensure Proper Fit: Choose a solar pool cover that fits your pool dimensions snugly to maximize coverage and heating efficiency.
  2. Remove Cover When Swimming: Remove the solar pool cover before swimming to prevent damage and ensure safety. Replace the cover immediately after swimming to retain heat and prevent evaporation.
  3. Regular Maintenance: Clean the solar pool cover regularly to remove dirt, debris, and algae buildup, which can reduce its effectiveness over time.
  4. Monitor Water Temperature: Use a pool thermometer to monitor water temperature regularly and adjust cover usage accordingly to maintain desired temperatures.

Conclusion:

When it comes to solar pool covers, placing the bubbles facing down is generally recommended for optimal heating efficiency. By maximizing contact between the cover and the water surface, minimizing evaporation, and preventing debris accumulation, bubbles-down configuration ensures that your pool stays warm and inviting throughout the swimming season. Remember to invest in a high-quality solar pool cover, follow proper installation and maintenance practices, and enjoy the benefits of a comfortably heated pool for extended swimming enjoyment.

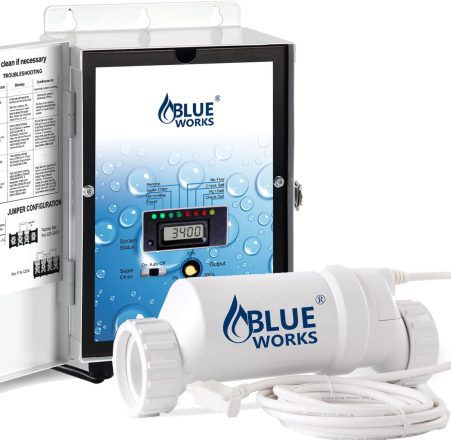
The Benefits of Adding Salt to Your Freshwater Pool: Exploring a Safer and More Comfortable Swimming Experience

When it comes to pool maintenance, many homeowners seek alternatives to traditional chlorine-based systems. One increasingly popular option is converting a freshwater pool into a saltwater pool by adding salt. While it may seem counterintuitive to add salt to a freshwater pool, the benefits of doing so are numerous. In this article, we’ll explore why someone might consider adding salt to their freshwater pool and the advantages it offers for a safer, more comfortable, and lower-maintenance swimming experience.

1. Gentler on Skin and Eyes:

One of the primary reasons for converting to a saltwater pool is the softer feel of the water. Saltwater pools have lower chlorine concentrations compared to traditional chlorine pools, resulting in water that is gentler on the skin and eyes. Swimmers are less likely to experience skin irritation, redness, or dryness after swimming in a saltwater pool, making it a more comfortable experience overall.

2. Reduced Chlorine Smell and Taste:

Saltwater pools produce chlorine through electrolysis, resulting in a more consistent and controlled release of chlorine into the water. This means there is less chloramine formation, which is responsible for the strong chlorine smell and taste often associated with traditional chlorine pools. As a result, swimmers in saltwater pools are less likely to experience unpleasant odors or tastes, enhancing the swimming experience.

3. Lower Maintenance Requirements:

Saltwater pools require less frequent monitoring and maintenance compared to traditional chlorine pools. Once the salt level is properly balanced, the salt chlorinator system automatically generates chlorine as needed, eliminating the need for manual chlorine additions. This can save homeowners time and effort in maintaining their pool, allowing them to spend more time enjoying it.

4. Cost Savings Over Time:

While the initial cost of installing a salt chlorinator system may be higher than traditional chlorine systems, saltwater pools can lead to cost savings over time. With fewer chemical additions and lower maintenance requirements, homeowners can reduce their spending on pool chemicals and maintenance products in the long run. Additionally, the extended lifespan of pool equipment due to reduced exposure to harsh chemicals can further contribute to cost savings.

5. Eco-Friendly Option:

Saltwater pools are often considered a more environmentally friendly option compared to traditional chlorine pools. With fewer chemical additions and lower chlorine concentrations, saltwater pools produce fewer harmful byproducts and reduce the overall environmental impact associated with pool maintenance. Additionally, salt is a natural and abundant resource, making it a sustainable choice for pool sanitation.

Conclusion:

Adding salt to a freshwater pool to convert it into a saltwater pool offers numerous benefits for homeowners seeking a safer, more comfortable, and lower-maintenance swimming experience. From gentler water that is easier on the skin and eyes to reduced chlorine smell and taste, saltwater pools provide a more enjoyable swimming environment for the whole family. With lower maintenance requirements and cost savings over time, saltwater pools are an attractive option for homeowners looking to enhance their pool experience while minimizing the environmental impact. If you’re considering converting your freshwater pool to a saltwater pool, explore the benefits further and consult with a pool professional to determine if it’s the right choice for you.

Finding the Perfect Temperature: A Guide to Swimming Pool Temperature and Maintenance

As the weather warms up and swimming season approaches, many pool owners find themselves wondering about the ideal temperature for their pool water. Achieving the perfect balance of warmth and comfort can enhance your swimming experience and ensure that your pool remains a refreshing oasis all season long. In this blog post, we’ll explore the best temperature for a swimming pool and share tips on how to maintain it for optimal enjoyment.

The Ideal Temperature for a Swimming Pool

The ideal temperature for a swimming pool can vary depending on factors such as personal preference, climate, and intended use. However, a general guideline for comfortable swimming conditions is to aim for a water temperature between 78°F and 82°F (25°C to 28°C). Here’s a breakdown of how temperature affects swimming comfort:

  • Below 78°F (25°C): Water temperatures below 78°F may feel too cold for some swimmers, especially children and individuals who are less accustomed to cooler temperatures. Swimming in water that is too cold can lead to discomfort and may shorten swimming sessions.
  • 78°F to 82°F (25°C to 28°C): This temperature range is considered optimal for most swimmers, providing a balance of warmth and refreshment. Water in this range is comfortable for swimming laps, playing games, and leisurely lounging in the pool.
  • Above 82°F (28°C): Water temperatures above 82°F may feel too warm for some swimmers, particularly in hot climates. While warmer water can be soothing, it may also cause excessive sweating and discomfort during prolonged swimming sessions.

How to Maintain the Ideal Pool Temperature

Maintaining the ideal temperature for your swimming pool requires regular monitoring and proper maintenance. Here are some tips to help you keep your pool water at the perfect temperature:

  1. Use a Pool Heater: If you live in a region with cooler temperatures or want to extend your swimming season, consider investing in a pool heater. Pool heaters come in various types, including gas, electric, and solar, and can help raise the water temperature to your desired level.
  2. Cover Your Pool: Using a pool cover when the pool is not in use can help retain heat and prevent heat loss due to evaporation. Choose a durable and properly fitted pool cover to maximize its effectiveness in maintaining temperature.
  3. Monitor Water Temperature: Regularly check the water temperature of your pool using a reliable pool thermometer. Aim to keep the water within the recommended temperature range for optimal comfort and enjoyment.
  4. Adjust Heating Settings: If you have a pool heater, adjust the heating settings as needed to maintain the desired water temperature. Be mindful of energy consumption and consider using a programmable thermostat to optimize heating efficiency.
  5. Consider Solar Heating: Solar heating systems harness the power of sunlight to heat pool water naturally. Installing solar panels or solar blankets can help supplement your pool heating efforts while reducing energy costs and environmental impact.
  6. Balance Chemical Levels: Properly balanced chemical levels are essential for maintaining water clarity, cleanliness, and comfort. Regularly test and adjust pH, chlorine, alkalinity, and calcium hardness levels to ensure optimal water quality.

Conclusion:

Achieving and maintaining the ideal temperature for your swimming pool is key to creating a comfortable and enjoyable swimming environment for you and your guests. By following the tips outlined in this guide and staying proactive with pool maintenance, you can ensure that your pool water remains at the perfect temperature throughout the swimming season. Dive in and enjoy the refreshing experience of swimming in your own backyard oasis!

Pressure-Side vs. Suction-Side Pool Cleaners: Which Is Right for You?

When it comes to keeping your pool clean, choosing the right pool cleaner is essential. Two popular options are pressure-side and suction-side pool cleaners. But what are the differences between them, and which one is best suited for your pool? In this blog post, we’ll explore the characteristics, pros, and cons of pressure-side and suction-side pool cleaners to help you make an informed decision.

Pressure-Side Pool Cleaners

Pressure-side pool cleaners operate by using the water pressure generated by your pool’s pump to move the cleaner around the pool. Here are some key characteristics, pros, and cons:

Pros:

  1. Efficient Cleaning: Pressure-side cleaners are known for their efficient cleaning capabilities, as they use the force of water pressure to propel the cleaner across the pool surface while simultaneously vacuuming debris.
  2. Independent Operation: Many pressure-side cleaners are equipped with their own debris bags or cartridges, allowing them to operate independently of your pool’s filtration system and reducing strain on the pump and filter.
  3. Effective for Large Debris: Pressure-side cleaners are particularly effective at picking up larger debris such as leaves, twigs, and pebbles, preventing them from clogging your pool’s filtration system.

Cons:

  1. Higher Cost: Pressure-side cleaners tend to be more expensive upfront compared to suction-side cleaners, making them a larger initial investment.
  2. Requires Booster Pump: Some pressure-side cleaners require a booster pump to operate effectively, adding to the overall cost of installation and maintenance.

Suction-Side Pool Cleaners

Suction-side pool cleaners rely on the suction power generated by your pool’s filtration system to operate. Here are their characteristics, pros, and cons:

Pros:

  1. Affordability: Suction-side cleaners are generally more affordable than pressure-side cleaners, making them a budget-friendly option for pool owners.
  2. Low Maintenance: Since suction-side cleaners rely on your pool’s existing filtration system, they typically require less maintenance and fewer additional components compared to pressure-side cleaners.
  3. Effective for Fine Debris: Suction-side cleaners excel at picking up fine debris such as dirt, sand, and algae, helping to maintain water clarity and cleanliness.

Cons:

  1. Reduced Cleaning Power: Suction-side cleaners may not be as powerful or efficient at cleaning as pressure-side cleaners, particularly when it comes to larger debris.
  2. Dependent on Filtration System: Suction-side cleaners are reliant on the suction power of your pool’s filtration system, which can reduce overall circulation and filtration efficiency.

Conclusion:

When choosing between pressure-side and suction-side pool cleaners, it’s essential to consider your pool’s specific needs, budget, and cleaning requirements. Pressure-side cleaners offer efficient cleaning capabilities and independence from the filtration system but come with a higher upfront cost. On the other hand, suction-side cleaners are more affordable and require less maintenance but may not be as powerful at cleaning larger debris. Ultimately, the best choice depends on your priorities and preferences as a pool owner.

Choosing the Best Pool Vacuum for Removing Dead Algae: A Comprehensive Guide

Dealing with algae in your pool can be a frustrating and challenging task. Whether it’s green, black, or mustard algae, getting rid of it requires thorough cleaning and maintenance. In this guide, we’ll explore the best pool vacuum options for removing dead algae and discuss why they’re effective in restoring your pool to its pristine condition.

Understanding Dead Algae

Before diving into the best pool vacuum options, let’s first understand what dead algae is and why it poses a problem for pool owners. Dead algae refers to algae cells that have been killed by sanitizers such as chlorine or algaecides. While the algae may no longer be actively growing, it can still cloud the water and cling to pool surfaces, requiring removal to restore water clarity and cleanliness.

Factors to Consider When Choosing a Pool Vacuum

When selecting a pool vacuum for removing dead algae, several factors come into play:

  1. Suction Power: A pool vacuum with strong suction power is essential for effectively removing dead algae from pool surfaces and capturing it in the filtration system.
  2. Filtration System: Look for a vacuum with a reliable filtration system that can trap even the smallest particles, including dead algae, preventing them from re-entering the pool water.
  3. Versatility: Opt for a pool vacuum that can clean various surfaces, including pool floors, walls, and steps, to ensure thorough cleaning of all areas affected by dead algae.
  4. Ease of Use: Choose a pool vacuum that is easy to assemble, maneuver, and operate, making the cleaning process more convenient and efficient.
  5. Durability: Invest in a high-quality pool vacuum that is built to last, with durable materials and components that can withstand regular use and exposure to pool chemicals.

Best Pool Vacuum Options for Removing Dead Algae

  1. Robotic Pool Vacuum: Robotic pool vacuums are a popular choice for removing dead algae due to their powerful suction and advanced filtration systems. These autonomous cleaners can navigate the pool independently, scrubbing and vacuuming surfaces to remove algae and debris effectively.
  2. Pressure-Side Pool Vacuum: Pressure-side pool vacuums utilize the water pressure from your pool’s pump to propel the cleaner across the pool while simultaneously vacuuming debris. These vacuums often feature built-in filtration bags or cartridges to capture dead algae and other particles.
  3. Suction-Side Pool Vacuum: Suction-side pool vacuums attach to your pool’s skimmer or suction port and rely on the suction power of the filtration system to operate. While they may not be as powerful as robotic or pressure-side vacuums, they can still effectively remove dead algae when used correctly.

Conclusion:

Removing dead algae from your pool requires the right tools and equipment, and choosing the best pool vacuum is essential for achieving optimal results. By considering factors such as suction power, filtration system, versatility, ease of use, and durability, you can select a pool vacuum that meets your needs and effectively removes dead algae, restoring your pool to its pristine condition for enjoyable swimming all season long.

A Beginner’s Guide: How to Hook Up and Use a Suction Side Pool Vacuum Cleaner

Keeping your pool clean is essential for ensuring a safe and enjoyable swimming experience. While manual cleaning methods can be effective, using a pool vacuum cleaner can make the task much easier and more efficient. In this guide, we’ll walk you through the process of hooking up and using a suction side pool vacuum cleaner, perfect for beginners looking to maintain their pool’s cleanliness.

Part 1: Hooking Up the Suction Side Pool Vacuum Cleaner

  1. Gather Your Equipment: Before you begin, ensure you have all the necessary equipment, including the pool vacuum cleaner, telescopic pole, vacuum head, hose, and skimmer or dedicated suction port.
  2. Prepare the Vacuum Head and Hose: Attach the vacuum head to one end of the telescopic pole, and then connect the hose to the other end of the vacuum head.
  3. Prime the Hose: To prevent air from entering the system and ensure proper suction, it’s important to prime the hose. Submerge the entire length of the hose in the pool, ensuring all air bubbles are released.
  4. Attach the Hose to the Skimmer or Suction Port: Depending on your pool’s configuration, you’ll either attach the hose to the skimmer or a dedicated suction port. If using the skimmer, remove the skimmer basket and insert the hose directly into the suction hole. If using a dedicated suction port, attach the hose securely to the port.
  5. Turn on the Pump: Once the hose is securely attached, turn on the pool pump to begin the suction process. You should see water flowing through the hose and into the vacuum head.

Part 2: Using the Suction Side Pool Vacuum Cleaner

  1. Maneuvering the Vacuum Head: Using the telescopic pole, guide the vacuum head along the pool floor, walls, and steps, covering all areas that require cleaning. Move the vacuum head slowly and methodically to ensure thorough cleaning.
  2. Monitoring the Suction: As you vacuum, periodically check the suction to ensure it remains strong and consistent. If the suction weakens, check for any obstructions in the hose or vacuum head and clear them as necessary.
  3. Cleaning Difficult Areas: For hard-to-reach areas such as corners and tight spaces, maneuver the vacuum head as close as possible and use short, precise movements to clean thoroughly.
  4. Emptying the Skimmer Basket: If you’re using the skimmer as the suction point, periodically check and empty the skimmer basket to prevent it from becoming clogged and reducing suction.
  5. Completing the Cleaning Process: Once you’ve vacuumed the entire pool, turn off the pool pump and disconnect the hose from the skimmer or suction port. Remove the vacuum head from the water and detach it from the telescopic pole.
  6. Rinsing and Storing: Rinse the vacuum head, hose, and telescopic pole with clean water to remove any debris and chemicals. Allow the equipment to dry thoroughly before storing it in a clean, dry area.

Conclusion: Using a suction side pool vacuum cleaner is a simple and effective way to keep your pool clean and inviting. By following these step-by-step instructions for hooking up and using the vacuum cleaner, you can maintain a sparkling clean pool all season long. Happy swimming!

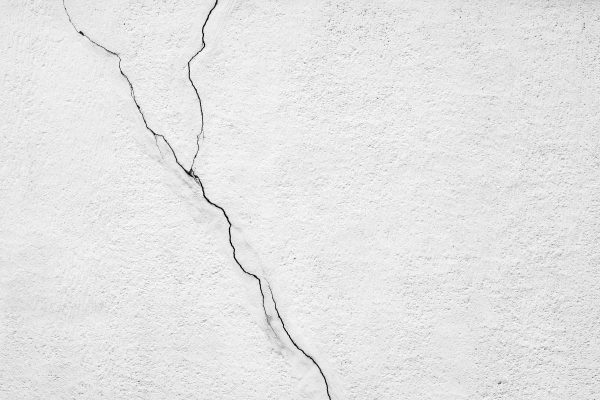
How to Identify and Repair Cracks in Your Pool Surface

A pristine and inviting pool can be a centerpiece of your outdoor oasis, offering relaxation and enjoyment for your family and friends. However, over time, your pool’s surface may develop cracks, which not only affect its aesthetic appeal but also its structural integrity. Identifying and addressing these cracks promptly is crucial to prevent further damage and maintain your pool’s functionality. In this blog, we will guide you through the process of identifying cracks in your pool surface and provide you with tips on how to deal with them effectively.

Identifying Pool Surface Cracks

  1. Visual Inspection: Begin by conducting a thorough visual inspection of your pool’s surface. Look for any irregularities, such as fine lines or fissures. Cracks can vary in size, so be vigilant in examining every inch of the pool.
  2. Feel for Texture Changes: Run your fingers over the pool surface, paying attention to any changes in texture. Cracks often result in rough or jagged areas that can be detected by touch.
  3. Listen for Hollow Sounds: Gently tap the pool surface with a rubber mallet or the handle of a screwdriver. If you hear a hollow sound or notice a difference in sound when tapping different areas, it could indicate the presence of a crack beneath the surface.
  4. Water Loss: If you notice an unexplained drop in your pool’s water level, it may be due to cracks. While this is not a definitive test, it can be a sign of a problem.

Types of Pool Cracks

Understanding the type of crack in your pool’s surface is essential for effective repair. Here are some common types:

  1. Hairline Cracks: Hairline cracks are small and usually less than 1/16 of an inch wide. They may not initially cause significant problems but can grow over time if left unaddressed.
  2. Structural Cracks: These cracks are more significant and can jeopardize the pool’s structural integrity. They often require professional attention.
  3. Surface Cracks: Surface cracks are typically cosmetic and do not penetrate deep into the pool’s structure. They can be repaired relatively easily.


Dealing with Pool Surface Cracks

  1. Surface Crack Repair: For minor surface cracks, you can consider a DIY repair using a pool patch kit. Follow the manufacturer’s instructions carefully and ensure the area is clean and dry before applying the patch.
  2. Consult a Professional: For more extensive cracks or structural issues, it’s best to consult a professional pool contractor. They can assess the severity of the problem and recommend the appropriate repair method, which may include structural repairs or even resurfacing the pool.
  3. Preventive Measures: To prevent future cracks, maintain proper water chemistry, and regularly inspect your pool for signs of damage. Properly winterize your pool if you live in an area with freezing temperatures to prevent freeze-thaw damage.
  4. Regular Maintenance: Routine pool maintenance, including cleaning, balancing chemicals, and checking for cracks, can go a long way in preserving your pool’s surface.

Conclusion

Identifying and addressing cracks in your pool surface is crucial for preserving the beauty and functionality of your pool. By conducting regular inspections, understanding the types of cracks, and taking appropriate measures, you can ensure your pool remains a source of enjoyment for years to come. For more significant cracks or structural issues, don’t hesitate to seek professional assistance to keep your pool in top condition. Remember, a well-maintained pool enhances the value of your property and provides endless enjoyment for you and your family.

Backwash Basics: When and How to Clean Your Swimming Pool Filter

A refreshing dive into your pool is the best way to beat the summer heat. But for that pristine water, a lot happens behind the scenes – especially within your pool filter. One of the vital maintenance routines for any pool owner is backwashing. Let’s dive into the hows and whens of this essential pool chore.

1. What is Backwashing?

Backwashing is the process of cleaning your pool’s sand or DE (diatomaceous earth) filter by reversing the flow of water to wash away contaminants and debris. In short, it’s like giving your filter a mini spa day to rejuvenate and work efficiently again.

2. Why is Backwashing Important?

Just as we need regular showers, your filter also needs a periodic clean-up. Over time, filters trap debris and particles which can restrict the water flow and decrease the filter’s efficiency. Backwashing:

  • Ensures clean water by removing debris from the filter.
  • Enhances the efficiency of the filtration system.
  • Extends the life of your filter.

3. Spotting the Right Time:

While many recommend backwashing on a set schedule, it’s best to be guided by the pressure gauge on your filter:

  • Monitor the Pressure: Most filters have an optimal operating range (often between 10-20 psi). When the pressure rises 8-10 psi over the baseline, it’s time to backwash.
  • Visual Checks: Some pools have a see-through glass or plastic “sight glass” which can be used to check the clarity of the water being backwashed. Once the water runs clear, the backwashing process is complete.
  • Regularly Scheduled Maintenance: Even if the pressure hasn’t increased significantly, consider backwashing once a month during peak usage.

4. The Backwashing Process:

a. Turn Off the Pump: Safety first! Always turn off the pump before moving the multiport valve or backwash valve.

b. Adjust the Valve: Rotate your filter’s multiport valve to the “backwash” position. If you have a slide valve, simply push or pull the handle to initiate backwash.

c. Turn On the Pump: With the valve in the backwash position, turn the pump back on. You’ll see water flow out through the waste line.

d. Rinse After Backwashing: Once water runs clear in the sight glass or after 2-3 minutes, turn off the pump, switch the valve to the “rinse” position, and turn the pump on again for about 20-30 seconds. This settles the sand and removes any remaining debris.

e. Return to Normal: Turn off the pump, move the valve back to “filter,” and then turn the pump back on.

5. A Few Tips:

  • Avoid Over-backwashing: Overdoing it can actually wash away the beneficial bacteria and useful particles that help trap contaminants.
  • Replace Lost DE: If you have a DE filter, you’ll need to replace the DE powder after backwashing.
  • Consult the Manual: Always refer to your filter’s manual for specific backwashing instructions and recommendations.

Conclusion:

Backwashing may sound technical, but once you get the hang of it, it’s just another easy step in your pool maintenance routine. With regular backwashing, your filter will continue to serve you efficiently, ensuring that every swim is a pleasure! ????‍♂️????

Turning Up the Heat: Understanding Pool Heater BTU and Its Impact on Your Pool

When it comes to heating your swimming pool, there’s a lot of talk about BTUs. But what exactly is a BTU, and how does it affect the warmth of your pool? In this article, we’ll dive into the world of BTUs, break down its significance, and help you choose the right heater for your pool.

What is BTU? BTU stands for British Thermal Unit. It is a measure of energy that represents the amount of heat required to raise the temperature of one pound of water by one degree Fahrenheit. In simpler terms, it’s a unit that quantifies the heat output of your pool heater.

How Does BTU Impact Pool Heating? The BTU rating of a pool heater tells you how powerful it is. A higher BTU means that the heater can produce more heat in a given timeframe, allowing it to warm your pool faster.

How to Calculate the Time Needed to Heat Your Pool: To determine how long it would take to heat your pool, you’ll need to consider a few factors: your pool’s volume in gallons, the desired temperature increase, and the BTU of your heater. You can also use our online calculator https://poolchemicalcalculator.com/Pool-Heat-Time-Calculator.html.

Here’s a simplified formula to estimate heating time:

  1. Calculate the number of pounds of water in your pool:
    • Pool volume in gallons × 8.34 (since 1 gallon of water weighs approximately 8.34 pounds)
  2. Determine the total BTUs needed:
    • Pounds of water × desired temperature increase (in °F)
  3. Estimate the heating time:
    • Total BTUs needed ÷ heater BTU rating = time in hours

For example, for a 10,000-gallon pool with a heater of 100,000 BTU, aiming to raise the temperature by 10°F:

  1. 10,000 gallons × 8.34 = 83,400 pounds
  2. 83,400 pounds × 10°F = 834,000 BTUs needed
  3. 834,000 BTUs ÷ 100,000 BTU/hour = 8.34 hours

Choosing the Right BTU for Your Pool: The ideal BTU rating for your heater will depend on:

  • The size of your pool: Larger pools may require heaters with higher BTU ratings.
  • The desired temperature increase: If you live in a colder climate and need a significant temperature increase, opt for a higher BTU.
  • How quickly you want to heat your pool: For rapid heating, go for a heater with a higher BTU rating.

Conclusion: Understanding BTUs is essential when selecting a pool heater. By considering your pool’s size, your heating goals, and the BTU rating of potential heaters, you can ensure you choose the right heater for your needs. Armed with this knowledge, you’re on your way to enjoying a warm, inviting pool regardless of the season!