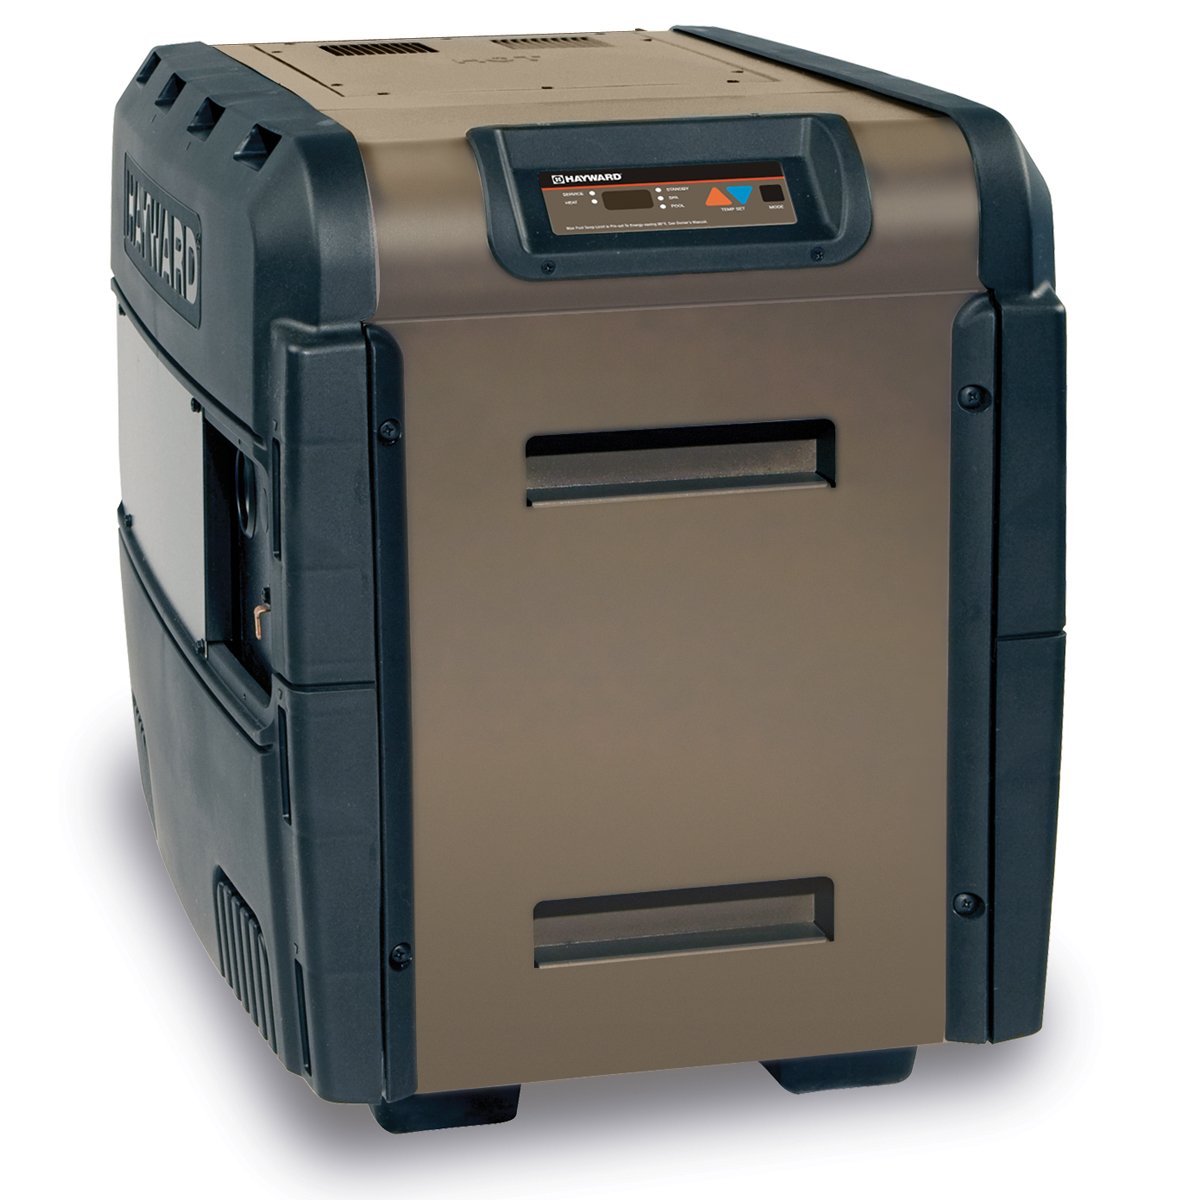
Warm Waters Await: Navigating the World of Pool Heaters

Dive into warm, welcoming waters even when the temperature drops. But with an array of pool heaters on the market, how does one pick the perfect match? Whether you’re aiming for an extended swimming season or simply seeking more comfortable waters, here’s a guide to making the best choice for your pool heating needs.

1. Gas Heaters:
Fueled by propane or natural gas, these heaters are popular for their rapid heating capacity.

  • Pros:
    • Quick heating, perfect for weekend use or sporadic swimming sessions.
    • Suitable for larger pools.
  • Cons:
    • May have higher operational costs due to fluctuating gas prices.
    • Requires a gas line, which might not be feasible for all setups.

2. Electric Resistance Heaters:
These heaters use electric currents to warm the water, offering an alternative for pools where gas isn’t an option.

  • Pros:
    • Doesn’t depend on outside temperatures.
    • No emissions, making them eco-friendlier.
  • Cons:
    • High operational costs, as they consume a lot of electricity.
    • Might need a hefty electrical setup.

3. Heat Pumps (Air-source and Water-source):
Extracting heat from the air or groundwater, these pumps are efficient but depend on the environment.

  • Pros:
    • Energy-efficient, leading to lower monthly costs.
    • Long lifespan (can last up to 20 years with proper maintenance).
  • Cons:
    • Initial investment is high.
    • Air-source pumps rely on air temperature, making them less effective in colder climates.

4. Solar Heaters:
Harnessing the power of the sun, solar heaters circulate pool water through solar collectors, warming it in the process.

  • Pros:
    • Extremely eco-friendly with minimal operational costs.
    • Sustainable and reduces carbon footprint.
  • Cons:
    • Efficiency depends on sunlight exposure; not ideal for overcast regions.
    • Requires large solar panels, which might not suit every property.

5. Pool Heat Covers:
Though not a heater in the traditional sense, these covers trap heat and reduce evaporation, acting as a complementary system.

  • Pros:
    • Cost-effective method to retain heat.
    • Reduces evaporation, saving on water costs.
  • Cons:
    • Not a primary source of heat.
    • Manual effort required to place and remove.

Conclusion:
Choosing the right pool heater can feel like navigating choppy waters, but with knowledge on your side, you can make an informed decision. Consider factors like your location, pool size, and budget. Remember, the perfect pool temperature is not just about comfort—it can extend your swimming season, increase property value, and offer endless warm memories. Dive in with confidence, knowing you’ve made the right choice!

Cover Story: Navigating the World of Swimming Pool Covers

Swimming pools provide leisure and fun, but they also need protection, especially when not in use. That’s where pool covers come into play. They offer a wide range of benefits, from safety to energy savings. Let’s uncover the details of different pool covers.

1. Solar Covers:
Solar covers resemble a giant sheet of bubble wrap. Their design traps the sun’s warmth and transfers it to the pool.

  • Pros:
    • Heat Magnet: Captures the sun’s energy to warm up the pool.
    • Cost-Efficient: Generally affordable and can save money on heating bills.
    • Evaporation Barrier: Reduces water loss, conserving your pool’s chemical balance.
  • Cons:
    • Fragile: Cannot bear heavy weights like debris or snow.
    • Short-Lived: UV exposure can degrade the plastic, reducing its lifespan.

2. Safety Covers:
Constructed from solid vinyl or mesh material, these are stretched tight across the pool, anchored by brackets installed into the pool deck.

  • Pros:
    • Child & Pet Safe: Sturdy enough to support the weight of children and pets.
    • Long-Lasting: Resilient materials promise longevity.
    • Cleanliness: Provides a barrier against dirt and debris.
  • Cons:
    • Higher Cost: Quality comes at a price.
    • Installation: Needs anchors, which might not be suitable for all pool decks.

3. Automatic Covers:
A modern marvel, these covers roll out from an installed reel system, often located at one end of the pool.

  • Pros:
    • User-Friendly: Simple push-button operation.
    • Energy Savings: Maintains water temperature, reducing heating bills.
    • Safety First: Prevents unsupervised pool access.
  • Cons:
    • Price Tag: Comes with a significant initial investment.
    • Upkeep: Mechanical parts may need occasional maintenance.

4. Mesh Covers:
These covers are lightweight, made of a mesh material that covers the pool but allows water (like rain) to seep through.

  • Pros:
    • Easy Handling: Lighter than solid covers, making it easier to install and remove.
    • No Puddles: Water goes through, ensuring no waterlogging on top.
    • Barrier: Blocks larger debris while allowing water passage.
  • Cons:
    • Not Completely Clear: Allows finer particles to pass through.
    • Lack of Insulation: Water can get cold as heat escapes through the mesh.

5. Winter Covers:
These are tarplike covers, usually held in place with water bags or weights around the pool’s edge.

  • Pros:
    • Seasonal Shield: Designed to guard your pool during the colder months.
    • Cost-Effective: More affordable than some high-end cover types.
    • Protection: Acts as a shield against winter debris.
  • Cons:
    • Safety Concerns: Not designed to hold weight; water buildup or snow could cause it to sag.
    • Wear & Tear: Vulnerable to damage from heavy snow or ice accumulation.

Conclusion:
The world of pool covers offers a plethora of choices, each designed for specific needs and benefits. From keeping your pool warm with a solar cover to ensuring its safety with a sturdy safety cover, the options are vast. Ensure you pick what’s best for your pool, taking into account your local climate, budget, and pool usage patterns. And remember, the right cover can be both a protector and a penny saver!

Mastering Hayward Pool Pump Troubleshooting: A Comprehensive Guide

Hayward is a renowned brand in the swimming pool equipment industry, well-known for its reliable and efficient pool pumps. However, like any other mechanical device, Hayward pool pumps may face issues from time to time. As a pool owner, learning how to troubleshoot your Hayward pool pump will save you time, money, and frustration. In this article, we’ll guide you through the most common Hayward pool pump problems and their solutions, empowering you to tackle any issues with confidence and ease.

  1. Problem: Pump Won’t Start or Stops Running

Solution:

  • Check for power: Ensure that the pump is receiving power by inspecting the circuit breaker, GFCI outlet, and any electrical connections. Reset the breaker or GFCI if needed.
  • Inspect the capacitor: If your pump tries to start but quickly stops or hums, the capacitor may be faulty. Replace the capacitor if necessary.
  • Check for debris: Clear any debris obstructing the impeller, as this can prevent the pump from starting.
  1. Problem: Pump Loses Prime or Sucks in Air


Solution:

  • Inspect the suction line: Look for any leaks in the suction line, and repair or replace the line if needed.
  • Check the water level: Ensure that the pool water level is high enough to cover the skimmer’s opening to prevent air from entering the system.
  • Examine the pump lid: Make sure the pump lid is properly sealed and replace the lid O-ring if it’s damaged.
  1. Problem: Pump is Noisy or Vibrates Excessively

Solution:

  • Check the motor bearings: If the pump emits a high-pitched whining noise, the motor bearings may be worn or damaged. Replace the bearings or the entire motor if necessary.
  • Inspect the impeller: Remove any debris from the impeller, as this can cause vibration and noise.
  • Secure the pump: Ensure that the pump is properly mounted and fastened to a stable base.
  1. Problem: Reduced Water Flow or Pressure

Solution:

  • Clean the filter: Inspect the pool filter and clean or replace the filter elements if needed.
  • Examine the pump basket: Empty the pump basket and remove any debris that may be obstructing water flow.
  • Check the pool valves: Make sure that all pool valves are open and functioning correctly.
  1. Problem: Pump Overheating

Solution:

  • Verify the pump’s voltage: Ensure that the pump is receiving the correct voltage according to the manufacturer’s specifications. An incorrect voltage can cause overheating.
  • Allow proper ventilation: Make sure the pump has adequate ventilation and is not exposed to direct sunlight for extended periods.
  • Check for debris: Remove any debris from the pump’s impeller, as this can cause the pump to work harder and overheat.

Conclusion:

By understanding the common issues and troubleshooting steps for your Hayward pool pump, you can ensure that your pool stays clean and clear, providing endless enjoyment for you and your family. Regular maintenance and vigilance can help prevent many of these issues from arising in the first place. However, if you’re ever in doubt or facing a complex problem, don’t hesitate to consult a pool professional for assistance.

If you pump is still under warranty you can contact Hayward here. https://hayward.com/support/resources/warranty

Hayward also has a great support center. https://hayward.com/support/support-center/


Variable Speed Pumps: The Energy-Efficient Pool Solution

As a pool owner, you’re always looking for ways to keep your swimming pool in top condition while also saving on energy and maintenance costs. One way to achieve this is by investing in a variable speed pump. In recent years, variable speed pumps have gained attention and are even being mandated by some states due to their energy efficiency and cost-saving benefits. In this article, we’ll discuss the importance of variable speed pumps and why they’re becoming a necessity for modern pool owners.

What are Variable Speed Pumps?

Variable speed pumps are a type of pool pump designed to operate at multiple speeds, allowing you to adjust the flow rate of water circulating through your pool’s filtration system. Unlike single-speed pumps, which run at a constant speed, variable speed pumps can be programmed to run at different speeds depending on the pool’s needs, optimizing energy usage and reducing overall operating costs.

Why are Variable Speed Pumps Important?

  1. Energy Efficiency: The primary advantage of variable speed pumps is their energy efficiency. Running a pool pump at a lower speed consumes less energy than running it at full speed. By adjusting the speed according to the pool’s needs, variable speed pumps can save up to 90% on energy consumption compared to traditional single-speed pumps. This translates to significant savings on your energy bill.
  2. Reduced Noise: Variable speed pumps are generally quieter than single-speed pumps because they operate at lower speeds. This can make a considerable difference in the overall enjoyment of your pool area, especially during early mornings and evenings when you might want  a more peaceful environment.
  1. Longer Equipment Lifespan: Running a pool pump at lower speeds puts less strain on the pump and other pool equipment, prolonging their lifespan. As a result, you’ll save money on maintenance and replacement costs in the long run.
  2. Better Water Quality: Variable speed pumps provide better water circulation, which helps distribute chemicals more evenly throughout the pool. This results in improved water quality and less frequent chemical adjustments. Additionally, better circulation can help prevent algae growth, reducing the need for algaecides and other chemical treatments.
  3. Environmental Impact: By consuming less energy, variable speed pumps contribute to a lower carbon footprint. As climate change and energy conservation become increasingly important, using energy-efficient equipment is a responsible choice for pool owners.

State Mandates and Regulations

Recognizing the benefits of variable speed pumps, some states have begun to mandate their use in residential pools. For example, California’s Title 20 energy efficiency standards require new or replacement pool pumps to be variable speed or two-speed models. Other states are likely to follow suit in the coming years as the push for energy efficiency continues to grow.

Conclusion

Investing in a variable speed pump for your swimming pool is a smart choice for both your wallet and the environment. With their energy-saving capabilities, reduced noise levels, improved water quality, and longer equipment lifespan, variable speed pumps are becoming the standard for modern pool owners. As state mandates and regulations increasingly favor energy-efficient solutions, now is the perfect time to make the switch to a variable speed pump and reap the benefits it has to offer.

Above Ground Pool Top Rails: An Overview and Replacement Guide

Above ground pools are a popular and affordable option for homeowners looking to add a swimming pool to their property. One essential component of an above ground pool is the top rail, which provides support and stability to the pool structure. In this article, we’ll explain what above ground pool top rails are, when they might need replacement, and how to replace them to maintain a safe and functional swimming pool.

What Are Above Ground Pool Top Rails?

Top rails are horizontal beams that run around the perimeter of an above ground pool at the top edge. They are typically made of metal or resin materials and are designed to provide support and stability to the pool walls. These rails also serve as a finished edge for the pool’s vinyl liner, ensuring a smooth and secure fit.

In addition to their structural role, top rails can also be a decorative element of your pool, with various styles and finishes available to suit your aesthetic preferences.

When to Replace Above Ground Pool Top Rails

There are several reasons why you might need to replace the top rails of your above ground pool:

  1. Damage: Top rails can become damaged due to harsh weather conditions, corrosion, or accidents. Visible signs of damage, such as bending, warping, or rust, may indicate that replacement is necessary to maintain the structural integrity of your pool.
  2. Aging: Over time, top rails may weaken or deteriorate due to exposure to pool chemicals, sunlight, and water. If your pool is more than a few years old, it’s a good idea to inspect the top rails regularly and replace them if necessary.
  3. Aesthetic reasons: If you’re updating the look of your pool, replacing the top rails can be a simple and effective way to improve its appearance.


How to Replace Above Ground Pool Top Rails

Step 1: Gather the necessary tools and materials

Before starting the replacement process, gather the necessary tools and materials, including:

  • Replacement top rails: Ensure they are the correct size and style for your pool.
  • A screwdriver or drill: To remove and install fasteners.
  • A rubber mallet or soft hammer: To help position the new top rails.

Step 2: Drain the pool

Before replacing the top rails, you’ll need to drain the pool water to a level below the top edge of the pool walls. This helps reduce the pressure on the pool walls and prevents water from spilling over during the replacement process.

Step 3: Remove the old top rails

Using a screwdriver or drill, remove the fasteners that secure the top rails to the pool structure. Carefully remove each rail, taking care not to damage the pool walls or liner. Set aside the old rails for disposal or recycling.

Step 4: Inspect the pool walls and liner

With the top rails removed, inspect the pool walls and liner for any signs of damage or wear. If necessary, repair or replace any damaged components before installing the new top rails.

Step 5: Install the new top rails

Position the new top rails on the pool walls, aligning them with the existing holes for the fasteners. Use a rubber mallet or soft hammer to gently tap the rails into place, ensuring a snug and secure fit. Attach the rails using the provided fasteners, tightening them with a screwdriver or drill.

Step 6: Refill the pool

With the new top rails installed, refill the pool to the appropriate water level. Check for any leaks or other issues and address them as necessary.

Conclusion

Above ground pool top rails play a crucial role in maintaining the structural integrity and appearance of your swimming pool. By understanding when and how to replace these components, you can keep your pool safe, functional, and looking its best. Always consult your pool manufacturer’s guidelines and instructions for the specific top rail replacement process and materials, as well as any local regulations that may apply. Regular inspection and maintenance of your above ground pool, including the top rails, will help extend its lifespan and ensure a pleasant swimming experience for you and your loved ones all season long.

A Step-by-Step Guide to Wiring Your Pool Pump

A pool pump plays a crucial role in maintaining a clean and inviting swimming pool, circulating the water through the filtration system to remove debris and contaminants. Properly wiring your pool pump is essential for its safe and efficient operation. In this article, we’ll provide a step-by-step guide on how to wire a pool pump. However, please note that working with electricity can be dangerous, and it’s always recommended to consult a licensed electrician for any electrical projects.

Disclaimer: This article is for informational purposes only. Always consult a licensed electrician when working with electricity.

Step 1: Gather the necessary tools and materials

Before beginning the wiring process, gather the necessary tools and materials, including:

  • A pool pump compatible with your pool system
  • Wiring diagram or installation manual for the pool pump
  • Electrical cable and conduit appropriate for your pool pump’s power requirements
  • Circuit breaker sized for the pool pump’s amperage
  • A junction box or timer (if applicable)
  • Wire strippers, screwdrivers, and a voltage tester
  • Wire connectors and cable clamps

Step 2: Turn off the power

Before working with any electrical wiring, turn off the power supply at the main electrical panel to prevent the risk of electrocution. Double-check that the power is off by using a voltage tester.

Step 3: Install a dedicated circuit breaker

If you haven’t already, install a dedicated circuit breaker for your pool pump in the main electrical panel. The circuit breaker should be sized according to the pool pump’s amperage requirements. Consult the pump’s installation manual or wiring diagram to determine the proper circuit breaker size.

Step 4: Run the electrical cable and conduit

Run the appropriate electrical cable from the main electrical panel to the pool pump location, ensuring the cable is properly protected with conduit according to your local electrical codes. Secure the conduit to the wall or ground using cable clamps, and connect the conduit to the circuit breaker panel and pool pump junction box or timer.

Step 5: Wire the pool pump junction box or timer (if applicable)

If your pool pump is connected to a junction box or timer, follow the manufacturer’s instructions for wiring the box or timer. Connect the electrical cable from the main panel to the line terminals in the junction box or timer, and tighten the terminal screws.

Step 6: Connect the electrical cable to the pool pump

Consult the pool pump’s installation manual or wiring diagram to determine the proper wiring connections. Use wire strippers to strip the insulation from the ends of the wires. Typically, the black or red wire is the “hot” or “live” wire, the white wire is the neutral wire, and the green or bare wire is the ground wire. Connect the wires to the corresponding terminals on the pool pump, using wire connectors to ensure a secure connection. Tighten the terminal screws, and attach the conduit to the pool pump using a cable clamp.

Step 7: Turn the power back on and test the pool pump

Once the wiring connections are complete and secure, turn the power back on at the main electrical panel. Test the pool pump to ensure it’s operating correctly. If the pump does not turn on or shows signs of malfunction, turn off the power and recheck the wiring connections. If problems persist, consult a licensed electrician.

Properly wiring your pool pump is essential for its safe and efficient operation. This step-by-step guide can provide an overview of the process, but always consult a licensed electrician when working with electricity to ensure your safety and compliance with local electrical codes. Regular maintenance and proper installation of your pool pump will help keep your swimming pool clean and clear, providing a refreshing and enjoyable experience all season long.

Harness the Sun: A DIY Guide to Building Your Pool Solar System

Swimming pools are a fantastic way to cool off and unwind during hot summer days, but maintaining a comfortable water temperature can be expensive, especially if you rely on traditional heating methods. However, there’s an eco-friendly and cost-effective solution: solar pool heating systems. In this engaging article, we’ll guide you through the process of building a DIY solar pool heating system, helping you harness the power of the sun to keep your pool warm and inviting all season long.

  1. Understanding Solar Pool Heating Systems Solar pool heating systems work by circulating your pool water through solar collectors, which absorb sunlight and transfer the heat to the water. The warmed water is then returned to the pool, raising its temperature. These systems are environmentally friendly, energy-efficient, and can significantly reduce your pool heating costs.
  2. Assessing Your Solar Potential Before you embark on your DIY solar pool heating project, evaluate your property’s solar potential. Consider the following factors:
  • Sun exposure: Your solar collectors need direct sunlight for a significant portion of the day. Ideally, they should face south and have no shading from trees or buildings.
  • Roof space or ground area: You’ll need sufficient space to install the solar collectors, either on your roof or in your yard.
  • Climate: While solar pool heaters can be effective in most climates, they’re especially beneficial in areas with abundant sunshine and mild to warm temperatures.
  1. Choosing the Right Solar Collectors There are several types of solar collectors available for pool heating, each with its pros and cons. Some popular options include:
  • Flat-plate collectors: These are the most common type, featuring a flat, dark-colored plate that absorbs sunlight and heats the water. They are relatively affordable and easy to install.
  • Evacuated tube collectors: These collectors consist of a series of glass tubes with a vacuum seal, providing superior insulation and heat transfer. They are more efficient than flat-plate collectors but can be more expensive and challenging to install.
  • Unglazed collectors: These collectors do not have a glass cover, making them less efficient but more affordable. They’re best suited for regions with mild climates.

Consider your budget, climate, and installation preferences when choosing your solar collectors.

  1. Designing Your DIY Solar Pool Heating System When designing your solar pool heating system, you’ll need to determine the appropriate size and layout for your solar collectors. Some factors to consider include:
  • Pool size: Larger pools require more solar collectors to achieve the desired temperature increase.
  • Desired temperature increase: If you want to raise your pool’s temperature significantly, you’ll need more solar collectors.
  • Collector efficiency: More efficient collectors require less surface area, so keep this in mind when choosing your collectors.

A general rule of thumb is to size your solar collector area to be 50-100% of your pool’s surface area, depending on your climate and heating goals.

  1. Installing Your DIY Solar Pool Heating System Once you’ve designed your system, gather the necessary materials and tools, and follow these general steps to install your solar pool heating system:
  • Install the solar collectors: Mount your solar collectors on the roof or another suitable location, ensuring they are securely fastened and angled for optimal sun exposure.
  • Connect the plumbing: Run PVC pipes from your pool’s existing pump and filtration system to the solar collectors, adding valves and fittings as needed to create a closed-loop circulation system.
  • Install a solar controller (optional): A solar controller can automatically divert water through the solar collectors when there is sufficient sunlight, optimizing your system’s efficiency.
  • Test and fine-tune: Once your system is installed, test it to ensure proper circulation and adjust the flow rate as needed to achieve the desired temperature increase.
  1. Enjoying Your Eco-friendly Heated Pool With your DIY solar pool heating system in place, you can now enjoy your warm and inviting pool throughout the swimming season without worrying about high energy bills. Not only will you save money, but you’ll also reduce your carbon footprint and contribute to a greener planet.
  1. Maintenance Tips for Your Solar Pool Heating System To keep your solar pool heating system running smoothly, follow these simple maintenance tips:
  • Regularly check the solar collectors for dirt or debris and clean them as needed to maintain their efficiency.
  • Inspect the mounting hardware and plumbing connections for signs of wear or damage, and repair or replace any compromised components.
  • If you live in a region that experiences freezing temperatures, drain your solar collectors and plumbing during the winter months to prevent damage from ice expansion.
  1. Expanding Your Solar Energy Usage Once you’ve successfully implemented a solar pool heating system, you might consider exploring other solar energy applications for your home. Solar water heaters, solar panels for electricity generation, and solar landscape lighting are just a few examples of how you can further harness the sun’s power to save money and reduce your environmental impact.

Building a DIY solar pool heating system is an excellent way for homeowners to extend their swimming season, save on energy costs, and promote a more sustainable lifestyle. By understanding the basics of solar pool heating, assessing your solar potential, choosing the right collectors, designing and installing your system, and maintaining it properly, you can enjoy a warm and inviting pool all season long. Plus, your solar pool heating project might just inspire you to explore other ways to harness the sun’s energy for your home.

Dealing with a Cracked Pool Filter Housing: Steps to Diagnose and Repair

A cracked pool filter housing can be a frustrating issue for any pool owner. Not only can it cause water leakage, but it can also reduce the efficiency of your pool’s filtration system. In this article, we will guide you through the steps to diagnose, repair, or replace a cracked pool filter housing, so you can get your pool back up and running as soon as possible.

  1. Diagnose the Problem

Before taking any action, it’s essential to confirm that the pool filter housing is indeed cracked. The signs of a cracked housing may include:

  • Visible cracks or damage to the housing
  • Unexplained water loss or leaks around the filter area
  • Reduced water pressure and filtration efficiency


Make sure to turn off your pool pump and filter system before inspecting the housing to avoid any injuries or further damage.

  1. Assess the Severity of the Crack

Once you’ve identified the crack, assess its severity to determine the best course of action. Small, hairline cracks may be repairable with a sealant or epoxy, while larger cracks or extensive damage may require a complete replacement of the housing.

  1. Repairing a Minor Crack

If the crack is minor and doesn’t compromise the structural integrity of the housing, you may be able to repair it using a pool-specific sealant or epoxy. Follow these steps:

  • Thoroughly clean the area around the crack, ensuring it’s free from dirt, algae, or debris.
  • Apply the sealant or epoxy according to the manufacturer’s instructions, making sure to completely cover the crack.
  • Allow the sealant or epoxy to cure for the recommended time before reassembling the filter and restarting the pool pump.
  1. Replacing the Filter Housing

If the crack is too severe for a simple repair, you’ll need to replace the entire filter housing. Here’s how:

  • Turn off the pool pump and filter system, and disconnect any electrical connections.
  • Consult your pool filter’s user manual to determine the correct replacement housing for your specific model.
  • Remove the existing housing according to the manufacturer’s instructions, taking care to avoid damage to any connecting pipes or components.
  • Install the new housing, ensuring a proper seal and alignment with the rest of the filter system.
  • Reconnect any electrical connections, and restart the pool pump to check for any leaks or issues.
  1. Preventing Future Cracks

To prevent future cracks or damage to your pool filter housing, follow these tips:

  • Maintain proper water chemistry, as unbalanced water can cause corrosion and damage to pool equipment.
  • Regularly clean and backwash your filter to prevent excessive pressure build-up that can stress the housing.
  • Inspect your pool equipment regularly for any signs of wear, damage, or leaks, and address issues promptly.

Conclusion:

Dealing with a cracked pool filter housing can be a challenging task, but with the right approach, you can quickly diagnose and resolve the issue. By regularly inspecting and maintaining your pool equipment, you can help prevent future problems and keep your pool in optimal condition all season long.

Frozen Frenzy: How to Protect Your Swimming Pool from Freezing Weather

Become the Ultimate Winter Pool Warrior and Conquer Freezing Temperatures with Confidence

Winter is coming, and it’s not just the inhabitants of Westeros who need to be prepared. As a new pool owner, you might not have realized that freezing temperatures can pose a serious threat to your backyard oasis. Fear not, brave winter warrior! We’re here to arm you with the knowledge and tactics you need to protect your swimming pool from the icy clutches of winter.

  1. Winterize Your Pool like a Pro

Like a squirrel storing nuts for the winter, it’s crucial to prepare your pool for the chilly months ahead. Winterizing your pool involves a series of steps, including adjusting chemicals, lowering water levels, and covering the pool. By doing this, you’ll protect your pool from freeze damage and ensure a smooth reopening come springtime. Share your winterizing prowess with fellow pool owners, and they’ll surely hail you as the ultimate pool protector.

  1. The Freeze Guard: Your Pool’s Secret Weapon


Like a loyal sidekick, a freeze guard will watch over your pool when temperatures plummet. This trusty device automatically turns on your pool pump when the mercury drops, keeping water flowing and preventing ice from forming in your pipes. With a freeze guard at your side, you’ll be able to sleep soundly, knowing your pool is safe from winter’s icy grip.

  1. Insulate Your Pool Plumbing like a Boss

When it comes to protecting your pool from freezing weather, insulation is key. By wrapping your pool’s pipes and equipment with insulation, you’ll create a warm and cozy barrier against the cold. Think of it as a superhero suit for your pool plumbing – a suit that guards against the arch-nemesis of every pool owner: frozen pipes!

  1. Pool Heaters: Turning up the Heat on Freezing Weather

If you want to go the extra mile in your battle against freezing temperatures, consider installing a pool heater. This powerful device will not only keep your pool water warm and inviting, but it’ll also prevent ice from forming on the surface. With a pool heater in your arsenal, you’ll be a force to be reckoned with in the war against winter.

  1. Sharing Your Winter Pool Wisdom

Your knowledge of protecting pools from freezing weather is a gift that should be shared with the world. Spread your wisdom on social media and in conversations with fellow pool owners, becoming a beacon of hope in the face of winter’s icy onslaught. By doing so, you’ll create a network of pool owners united against the perils of freezing weather, ensuring the survival of backyard oases everywhere.

Conclusion:

Now that you’re armed with the knowledge and tactics to protect your swimming pool from freezing weather, you’re ready to face the winter months with confidence. Embrace your role as the ultimate winter pool warrior and share your expertise with others, creating a legion of pool protectors ready to conquer the cold. Together, you’ll safeguard your swimming pools against winter’s chill, ensuring they remain the centerpieces of relaxation, fun, and lasting memories for years to come.

Pool Pumps: Lifespan and Signs It’s Time for a Replacement

How to know when your pool pump has reached the end of its life

Pool pumps play a crucial role in maintaining the cleanliness and overall health of your swimming pool. They circulate water through the filter, ensuring that debris and contaminants are removed, and the water remains crystal clear. Like any other piece of equipment, pool pumps have a limited lifespan and will eventually need to be replaced. In this article, we’ll discuss the average lifespan of a pool pump and the signs that indicate it’s time for a replacement.

Average Lifespan of Pool Pumps

The average lifespan of a pool pump depends on various factors, including the quality of the pump, how well it’s maintained, and how often it’s used. On average, a high-quality pool pump can last between 8 to 12 years with proper care and maintenance. However, some pumps may need to be replaced sooner due to heavy use or poor maintenance.


Signs That It’s Time to Replace Your Pool Pump

  1. Frequent Loss of Prime

If your pool pump is consistently losing prime, or the ability to maintain a vacuum, it may be time for a replacement. Loss of prime can be caused by several factors, such as a clogged impeller or a leak in the suction line. However, if the problem persists even after addressing these issues, it could be a sign of a failing pool pump.

  1. Increased Energy Consumption

As a pool pump ages, its efficiency can decrease, resulting in higher energy consumption. If you notice a sudden spike in your energy bill, it might be due to an aging pool pump that’s working harder to maintain proper water circulation. Replacing your old pump with a new, energy-efficient model can help you save on energy costs in the long run.

  1. Excessive Noise

Pool pumps naturally produce some noise during operation, but if your pump starts to make loud, unusual noises, it could be a sign of a problem. Grinding or screeching sounds can indicate a worn bearing or a failing motor, both of which are signs that it’s time to consider a replacement.

  1. Leaking Water

If you notice water leaking around the pool pump, it may be a sign that the pump’s seals or gaskets have worn out. In some cases, these components can be replaced, but if the pump continues to leak or if the damage is extensive, it’s more cost-effective to replace the entire pump.

  1. Decreased Water Flow

A decrease in water flow can be a sign that your pool pump is struggling to maintain proper circulation. This can result from a clogged filter or impeller, but if the issue persists even after cleaning these components, it may be time for a new pump.

  1. Visible Signs of Wear and Tear

Inspect your pool pump regularly for visible signs of wear and tear, such as rust, corrosion, or cracks in the housing. These issues can lead to reduced efficiency and potential leaks, and they’re often a sign that the pump is reaching the end of its lifespan.
Conclusion

Regular maintenance and proper care can help extend the life of your pool pump, but eventually, it will need to be replaced. Keep an eye out for the signs mentioned above and consult with a pool professional if you suspect your pump may be nearing the end of its life. Replacing your pool pump with a newer, more energy-efficient model will not only save you money on energy costs but also ensure that your pool remains clean and enjoyable for years to come.