Choosing the Best Pool Cover: A Comprehensive Guide for Pool Owners

Find the Perfect Pool Cover to Protect Your Pool and Maximize Its Benefits

A pool cover is an essential accessory for any pool owner. It serves multiple purposes, from keeping debris and dirt out of the pool to conserving water and reducing evaporation. With a variety of pool cover types on the market, finding the perfect one for your pool can be overwhelming. This article will provide you with a comprehensive guide to help you choose the best pool cover based on your specific needs and preferences.

Types of Pool Covers

There are several types of pool covers available, each with its unique features and benefits:

  1. Solar Pool Covers: Solar pool covers, also known as solar blankets, are designed to trap heat from the sun and transfer it to your pool water. They reduce evaporation and help maintain water temperature, making them energy-efficient and cost-effective.
  2. Winter Pool Covers: Designed to protect your pool during the winter months, these covers prevent debris from entering the pool and help maintain water quality. They are typically made of heavy-duty materials, such as vinyl or polyethylene, to withstand harsh weather conditions.
  3. Safety Pool Covers: Safety covers are designed to prevent accidental drowning by providing a barrier between the water and the surrounding environment. They can be made of solid materials or mesh and are secured to the pool deck with anchors or straps.
  4. Automatic Pool Covers: Automatic pool covers can be opened and closed with the push of a button, providing convenience and ease of use. They can function as safety covers and help maintain water temperature and cleanliness.

Factors to Consider When Choosing a Pool Cover

  1. Purpose: Determine the primary purpose of your pool cover. Are you looking to conserve energy, protect your pool during the winter months, or provide a safety barrier? Your primary goal will help you narrow down the type of pool cover best suited for your needs.
  2. Pool Shape and Size: The shape and size of your pool are essential factors to consider when selecting a pool cover. Custom-made covers are available for irregularly shaped pools, but they may come at a higher cost. Ensure the cover you choose is compatible with your pool’s dimensions.
  3. Material: The material of a pool cover impacts its durability, strength, and effectiveness. Solar pool covers are often made of UV-resistant polyethylene or vinyl, while winter and safety covers can be made of heavy-duty vinyl, polyethylene, or mesh. Consider the material’s longevity and resistance to weather conditions when choosing a pool cover.
  4. Ease of Use: Some pool covers, like automatic pool covers, are more user-friendly than others. If ease of use is important to you, consider investing in an automatic cover or one that can be easily installed and removed by a single person.
  5. Budget: Pool covers vary in price based on their type, material, and features. Determine your budget beforehand and choose a cover that meets your needs without breaking the bank.
  6. Warranty and Support: A pool cover is an investment, and a warranty can provide peace of mind in case of defects or issues. Look for pool covers with a warranty and manufacturers that offer customer support.

Choosing the best pool cover for your swimming pool requires careful consideration of factors like purpose, pool size and shape, material, ease of use, budget, and warranty. By evaluating your specific needs and preferences, you can select the ideal pool cover to protect your pool, conserve energy, and enhance safety. A well-chosen pool cover can help you save time, money, and effort in maintaining your pool, allowing you to enjoy its benefits for years to come.

Changing Your Pool Light Bulb: A Step-By-Step Guide for a Safe and Efficient Replacement

Illuminate Your Pool with Ease by Following These Simple Steps to Replace Your Pool Light Bulb

Introduction

A well-lit swimming pool not only enhances its aesthetic appeal but also ensures safety during nighttime swims. Pool light bulbs can eventually burn out, and replacing them is a crucial part of pool maintenance. This article will provide you with a step-by-step guide on how to change a pool light bulb safely and efficiently.

Caution: Working with electricity and water can be dangerous. If you’re not comfortable or experienced with electrical work, it’s best to consult a professional electrician or pool technician to replace the pool light bulb for you.

Step 1: Gather the Necessary Tools and Supplies

Before you start, gather the following tools and supplies:

  1. A replacement pool light bulb compatible with your pool light fixture
  2. A flathead screwdriver or a Phillips screwdriver, depending on your fixture
  3. A multimeter to test for electrical voltage (optional, but recommended)
  4. A clean, dry towel
  5. Waterproof silicone grease (optional)


Step 2: Turn Off the Power

Safety is paramount when working with electrical components. Turn off the power to the pool light at the circuit breaker or switch. To ensure the power is off, you can use a multimeter to test for voltage at the light switch.

Step 3: Remove the Light Fixture

Locate the pool light fixture, typically mounted on the pool wall below the waterline. Depending on your pool’s design, you may need to lower the water level to access the fixture.

Remove the single screw or multiple screws that secure the light fixture to the pool wall using a screwdriver. Carefully pull the fixture out of the niche, lifting it up and onto the pool deck. Most pool light fixtures have enough cable coiled behind them to allow you to set the fixture on the pool deck for easy access.

Step 4: Remove the Light Fixture Lens

With the light fixture on the pool deck, locate and remove the screws or clips holding the lens or faceplate in place. Carefully lift the lens or faceplate off the fixture, exposing the light bulb.

Step 5: Remove the Old Light Bulb

Before removing the old light bulb, take note of its type, wattage, and base to ensure you have the correct replacement. Unscrew the old light bulb by turning it counterclockwise and dispose of it safely.

Step 6: Install the New Light Bulb

Carefully screw the new light bulb into the socket by turning it clockwise. Avoid touching the glass with your bare hands, as oils from your skin can create hot spots on the bulb and reduce its lifespan. Use a clean, dry towel to handle the bulb if necessary.

Step 7: Reassemble the Light Fixture

Before reassembling the light fixture, inspect the lens gasket for any signs of wear or damage. If needed, replace the gasket to ensure a watertight seal. Optionally, you can apply a thin layer of waterproof silicone grease to the gasket to improve the seal and make it easier to remove in the future.

Place the lens or faceplate back onto the light fixture and secure it with the screws or clips.

Step 8: Test the New Light Bulb

Before reinstalling the light fixture in the pool, turn the power back on at the circuit breaker or switch and test the new light bulb to ensure it’s functioning properly. If the light does not turn on, double-check your connections and ensure the bulb is correctly seated in the socket.

Step 9: Reinstall the Light Fixture

With the new light bulb tested and confirmed to be working, turn off the power again at the circuit breaker or switch. Carefully guide the light fixture back into the niche, ensuring the cable is coiled neatly behind it. Secure the fixture to the pool wall by reinstalling the screw(s) that were removed in Step 3.

Step 10: Turn the Power Back On


Once the light fixture is securely in place, turn the power back on at the circuit breaker or switch. Test the pool light one final time to ensure it’s functioning correctly.

Conclusion

Changing a pool light bulb may seem like a daunting task, but by following this step-by-step guide, you can safely and efficiently replace the bulb and enjoy a well-lit pool once again. Always prioritize safety when working with electrical components, and consult a professional electrician or pool technician if you’re unsure about any steps in the process. With the proper precautions and guidance, you can keep your pool illuminated and inviting for nighttime swims.

Understanding Turnover Rate in Swimming Pools: A Comprehensive Guide to Efficient Water Circulation

The Importance of Turnover Rate, Factors That Impact It, How to Modify It, and Measuring Techniques

Turnover rate is a crucial aspect of swimming pool maintenance, as it determines the efficiency of water circulation and filtration. Proper turnover rates ensure clean, clear, and safe water for swimmers by effectively removing debris and contaminants. In this article, we will discuss the importance of turnover rate, the factors that impact it, ways to change it, and how to measure it.

What is Turnover Rate?

Turnover rate refers to the time it takes for a swimming pool’s entire volume of water to pass through the filtration system. It is typically measured in hours and is an essential factor in determining the effectiveness of the pool’s circulation and filtration system.

Why is Turnover Rate Important?

  1. Water Clarity: Proper turnover rates help maintain clear water by effectively removing suspended particles and debris.
  2. Sanitation: Efficient circulation and filtration aid in distributing sanitizers evenly throughout the pool, ensuring a safe and healthy swimming environment.
  3. Chemical Balance: Good turnover rates help maintain balanced water chemistry by facilitating the even distribution of chemicals.
  4. Energy Efficiency: An appropriate turnover rate reduces energy consumption by ensuring that the pool’s circulation system operates efficiently.


Factors Impacting Turnover Rate

  1. Pool Size and Design: The volume and shape of the pool impact the turnover rate, as larger or more complex pools may require longer turnover times.
  2. Filtration System: The type, size, and efficiency of the pool’s filtration system directly influence the turnover rate.
  3. Pump Capacity: The pump’s flow rate, measured in gallons per minute (GPM), affects how quickly water is circulated and filtered.
  4. Bather Load: Higher bather loads introduce more contaminants into the pool, potentially necessitating faster turnover rates to maintain water quality.

Ways to Change Turnover Rate

  1. Adjust Pump Speed: If your pool is equipped with a variable-speed pump, adjusting the pump speed can help modify the turnover rate.
  2. Upgrade Filtration System: Upgrading to a larger or more efficient filtration system can improve the turnover rate by increasing the system’s capacity.
  3. Modify Pump Run Time: Increasing the pump’s run time can help achieve a faster turnover rate, while reducing the run time may conserve energy in pools with lower bather loads or contamination levels.
  4. Regular Maintenance: Cleaning and maintaining the filtration system, skimmers, and pool surfaces can help ensure optimal turnover rates by preventing clogs and enhancing circulation efficiency.


How to Measure Turnover Rate

  1. Calculate Pool Volume: Determine your pool’s volume in gallons using the appropriate formula based on its shape and dimensions.
  2. Determine Pump Flow Rate: Find the flow rate of your pool pump, usually measured in gallons per minute (GPM). This information can be found in the pump’s manual or on the manufacturer’s website.
  3. Convert Flow Rate to Gallons per Hour (GPH): Multiply the pump’s flow rate (GPM) by 60 to convert it to gallons per hour (GPH).
  4. Calculate Turnover Time: Divide your pool’s volume (in gallons) by the pump’s flow rate (in GPH) to find the turnover time in hours.

The turnover rate in a swimming pool is a critical aspect of pool maintenance, affecting water clarity, sanitation, chemical balance, and energy efficiency. Understanding the importance of turnover rate, the factors that impact it, and ways to modify it can help pool owners maintain a safe and enjoyable swimming environment. By measuring the turnover rate and adjusting it as needed, pool owners can ensure efficient water circulation and filtration for a well-maintained swimming pool.

Priming Your Pool Pump: A Comprehensive Guide to Ensuring Optimal Performance

Learn the Steps to Properly Prime Your Pool Pump for Maximum Efficiency and Trouble-Free Operation

A pool pump is an essential component of any swimming pool, responsible for circulating water through the filtration system to keep the pool clean and safe. Priming the pump is a crucial step in ensuring its optimal performance and preventing potential issues. In this article, we will discuss the process of priming a pool pump, why it’s essential, and the steps you need to take to do it properly.


Why is Priming a Pool Pump Important?

Priming a pool pump removes air from the pump and the plumbing system, ensuring that water flows smoothly and efficiently through the system. A pump that isn’t properly primed can experience a loss of suction, reduced water flow, and increased strain on the motor, leading to potential damage and reduced longevity.

Steps to Properly Prime a Pool Pump

Follow these steps to correctly prime your pool pump and ensure its optimal performance:

  1. Turn off the pump: Before you begin the priming process, make sure to switch off the pool pump to prevent any accidents or damage to the pump.
  2. Clean the pump strainer basket: Remove the pump strainer lid and clean the basket to ensure there are no obstructions or debris that could hinder water flow. Replace the basket and securely fasten the lid back in place.
  3. Open the air relief valve (if applicable): If your pool pump or filter system has an air relief valve, open it to allow any trapped air to escape during the priming process.
  4. Fill the pump with water: Use a garden hose or a bucket of water to fill the pump housing with water. This helps to create a water seal, allowing the pump to generate suction more efficiently when it’s turned back on.
  5. Check the pool water level: Ensure that the pool water level is high enough to cover the skimmer opening. A low water level can lead to air being drawn into the system, making it difficult for the pump to prime.
  6. Open the skimmer and return valves: Make sure all skimmer and return line valves are open, allowing water to flow freely through the system.
  7. Turn on the pump: Switch the pool pump back on and observe the water flow through the pump strainer basket. You should see water filling the pump housing and any air bubbles being forced out through the air relief valve (if applicable).
  8. Monitor the pressure gauge: Keep an eye on the pressure gauge on the filter as the pump primes. The pressure should gradually rise as air is expelled from the system and water begins to circulate.
  9. Close the air relief valve (if applicable): Once the pump is fully primed and there are no visible air bubbles, close the air relief valve.
  10. Check for leaks and proper water flow: Inspect the pump and surrounding plumbing for any leaks or signs of improper water flow. If any issues are detected, address them promptly to avoid damage to the pump or the pool system.


Conclusion

Priming a pool pump is a crucial step in maintaining the efficiency and longevity of your pool’s circulation system. By following the steps outlined in this guide, you can ensure that your pool pump is primed correctly, leading to a cleaner, safer, and more enjoyable swimming experience. Regularly inspect and maintain your pool pump to prevent potential issues and enjoy trouble-free operation for years to come.

A First-Time Homeowner’s Guide to Opening an Inground Swimming Pool

Discover the Best Date, Detailed Steps, Equipment, and Tips for a Successful Pool Opening Experience

Introduction

Owning an inground swimming pool can provide countless hours of relaxation and enjoyment. However, opening the pool for the season can be a daunting task, especially for first-time homeowners. In this article, we will guide you through the process of opening your inground swimming pool, including the best date to open, detailed steps, necessary equipment, and helpful tips and tricks to ensure a smooth and successful pool opening experience.

Best Date to Open Your Inground Swimming Pool

The ideal date to open your inground swimming pool depends on your location and local climate. Generally, it is best to open your pool when daytime temperatures consistently stay above 70°F (21°C). This helps avoid cold water temperatures and increased energy costs, while also preventing algae growth and other contaminants from developing in the pool.

Detailed Steps for Opening Your Inground Swimming Pool

Step 1: Clean the Pool Area Begin by removing any leaves, debris, and trash from around your pool. This will help prevent dirt and debris from entering the water during the opening process.

Step 2: Remove the Pool Cover Carefully remove your winter pool cover, being mindful of any accumulated water or debris. Clean and dry the cover thoroughly before storing it for the off-season.


Step 3: Inspect the Pool for Damage Examine your pool for any signs of damage, such as cracks in the plaster, loose tiles, or damaged fittings. Address any issues before proceeding with the opening process.

Step 4: Reinstall Pool Equipment Reinstall any pool equipment that was removed or winterized during the off-season, including ladders, handrails, skimmer baskets, filter, pump, and any other accessories.

Step 5: Fill the Pool Using a garden hose, fill your pool to the appropriate water level, typically halfway up the skimmer opening.

Step 6: Prime and Start the Pump Prime your pool pump by filling the pump basket with water and ensuring all valves are open. Turn on the pump and check for proper water flow and circulation.

Step 7: Test and Balance the Water Chemistry Using a pool test kit or test strips, check the levels of pH, chlorine, total alkalinity, and calcium hardness in your pool water. Adjust the chemical levels as needed to achieve optimal balance:

  • pH: 7.2-7.8
  • Chlorine: 1-3 ppm (parts per million) for traditional chlorine pools or 2-4 ppm for saltwater pools
  • Total Alkalinity: 80-120 ppm
  • Calcium Hardness: 200-400 ppm

Step 8: Shock the Pool Shocking your pool involves adding a high dose of chlorine or other sanitizer to eliminate any bacteria, algae, and other contaminants that may have developed during the off-season. Follow the manufacturer’s instructions for the proper dosage and application procedure.

Step 9: Clean the Pool Skim the surface of your pool to remove any debris, brush the pool walls and floor, and vacuum the pool thoroughly to ensure a clean and inviting swimming environment.

Necessary Equipment for Pool Opening

  • Pool cover pump (if applicable)
  • Leaf skimmer or pool net
  • Pool brush
  • Pool vacuum
  • Garden hose
  • Pool test kit or test strips
  • Pool chemicals (pH adjusters, chlorine or alternative sanitizer, shock treatment, etc.)
  • Pool opening supplies (lubricants, o-rings, etc., if needed)

Tips and Tricks for a Smooth Pool Opening

  1. Plan ahead: Set a date for your pool opening and gather all necessary supplies and equipment well in advance. This ensures you’re prepared and can avoid any last-minute surprises.
  2. Enlist help: Pool opening can be a time-consuming process. Recruit family members or friends to assist with tasks such as removing the pool cover and cleaning the pool area.
  3. Be patient: Allow the pool water to circulate for at least 24 hours before testing and adjusting the water chemistry. This will ensure accurate readings and more effective chemical adjustments.
  4. Keep a maintenance log: Document the chemical levels, equipment settings, and any issues encountered during the pool opening process. This information can be helpful for future reference and to track changes in your pool’s condition over time.
  5. Monitor water chemistry closely: In the first few weeks after opening your pool, test the water chemistry more frequently (every 2-3 days) to ensure proper balance and sanitization. As the season progresses and the water stabilizes, you can reduce testing frequency to once per week.
  6. Run the pump and filter longer initially: Running your pool pump and filter for longer periods (12-24 hours) immediately after opening your pool can help clear any cloudiness, debris, or contaminants more quickly.
  7. Consider a professional pool opening service: If you are unsure about the pool opening process or prefer to have an expert handle the task, many pool service companies offer pool opening packages that include equipment installation, water testing, and chemical balancing.


Conclusion

Opening an inground swimming pool for the first time may seem like a challenging task, but with proper planning and guidance, it can be a smooth and successful experience. By following the detailed steps outlined in this article, and applying the tips and tricks for a seamless pool opening, you can ensure a safe, clean, and enjoyable swimming environment for you and your family. Enjoy the benefits of your inground swimming pool all season long by taking the time to properly prepare and open it, setting the stage for endless hours of fun and relaxation.

Troubleshooting and Fixing Air in Your Pool Lines: A Comprehensive Guide for Homeowners

Learn about the Possible Causes of Air in Your Pool, How to Troubleshoot, and How to Correct the Problem

Having air in your pool system can lead to various issues, such as reduced water flow, inefficient filtration, and increased wear on your pool equipment. As a homeowner, it’s important to understand the possible causes of air in your pool, how to troubleshoot the issue, and how to correct the problem to ensure the smooth operation of your pool system. In this article, we will discuss the common causes of air in your pool, steps to troubleshoot the issue, and ways to fix the problem.


Possible Causes of Air in Your Pool

  1. Air Leaks in the Pool Equipment: Air may be entering the pool system through leaks in the pool equipment, such as the pump, filter, or plumbing.
  2. Pool Skimmer Issues: A malfunctioning or improperly maintained pool skimmer can introduce air into the system.
  3. Water Level: If the water level in the pool is too low, the skimmer may draw in air, causing bubbles and air pockets in the system.

Troubleshooting Air in Your Pool

  1. Inspect Pool Equipment: Check the pump, filter, and plumbing for any signs of leaks, damage, or loose connections that may be allowing air to enter the system.
  2. Check the Pool Skimmer: Ensure that the skimmer is functioning properly and that the basket and weir are clean and in good condition.
  3. Monitor the Water Level: Make sure the water level in the pool is at the appropriate height, typically halfway up the skimmer opening, to prevent air from being drawn into the system.
  4. Look for Bubbles: Observe the pool returns and look for excessive air bubbles, which may indicate air in the system.


Correcting the Problem

  1. Repair Leaks and Damage: If you discover leaks or damage in your pool equipment, make the necessary repairs or replace the damaged components to prevent air from entering the system.
  2. Maintain the Pool Skimmer: Clean the skimmer basket regularly and ensure the weir is functioning correctly. If the skimmer or its components are damaged, make repairs or replace them as needed.
  3. Adjust the Water Level: If the water level in the pool is too low, add water to bring it up to the appropriate height. Alternatively, if the water level is too high, use a pool siphon or pump to lower it.
  4. Lubricate O-Rings and Gaskets: Check and lubricate the O-rings and gaskets on your pool equipment, such as the pump lid and filter housing, to ensure a proper seal and prevent air from entering the system.
  5. Prime the Pool Pump: If the pool pump has lost its prime due to air in the system, turn off the pump, fill the pump basket with water, and replace the lid. Turn the pump back on and allow it to re-prime itself, which should help remove air from the system.

Air in your pool system can lead to a variety of issues that can affect the performance and longevity of your pool equipment. By understanding the possible causes of air in your pool, taking the time to troubleshoot the issue, and knowing how to correct the problem, you can ensure your pool system operates efficiently and effectively. Regular pool maintenance and inspections will help to prevent air from entering your pool system and keep your pool running smoothly.

Chlorine Generators: A Modern Approach to Pool Sanitization

Understanding the Electrolysis Process, Maintenance, and the Advantages and Disadvantages of Saltwater Systems

Chlorine generators, also known as saltwater chlorinators or saltwater pool systems, are gaining popularity as an alternative to traditional chlorine-based pool sanitization methods. These systems utilize an electrolysis process to convert salt into chlorine, providing continuous and efficient pool sanitization. In this article, we will explore the electrolysis process, the importance of maintaining proper salt concentration, how to care for the electrolysis cell, and the pros and cons of chlorine generators compared to traditional chlorine.

The Electrolysis Process: Converting Salt to Chlorine

Chlorine generators utilize an electrolysis process to convert dissolved salt (sodium chloride) into chlorine gas (Cl2), hypochlorous acid (HClO), and sodium hydroxide (NaOH). When pool water containing salt passes through the generator’s electrolysis cell, an electric current is applied to the cell’s metal plates. This current causes a chemical reaction, separating the sodium and chloride ions in the salt. The chloride ions combine to form chlorine gas, which dissolves in the water, creating hypochlorous acid, the active sanitizing agent.


Maintaining Proper Salt Concentration

For a chlorine generator to work efficiently, the pool water must have a proper salt concentration, typically between 2,500 and 3,500 parts per million (ppm). Maintaining the correct salt level is crucial for several reasons:

  1. Optimal chlorine production: Insufficient salt levels can lead to inadequate chlorine production, compromising pool sanitization and water quality.
  2. System efficiency: Excess salt can cause the generator to work harder, leading to increased wear and tear and a shorter lifespan.
  3. Water balance: An appropriate salt concentration helps maintain water balance, preventing issues like scaling or corrosion.

It is essential to test salt levels regularly and adjust them as needed to ensure optimal system performance.

Caring for the Electrolysis Cell

Regular maintenance of the electrolysis cell is crucial for the longevity and efficiency of a chlorine generator. Follow these steps to care for your cell:

  1. Inspect and clean the cell regularly: Check the cell for any signs of calcium buildup or scaling. If necessary, clean the cell using a mild acid wash (usually a mixture of water and muriatic acid) or a specialized cell cleaner as per the manufacturer’s instructions.
  2. Check and replace the cell as needed: Over time, the cell’s metal plates will wear out and require replacement. Follow the manufacturer’s guidelines for cell replacement to ensure optimal system performance.

Chlorine Generators vs. Traditional Chlorine: Pros and Cons

Pros:

  1. Consistent chlorine levels: Chlorine generators provide a continuous supply of chlorine, maintaining consistent sanitization and reducing the need for manual chlorine adjustments.
  2. Reduced chemical handling: Since the generator converts salt into chlorine, there’s less need to handle and store hazardous chemicals.
  3. Softer water: Saltwater pools often feel softer and less irritating to the skin and eyes compared to traditional chlorine pools.
  4. Cost-effective: Although the initial investment is higher, chlorine generators can save money in the long run due to reduced chemical costs.

Cons:

  1. Initial cost: Chlorine generators have a higher upfront cost compared to traditional chlorination methods.
  2. Complex technology: These systems can be more complicated than traditional chlorination methods, requiring proper installation and regular maintenance.
  3. Potential for corrosion: Salt can cause corrosion in pool fixtures and equipment if not adequately maintained and balanced.
  4. Inadequate for certain pool types: Some pool materials, such as certain natural stones, may not be suitable for saltwater systems due to the risk of damage or erosion.


Chlorine generators offer an innovative and efficient method for pool sanitization, using an electrolysis process to convert salt into chlorine. Proper maintenance, including maintaining appropriate salt concentration and caring for the electrolysis cell, is crucial for ensuring the system’s longevity and effectiveness.

While saltwater systems have their advantages, such as consistent chlorine levels, reduced chemical handling, and softer water, they also come with some drawbacks, including a higher initial cost, potential for corrosion, and compatibility concerns with certain pool materials. By understanding the pros and cons of chlorine generators compared to traditional chlorine, pool owners can make an informed decision on the best sanitization method for their specific needs and preferences.

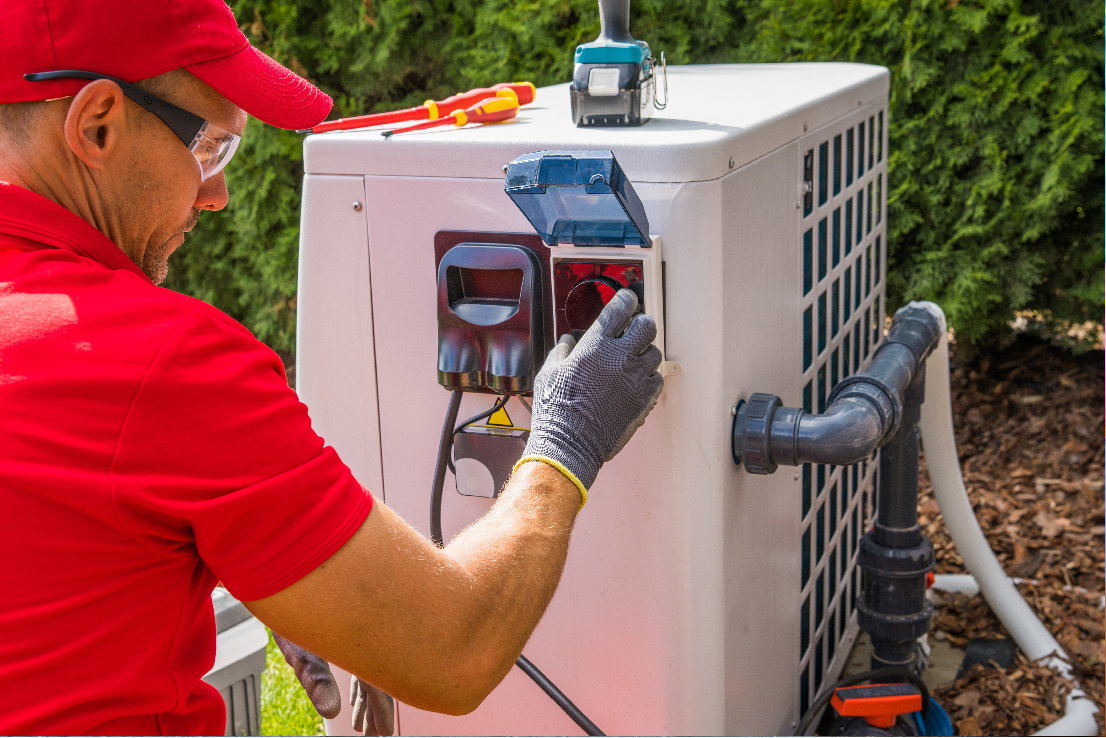
A Comprehensive Guide to Pool Heaters: Types, Benefits, and Considerations

Making an Informed Decision on the Best Heating Solution for Your Pool

A swimming pool heater can extend your pool season by providing comfortable water temperatures even during colder months. With several types of pool heaters available, it’s essential to understand the benefits and drawbacks of each to make an informed decision that suits your needs and preferences. In this article, we will discuss the different types of pool heaters and their respective pros and cons.

  1. Gas Pool Heaters

Gas pool heaters are fueled by either natural gas or propane. They are popular due to their ability to heat pools quickly and efficiently.

Pros:

  • Fast heating: Gas heaters can raise pool temperatures quickly, making them ideal for on-demand heating.
  • Independent of outdoor temperature: They are not reliant on the weather or sunlight, allowing for efficient heating even on cold or cloudy days.

Cons:

  • High operating cost: Gas heaters have relatively high fuel costs, which can be expensive to run over time.
  • Regular maintenance: Gas heaters require more frequent maintenance than other types of heaters, which may lead to additional expenses.
  1. Electric Resistance Heaters

Electric resistance heaters use electricity to generate heat through resistive heating elements. They are less common than other types of heaters due to their higher operating costs but can be a viable option in certain circumstances.

Pros:

  • Environmentally friendly: Electric heaters produce no emissions, making them an eco-friendly choice.
  • Easy installation: These heaters require minimal plumbing and can be installed relatively quickly.

Cons:

  • High energy consumption: Electric resistance heaters consume a large amount of electricity, leading to high operating costs.
  • Not suitable for large pools: Due to their high energy consumption, they are not practical for heating larger pools.


  1. Heat Pumps

Heat pumps transfer heat from the surrounding air to the pool water, making them an energy-efficient option for pool heating. There are two types of heat pumps: air-source and water-source.

Pros:

  • Energy efficiency: Heat pumps use significantly less energy than gas or electric resistance heaters, resulting in lower operating costs.
  • Long lifespan: Heat pumps have a longer service life compared to gas heaters, making them a more durable option.

Cons:

  • Dependent on outdoor temperature: Heat pumps rely on ambient air temperature, which makes them less effective in colder climates or during winter months.
  • Slow heating: Heat pumps take longer to heat a pool compared to gas heaters, making them less suitable for on-demand heating.
  1. Solar Pool Heaters

Solar pool heaters utilize solar energy to heat the pool water, making them an environmentally friendly and cost-effective option.

Pros:

  • Low operating costs: Solar heaters have minimal operating costs as they rely on the sun’s energy, which is free.
  • Environmentally friendly: Using solar energy produces no emissions, making this type of heater a sustainable choice.

Cons:

  • Weather dependent: Solar heaters rely on sunlight, which makes them less effective on cloudy days or during the winter season.
  • Slow heating: Like heat pumps, solar heaters take longer to heat a pool than gas heaters.

Choosing the right pool heater depends on factors such as the size of your pool, your location, and your budget. Gas heaters provide quick heating but have higher operating costs, while electric resistance heaters are eco-friendly but not suitable for larger pools. Heat pumps offer energy efficiency but are dependent on ambient temperatures, and solar heaters provide low-cost, sustainable heating but are weather-dependent.

By understanding the pros and cons of each type of pool heater, you can make an informed decision and select the best heating solution for your swimming pool.

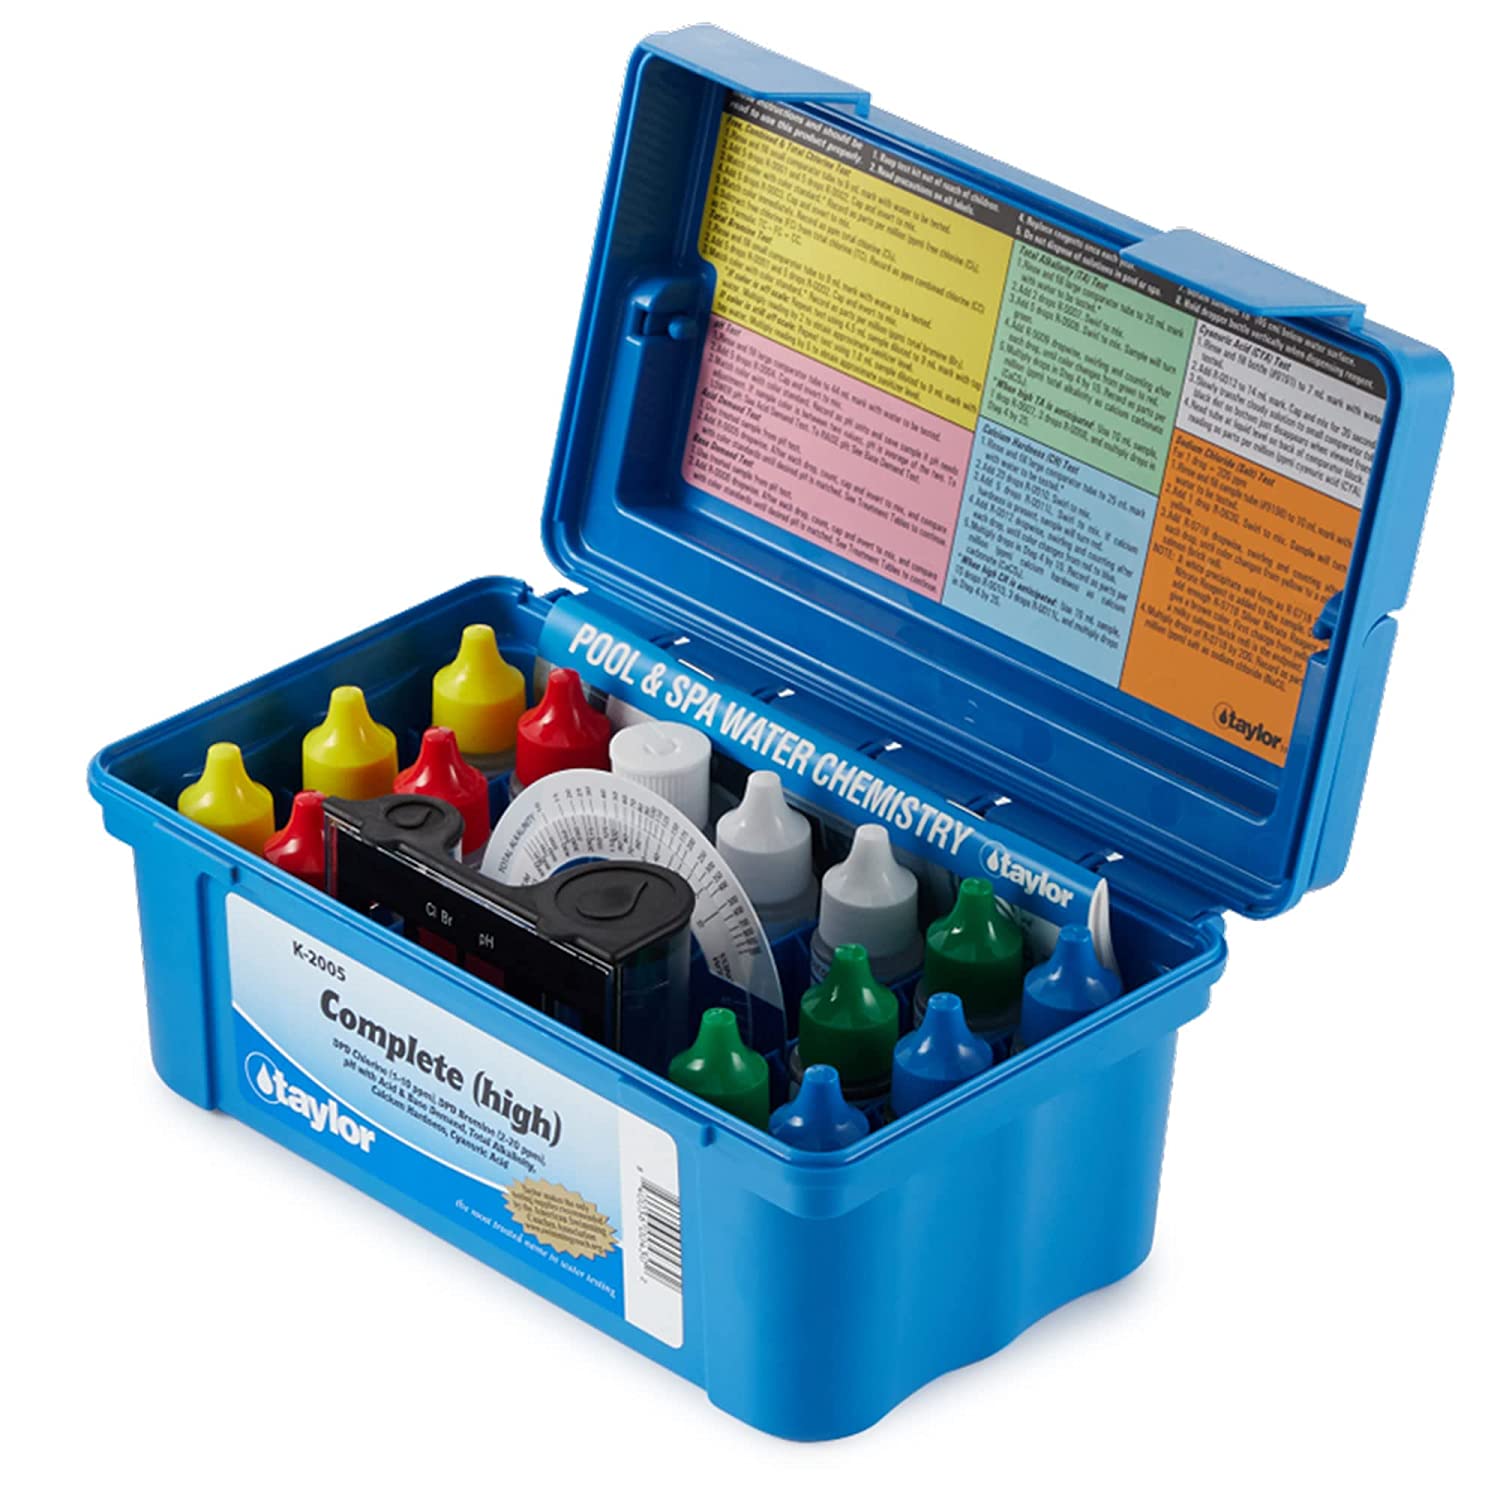
Dive Into Clarity: A Guide to Different Types of Pool Test Kits and the Best Options for Accurate Readings

Proper pool maintenance is essential for ensuring sparkling clean water and a safe swimming environment. One crucial aspect of pool maintenance is regularly testing the water chemistry. With a plethora of pool test kits available in the market, it can be challenging to determine which one is the best fit for your needs. This article aims to guide you through the different types of pool test kits and highlight the ones that provide the most accurate readings.

  1. Types of Pool Test Kits

There are three primary types of pool test kits: test strips, liquid test kits, and digital test kits. Each type has its advantages and drawbacks, which we will discuss below.

a. Test Strips

Test strips are a popular choice for their ease of use and affordability. To use a test strip, simply dip it into the pool water, wait for the specified time, and compare the color changes to a provided chart. Test strips can measure a variety of parameters, including chlorine, bromine, pH, alkalinity, and hardness.

Pros:

  • Affordable
  • Easy to use
  • Quick results


Cons:

  • Less accurate than other testing methods
  • Can be affected by exposure to moisture or sunlight

b. Liquid Test Kits

Liquid test kits use reagents, which are chemical solutions that react with pool water to produce a color change. These kits typically come with vials, reagent bottles, and a color chart. To test the water, you’ll fill a vial with pool water, add the required number of drops from the reagent bottles, and compare the resulting color to the chart.

Pros:

  • More accurate than test strips
  • Can test for multiple parameters

Cons:

  • Slightly more complex to use
  • Reagents have a limited shelf life


c. Digital Test Kits

Digital test kits combine the accuracy of liquid test kits with the convenience of electronic readings. They typically use a small device or probe that is dipped into the pool water. The device then analyzes the water and displays the results on an LCD screen.

Pros:

  • Highly accurate
  • Easy to read results
  • Can store and track data

Cons:

  • More expensive than other testing methods
  • Requires batteries or charging
  1. Top Pool Test Kits for Accurate Readings

Below are some of the best pool test kits available in the market, known for their accuracy and reliability:

a. Taylor Technologies K-2006 Complete Swimming Pool Water Test Kit

The Taylor Technologies K-2006 is a liquid test kit that provides accurate readings for parameters such as free and total chlorine, bromine, pH, alkalinity, calcium hardness, and cyanuric acid. It uses the FAS-DPD titration method for precise chlorine measurements, making it a top choice among pool professionals.

b. LaMotte ColorQ Pro 7 Digital Pool Test Kit

The LaMotte ColorQ Pro 7 is a digital test kit that offers precise readings for free chlorine, total chlorine, bromine, pH, alkalinity, calcium hardness, and cyanuric acid. With a user-friendly interface and easy-to-read digital results, this kit eliminates the guesswork associated with color-matching.

c. AquaChek Select 7-in-1 Pool and Spa Test Strips

For those who prefer test strips, the AquaChek Select 7-in-1 offers accurate readings for free chlorine, total chlorine, bromine, pH, alkalinity, calcium hardness, and cyanuric acid. While not as precise as liquid or digital test kits, these test strips are a reliable and affordable option for maintaining balanced pool water.

Selecting the right pool test kit is crucial for maintaining a clean and healthy pool.

Pool Filters: Understanding Types, Benefits, and Drawbacks

A well-functioning pool filter is essential for maintaining crystal-clear water and preventing contaminants from affecting the quality of your swimming pool. This article will discuss the different types of pool filters, along with their benefits and drawbacks, to help you make an informed decision when choosing the right filter for your pool.

1. Sand Filters
Sand filters are the most common type of pool filter, known for their simplicity and cost-effectiveness. They use a bed of specially graded sand to trap dirt and debris as water flows through the filter.

Benefits:

Low initial cost
Easy to operate and maintain
Effective for medium-sized debris
Drawbacks:

Less effective for very fine particles
Requires periodic backwashing, which may waste water
Sand needs to be replaced every 5-7 years

2. Cartridge Filters
Cartridge filters use a cylindrical, pleated filter cartridge made from polyester or another synthetic material. As water passes through the cartridge, it captures dirt and debris, making them more effective at trapping smaller particles than sand filters.

Benefits:

Greater filtration area than sand filters
Energy-efficient due to lower required water flow
Easy to clean and maintain
Less water waste since they don’t require backwashing
Drawbacks:

Higher initial cost than sand filters
Cartridges need to be replaced every 1-3 years
May require more frequent cleaning during heavy pool usage

3. Diatomaceous Earth (DE) Filters
DE filters use a fine powder made from the fossilized remains of diatoms, a type of algae, to form a porous layer that traps even the smallest particles. These filters are considered the most effective at capturing debris and providing the clearest pool water.

Benefits:

Superior filtration, capable of capturing particles as small as 2-5 microns
Provides the clearest and cleanest pool water
Long-lasting DE filter grids
Drawbacks:

Higher initial cost than sand and cartridge filters
Requires periodic backwashing, which may waste water
DE powder needs to be replaced after each backwash, adding to maintenance costs
More complex and time-consuming cleaning process
Conclusion

When choosing a pool filter, it’s essential to consider the benefits and drawbacks of each type. Sand filters are affordable and easy to maintain but may not capture the smallest particles. Cartridge filters offer better filtration and require less water, but their cartridges need to be replaced periodically. DE filters provide the best filtration but come with higher costs and a more complex maintenance process. Assess your pool’s specific needs and preferences to determine the best filter for your situation.