What to Do If You Find a Tear in Your Pool Liner: A Step-by-Step Guide for Pool Owners

Discovering a tear in your pool liner can be a cause for concern for any pool owner. Whether the tear is small or large, addressing it promptly is essential to prevent further damage and ensure the continued enjoyment of your pool. In this blog post, we’ll provide a comprehensive guide on what to do if you find a tear in your pool liner, including steps to assess the damage, temporary solutions to prevent water loss, and options for repair or replacement.

1. Assess the Damage:

The first step is to assess the extent of the tear and determine whether it can be repaired or if the liner needs to be replaced. Carefully inspect the area around the tear for any signs of stretching, pulling, or additional damage. Small tears or punctures may be repairable, while larger tears or extensive damage may require professional intervention.

2. Temporarily Patch the Tear:

If the tear is small and manageable, you can temporarily patch it to prevent water loss and further damage until a permanent solution can be implemented. Options for temporary patches include waterproof tape, vinyl patch kits, or pool liner repair patches specifically designed for underwater use. Apply the patch carefully and securely over the tear, ensuring a watertight seal.

3. Monitor Water Levels:

After patching the tear, monitor the water level in your pool closely to ensure that the patch is holding and preventing water leakage. If you notice a significant drop in water level or continued leakage despite the patch, it may indicate that the tear is larger than initially thought or that additional repairs are needed.

4. Consider Professional Repair or Replacement:

For larger tears or damage beyond simple patching, it’s advisable to seek professional assistance from a pool repair technician or installer. They can assess the extent of the damage, recommend appropriate repair options, and perform the necessary repairs or replacement of the pool liner. Professional repair ensures that the job is done correctly and effectively, minimizing the risk of future issues.

5. Prevent Future Damage:

Once the tear has been repaired or the liner replaced, take steps to prevent future damage and prolong the lifespan of your pool liner. Avoid sharp objects or rough surfaces that could puncture or tear the liner, and be cautious when handling pool equipment or accessories near the pool walls. Regularly inspect the pool liner for signs of wear, damage, or deterioration, and address any issues promptly to prevent further damage.

Conclusion:

Discovering a tear in your pool liner can be a stressful experience, but with prompt action and proper repair techniques, you can address the issue effectively and ensure the continued enjoyment of your pool. By assessing the damage, temporarily patching the tear, and seeking professional assistance if needed, you can restore your pool liner to optimal condition and prevent future damage. Remember to monitor water levels closely and take precautions to prevent future tears or damage, ensuring that your pool remains a source of relaxation and enjoyment for years to come.

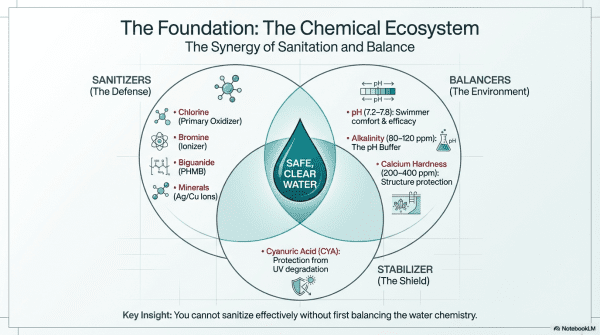
The Importance of Pool Chlorine Stabilization: Ensuring Effective Water Sanitization

Maintaining proper chlorine levels in your swimming pool is essential for ensuring clean and safe water for swimmers. However, chlorine can degrade quickly when exposed to sunlight, reducing its effectiveness in sanitizing pool water. That’s where pool chlorine stabilizers come in. In this blog post, we’ll explore why pool chlorine needs to be stabilized and the importance of using stabilizers to maintain optimal water quality in your pool.

Understanding Pool Chlorine Stabilization:

Chlorine is the most common sanitizer used in swimming pools to kill bacteria, viruses, and algae and to maintain water clarity. However, chlorine is susceptible to degradation when exposed to ultraviolet (UV) sunlight. This degradation, known as chlorine loss or chlorine burn-off, can occur rapidly and significantly reduce the effectiveness of chlorine in sanitizing pool water.

Why Pool Chlorine Needs to Be Stabilized:

  1. Preventing Chlorine Loss: Chlorine stabilizers, also known as cyanuric acid or stabilizer, help prevent chlorine loss by shielding it from UV sunlight. Stabilized chlorine molecules are less prone to degradation, allowing them to remain active in the water longer and provide continuous sanitation.
  2. Maintaining Sanitation Levels: Stabilizing chlorine helps maintain consistent chlorine levels in the pool, ensuring effective sanitation and protection against harmful pathogens. Without proper stabilization, chlorine levels can fluctuate, leading to inadequate disinfection and increased risk of waterborne illnesses.
  3. Maximizing Chlorine Efficiency: By reducing chlorine loss due to sunlight exposure, stabilizers help maximize the efficiency of chlorine in killing bacteria, viruses, and algae. This allows pool owners to maintain lower chlorine levels while still achieving the desired level of sanitation, reducing overall chemical usage and cost.
  4. Extending Chlorine Lifespan: Stabilized chlorine molecules have a longer lifespan in pool water, which means less frequent dosing and maintenance for pool owners. This can save both time and money in the long run by reducing the need for frequent chlorine additions and adjustments.

Importance of Using Pool Chlorine Stabilizers:

  1. Water Quality and Safety: Properly stabilized chlorine helps maintain optimal water quality and safety for swimmers by ensuring consistent and effective disinfection. This helps reduce the risk of waterborne illnesses and infections associated with inadequate sanitation.
  2. Cost-Effectiveness: Using pool chlorine stabilizers can help pool owners save money by extending the lifespan of chlorine and reducing the frequency of chemical additions. Additionally, stabilized chlorine allows for lower chlorine levels while still achieving the desired sanitation, further reducing chemical costs.
  3. Environmental Benefits: By reducing chlorine loss and minimizing the need for frequent chemical additions, pool chlorine stabilizers can help minimize the environmental impact associated with chlorine use. This includes reducing chemical runoff and minimizing chlorine exposure to aquatic ecosystems.

Conclusion:

Pool chlorine stabilization plays a crucial role in maintaining clean, safe, and inviting swimming pool water. By shielding chlorine from degradation caused by sunlight exposure, stabilizers help ensure consistent and effective sanitation while maximizing chlorine efficiency and lifespan. Pool owners should prioritize using pool chlorine stabilizers as part of their regular pool maintenance routine to achieve optimal water quality and safety for swimmers, while also promoting cost-effectiveness and environmental sustainability.

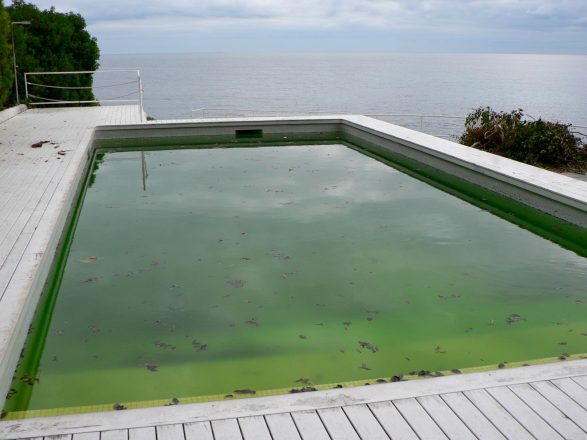
Acid Washing Your Swimming Pool: A Comprehensive Guide

Over time, swimming pool surfaces can develop unsightly stains, mineral deposits, or algae growth that regular cleaning methods may not effectively remove. In such cases, acid washing can be a powerful solution to restore the appearance of pool surfaces and rejuvenate their beauty. In this blog post, we’ll delve into what acid washing a swimming pool entails, when it’s needed, and how to do it safely and effectively.

What is Acid Washing?

Acid washing is a process used to remove stubborn stains, mineral deposits, algae, or other contaminants from swimming pool surfaces. It involves applying a diluted acid solution to the pool’s walls, floors, or tile surfaces to dissolve and lift away buildup and discoloration. Acid washing can rejuvenate the appearance of pool surfaces and restore their original luster.

When is Acid Washing Needed?

Acid washing may be necessary under the following circumstances:

  1. Stubborn Stains: Despite regular cleaning efforts, certain stains or discoloration may persist on pool surfaces, including calcium deposits, rust stains, or organic stains.
  2. Algae Infestation: Severe algae infestations that have penetrated the surface of pool plaster or tile may require acid washing to effectively remove the algae and prevent regrowth.
  3. Mineral Deposits: Hard water or high calcium levels can lead to the buildup of mineral deposits on pool surfaces, resulting in scaling or scaling. Acid washing can help dissolve and remove these deposits.
  4. Preparation for Resurfacing: Before resurfacing or replastering a pool, acid washing may be necessary to clean and prepare the existing surface for the application of new materials.

How to Acid Wash a Swimming Pool:

  1. Preparation: Before beginning the acid washing process, drain the pool to the desired level below the stained or affected areas. Disconnect any pool equipment, such as pumps and filters, to prevent damage from the acid solution.
  2. Safety Precautions: Wear appropriate protective gear, including gloves, goggles, and a respirator mask, to protect against contact with acid fumes or splashes.
  3. Prepare Acid Solution: Dilute muriatic acid (hydrochloric acid) with water in a ratio of approximately one part acid to ten parts water. Add the acid to the water slowly and carefully to avoid splashing or generating heat.
  4. Apply Acid Solution: Using a sprayer or watering can, apply the diluted acid solution evenly to the stained or affected areas of the pool surface. Work in small sections to ensure thorough coverage.
  5. Scrubbing: After applying the acid solution, use a stiff-bristled brush or scrubbing pad to agitate the surface and loosen stubborn stains or deposits. Take care not to apply excessive pressure or scrub too vigorously, as this can damage the pool surface.
  6. Rinse Thoroughly: Once the stains have been loosened, rinse the pool surface thoroughly with water to remove the acid solution and any dissolved debris. Use a hose or pressure washer to ensure complete removal.
  7. Neutralize Acid: After rinsing, neutralize any remaining acid on the pool surface by applying a baking soda solution (approximately one pound of baking soda per gallon of water) and scrubbing gently. Rinse again to remove the neutralizing solution.
  8. Refill Pool: Once the acid washing process is complete and the pool surface has been thoroughly rinsed and neutralized, refill the pool with fresh water to the desired level.
  9. Balance Water Chemistry: Test the pool water and adjust chemical levels as needed to ensure proper water balance and safety for swimming.

Conclusion:

Acid washing is a powerful method for removing stubborn stains, mineral deposits, algae, and other contaminants from swimming pool surfaces. When performed correctly and with proper safety precautions, acid washing can rejuvenate the appearance of pool surfaces and restore their original beauty. Whether addressing persistent stains, preparing for resurfacing, or combating algae infestations, acid washing can be an effective solution for maintaining a clean and inviting swimming environment. If you’re unsure about how to acid wash your pool safely and effectively, consider consulting with a professional pool service technician for assistance.

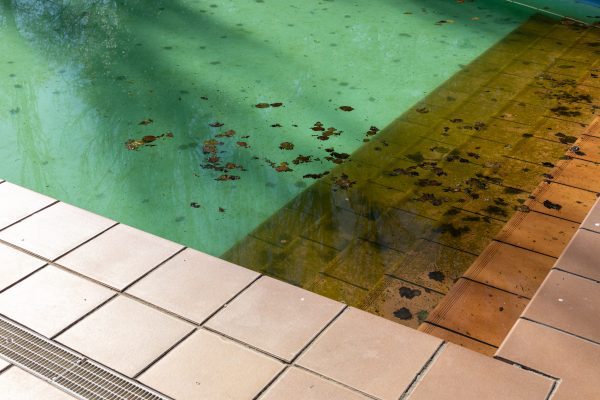
Dealing with Black Spots in Your Pool: Causes and Solutions

Black spots in a pool can be a frustrating sight for any pool owner, especially when they persist despite regular cleaning and maintenance efforts. While black spots are often associated with algae growth, they can also be caused by other factors such as mineral deposits, metal staining, or even organic debris. In this blog post, we’ll explore the possible causes of black spots in a pool that aren’t algae and discuss effective strategies for getting rid of them to restore your pool’s clarity and beauty.

Identifying the Causes of Black Spots:

  1. Metal Staining: Metals such as iron, copper, or manganese can leach into pool water from various sources, including water sources, pool equipment, or metal fixtures. When these metals oxidize, they can form dark stains or discoloration on pool surfaces.
  2. Mineral Deposits: Calcium, magnesium, and other minerals present in pool water can accumulate on pool surfaces over time, especially in areas with high evaporation rates or hard water. These deposits can appear as dark spots or scaling on pool walls, floors, or tile grout.
  3. Organic Debris: Decomposing organic matter, such as leaves, twigs, or insects, can settle on pool surfaces and create black spots or stains as they break down. These spots may appear in areas with poor circulation or where debris tends to accumulate.

Strategies for Removing Black Spots:

  1. Metal Stain Removers: Commercial metal stain removers are available that can effectively dissolve and remove metal stains from pool surfaces. Follow the manufacturer’s instructions carefully when using these products and consider conducting a spot test in an inconspicuous area before widespread application.
  2. Ascorbic Acid Treatment: Ascorbic acid, commonly known as vitamin C, can be used to effectively remove metal stains from pool surfaces. Dissolve ascorbic acid powder in water and apply the solution directly to affected areas. Allow the solution to sit for several minutes, then scrub the stains with a pool brush before rinsing thoroughly.
  3. Chelating Agents: Chelating agents such as EDTA (ethylenediaminetetraacetic acid) or HEDP (1-hydroxyethylidene-1,1-diphosphonic acid) can help sequester metals in the water, preventing them from depositing onto pool surfaces. Regular use of chelating agents can help prevent future metal staining.
  4. Acid Washing: In severe cases of mineral deposits or staining, acid washing may be necessary to restore the appearance of pool surfaces. Acid washing involves applying a diluted acid solution to the pool surfaces to dissolve and remove stubborn stains and deposits. Due to the caustic nature of acid washing, it’s best left to professional pool service technicians.
  5. Preventative Measures: To prevent the recurrence of black spots, maintain proper water chemistry and balance, including pH, alkalinity, and calcium hardness levels. Regularly clean and brush pool surfaces to remove debris and prevent buildup.

Conclusion:

Black spots in a pool can be unsightly and frustrating to deal with, especially when they’re not caused by algae growth. By identifying the underlying causes of black spots and implementing appropriate removal strategies, you can effectively restore your pool’s clarity and beauty. Whether dealing with metal staining, mineral deposits, or organic debris, there are various solutions available to address the issue and prevent recurrence. With proper maintenance and preventative measures, you can enjoy a clean and inviting swimming environment all season long.

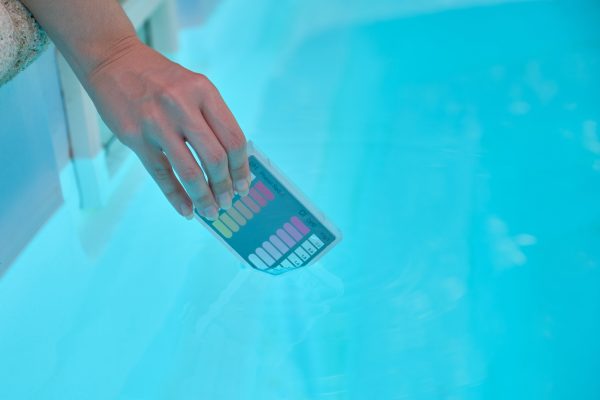
DIY Guide: Making Homemade Phosphate Remover for Your Pool

Phosphates are a common nutrient found in pool water, often introduced through sources such as fertilizers, leaves, and organic debris. While phosphates themselves are not harmful to swimmers, they can contribute to algae growth and reduce water clarity. Commercial phosphate removers are available, but making your own homemade phosphate remover can be a cost-effective and environmentally friendly alternative. In this blog post, we’ll explore how to make homemade phosphate remover using simple ingredients and easy-to-follow methods.

Understanding Phosphates in Pool Water

Phosphates are naturally occurring compounds that serve as nutrients for algae growth. When present in high concentrations in pool water, phosphates can fuel algae blooms, leading to green, cloudy water and increased maintenance requirements. Removing phosphates from the pool water can help prevent algae growth and maintain water clarity.

Ingredients for Homemade Phosphate Remover:

  1. White Vinegar: White vinegar, commonly used for household cleaning, contains acetic acid, which can help bind and precipitate phosphates in pool water.
  2. Liquid Dish Soap: Liquid dish soap acts as a surfactant, helping to break down organic matter and facilitate phosphate removal.
  3. Distilled Water: Distilled water is free of impurities and additives, making it ideal for diluting the phosphate remover solution.

DIY Methods for Making Homemade Phosphate Remover:

Method 1: Vinegar and Dish Soap Solution

  1. Measure Ingredients: In a clean container, mix together equal parts white vinegar and liquid dish soap. The exact quantities will depend on the size of your pool and the concentration of phosphates.
  2. Dilute with Water: Add distilled water to the vinegar and dish soap mixture to dilute the solution. The ratio of water to vinegar/dish soap mixture can vary depending on the phosphate levels in your pool.
  3. Stir Well: Stir the solution thoroughly to ensure that the vinegar and dish soap are evenly distributed in the water.
  4. Apply to Pool Water: With the pool pump running, slowly pour the homemade phosphate remover solution into the pool water, distributing it evenly across the surface.
  5. Allow to Circulate: Allow the phosphate remover solution to circulate in the pool for several hours or overnight to facilitate phosphate binding and precipitation.
  6. Test and Monitor: After allowing the solution to circulate, test the phosphate levels in your pool water using a phosphate test kit. Monitor the levels regularly and repeat the treatment as needed until the desired phosphate level is achieved.

Method 2: Direct Application

  1. Mix Ingredients: Alternatively, you can mix white vinegar and liquid dish soap directly into a spray bottle or garden sprayer without diluting with water.
  2. Spray on Pool Surface: Spray the homemade phosphate remover solution directly onto the pool surface, focusing on areas with visible algae growth or debris accumulation.
  3. Brush and Rinse: Use a pool brush to agitate the solution and scrub any affected areas. Allow the solution to sit for a few minutes, then rinse the pool surface thoroughly with water.
  4. Repeat as Needed: For persistent phosphate problems, repeat the application process as needed until the desired results are achieved.

Safety Precautions:

  • Avoid using homemade phosphate remover solutions in large quantities, as excessive use may affect pool chemistry and water balance.
  • Test pool water regularly to monitor phosphate levels and adjust treatment accordingly.
  • Wear gloves and eye protection when handling vinegar and dish soap to prevent skin and eye irritation.

Conclusion:

Making homemade phosphate remover for your pool is a simple and cost-effective way to combat algae growth and maintain water clarity. By using common household ingredients such as white vinegar and liquid dish soap, you can effectively reduce phosphate levels in your pool water and enjoy a clean and inviting swimming environment. Experiment with different methods and concentrations to find the best solution for your pool’s needs, and enjoy crystal-clear water all season long.

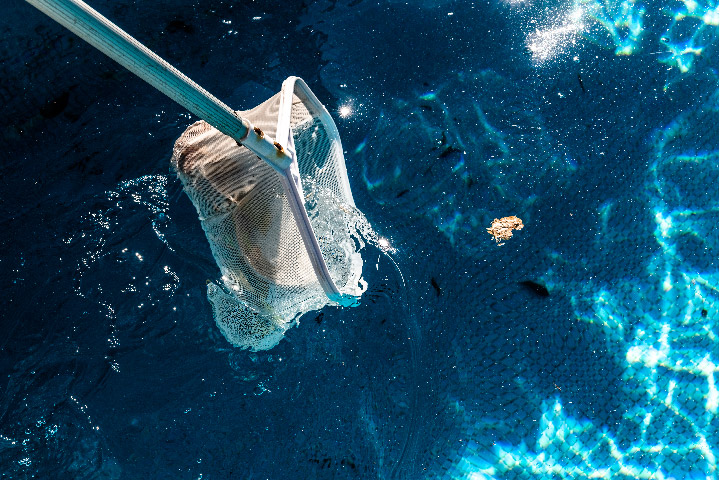
DIY Guide: Making Homemade Pool Flocculant for Crystal-Clear Water

Achieving crystal-clear pool water is a top priority for every pool owner, but sometimes standard filtration methods aren’t enough to remove fine particles and debris. In such cases, pool flocculant can be a game-changer. While commercial flocculants are readily available, making your own homemade pool flocculant is a cost-effective and environmentally friendly alternative. In this blog post, we’ll explore how to make homemade pool flocculant using simple ingredients and easy-to-follow methods.

What is Pool Flocculant?

Pool flocculant is a chemical additive that helps clarify pool water by causing suspended particles to clump together, making them easier to remove through filtration or vacuuming. Flocculants work by coagulating tiny particles, such as dirt, algae, and other debris, into larger clumps that can be easily captured by the pool’s filtration system.

Ingredients for Homemade Pool Flocculant:

  1. Alum (Aluminum Sulfate): Alum is a common flocculant used in water treatment and can be found in powdered form at most hardware or pool supply stores. It acts as a coagulant, binding suspended particles together to facilitate removal from the water.
  2. Water: Tap water or distilled water can be used as a solvent to dissolve the alum powder and create the flocculant solution.

DIY Methods for Making Homemade Pool Flocculant:

Method 1: Alum Solution

  1. Measure Ingredients: In a clean container, measure out the desired amount of alum powder based on your pool size and water condition. A typical dosage is approximately 1 tablespoon of alum per 10,000 gallons of pool water.
  2. Dissolve Alum: Add the alum powder to a bucket of warm water, stirring continuously until the powder is completely dissolved. Use a stirring stick or spoon to ensure thorough mixing.
  3. Allow Settling: Let the alum solution sit undisturbed for several hours or overnight to allow any undissolved particles to settle to the bottom of the container.
  4. Decant Clear Solution: Carefully pour off the clear liquid from the top of the container, leaving behind any sediment or residue at the bottom. The clear liquid is your homemade pool flocculant solution, ready to be added to the pool.

Method 2: Alum Sock

  1. Prepare Alum Sock: Place a clean sock or nylon stocking inside a plastic container or bucket. Fill the sock with alum powder, tying off the open end securely to create a makeshift filter bag.
  2. Soak in Water: Submerge the alum sock in a bucket of warm water, allowing the water to permeate the sock and dissolve the alum powder gradually.
  3. Wait for Dissolution: Allow the alum sock to soak in the water for several hours or overnight, periodically agitating or squeezing the sock to facilitate the release of the dissolved alum into the water.
  4. Use the Solution: Once the alum powder has fully dissolved, remove the alum sock from the bucket, and discard it. The water in the bucket is now your homemade pool flocculant solution, ready to be added to the pool.

Application of Homemade Pool Flocculant:

  1. Turn Off Pool Equipment: Before adding the homemade flocculant to the pool, turn off the pool pump and filtration system to allow the water to become still.
  2. Pour Flocculant Solution: Carefully pour the homemade flocculant solution around the perimeter of the pool, ensuring even distribution across the water surface.
  3. Wait for Settling: Allow the flocculant to work its magic by causing suspended particles to clump together and settle to the bottom of the pool. This process may take several hours or overnight, depending on the severity of the cloudiness.
  4. Vacuum or Backwash: Once the particles have settled, use a pool vacuum or backwash the filter to remove the sediment from the pool bottom. Be cautious not to disturb the settled particles while vacuuming.
  5. Monitor and Adjust: After vacuuming, monitor the water clarity and adjust filtration settings as needed to maintain optimal water quality. Repeat the flocculation process if necessary to achieve the desired level of clarity.

Safety Precautions:

  • Always wear gloves and eye protection when handling alum powder to prevent skin and eye irritation.
  • Keep children and pets away from the flocculant solution and pool area during the application and settling process.
  • Dispose of any unused alum solution properly and according to local regulations.

Conclusion:

Making homemade pool flocculant is a simple and cost-effective way to achieve crystal-clear water in your swimming pool. By using readily available ingredients and following easy-to-follow methods, you can effectively clarify pool water and enjoy a pristine swimming experience. Whether you choose to dissolve alum powder in water or create an alum sock filter, homemade pool flocculant offers an environmentally friendly alternative to commercial products without sacrificing effectiveness. Experiment with different dosages and methods to find the best solution for your pool’s needs, and enjoy sparkling clean water all season long.

Flocking Your Pool with a Sand Filter: A Step-by-Step Guide

Flocking is a popular method for clarifying pool water by removing fine particles and debris that may not be captured by the filtration system alone. While flocking is commonly associated with cartridge or DE (diatomaceous earth) filters, it’s also possible to flock a pool using a sand filter. In this blog post, we’ll provide a step-by-step guide on how to flock your pool with a sand filter, helping you achieve crystal-clear water for a pristine swimming experience.

What is Flocking?

Flocking is a process that involves adding a flocculant chemical to the pool water to bind together fine particles, forming larger clumps that can be easily removed by the filtration system. This helps improve water clarity by effectively removing suspended debris, algae, and other contaminants.

Step-by-Step Guide to Flocking Your Pool with a Sand Filter:

  1. Test and Balance Pool Water: Before flocking your pool, test the water chemistry using a reliable pool water test kit. Ensure that pH and alkalinity levels are within the recommended range (pH 7.2-7.6, alkalinity 80-120 ppm) for optimal flocking results.
  2. Backwash the Sand Filter: Start by backwashing your sand filter to ensure optimal filtration efficiency. Follow the manufacturer’s instructions for your specific filter model to perform a thorough backwashing cycle.
  3. Prepare the Floc Solution: Dissolve the flocculant chemical (such as aluminum sulfate or potassium alum) in a bucket of water according to the manufacturer’s instructions. Stir the solution well to ensure complete dissolution.
  4. Apply the Floc Solution: With the pool pump running, slowly pour the floc solution into the pool water, distributing it evenly across the surface. Avoid pouring the solution directly into the skimmer, as this may interfere with filtration.
  5. Run the Filter Overnight: Allow the sand filter to run continuously overnight to circulate the floc solution throughout the pool water. This will help facilitate the flocculation process and encourage the formation of larger particle clumps.
  6. Shut Off the Pump: After allowing the filter to run overnight, shut off the pump to allow the floc particles to settle to the bottom of the pool. This may take several hours, depending on the severity of the water cloudiness.
  7. Vacuum the Pool: Once the floc particles have settled to the bottom of the pool, use a pool vacuum to carefully and slowly vacuum the pool floor, being careful not to disturb the settled particles. Use a manual vacuum or a vacuum head attached to a telescopic pole for best results.
  8. Backwash the Filter Again: After vacuuming, backwash the sand filter once again to remove any remaining debris and floc particles from the filter media. Follow the manufacturer’s instructions for the backwashing procedure.
  9. Monitor Water Clarity: After flocking and vacuuming, monitor the water clarity over the next few days to ensure that the pool remains clear and free of suspended particles. If necessary, repeat the flocking process or adjust filtration settings to maintain optimal water quality.

Conclusion:

Flocking your pool with a sand filter is a straightforward process that can help improve water clarity and remove fine particles and debris. By following the steps outlined in this guide and using the appropriate flocculant chemical, you can achieve crystal-clear water for a pristine swimming experience. Remember to test and balance your pool water regularly and consult with a pool professional if you have any questions or concerns about the flocking process.

Does Chlorine Kill Lice? Treating Swimming Pools After Lice Exposure

As summer approaches and swimming pools become a popular destination for cooling off and having fun, concerns about hygiene and safety naturally arise. One common question that may come to mind is whether chlorine effectively kills lice in swimming pools. Additionally, if someone with lice has swum in a pool, what steps should be taken to ensure the pool is safe for others? In this blog post, we’ll explore whether chlorine kills lice and discuss proper procedures for treating swimming pools after lice exposure.

Does Chlorine Kill Lice?

Chlorine is a powerful disinfectant commonly used in swimming pools to kill bacteria, viruses, and other microorganisms. However, when it comes to lice, chlorine may not be as effective. Lice are parasites that infest the hair and scalp of humans and feed on blood. While chlorine may temporarily immobilize or drown lice in water, it is unlikely to kill them outright, especially if they are attached to the hair and scalp.

Treating Swimming Pools After Lice Exposure

If someone with lice has swum in a pool, it’s essential to take prompt action to minimize the risk of lice transmission to others. Here are the steps to follow for treating the swimming pool after lice exposure:

  1. Close the Pool: As soon as you become aware that someone with lice has been in the pool, close the pool to prevent further exposure and potential transmission to other swimmers.
  2. Notify Pool Users: Inform anyone who may have been in contact with the infested individual about the situation, advising them to take precautions and refrain from using the pool until it has been treated.
  3. Increase Chlorine Levels: While chlorine may not effectively kill lice, it can help disinfect the pool and reduce the risk of bacterial or viral contamination. Increase the chlorine levels in the pool to the recommended range for superchlorination, typically between 5 and 10 parts per million (ppm).
  4. Maintain Filtration and Circulation: Ensure that the pool’s filtration and circulation systems are operating effectively to help remove any contaminants from the water.
  5. Shock Treatment: Consider performing a shock treatment to further sanitize the pool and eliminate any remaining microorganisms or parasites. Follow the manufacturer’s instructions carefully when adding shock treatment chemicals to the pool.
  6. Monitor Water Quality: Regularly test the pool water to ensure that chlorine levels remain within the recommended range and adjust as needed to maintain proper disinfection.
  7. Wait Before Reopening: Allow sufficient time for the chlorine levels to return to normal and for the water to circulate and filter effectively before reopening the pool to swimmers.

Conclusion:

While chlorine may not be effective at killing lice in swimming pools, it is still important to take precautions and treat the pool properly after lice exposure to minimize the risk of transmission to others. By following the steps outlined above and maintaining proper pool maintenance practices, you can help ensure a safe and enjoyable swimming experience for all. If you have further concerns about lice exposure or pool sanitation, consider consulting with a professional pool technician or healthcare provider for guidance.

Diving Deep into Winterizing: Tailoring Your Tactics to Your Pool Surface

Winter is coming, and pool owners everywhere are looking to batten down the hatches to ensure their beloved oasis remains in top shape for the next swimming season. But did you know that the type of surface your pool has can influence how you should winterize? Here’s a dive deep into the diverse world of pool surfaces and the best ways to winterize each one.

1. Plaster Pools (Gunite or Concrete):

  • Overview: Plaster pools are classic and durable, providing a smooth surface. However, they are more pH reactive, meaning they can become acidic or alkaline relatively quickly.
  • Winterizing Tips:
    • Balance your pool chemicals, especially ensuring your pH is within the 7.2-7.6 range.
    • Brush the pool’s surface regularly before covering it. This prevents algae growth and minimizes staining.
    • A solid pool cover is often recommended to prevent debris from staining the surface.

2. Vinyl Liner Pools:

  • Overview: Vinyl pools offer a non-abrasive, smooth surface. However, they can be punctured or torn.
  • Winterizing Tips:
    • Avoid lowering the water level too much, as the weight of the water holds the liner in place.
    • Use air pillows under the cover to balance the weight of snow or rainwater, which can prevent the liner from stretching or tearing.
    • Inspect your liner for any signs of wear or damage before winter and address them to prevent worsening.

3. Fiberglass Pools:

  • Overview: These pools are essentially giant shells placed into the ground. They are low maintenance and resist algae growth.
  • Winterizing Tips:
    • Fiberglass pools require fewer adjustments in pH and alkalinity, but always ensure they’re balanced before winter.
    • Because of their algae resistance, using an algaecide might not be as crucial, but it’s still a good precaution.
    • Regularly clean and inspect the gel coat surface.

4. Pebble-Tec or Stone Surfaces:

  • Overview: Often found in luxury pools, these surfaces have a beautiful, natural finish but can become rough over time.
  • Winterizing Tips:
    • Pay special attention to calcium levels. High calcium can cause scaling on the surface.
    • Like plaster pools, brushing is essential to prevent algae and maintain the texture.
    • A mesh pool cover allows rainwater to pass through, reducing the chance of surface staining from standing water.

5. Tiled Pools:

  • Overview: Tile provides a stunning, durable, and smooth surface but can be susceptible to frost damage in freezing temperatures.
  • Winterizing Tips:
    • Check and repair any loose or damaged tiles before the cold sets in.
    • Ensure proper water chemistry to prevent scale buildup on tiles.
    • Opt for a solid cover to minimize water, snow, and ice contact with the tiles.

Conclusion: Every pool is unique, and understanding its specific needs based on its surface type is vital. Winterizing your pool properly ensures you’re set for a smoother, easier pool opening when warm weather returns. So, know your pool’s surface, take the right steps, and dive into winter with confidence!

Winter-Ready Waters: The A-Z of Balancing Pool Chemicals for the Frosty Season

Winterizing your swimming pool isn’t just about putting on a cover and hoping for the best. Proper chemical balance is crucial for ensuring your pool is protected during the colder months and ready to dive into when summer returns. But what chemicals are we talking about, and what do they actually do? Let’s plunge into the details!

1. Chlorine:
The cornerstone of pool sanitation. Chlorine kills bacteria, algae, and other contaminants, ensuring water remains clear and healthy.

  • For Winter: Apply a chlorine shock treatment to eradicate any lingering bacteria. This prepares the pool for the winter months. Aim for a chlorine level of 1-3 ppm.

2. pH Balancers:
Maintaining the right pH ensures chlorine and other sanitizers work effectively.

  • For Winter: Before winterizing, adjust the pH level to fall between 7.4 and 7.6. You can use pH increasers or decreasers as necessary.

3. Alkalinity Balancers:
Alkalinity acts as a buffer for pH, keeping it stable. It prevents pH levels from fluctuating rapidly, which can harm pool equipment and surfaces.

  • For Winter: Aim for a total alkalinity between 80 and 120 ppm. Adjust using alkalinity increasers if needed.

4. Calcium Hardness Adjusters:
Calcium hardness refers to the amount of dissolved calcium in the water. Proper levels prevent plaster damage and cloudy water.

  • For Winter: Ensure calcium hardness is between 200 and 400 ppm for concrete pools. For vinyl pools, aim for 175-225 ppm.

5. Algaecides:
While chlorine combats algae, an algaecide gives that extra layer of protection, ensuring your pool remains algae-free.

  • For Winter: After shocking your pool, add a quality winter algaecide to prevent any algae growth during the off-season.

6. Pool Antifreeze:
Not your standard chemical for balance, but it’s essential for those living in particularly frosty areas. Pool antifreeze prevents water in your pipes from freezing, expanding, and causing damage.

  • For Winter: Add to your pool’s plumbing system, particularly if you anticipate temperatures dropping below freezing. Ensure you opt for pool-specific antifreeze and not automobile antifreeze.

7. Stain and Scale Preventers:
These prevent metal stains and scale buildup, which can mar your pool’s appearance.

  • For Winter: Add a stain and scale preventer to guard against unsightly mineral deposits, especially if your pool has high mineral content.

Prepping your pool for winter isn’t just a dive-and-done affair. It’s a well-orchestrated ballet of chemistry, ensuring your pool stays protected from the harsh elements and remains in top condition for summer splashes. By understanding and balancing these chemicals, you’re not just winterizing your pool – you’re setting the stage for a smooth opening when the sun shines high again. So, gear up, balance right, and let your pool have its winter slumber in peace!