Pool Filter Cleaning: Complete Guide for All Filter Types

## Why Pool Filter Cleaning Matters

Your filter traps particles as small as 10-50 microns. For reference, a human hair measures about 70 microns. These trapped particles accumulate over time and create resistance. This reduces flow and forces your pump to work harder.

**Signs your filter needs cleaning:**
– Pressure gauge reads 8-10 psi above normal baseline
– Water flow from return jets is weaker
– Pool water is cloudy despite balanced chemistry
– Pump runs louder or hotter than usual
– 4-6 weeks have passed since your last cleaning (cartridge filters)
– 6-12 months have passed since your last backwash (sand filters)

A dirty filter doesn’t just affect water clarity. It can damage your pump, increase energy costs by 30-50%, and shorten your equipment’s lifespan.

## How to Clean a Cartridge Pool Filter

Cartridge filters are the most common type in residential pools. They require no backwashing and trap particles as small as 10-15 microns.

### What You’ll Need:
– Garden hose with spray nozzle or pressure washer (low pressure only)
– Filter cleaner solution (commercial or DIY with TSP or muriatic acid)
– Large bucket or trash can
– Rubber gloves
– Replacement cartridge (if current one is worn out)

### Step-by-Step Cleaning Process:

**Step 1: Turn Off the Pump**
Turn off your pool pump and release system pressure before opening the filter housing. Most filters have a manual air relief valve. Turn it to release trapped air.

**Step 2: Remove the Filter Cartridge**
Open the filter housing (usually a top clamp or threaded lid) and lift out the cartridge. Inspect it for tears, worn pleats, or crushed areas. If you find damage, replace the cartridge.

**Step 3: Rinse with a Hose**
Spray the cartridge pleats from top to bottom using a garden hose at a 45-degree angle. Rotate the cartridge to clean all pleats. This removes surface dirt and debris.

For heavily soiled cartridges, use a filter cleaning wand or pressure washer attachment designed for pool filters. Standard pressure washers above 1500 psi can damage the filter media. Use low pressure only.

**Step 4: Deep Clean with Filter Cleaner (Every 3-4 Cleanings)**
For a deep clean, soak the cartridge in a filter cleaning solution.

Fill a large bucket or trash can with enough water to submerge the cartridge. Add commercial filter cleaner (follow product instructions) or make your own with 1 cup of TSP (trisodium phosphate) per 5 gallons of water.

Soak for 8-12 hours. Overnight works well.

For stubborn oils and scale, use a diluted muriatic acid soak: 1 part acid to 10 parts water. Use extreme caution and proper ventilation when handling acid.

**Step 5: Final Rinse**
After soaking, rinse the cartridge thoroughly to remove all cleaner residue. Leftover chemicals will foam when the pump restarts.

**Step 6: Reassemble and Restart**
Place the clean (or new) cartridge back into the housing. Make sure the lid is properly sealed. Close the air relief valve and restart the pump. Check for leaks and verify that pressure has returned to baseline (usually 8-15 psi, depending on your system).

**Pro tip:** Keep a spare cartridge on hand. When it’s time to clean, swap in the spare and take your time deep cleaning the dirty one. Your pool has no downtime.

## How to Clean a Sand Pool Filter

Sand filters are durable and low-maintenance. They can last 5-7 years before the sand needs replacing. Cleaning a sand filter happens through backwashing. This reverses water flow to flush out trapped debris.

### What You’ll Need:
– Backwash hose (usually included with the filter)
– Waste outlet (drains to yard, sewer, or designated area)

### Step-by-Step Backwashing Process:

**Step 1: Turn Off the Pump**
Never change valve settings while the pump runs. This can damage the multiport valve.

**Step 2: Set Valve to “Backwash”**
Turn the multiport valve handle to the “Backwash” position. Attach the backwash hose to the waste port and direct it to an appropriate drainage area. Do not drain into your pool.

**Step 3: Run the Pump**
Turn the pump back on and let it run for 2-3 minutes. Watch the sight glass (if your filter has one). You’ll see dirty water flowing out. When the water runs clear, the backwash is complete.

**Step 4: Rinse**
Turn off the pump. Set the valve to “Rinse” and run the pump for 30-60 seconds. This clears out remaining debris and resets the sand bed.

**Step 5: Return to Normal Filtration**
Turn off the pump. Set the valve back to “Filter” and restart. Check the pressure gauge. It should be back to baseline (typically 10-15 psi).

**How often to backwash:**
– When pressure rises 8-10 psi above baseline
– After shocking or heavy pool use
– Every 4-6 weeks during swimming season

**When to replace sand:**
Replace sand media every 5-7 years. Over time, the sharp edges that trap particles become smooth and rounded. This reduces filtration effectiveness. If backwashing doesn’t restore pressure or your water is consistently cloudy, you need fresh sand.

## How to Clean a DE (Diatomaceous Earth) Filter

DE filters provide the finest filtration. They trap particles down to 3-5 microns. They require the most maintenance. Cleaning involves backwashing and recharging with fresh DE powder.

### What You’ll Need:
– DE powder (food-grade diatomaceous earth)
– Backwash hose
– Scoop or measuring cup
– Filter cleaner (for deep cleaning, annually)

### Step-by-Step Cleaning Process:

**Step 1: Backwash the Filter**
Follow the same backwashing steps as a sand filter. Turn off pump, set to backwash, run for 2-3 minutes, rinse, return to filter.

**Step 2: Recharge with Fresh DE Powder**
After backwashing, you must add fresh DE powder to recoat the filter grids.

Check your filter manual for the correct amount. This is typically 1 pound of DE per 10 square feet of filter area.

With the pump running, pour the DE powder slowly into the skimmer. The DE will flow through the system and coat the filter grids.

**Step 3: Deep Clean (Annually)**
Once per year, open the filter housing and manually clean the grids.

Turn off the pump and release pressure. Remove the grids and hose them down thoroughly. Soak in a filter cleaning solution to remove oils and scale. Rinse, reassemble, and recharge with fresh DE.

**Important safety note:** Wear a dust mask when handling DE powder. Food-grade DE is non-toxic, but inhaling the fine dust can irritate your lungs.

**How often to clean:**
– Backwash and recharge when pressure rises 8-10 psi
– Deep clean the grids once per year (usually at opening or closing)
– Replace grids every 3-5 years if damaged or worn

## ???? Recommended Filter Cleaning Products

*As an Amazon Associate, we earn from qualifying purchases. These products make filter maintenance easier and extend equipment life.*

**[Unicel C-4326 Replacement Cartridge](https://www.amazon.com/dp/B004LW6ZRQ?tag=poolcalc04-20)** (~$45). High-quality replacement cartridge for Hayward Star-Clear and similar models. 25 sq ft surface area fits most residential pools.

**[Leisure Time Filter Clean](https://www.amazon.com/dp/B000UVHQGG?tag=poolcalc04-20)** (~$14). Powerful granular cleaner for cartridge filters. Removes oils, minerals, and organic buildup. One bottle lasts an entire season.

**[Natural Chemistry Pool Perfect Filter Perfect](https://www.amazon.com/dp/B00Y8E0MOM?tag=poolcalc04-20)** (~$18). Enzymatic filter cleaner that breaks down oils and organic waste. Biodegradable and safe for all filter types.

**[Water TechniX Pool Filter Cleaning Wand](https://www.amazon.com/dp/B07Z6NKTS7?tag=poolcalc04-20)** (~$25). Attaches to your garden hose and directs water deep into cartridge pleats. Speeds up the cleaning process.

**[Rx Clear DE Powder 25 lbs](https://www.amazon.com/dp/B00N8I2FJU?tag=poolcalc04-20)** (~$35). Food-grade diatomaceous earth for DE filters. 25-pound bucket lasts multiple seasons for most residential pools.

**[Pro Team Filter Cleaner Tablet](https://www.amazon.com/dp/B000UVDOFE?tag=poolcalc04-20)** (~$20). Drop-in filter cleaning tablets for cartridge filters. Dissolve oils and minerals overnight without scrubbing.

**[HTH Filter Sand 50 lbs](https://www.amazon.com/dp/B0014DTYG2?tag=poolcalc04-20)** (~$18). Premium #20 silica sand for sand filters. Specifically sized for optimal filtration. Replace every 5-7 years.

## ???? Track Your Filter Maintenance with Pool Chemical Calculator

Keeping track of filter cleaning schedules, pressure readings, and maintenance history is easy with the **Pool Chemical Calculator** app.

✅ Log filter cleanings and pressure readings
✅ Set reminders for backwashing and deep cleaning
✅ Track chemical dosing and water balance
✅ Free to download

**[Download for Android →](https://play.google.com/store/apps/details?id=com.poolchemicalcalculator.poolcalc)**
**[Download for iPhone/iPad →](https://itunes.apple.com/us/app/pool-chem-calculator/id1453351222)**
**[Use Online →](https://poolchemicalcalculator.com)**

## Filter Cleaning Schedule: How Often Should You Clean?

**Cartridge Filters:**
– Quick rinse: Every 4-6 weeks during swim season
– Deep clean soak: Every 3-4 months (or 3-4 quick rinses)
– Replace cartridge: Every 2-3 years (or sooner if damaged)

**Sand Filters:**
– Backwash: When pressure rises 8-10 psi (typically every 4-6 weeks)
– Replace sand: Every 5-7 years

**DE Filters:**
– Backwash and recharge: When pressure rises 8-10 psi (every 4-8 weeks)
– Deep clean grids: Once per year
– Replace grids: Every 3-5 years

**Pro tip:** Write down your filter’s baseline pressure when it’s freshly cleaned. This becomes your reference point. When pressure rises 8-10 psi above baseline, clean the filter.

## When Cleaning Doesn’t Help

If you’ve cleaned your filter but still experience cloudy water, weak flow, or high pressure, check these potential issues.

**1. Worn Filter Media**
Cartridge pleats tear, sand becomes rounded, and DE grids crack. Cleaning won’t fix physical damage. You need a replacement.

**2. Undersized Filter**
If your filter is too small for your pool’s volume or bather load, it will clog quickly no matter how often you clean it. Consult a pool pro to verify your filter is properly sized.

**3. Pump or Plumbing Issues**
If pressure is consistently high even after cleaning, you may have a clogged impeller, closed valves, or kinked hoses. Inspect your entire circulation system.

**4. Chemical Imbalance**
High calcium hardness or poor water chemistry can cause scaling and mineral buildup inside the filter. A muriatic acid soak often resolves this.

## FAQs About Pool Filter Cleaning

### How do I know when my pool filter needs cleaning?

Check your filter’s pressure gauge. When pressure rises 8-10 psi above your baseline (the pressure when the filter is freshly cleaned), clean the filter. Other signs include reduced water flow from return jets, cloudy water despite balanced chemistry, and louder pump operation.

### Can I clean my pool filter with a pressure washer?

Yes, but use caution. Use low pressure (below 1500 psi) and a wide spray pattern. High-pressure washers can damage cartridge pleats and tear the filter media. A garden hose with a dedicated filter cleaning wand is safer and works well for most cleanings.

### How often should I clean my cartridge pool filter?

Rinse your cartridge filter every 4-6 weeks during swim season, or whenever pressure rises 8-10 psi above baseline. Every 3-4 cleanings, perform a deep soak in filter cleaner to remove oils and minerals. Replace the cartridge every 2-3 years or sooner if you notice tears or crushed pleats.

### Should I backwash my sand filter after shocking?

Yes. Shocking oxidizes contaminants and causes them to clump together. Your filter captures these particles. After shocking, your filter works overtime to remove these particles. Backwashing afterward clears out the accumulated debris and restores flow.

### What happens if I never clean my pool filter?

A clogged filter reduces circulation. This leads to cloudy water, algae growth, and chemical imbalances. Your pump has to work harder to push water through the blockage. This increases energy costs by 30-50% and shortens the pump’s lifespan. In extreme cases, excessive pressure can crack the filter housing or damage internal components.

Pool filter cleaning is one of the most important maintenance tasks you can do. A clean filter means crystal-clear water, lower energy costs, and equipment that lasts years longer.

Whether you have a cartridge, sand, or DE filter, the process is straightforward once you understand the basics. Check your pressure gauge regularly. Clean when it’s 8-10 psi above baseline. Don’t skip the deep cleaning sessions.

For personalized chemical dosing and maintenance reminders based on your specific pool setup, download the **Pool Chemical Calculator** app. It takes the guesswork out of pool care.

**Related Articles:**
– [Cloudy Pool Water: Causes, Fixes & Prevention](https://poolchemicalcalculator.com/news/cloudy-pool-water)
– [Pool Water Chemistry: The Complete Guide](https://poolchemicalcalculator.com/news/pool-water-chemistry)
– [How to Shock a Pool (Step-by-Step)](https://poolchemicalcalculator.com/news/pool-shock-treatment)

How to Lower CYA Levels: The Ultimate Guide to Fixing Over-Stabilization

If you’ve been following our 2025 guide to pool chemistry, you know that Cyanuric Acid (CYA) is basically “sunscreen” for your chlorine. It’s essential for protecting your sanitizer from being evaporated by the sun’s UV rays. But there is a very real tipping point where “a little bit of help” turns into a “chemical lockdown.”

When your CYA levels climb too high—a condition known as over-stabilization—your chlorine becomes trapped. It’s still in the water, but it’s chemically “handcuffed” and unable to kill algae or bacteria. If you’re staring at a green pool despite having “high” chlorine readings, you likely have a CYA problem.

In this guide, we’ll look at the safest, most effective ways to lower your stabilizer levels and get your pool back into the safety zone.

The Over-Stabilization Trap: Why High CYA is a Maintenance Nightmare

In the world of the Model Aquatic Health Code (MAHC), the recommended limit for CYA is often 50 ppm, with some residential pros suggesting up to 30–50 ppm for standard pools. Once you cross the 100 ppm mark, you are in the danger zone.

The problem is that most common chlorine products—specifically “Trichlor” pucks and “Dichlor” shock—are “stabilized.” This means they contain CYA. Every time you add a puck to your feeder, you are permanently increasing your CYA level. Unlike water, CYA does not evaporate. It only leaves your pool through splash-out, backwashing, or a physical drain.

High CYA leads to:

  • Chlorine Ineffectiveness: You might need 10 ppm of chlorine just to do the work that 2 ppm would do at lower CYA levels.

  • Cloudy Water: Fine particles aren’t filtered as easily when the chemistry is out of whack.

  • Algae Blooms: Even with chlorine present, algae can thrive because the sanitizer is too slow to react.

How to Test for High CYA Accurately

Before you take drastic measures, you need an accurate reading. Many “test strips” struggle to differentiate between 100 ppm and 150 ppm. For a true “source of truth,” use a DPD test kit with a turbidimetric (cloudy water) test or a digital kit like the LaMotte SpinTouch.

Pro Tip: If your test shows the maximum reading immediately, perform a “dilution test.” Mix one part pool water with one part tap water, test that mixture, and multiply the result by two. This gives you a much clearer picture of just how high your levels actually are.

The Gold Standard: The Drain and Refill Method

Currently, the only 100% reliable way to lower CYA is to remove a portion of the high-CYA water and replace it with fresh water.

1. Calculate the Percentage

If your CYA is at 100 ppm and you want it at 50 ppm, you need to replace 50% of your water. The Pool Chemical Calculator can help you determine your total pool volume so you know exactly how much water you’re moving.

2. The Safe Way to Drain

  • Never drain a pool completely without professional guidance. Hydrostatic pressure from the ground can literally pop a pool out of the earth or cause liners to shrink and tear.

  • The “Salami Slice” Approach: If you need to replace 50%, do it in two or three smaller sessions (20% at a time). Drain a foot or two, refill, circulate for 24 hours, and repeat. This is much safer for your pool’s structural integrity.

3. Use the “Water Exchange” Method

If you have a concrete pool, you can sometimes “exchange” water by placing a garden hose in the deep end while simultaneously pumping water out from the surface. Since high-CYA water is often cooler and denser, it tends to settle, allowing you to pull out the “bad” water while adding the “good.”

Alternative Solutions: CYA Reducers and Reverse Osmosis

You may see “CYA Reducer” packets at the store. These use specialized enzymes to “eat” the cyanuric acid.

  • The Catch: These are notoriously finicky. They require specific water temperatures (usually above 70°F), a pH around 7.2, and zero chlorine in the water to work. For most homeowners, the cost and the narrow window of success make draining and refilling the more practical choice.

  • Reverse Osmosis (RO) Filtration: In drought-prone areas like Arizona or California, mobile RO trailers can filter your water at the curb, removing CYA and calcium without wasting water. It’s expensive but eco-friendly.

How to Prevent CYA from Climbing Again

Once you’ve hit that target 30–50 ppm range, keep it there by changing your habits:

  • Switch to Unstabilized Chlorine: Use Liquid Chlorine (Sodium Hypochlorite) or Cal-Hypo for your weekly sanitization. Neither of these contains CYA.

  • Limit the Pucks: Use Trichlor pucks only when you’re going on vacation or if you specifically need to raise your CYA.

  • Monitor Monthly: Use the Pool Chemical Calculator to log your CYA levels once a month. Catching a climb early is much easier than fixing a 150 ppm disaster.

Conclusion: Take Control of Your Stabilizer

High CYA is the “silent killer” of pool clarity. It’s frustrating to spend money on chlorine that isn’t working, but by following a disciplined drain-and-refill schedule, you can reset your chemistry and enjoy a safer, clearer swim.

Don’t guess your dosage. Use the Pool Chemical Calculator to track your CYA trends and calculate exactly how much water you need to exchange to hit your goals.

Ready to fix your water? Download the Pool Chemical Calculator today to get your pool back in balance! Download on the Google Play Store


Internal Links to Explore:


Recommended Products

As an Amazon Associate, we earn from qualifying purchases.

Understanding the Timing: When to Shock Your Pool After Adding Algaecide

Maintaining a clean and algae-free pool requires a combination of preventive measures and reactive treatments. Algaecide and shock treatments are two essential components of pool maintenance, but understanding the proper timing between these treatments is crucial for maximizing their effectiveness. In this article, we’ll delve into the question of how long you should wait after adding algaecide before shocking your pool, providing insights to help you keep your pool water clean, clear, and algae-free.

The Role of Algaecide and Shock in Pool Maintenance:

Algaecide is a chemical treatment specifically designed to prevent and control algae growth in pool water. It works by disrupting algae cell membranes, inhibiting photosynthesis, and preventing algae from thriving and multiplying. Algaecide is typically added to the pool water on a regular basis as part of routine maintenance to prevent algae outbreaks and maintain water clarity.

Shock treatments, on the other hand, are powerful oxidizing agents that help eliminate organic contaminants, bacteria, and algae spores from pool water. Shocking the pool involves adding a concentrated dose of chlorine or other oxidizing agents to rapidly raise the chlorine level and sanitize the water. Shock treatments are used as a reactive measure to address existing algae blooms, cloudy water, or chlorine demand spikes.

Timing Considerations: When to Shock After Adding Algaecide

  1. Follow Manufacturer’s Instructions: The timing between adding algaecide and shocking your pool may vary depending on the specific products used. Always read and follow the manufacturer’s instructions on the product labels carefully for guidance on application rates, dosing intervals, and compatibility with other pool chemicals.
  2. Wait at Least 24 Hours: In general, it’s advisable to wait at least 24 hours after adding algaecide before shocking your pool. This allows sufficient time for the algaecide to disperse and circulate throughout the pool water, maximizing its effectiveness in controlling algae growth.
  3. Consider Algaecide Type: The type of algaecide used may influence the timing of shock treatments. Quaternary ammonium-based algaecides, for example, may require longer waiting periods before shocking the pool compared to copper-based algaecides. Refer to the manufacturer’s instructions for specific guidance based on the algaecide type.
  4. Monitor Water Conditions: Pay close attention to water conditions and visual cues to determine if and when shock treatment is needed after adding algaecide. If algae growth persists or water clarity issues persist despite algaecide treatment, it may be necessary to shock the pool to eliminate remaining algae spores and organic contaminants.

Best Practices for Pool Maintenance:

  1. Regular Testing and Monitoring: Maintain proper pool water balance and sanitation levels by regularly testing water chemistry parameters, including pH, chlorine, alkalinity, and cyanuric acid. Monitor water clarity and appearance for signs of algae growth or contamination.
  2. Preventative Maintenance: Incorporate algaecide treatments into your regular pool maintenance routine to prevent algae growth and maintain water clarity. Follow a consistent schedule for adding algaecide and shock treatments as recommended by the manufacturer.
  3. Address Issues Promptly: Address any signs of algae growth, cloudy water, or water chemistry imbalances promptly to prevent further deterioration and potential algae outbreaks. Act quickly to treat and resolve issues using appropriate pool chemicals and treatments.

Conclusion:

Maintaining a clean and algae-free pool requires proper timing and coordination between algaecide and shock treatments. While it’s generally advisable to wait at least 24 hours after adding algaecide before shocking the pool, specific timing may vary depending on the products used and water conditions. By following manufacturer’s instructions, monitoring water conditions closely, and addressing issues promptly, you can effectively control algae growth, maintain water clarity, and enjoy a clean and inviting swimming environment all season long.

???? Recommended Products

Based on the topics covered in this article, here are our top product picks to help you maintain a healthy, sparkling pool:

As an Amazon Associate, we earn from qualifying purchases. Prices are approximate and may vary.

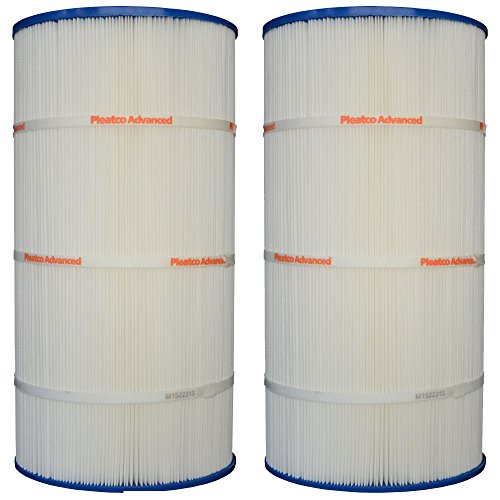
DIY Pool Filter Cartridge Cleaner: Effective Solutions for a Sparkling Clean Pool

Regular maintenance of your pool filter cartridge is essential for ensuring optimal filtration and water clarity. While commercial filter cartridge cleaners are readily available, you can also create effective homemade alternatives using household ingredients. In this article, we’ll explore several DIY pool filter cartridge cleaner recipes and methods to help you keep your pool filter cartridges clean and your pool water sparkling all season long.

Why Clean Your Pool Filter Cartridge?

Pool filter cartridges play a crucial role in removing dirt, debris, and contaminants from pool water, helping to maintain water clarity and sanitation. Over time, these cartridges can become clogged with debris, reducing filtration efficiency and potentially leading to cloudy water or algae growth. Regular cleaning of pool filter cartridges is essential to ensure optimal performance and prolong their lifespan.

Homemade Pool Filter Cartridge Cleaner Recipes:

  1. Vinegar Solution: Vinegar is an excellent natural cleaner that can effectively break down dirt, grease, and mineral deposits on pool filter cartridges. To make a vinegar cleaning solution, mix equal parts white vinegar and water in a large bucket or container. Soak the pool filter cartridge in the vinegar solution for several hours or overnight, then rinse thoroughly with clean water.
  2. Baking Soda Paste: Baking soda is another versatile household cleaner that can help remove stubborn stains and buildup from pool filter cartridges. To make a baking soda paste, mix baking soda with water until it forms a thick, spreadable consistency. Apply the paste to the surface of the filter cartridge and scrub gently with a soft brush or sponge. Rinse the cartridge thoroughly with clean water to remove any residue.
  3. Dish Soap Solution: Dish soap is effective at breaking down oils and grease, making it suitable for cleaning pool filter cartridges. Fill a bucket or container with warm water and add a small amount of mild dish soap. Submerge the filter cartridge in the soapy water and agitate gently to loosen dirt and debris. Rinse the cartridge thoroughly with clean water to remove any soap residue.
  4. Lemon Juice and Baking Soda Soak: Lemon juice contains citric acid, which can help dissolve mineral deposits and stains on pool filter cartridges. Combine lemon juice with baking soda to create a powerful cleaning solution. Mix equal parts lemon juice and baking soda to form a paste, then apply the paste to the filter cartridge and let it sit for several hours. Rinse the cartridge thoroughly with clean water to remove any residue.

Additional Tips for Cleaning Pool Filter Cartridges:

  • Use a Pressure Washer: If stubborn debris or buildup remains on the filter cartridge, you can use a pressure washer to dislodge it. Use a low-pressure setting to avoid damaging the cartridge material, and work from top to bottom to ensure thorough cleaning.
  • Rotate Cartridges: To extend the lifespan of your pool filter cartridges, consider having multiple cartridges on hand and rotating them regularly. This allows you to clean and dry one cartridge while the other is in use, ensuring continuous filtration and optimal performance.
  • Regular Maintenance: Make a habit of cleaning your pool filter cartridges regularly, ideally every few weeks during the peak swimming season. This helps prevent clogging and ensures consistent water flow and filtration efficiency.

Conclusion:

Maintaining clean pool filter cartridges is essential for ensuring optimal filtration and water quality in your swimming pool. With these DIY pool filter cartridge cleaner recipes and methods, you can effectively remove dirt, debris, and stains from your cartridges using simple household ingredients. By incorporating regular cartridge cleaning into your pool maintenance routine, you can enjoy sparkling clean pool water and a more enjoyable swimming experience all season long.

???? Recommended Products

Based on the topics covered in this article, here are our top product picks to help you maintain a healthy, sparkling pool:

As an Amazon Associate, we earn from qualifying purchases. Prices are approximate and may vary.

Dealing with Excess Algaecide in Your Pool: Causes and Solutions

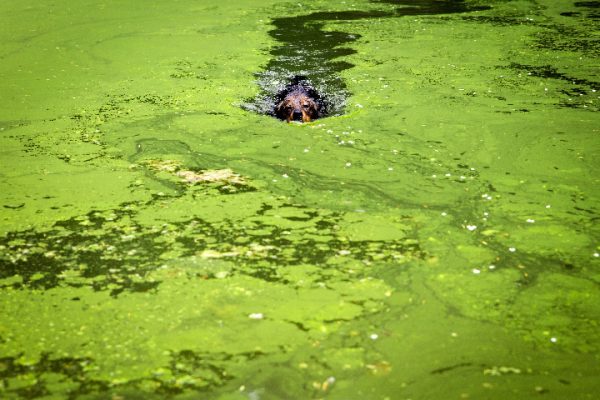
Algaecides are essential chemicals used in pool maintenance to prevent and treat algae growth, helping to keep pool water clean and clear. However, using too much algaecide can lead to unintended consequences and potential problems for pool owners. In this article, we’ll explore the causes of excess algaecide in your pool, the signs to look out for, and actionable solutions to address this issue and restore optimal water balance.

Understanding Algaecide in Pool Water:

Algaecides are chemical compounds specifically formulated to inhibit the growth of algae in pool water. They work by disrupting algae cell walls or inhibiting photosynthesis, preventing algae from thriving and multiplying. While algaecides are effective at controlling algae, using them in excess can lead to imbalanced water chemistry and potential side effects.

Causes of Excess Algaecide:

  1. Overdosing: Adding too much algaecide to your pool water, either intentionally or inadvertently, can lead to excess levels of the chemical. Overdosing may occur when following incorrect dosage instructions, using a concentrated algaecide product, or adding algaecide too frequently.
  2. Cumulative Buildup: Algaecide residues can accumulate in pool water over time, especially if algaecide treatments are applied frequently or if a residual algaecide product is used. This buildup can result in excess algaecide levels and potential water chemistry imbalances.

Signs of Excess Algaecide:

  1. Foaming: Excess algaecide in pool water can cause foaming, especially when combined with other pool chemicals or agitation from pool equipment. Foam may accumulate on the pool surface or persist when water is agitated, indicating a potential imbalance.
  2. Cloudy Water: Cloudiness or turbidity in pool water can result from excess algaecide levels, as well as other water chemistry imbalances. Cloudiness may indicate a buildup of algaecide residues or reaction byproducts, impairing water clarity.
  3. Skin and Eye Irritation: High concentrations of algaecide in pool water can cause skin and eye irritation in swimmers. Symptoms may include redness, itching, or discomfort after swimming, indicating a potential imbalance or chemical overdose.

Solutions for Addressing Excess Algaecide:

  1. Dilute the Pool Water: If you suspect excess algaecide levels in your pool, diluting the water by partially draining and refilling the pool can help reduce algaecide concentrations. Monitor water chemistry and adjust chemical levels as needed to restore balance.
  2. Enhance Filtration and Circulation: Increasing filtration and circulation in your pool can help remove excess algaecide residues and restore water clarity. Run the pool pump and filter system for longer periods, and clean or backwash the filter as needed to improve efficiency.
  3. Test and Adjust Water Chemistry: Regularly test pool water chemistry using a reliable pool water test kit and adjust chemical levels as needed to maintain balance. Pay close attention to algaecide levels, as well as pH, chlorine, and alkalinity, and take corrective action to restore optimal water balance.
  4. Consult a Pool Professional: If you’re unsure how to address excess algaecide in your pool or if the problem persists despite your efforts, consider consulting with a pool professional or water chemistry expert. They can assess the situation, provide recommendations for corrective action, and help restore water quality.

Conclusion:

While algaecides are valuable tools for preventing and treating algae growth in pools, using too much algaecide can lead to unintended consequences and potential water chemistry imbalances. By understanding the causes and signs of excess algaecide and taking proactive measures to address the issue, pool owners can restore optimal water balance and maintain a clean and healthy swimming environment. Regular monitoring of water chemistry, proper dosage of algaecide, and prompt corrective action are essential for ensuring the effective and safe use of algaecides in pool maintenance.

???? Recommended Products

Based on the topics covered in this article, here are our top product picks to help you maintain a healthy, sparkling pool:

As an Amazon Associate, we earn from qualifying purchases. Prices are approximate and may vary.

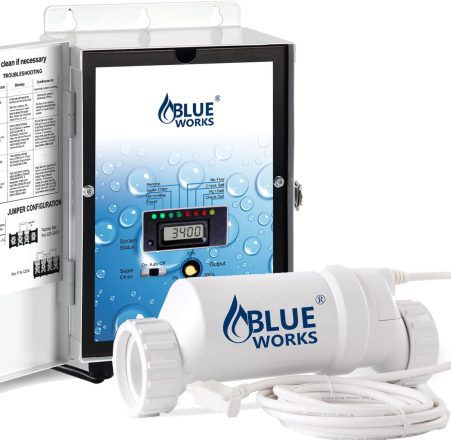
The Benefits of Adding Salt to Your Freshwater Pool: Exploring a Safer and More Comfortable Swimming Experience

When it comes to pool maintenance, many homeowners seek alternatives to traditional chlorine-based systems. One increasingly popular option is converting a freshwater pool into a saltwater pool by adding salt. While it may seem counterintuitive to add salt to a freshwater pool, the benefits of doing so are numerous. In this article, we’ll explore why someone might consider adding salt to their freshwater pool and the advantages it offers for a safer, more comfortable, and lower-maintenance swimming experience.

1. Gentler on Skin and Eyes:

One of the primary reasons for converting to a saltwater pool is the softer feel of the water. Saltwater pools have lower chlorine concentrations compared to traditional chlorine pools, resulting in water that is gentler on the skin and eyes. Swimmers are less likely to experience skin irritation, redness, or dryness after swimming in a saltwater pool, making it a more comfortable experience overall.

2. Reduced Chlorine Smell and Taste:

Saltwater pools produce chlorine through electrolysis, resulting in a more consistent and controlled release of chlorine into the water. This means there is less chloramine formation, which is responsible for the strong chlorine smell and taste often associated with traditional chlorine pools. As a result, swimmers in saltwater pools are less likely to experience unpleasant odors or tastes, enhancing the swimming experience.

3. Lower Maintenance Requirements:

Saltwater pools require less frequent monitoring and maintenance compared to traditional chlorine pools. Once the salt level is properly balanced, the salt chlorinator system automatically generates chlorine as needed, eliminating the need for manual chlorine additions. This can save homeowners time and effort in maintaining their pool, allowing them to spend more time enjoying it.

4. Cost Savings Over Time:

While the initial cost of installing a salt chlorinator system may be higher than traditional chlorine systems, saltwater pools can lead to cost savings over time. With fewer chemical additions and lower maintenance requirements, homeowners can reduce their spending on pool chemicals and maintenance products in the long run. Additionally, the extended lifespan of pool equipment due to reduced exposure to harsh chemicals can further contribute to cost savings.

5. Eco-Friendly Option:

Saltwater pools are often considered a more environmentally friendly option compared to traditional chlorine pools. With fewer chemical additions and lower chlorine concentrations, saltwater pools produce fewer harmful byproducts and reduce the overall environmental impact associated with pool maintenance. Additionally, salt is a natural and abundant resource, making it a sustainable choice for pool sanitation.

Conclusion:

Adding salt to a freshwater pool to convert it into a saltwater pool offers numerous benefits for homeowners seeking a safer, more comfortable, and lower-maintenance swimming experience. From gentler water that is easier on the skin and eyes to reduced chlorine smell and taste, saltwater pools provide a more enjoyable swimming environment for the whole family. With lower maintenance requirements and cost savings over time, saltwater pools are an attractive option for homeowners looking to enhance their pool experience while minimizing the environmental impact. If you’re considering converting your freshwater pool to a saltwater pool, explore the benefits further and consult with a pool professional to determine if it’s the right choice for you.

???? Recommended Products

Based on the topics covered in this article, here are our top product picks to help you maintain a healthy, sparkling pool:

As an Amazon Associate, we earn from qualifying purchases. Prices are approximate and may vary.

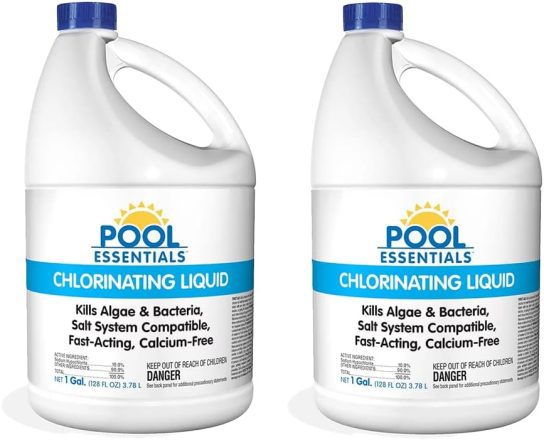
How Much Liquid Chlorine to Add to Pool

Maintaining proper chlorine levels is essential for ensuring clean and safe swimming pool water. Liquid chlorine is a popular choice for pool owners due to its convenience and effectiveness in sanitizing pool water. However, knowing how much liquid chlorine to add and how to add it properly is crucial to avoid over chlorination or under chlorination. In this article, we’ll provide a comprehensive guide on determining the correct dosage of liquid chlorine for your pool and the best practices for adding it to maintain optimal water quality.

Calculating the Proper Dosage of Liquid Chlorine:

    1. Test Your Pool Water: Before adding liquid chlorine to your pool, use a reliable pool water test kit to measure the current chlorine level. The ideal chlorine range for most pools is between 1.0 to 3.0 parts per million (ppm).
    2. Determine Required Dosage: Calculate the amount of liquid chlorine needed to raise the chlorine level to the desired range based on your pool’s volume. Refer to a chlorine dosing chart or use an online calculator to determine the appropriate dosage. https://poolchemicalcalculator.com/Pool-Free-Chlorine-Calculator.html
    3. Consider Chlorine Demand: Factors such as sunlight exposure, bather load, and water temperature can affect chlorine demand. Adjust your dosage accordingly to compensate for these factors and maintain adequate sanitation.

How to Add Liquid Chlorine to Your Pool:

  1. Choose the Right Time: It’s best to add liquid chlorine to your pool in the evening or at night to minimize sunlight exposure, which can cause rapid chlorine degradation. This allows the chlorine to work more effectively and last longer in the water.
  2. Pre-Dilute for Even Distribution: To ensure even distribution of chlorine throughout the pool water, pre-dilute the liquid chlorine in a bucket of water before adding it to the pool. This helps prevent localized over chlorination and minimizes the risk of damaging pool surfaces or equipment.
  3. Pour Diluted Chlorine Slowly: With the pool pump running, slowly pour the diluted liquid chlorine solution around the perimeter of the pool while walking around the edge. Avoid pouring the chlorine directly into the skimmer or near pool fixtures to prevent damage.
  4. Brush Pool Surfaces: After adding liquid chlorine to the pool, use a pool brush to gently brush the pool surfaces, including walls and floors. This helps distribute the chlorine evenly and ensures thorough mixing with the pool water.
  5. Wait Before Swimming: Allow sufficient time for the liquid chlorine to disperse and mix with the pool water before swimming. This typically takes about 30 minutes to 1 hour, depending on the circulation and filtration system.
  6. Monitor Chlorine Levels: After adding liquid chlorine to the pool, retest the chlorine levels periodically to ensure they remain within the recommended range. Adjust the dosage as needed to maintain proper sanitation and water quality.

Safety Precautions:

  • Wear appropriate protective gear, including gloves and eye protection, when handling liquid chlorine to avoid skin and eye irritation.
  • Store liquid chlorine in a cool, well-ventilated area away from direct sunlight and heat sources.
  • Keep liquid chlorine out of reach of children and pets, and never mix it with other pool chemicals.

Conclusion:

Adding liquid chlorine to your pool is a straightforward process that requires careful calculation and proper dosing to maintain optimal water quality and safety. By following the guidelines outlined in this guide and taking necessary safety precautions, you can effectively sanitize your pool water and enjoy a clean and inviting swimming environment all season long. Remember to test chlorine levels regularly and adjust dosage as needed to keep your pool water balanced and crystal clear.


Recommended Products

As an Amazon Associate, we earn from qualifying purchases.

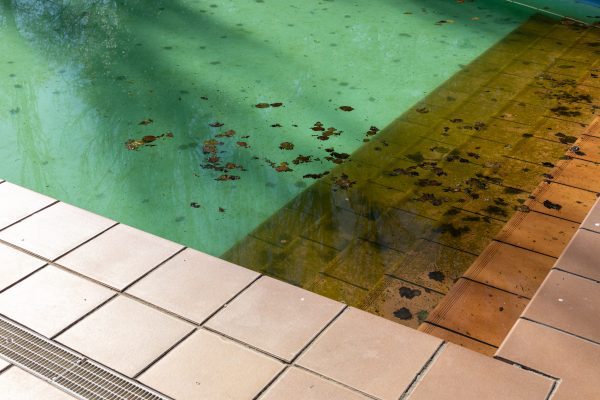
Dealing with Black Spots in Your Pool: Causes and Solutions

Black spots in a pool can be a frustrating sight for any pool owner, especially when they persist despite regular cleaning and maintenance efforts. While black spots are often associated with algae growth, they can also be caused by other factors such as mineral deposits, metal staining, or even organic debris. In this blog post, we’ll explore the possible causes of black spots in a pool that aren’t algae and discuss effective strategies for getting rid of them to restore your pool’s clarity and beauty.

Identifying the Causes of Black Spots:

  1. Metal Staining: Metals such as iron, copper, or manganese can leach into pool water from various sources, including water sources, pool equipment, or metal fixtures. When these metals oxidize, they can form dark stains or discoloration on pool surfaces.
  2. Mineral Deposits: Calcium, magnesium, and other minerals present in pool water can accumulate on pool surfaces over time, especially in areas with high evaporation rates or hard water. These deposits can appear as dark spots or scaling on pool walls, floors, or tile grout.
  3. Organic Debris: Decomposing organic matter, such as leaves, twigs, or insects, can settle on pool surfaces and create black spots or stains as they break down. These spots may appear in areas with poor circulation or where debris tends to accumulate.

Strategies for Removing Black Spots:

  1. Metal Stain Removers: Commercial metal stain removers are available that can effectively dissolve and remove metal stains from pool surfaces. Follow the manufacturer’s instructions carefully when using these products and consider conducting a spot test in an inconspicuous area before widespread application.
  2. Ascorbic Acid Treatment: Ascorbic acid, commonly known as vitamin C, can be used to effectively remove metal stains from pool surfaces. Dissolve ascorbic acid powder in water and apply the solution directly to affected areas. Allow the solution to sit for several minutes, then scrub the stains with a pool brush before rinsing thoroughly.
  3. Chelating Agents: Chelating agents such as EDTA (ethylenediaminetetraacetic acid) or HEDP (1-hydroxyethylidene-1,1-diphosphonic acid) can help sequester metals in the water, preventing them from depositing onto pool surfaces. Regular use of chelating agents can help prevent future metal staining.
  4. Acid Washing: In severe cases of mineral deposits or staining, acid washing may be necessary to restore the appearance of pool surfaces. Acid washing involves applying a diluted acid solution to the pool surfaces to dissolve and remove stubborn stains and deposits. Due to the caustic nature of acid washing, it’s best left to professional pool service technicians.
  5. Preventative Measures: To prevent the recurrence of black spots, maintain proper water chemistry and balance, including pH, alkalinity, and calcium hardness levels. Regularly clean and brush pool surfaces to remove debris and prevent buildup.

Conclusion:

Black spots in a pool can be unsightly and frustrating to deal with, especially when they’re not caused by algae growth. By identifying the underlying causes of black spots and implementing appropriate removal strategies, you can effectively restore your pool’s clarity and beauty. Whether dealing with metal staining, mineral deposits, or organic debris, there are various solutions available to address the issue and prevent recurrence. With proper maintenance and preventative measures, you can enjoy a clean and inviting swimming environment all season long.

???? Recommended Products

Based on the topics covered in this article, here are our top product picks to help you maintain a healthy, sparkling pool:

As an Amazon Associate, we earn from qualifying purchases. Prices are approximate and may vary.

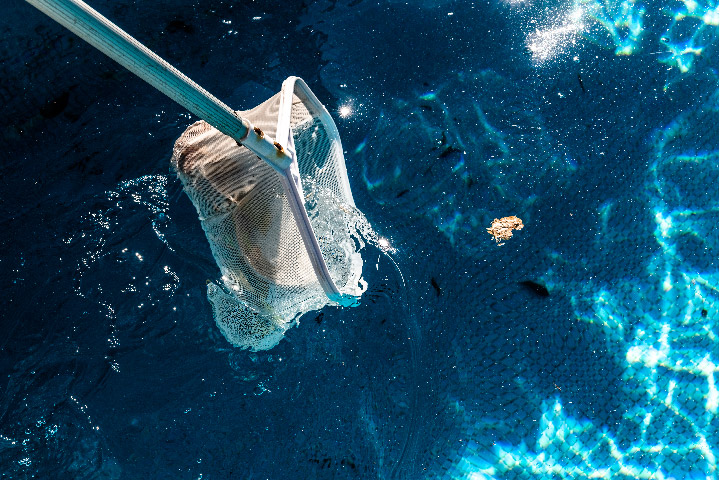
DIY Guide: Making Homemade Pool Flocculant for Crystal-Clear Water

Achieving crystal-clear pool water is a top priority for every pool owner, but sometimes standard filtration methods aren’t enough to remove fine particles and debris. In such cases, pool flocculant can be a game-changer. While commercial flocculants are readily available, making your own homemade pool flocculant is a cost-effective and environmentally friendly alternative. In this blog post, we’ll explore how to make homemade pool flocculant using simple ingredients and easy-to-follow methods.

What is Pool Flocculant?

Pool flocculant is a chemical additive that helps clarify pool water by causing suspended particles to clump together, making them easier to remove through filtration or vacuuming. Flocculants work by coagulating tiny particles, such as dirt, algae, and other debris, into larger clumps that can be easily captured by the pool’s filtration system.

Ingredients for Homemade Pool Flocculant:

  1. Alum (Aluminum Sulfate): Alum is a common flocculant used in water treatment and can be found in powdered form at most hardware or pool supply stores. It acts as a coagulant, binding suspended particles together to facilitate removal from the water.
  2. Water: Tap water or distilled water can be used as a solvent to dissolve the alum powder and create the flocculant solution.

DIY Methods for Making Homemade Pool Flocculant:

Method 1: Alum Solution

  1. Measure Ingredients: In a clean container, measure out the desired amount of alum powder based on your pool size and water condition. A typical dosage is approximately 1 tablespoon of alum per 10,000 gallons of pool water.
  2. Dissolve Alum: Add the alum powder to a bucket of warm water, stirring continuously until the powder is completely dissolved. Use a stirring stick or spoon to ensure thorough mixing.
  3. Allow Settling: Let the alum solution sit undisturbed for several hours or overnight to allow any undissolved particles to settle to the bottom of the container.
  4. Decant Clear Solution: Carefully pour off the clear liquid from the top of the container, leaving behind any sediment or residue at the bottom. The clear liquid is your homemade pool flocculant solution, ready to be added to the pool.

Method 2: Alum Sock

  1. Prepare Alum Sock: Place a clean sock or nylon stocking inside a plastic container or bucket. Fill the sock with alum powder, tying off the open end securely to create a makeshift filter bag.
  2. Soak in Water: Submerge the alum sock in a bucket of warm water, allowing the water to permeate the sock and dissolve the alum powder gradually.
  3. Wait for Dissolution: Allow the alum sock to soak in the water for several hours or overnight, periodically agitating or squeezing the sock to facilitate the release of the dissolved alum into the water.
  4. Use the Solution: Once the alum powder has fully dissolved, remove the alum sock from the bucket, and discard it. The water in the bucket is now your homemade pool flocculant solution, ready to be added to the pool.

Application of Homemade Pool Flocculant:

  1. Turn Off Pool Equipment: Before adding the homemade flocculant to the pool, turn off the pool pump and filtration system to allow the water to become still.
  2. Pour Flocculant Solution: Carefully pour the homemade flocculant solution around the perimeter of the pool, ensuring even distribution across the water surface.
  3. Wait for Settling: Allow the flocculant to work its magic by causing suspended particles to clump together and settle to the bottom of the pool. This process may take several hours or overnight, depending on the severity of the cloudiness.
  4. Vacuum or Backwash: Once the particles have settled, use a pool vacuum or backwash the filter to remove the sediment from the pool bottom. Be cautious not to disturb the settled particles while vacuuming.
  5. Monitor and Adjust: After vacuuming, monitor the water clarity and adjust filtration settings as needed to maintain optimal water quality. Repeat the flocculation process if necessary to achieve the desired level of clarity.

Safety Precautions:

  • Always wear gloves and eye protection when handling alum powder to prevent skin and eye irritation.
  • Keep children and pets away from the flocculant solution and pool area during the application and settling process.
  • Dispose of any unused alum solution properly and according to local regulations.

Conclusion:

Making homemade pool flocculant is a simple and cost-effective way to achieve crystal-clear water in your swimming pool. By using readily available ingredients and following easy-to-follow methods, you can effectively clarify pool water and enjoy a pristine swimming experience. Whether you choose to dissolve alum powder in water or create an alum sock filter, homemade pool flocculant offers an environmentally friendly alternative to commercial products without sacrificing effectiveness. Experiment with different dosages and methods to find the best solution for your pool’s needs, and enjoy sparkling clean water all season long.

???? Recommended Products

Based on the topics covered in this article, here are our top product picks to help you maintain a healthy, sparkling pool:

As an Amazon Associate, we earn from qualifying purchases. Prices are approximate and may vary.

Clarifier vs. Flocculant: Understanding Their Role in Pool Maintenance

Clear, sparkling pool water is not only aesthetically pleasing but also essential for a safe and enjoyable swimming experience. To achieve pristine water clarity, pool owners often turn to chemical additives such as clarifiers and flocculants. In this blog post, we’ll explore the differences between clarifiers and flocculants, how they work, and when to use them in pool maintenance routines.

Clarifier: Enhancing Water Clarity

Clarifiers are chemical additives designed to improve water clarity by coagulating small particles suspended in the pool water. These particles, including dirt, debris, and microscopic algae, are often too small to be captured by the pool’s filtration system and can contribute to cloudy or dull water. Clarifiers work by causing these tiny particles to clump together, forming larger aggregates that are easier for the filter to trap and remove.

How Clarifiers Work:

  1. Dispersing Agent: Clarifiers contain a dispersing agent that helps evenly distribute the chemical throughout the pool water.
  2. Coagulation: Once dispersed, the clarifier attracts and binds to suspended particles, causing them to clump together.
  3. Filtration: The larger particle aggregates formed by the clarifier are captured by the pool’s filter, resulting in clearer water.

When to Use Clarifiers:

  • Use clarifiers when pool water appears cloudy or dull due to the presence of fine particles that cannot be effectively filtered out.
  • Clarifiers are especially helpful after heavy pool usage, following a storm, or during periods of high pollen or debris accumulation.

Flocculant: Settling Suspended Particles

Flocculants, often referred to as “floc,” are powerful chemical agents that work by causing suspended particles in the pool water to clump together and settle to the bottom of the pool. Unlike clarifiers, which form larger particle aggregates that are captured by the filter, flocculants create visible clumps that can be vacuumed or manually removed from the pool.

How Flocculants Work:

  1. Aggregation: Flocculants bind to suspended particles in the water, causing them to aggregate and form visible clumps.
  2. Settling: The heavy clumps created by the flocculant quickly settle to the bottom of the pool, taking the suspended particles with them.
  3. Removal: Once settled, the particles can be removed from the pool by vacuuming the pool floor or manually scooping them out.

When to Use Flocculants:

  • Flocculants are best used when pool water is excessively cloudy or turbid, indicating a high concentration of suspended particles.
  • Use flocculants as a last resort when other methods, such as filtration and clarifiers, have failed to improve water clarity.

Conclusion:

Clarifiers and flocculants are valuable tools in the pool owner’s arsenal for achieving and maintaining clear, sparkling water. While clarifiers work by coagulating small particles to improve filtration efficiency, flocculants cause suspended particles to settle to the bottom of the pool for easy removal. By understanding the differences between clarifiers and flocculants and knowing when to use each product, pool owners can effectively combat cloudy water and enjoy a pristine swimming environment all season long. Remember to follow manufacturer instructions and proper dosing guidelines when using clarifiers and flocculants to ensure safe and effective results.

???? Recommended Products

Based on the topics covered in this article, here are our top product picks to help you maintain a healthy, sparkling pool:

As an Amazon Associate, we earn from qualifying purchases. Prices are approximate and may vary.