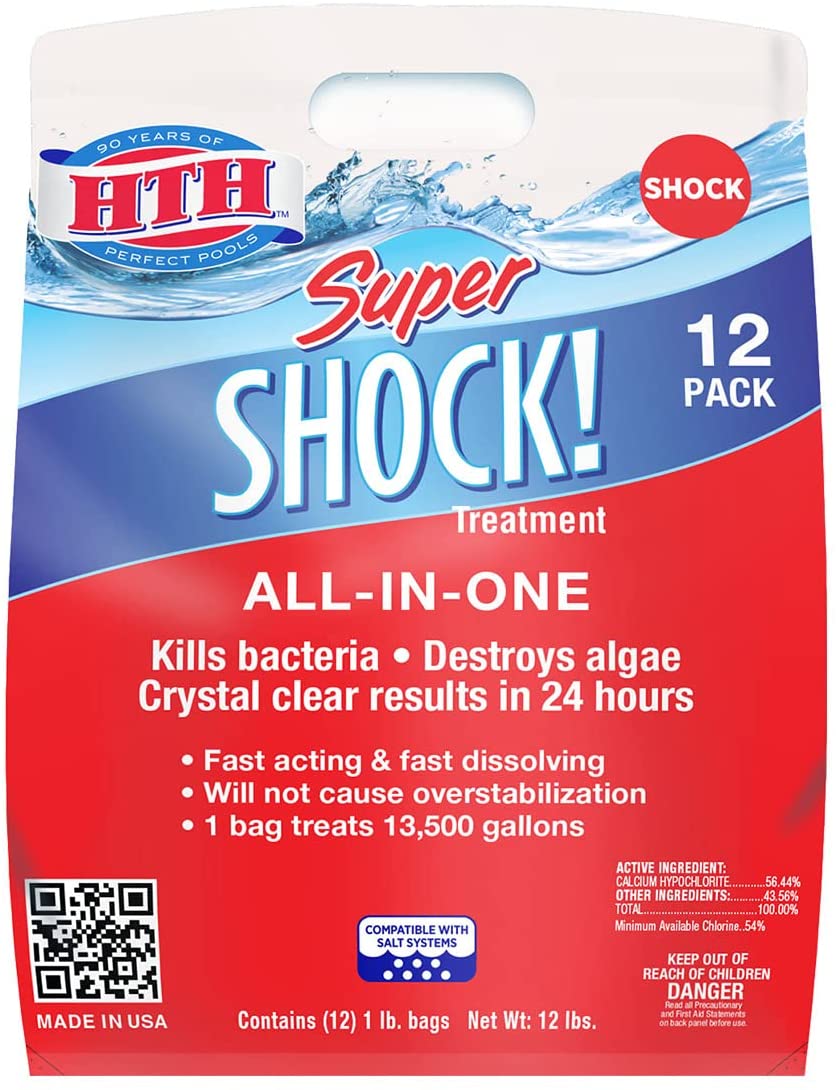
Can You Over Shock a Pool? Understanding Pool Shocking and What to Do

If you’re a pool owner, you’re likely familiar with the process of shocking your pool. Shocking is an essential part of pool maintenance, as it helps eliminate bacteria, algae, and other contaminants that can build up in the water. However, there’s a common question that arises among pool owners: can you over shock a pool? In this blog post, we’ll explore the concept of pool shocking, whether it’s possible to overdo it, and what to do if you find yourself in this situation.

Understanding Pool Shocking

Before diving into the question of whether you can over shock a pool, let’s first understand what pool shocking entails. Pool shocking involves adding a concentrated dose of chlorine or other chemical sanitizers to the pool water. This high dosage rapidly raises the chlorine level in the water, effectively killing off bacteria, algae, and other organic contaminants.

Can You Over Shock a Pool?

The short answer is yes, it is possible to over shock a pool. Over shocking occurs when you add too much chlorine or other shock treatment to the pool water, resulting in excessively high levels of sanitizer. While shocking is necessary to maintain clean and safe swimming conditions, excessive shock treatment can lead to several issues:

  1. Damage to Pool Equipment: High levels of chlorine can corrode pool equipment such as pumps, filters, and liners, leading to premature wear and tear.
  2. Skin and Eye Irritation: Excessive chlorine levels can cause skin and eye irritation for swimmers, leading to discomfort and potential health risks.
  3. Bleached Pool Surfaces: Over shocking can also cause pool surfaces, such as liners and tiles, to become bleached or discolored due to the high concentration of chlorine.
  4. Environmental Impact: Discharging excess chlorine into the environment can harm plants, wildlife, and aquatic ecosystems, leading to ecological imbalances.

What to Do if You Over Shock Your Pool

If you find yourself in a situation where you’ve over shocked your pool, don’t panic. Here are some steps you can take to rectify the situation:

  1. Test the Water: Use a pool testing kit to measure the chlorine levels in the water. This will give you an idea of how much excess chlorine is present.
  2. Dilute the Water: One way to reduce chlorine levels is to dilute the pool water by adding fresh water. You can do this by partially draining the pool and refilling it with clean water.
  3. Neutralize the Chlorine: There are products available specifically designed to neutralize chlorine in pool water. Follow the manufacturer’s instructions carefully when using these products to avoid further complications.
  4. Monitor the Water: Continue testing the pool water regularly to ensure that chlorine levels return to a safe range. You may need to repeat the dilution or neutralization process until the chlorine levels are within acceptable limits.
  5. Prevent Future Over Shocking: To avoid over shocking your pool in the future, carefully follow the manufacturer’s instructions when adding shock treatment. It’s also a good idea to regularly test the pool water and maintain proper chemical balance to prevent the need for excessive shock treatment.

In conclusion, while shocking is an essential part of pool maintenance, it’s important to exercise caution to avoid over shocking your pool. By understanding the potential risks and taking appropriate measures to correct any over shocking incidents, you can maintain a clean, safe, and enjoyable swimming environment for you and your family.

How to Identify and Repair Cracks in Your Pool Surface

A pristine and inviting pool can be a centerpiece of your outdoor oasis, offering relaxation and enjoyment for your family and friends. However, over time, your pool’s surface may develop cracks, which not only affect its aesthetic appeal but also its structural integrity. Identifying and addressing these cracks promptly is crucial to prevent further damage and maintain your pool’s functionality. In this blog, we will guide you through the process of identifying cracks in your pool surface and provide you with tips on how to deal with them effectively.

Identifying Pool Surface Cracks

  1. Visual Inspection: Begin by conducting a thorough visual inspection of your pool’s surface. Look for any irregularities, such as fine lines or fissures. Cracks can vary in size, so be vigilant in examining every inch of the pool.
  2. Feel for Texture Changes: Run your fingers over the pool surface, paying attention to any changes in texture. Cracks often result in rough or jagged areas that can be detected by touch.
  3. Listen for Hollow Sounds: Gently tap the pool surface with a rubber mallet or the handle of a screwdriver. If you hear a hollow sound or notice a difference in sound when tapping different areas, it could indicate the presence of a crack beneath the surface.
  4. Water Loss: If you notice an unexplained drop in your pool’s water level, it may be due to cracks. While this is not a definitive test, it can be a sign of a problem.

Types of Pool Cracks

Understanding the type of crack in your pool’s surface is essential for effective repair. Here are some common types:

  1. Hairline Cracks: Hairline cracks are small and usually less than 1/16 of an inch wide. They may not initially cause significant problems but can grow over time if left unaddressed.
  2. Structural Cracks: These cracks are more significant and can jeopardize the pool’s structural integrity. They often require professional attention.
  3. Surface Cracks: Surface cracks are typically cosmetic and do not penetrate deep into the pool’s structure. They can be repaired relatively easily.


Dealing with Pool Surface Cracks

  1. Surface Crack Repair: For minor surface cracks, you can consider a DIY repair using a pool patch kit. Follow the manufacturer’s instructions carefully and ensure the area is clean and dry before applying the patch.
  2. Consult a Professional: For more extensive cracks or structural issues, it’s best to consult a professional pool contractor. They can assess the severity of the problem and recommend the appropriate repair method, which may include structural repairs or even resurfacing the pool.
  3. Preventive Measures: To prevent future cracks, maintain proper water chemistry, and regularly inspect your pool for signs of damage. Properly winterize your pool if you live in an area with freezing temperatures to prevent freeze-thaw damage.
  4. Regular Maintenance: Routine pool maintenance, including cleaning, balancing chemicals, and checking for cracks, can go a long way in preserving your pool’s surface.

Conclusion

Identifying and addressing cracks in your pool surface is crucial for preserving the beauty and functionality of your pool. By conducting regular inspections, understanding the types of cracks, and taking appropriate measures, you can ensure your pool remains a source of enjoyment for years to come. For more significant cracks or structural issues, don’t hesitate to seek professional assistance to keep your pool in top condition. Remember, a well-maintained pool enhances the value of your property and provides endless enjoyment for you and your family.

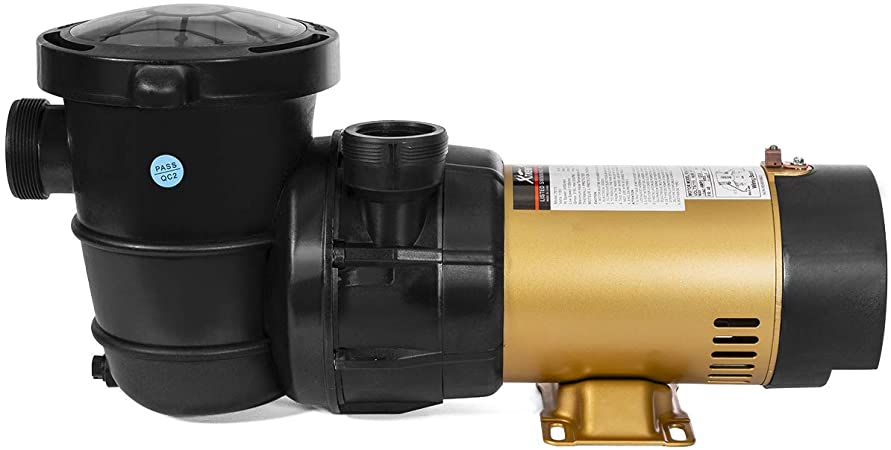
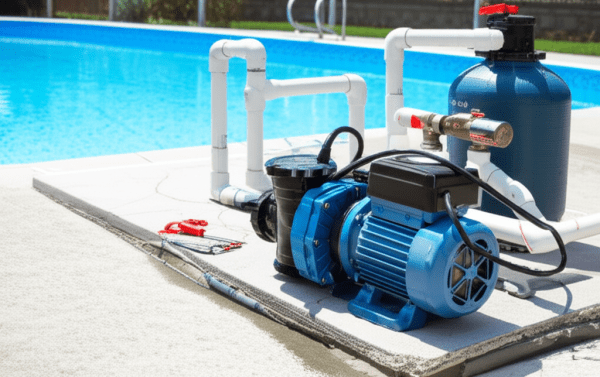
Mastering Hayward Pool Pump Troubleshooting: A Comprehensive Guide

Hayward is a renowned brand in the swimming pool equipment industry, well-known for its reliable and efficient pool pumps. However, like any other mechanical device, Hayward pool pumps may face issues from time to time. As a pool owner, learning how to troubleshoot your Hayward pool pump will save you time, money, and frustration. In this article, we’ll guide you through the most common Hayward pool pump problems and their solutions, empowering you to tackle any issues with confidence and ease.

  1. Problem: Pump Won’t Start or Stops Running

Solution:

  • Check for power: Ensure that the pump is receiving power by inspecting the circuit breaker, GFCI outlet, and any electrical connections. Reset the breaker or GFCI if needed.
  • Inspect the capacitor: If your pump tries to start but quickly stops or hums, the capacitor may be faulty. Replace the capacitor if necessary.
  • Check for debris: Clear any debris obstructing the impeller, as this can prevent the pump from starting.
  1. Problem: Pump Loses Prime or Sucks in Air


Solution:

  • Inspect the suction line: Look for any leaks in the suction line, and repair or replace the line if needed.
  • Check the water level: Ensure that the pool water level is high enough to cover the skimmer’s opening to prevent air from entering the system.
  • Examine the pump lid: Make sure the pump lid is properly sealed and replace the lid O-ring if it’s damaged.
  1. Problem: Pump is Noisy or Vibrates Excessively

Solution:

  • Check the motor bearings: If the pump emits a high-pitched whining noise, the motor bearings may be worn or damaged. Replace the bearings or the entire motor if necessary.
  • Inspect the impeller: Remove any debris from the impeller, as this can cause vibration and noise.
  • Secure the pump: Ensure that the pump is properly mounted and fastened to a stable base.
  1. Problem: Reduced Water Flow or Pressure

Solution:

  • Clean the filter: Inspect the pool filter and clean or replace the filter elements if needed.
  • Examine the pump basket: Empty the pump basket and remove any debris that may be obstructing water flow.
  • Check the pool valves: Make sure that all pool valves are open and functioning correctly.
  1. Problem: Pump Overheating

Solution:

  • Verify the pump’s voltage: Ensure that the pump is receiving the correct voltage according to the manufacturer’s specifications. An incorrect voltage can cause overheating.
  • Allow proper ventilation: Make sure the pump has adequate ventilation and is not exposed to direct sunlight for extended periods.
  • Check for debris: Remove any debris from the pump’s impeller, as this can cause the pump to work harder and overheat.

Conclusion:

By understanding the common issues and troubleshooting steps for your Hayward pool pump, you can ensure that your pool stays clean and clear, providing endless enjoyment for you and your family. Regular maintenance and vigilance can help prevent many of these issues from arising in the first place. However, if you’re ever in doubt or facing a complex problem, don’t hesitate to consult a pool professional for assistance.

If you pump is still under warranty you can contact Hayward here. https://hayward.com/support/resources/warranty

Hayward also has a great support center. https://hayward.com/support/support-center/


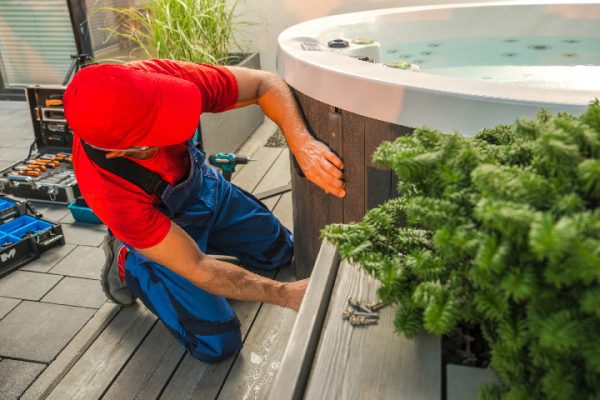
Understanding Chlorine Levels in Swimming Pools and Spas: The Ultimate Guide

Chlorine plays a vital role in keeping swimming pools and spas clean, safe, and free of harmful microorganisms. Maintaining the proper chlorine levels is essential for ensuring a comfortable swimming experience and preventing issues such as algae growth and waterborne illnesses. In this article, we will discuss the optimal chlorine levels for swimming pools and spas and why it is crucial to monitor and maintain them consistently.

Ideal Chlorine Levels for Swimming Pools and Spas

  1. Free Chlorine

Free chlorine is the active, sanitizing form of chlorine in pool water. It eliminates bacteria, viruses, and organic contaminants, keeping the water clean and safe. The ideal free chlorine level for swimming pools and spas should fall within the following ranges:

  • Swimming Pools: 1.0 – 3.0 ppm (parts per million)
  • Spas: 3.0 – 5.0 ppm
  1. Combined Chlorine

Combined chlorine, also known as chloramines, forms when free chlorine reacts with organic contaminants, such as sweat, urine, and body oils. Chloramines are less effective sanitizers and can cause eye and skin irritation, as well as a strong chlorine smell. The combined chlorine level should be as close to 0 ppm as possible, but no higher than 0.5 ppm.

  1. Total Chlorine

Total chlorine is the sum of free chlorine and combined chlorine. Ideally, the total chlorine level should be equal to the free chlorine level, indicating that there is no combined chlorine present. If the total chlorine level is significantly higher than the free chlorine level, it may be necessary to shock the pool or spa to eliminate chloramines.

Why Monitoring and Maintaining Chlorine Levels is Important

  1. Swimmer Comfort and Health

Proper chlorine levels prevent the growth of harmful bacteria and algae, ensuring a safe and enjoyable swimming environment. High chlorine levels can cause skin, eye, and respiratory irritation, while low levels increase the risk of waterborne illnesses.

  1. Pool and Spa Surface Protection

Maintaining the appropriate chlorine levels helps protect pool and spa surfaces from staining and deterioration caused by algae and bacteria growth.

  1. Equipment Longevity

Proper chlorine levels help prevent the buildup of organic material and scale deposits on pool and spa equipment, such as filters and pumps, ensuring their longevity and efficiency.

  1. Water Clarity

Maintaining optimal chlorine levels helps keep pool and spa water clear and inviting. Low chlorine levels can lead to cloudy water and algae blooms, while high levels may cause the water to turn green or develop a strong chlorine odor.

How to Monitor and Maintain Chlorine Levels

  1. Test Regularly

Use a reliable pool water test kit or test strips to measure chlorine levels at least once a week for swimming pools and twice a week for spas. More frequent testing may be necessary during periods of heavy use, after rainstorms, or when water chemistry is unbalanced.

  1. Adjust Chlorine Levels

If chlorine levels are too low, add a chlorine product, such as tablets, granules, or liquid, following the manufacturer’s recommendations for the appropriate dosage. If chlorine levels are too high, you can lower them by adding a chlorine neutralizer or allowing the sun to naturally dissipate the excess chlorine.

  1. Shock Treatment

Performing a shock treatment, which involves adding a large dose of chlorine, can help eliminate chloramines and restore water clarity. Shock your pool or spa as needed, typically once a week for pools and after every use for spas.

Understanding and maintaining proper chlorine levels in swimming pools and spas is essential for creating a safe, clean, and enjoyable environment for swimmers. By regularly monitoring chlorine levels and making necessary adjustments, you can prevent potential health risks and protect your pool and spa surfaces and equipment. Make sure to invest in a reliable water test kit or test strips and follow the manufacturer’s guidelines for adjusting chlorine levels and performing shock treatments. With consistent attention and care, you can ensure crystal-clear water and a healthy swimming experience for all.

Using Sulfuric Acid in Swimming Pools: Should You Use It or Is There a Better Option?

Explore the use of sulfuric acid in swimming pools, its applications, and whether there are safer and more effective alternatives for pool maintenance.

Maintaining a healthy and balanced swimming pool requires various chemicals to manage pH levels, sanitize the water, and prevent algae growth. While sulfuric acid is a potential option for pool maintenance, it’s essential to understand its specific applications, safety concerns, and whether there are better alternatives. This article will discuss the use of sulfuric acid in swimming pools and provide recommendations on whether to use it or opt for a different option.

Sulfuric Acid and Its Use in Swimming Pools

Sulfuric acid (H2SO4) is a strong, corrosive acid commonly used in various industrial applications, such as battery manufacturing, fertilizer production, and water treatment. In swimming pools, sulfuric acid can serve as an alternative to muriatic acid (hydrochloric acid) for lowering the pH and total alkalinity levels.

Although sulfuric acid can be effective in adjusting the water balance, it’s not commonly used in residential pools due to its highly corrosive nature and the availability of safer alternatives.

Safety Concerns with Sulfuric Acid

Handling sulfuric acid requires extreme caution as it poses several risks, including:

  1. Corrosion: Sulfuric acid is highly corrosive and can damage pool equipment, including pumps, filters, and heaters, if not used correctly.
  2. Toxic fumes: When added to water, sulfuric acid produces toxic fumes that can cause respiratory issues if inhaled.
  3. Skin and eye irritation: Direct contact with sulfuric acid can lead to severe skin burns and eye damage. Proper protective gear, such as gloves, goggles, and a mask, is necessary when handling this chemical.

Alternative Options for pH and Alkalinity Control

Given the risks associated with sulfuric acid, several safer alternatives are commonly used for pool maintenance:

  1. Muriatic acid (hydrochloric acid): Muriatic acid is a popular option for lowering pH and total alkalinity levels in swimming pools. While still corrosive, it is generally considered safer and easier to handle than sulfuric acid. Always wear protective gear and follow the manufacturer’s guidelines when using muriatic acid.
  2. Sodium bisulfate (dry acid): Sodium bisulfate is a granular acid that can be used as a safer alternative to liquid acids. It’s easier to store and handle, making it an attractive option for residential pool owners. Follow the manufacturer’s instructions for dosage and application.

While sulfuric acid can be effective in managing pH and total alkalinity levels in swimming pools, its highly corrosive nature and associated safety risks make it a less desirable option for residential pool maintenance. Safer and more commonly used alternatives, such as muriatic acid and sodium bisulfate, provide effective pH control with fewer hazards.

When managing your pool’s water chemistry, always prioritize safety and follow the manufacturer’s instructions for handling and applying chemicals. By choosing the appropriate products for your pool and maintaining a regular maintenance routine, you can ensure a clean, healthy, and enjoyable swimming environment.

Pool Clarifier vs. Flocculant: Understanding the Differences and Their Applications

Learn about the differences between pool clarifiers and flocculants, their specific uses, and when to choose one over the other to maintain a clear and sparkling pool.

Maintaining crystal clear water is an essential aspect of pool maintenance. Two common chemical treatments used to achieve this are pool clarifiers and flocculants. Both products serve to remove particles and impurities from your pool water, but they function in different ways and have distinct applications. In this article, we’ll explore the differences between pool clarifiers and flocculants and help you determine which one is best suited for your pool maintenance needs.

Pool Clarifier: Function and Use

A pool clarifier is a chemical product designed to help your pool’s filtration system work more effectively. It works by binding tiny particles, such as dirt, algae, and other debris, into larger clumps called flocs. These flocs are more easily captured by your pool’s filter, resulting in clearer water.

Clarifiers are typically used when the water is slightly cloudy or when there is a higher level of particulate matter present. They are a gentle, gradual solution to improving water clarity, and it may take several days for the clarifier to show significant results.

To use a pool clarifier, simply follow the manufacturer’s instructions for dosage and application. Generally, you will add the recommended amount of clarifier to the pool water, and the circulation system will help disperse the product evenly.

Pool Flocculant: Function and Use

A pool flocculant, also known as a coagulant or floc, is another chemical product designed to clear cloudy pool water. However, it works differently than a clarifier. Flocculants bind particles together into larger flocs, similar to clarifiers, but these flocs become heavy and sink to the pool’s bottom.

Once the particles have settled, they can be vacuumed up manually using a pool vacuum. This process allows for a more rapid and aggressive solution to clearing the water, making it an excellent choice for severely cloudy water or when a quick fix is necessary.


To use a pool flocculant, follow the manufacturer’s instructions for dosage and application. Typically, you will add the recommended amount of flocculant to the pool water, allow the particles to settle overnight, and then vacuum the pool bottom to remove the debris.

Choosing Between Pool Clarifier and Flocculant

When deciding whether to use a pool clarifier or flocculant, consider the following factors:

  1. Severity of Cloudiness: If your pool water is only slightly cloudy, a clarifier may be the best option as it works gently over time. However, if your pool water is extremely cloudy or murky, a flocculant may be more effective for rapid results.
  2. Filtration System: Since clarifiers rely on the pool’s filtration system to remove particles, they work best when your filter is functioning properly. If your filter is not operating optimally or is undersized, a flocculant may be a better choice.
  3. Time and Effort: Using a pool clarifier requires less hands-on effort, as the filtration system does most of the work. On the other hand, using a flocculant requires manual vacuuming after the particles have settled. Consider your availability and willingness to put in the extra effort when choosing between these two products.

Conclusion

Both pool clarifiers and flocculants are effective at removing impurities and improving water clarity, but they have different applications and uses. Consider the severity of the cloudiness, the effectiveness of your pool’s filtration system, and your personal time and effort commitment when deciding which product is best suited for your pool maintenance needs. By choosing the right product for your specific situation, you can efficiently maintain clear and sparkling pool water for a more enjoyable swimming experience.

Remember, maintaining proper water balance, regularly cleaning your pool’s filter, and practicing good pool hygiene will help reduce the need for clarifiers and flocculants. By incorporating these practices into your regular pool maintenance routine, you can minimize the use of chemical treatments and ensure a healthy, clean pool for you and your family to enjoy.

Inground vs. Above Ground Pools: Comparing Costs and Considerations for a 10,000-Gallon Pool

Discover the average costs of installing a 10,000-gallon inground pool vs. an above ground pool, and explore the pros and cons of each option to make an informed decision.

When planning to install a 10,000-gallon swimming pool, one of the most significant decisions you’ll need to make is whether to choose an inground or an above ground pool. Both options have their pros and cons, and costs can vary significantly. In this article, we will break down the average costs of installing a 10,000-gallon inground pool vs. an above ground pool, and provide insight into the advantages and disadvantages of each type.

Comparing Costs: Inground vs. Above Ground Pools

  1. Inground Pool Installation

The cost of installing a 10,000-gallon inground pool can vary widely based on factors such as materials, location, and customization options. On average, homeowners can expect to spend between $35,000 and $65,000 for a 10,000-gallon inground pool. This cost includes excavation, pool materials (concrete, fiberglass, or vinyl liner), pool equipment, and labor. Additional features, such as waterfalls, lighting, and heating systems, can increase the total cost.

  1. Above Ground Pool Installation

Installing a 10,000-gallon above ground pool is typically less expensive than an inground pool. On average, the cost of an above ground pool ranges from $1,500 to $5,000, depending on the materials and quality of the pool. This cost includes the pool kit, installation, and basic pool equipment. However, it does not cover the cost of additional features or decking, which can add several thousand dollars to the overall expense.

Inground Pools: Pros and Cons

Pros:

  • Greater customization options: Inground pools offer more flexibility in terms of design, shape, and size.
  • Enhanced aesthetic appeal: Inground pools often look more attractive and blend seamlessly into the landscape.
  • Increased property value: In many cases, inground pools can increase the value of your home, making them a more appealing option for potential buyers.
  • Longer lifespan: Inground pools, especially those made from concrete, tend to last longer than above ground pools.


Cons:

  • Higher installation and maintenance costs: Inground pools require a more significant upfront investment and can be more expensive to maintain.
  • More complex installation: Installing an inground pool often requires more time and labor compared to above ground options.
  • Permitting and zoning requirements: Inground pool installations may be subject to stricter local regulations, requiring permits and adherence to specific zoning rules.

Above Ground Pools: Pros and Cons

Pros:

  • Lower installation and maintenance costs: Above ground pools are generally less expensive to install and maintain than inground pools.
  • Easier installation: Most above ground pools can be installed more quickly and with less disruption to your property.
  • More accessible for relocation or removal: If you decide to move or no longer want a pool, above ground pools are easier to disassemble and relocate or remove entirely.
  • Fewer permitting and zoning issues: Above ground pools typically have fewer local regulations to navigate, making the installation process smoother.

Cons:

  • Limited customization options: Above ground pools usually come in standard shapes and sizes, offering fewer customization choices.
  • Less aesthetic appeal: Some homeowners may find above ground pools less visually appealing than their inground counterparts.
  • Shorter lifespan: Above ground pools generally have a shorter lifespan, especially if they are made from lower-quality materials.
  • Potential for lower resale value: In some cases, an above ground pool may not add to the property value and may even detract from it in the eyes of potential buyers.

The decision between installing a 10,000-gallon inground pool or an above ground pool depends on your budget, preferences, and long-term plans. In general, inground pools offer greater customization options, a more attractive appearance, and a longer lifespan, but they come with higher installation and maintenance costs. On the other hand, above ground pools are more budget-friendly, easier to install and remove, but may have a shorter lifespan and limited design choices.

When considering which type of pool is best for you, carefully weigh the pros and cons of each option, and factor in the installation and maintenance costs. Consult with pool installation professionals to get a clearer understanding of the specific costs and requirements involved in your area. By doing thorough research and understanding the implications of your decision, you can make the best choice for your home and lifestyle, and enjoy your new pool for years to come.

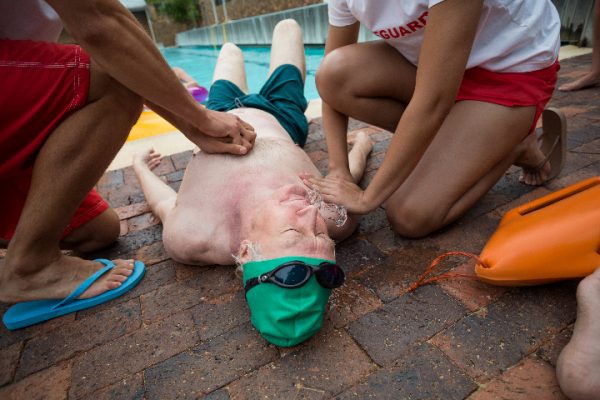
Essential Safety Rules for Swimming After Adding Pool Chemicals

Discover the crucial safety rules you should follow when swimming after adding pool chemicals. Learn how to keep your family safe and enjoy a pristine pool experience.

A well-maintained swimming pool is essential for enjoying those warm, sunny days with family and friends. Properly balancing and adding pool chemicals plays a significant role in keeping your pool safe and clean. However, diving in too soon after treating your pool with chemicals can have adverse effects on your health. In this blog, we will explain the essential safety rules to follow when swimming after adding pool chemicals, ensuring a safe and enjoyable experience for everyone.

  1. Wait for Pool Chemicals to Disperse

The first rule to follow when swimming after adding pool chemicals is allowing enough time for the chemicals to disperse evenly throughout the water. Chlorine and other chemical treatments can cause skin and eye irritation if not adequately diluted. The standard waiting period is typically 30 minutes to an hour after adding chemicals, but it’s essential to refer to the manufacturer’s recommendations for specific guidelines.

  1. Test Water Balance Levels

Before jumping back in, ensure your pool water is correctly balanced by testing the pH, chlorine, and other essential levels. Ideal pH levels should be between 7.2 and 7.6, while free chlorine should range from 1 to 3 parts per million (ppm). Use a reliable pool test kit or test strips to determine the water balance, and only swim once the levels are within the recommended ranges.

  1. Proper Ventilation and Pool Circulation


When adding pool chemicals, it’s crucial to have proper ventilation and circulation in your pool. Adequate circulation helps distribute chemicals evenly throughout the water, preventing concentrated areas that could be harmful to swimmers. Turn on your pool pump and filter system while adding chemicals, and let it run for at least an hour or according to the manufacturer’s guidelines to ensure even distribution.

  1. Wear Appropriate Swimwear and Gear

Swimming in chemically treated water can cause skin irritation and eye discomfort, so it’s essential to wear appropriate swimwear and gear. Invest in quality, chemical-resistant swimwear and use goggles to protect your eyes from the chemicals. After swimming, rinse off your swimwear and shower with soap to remove any lingering chemicals from your body.

  1. Avoid Swimming After Heavy Chemical Treatments

Some pool maintenance tasks, such as shocking or algaecide treatments, involve using large amounts of chemicals. These heavy treatments require an extended waiting period before it’s safe to swim. In most cases, you should wait at least 24 hours before swimming after a shock treatment or algaecide application. Always follow the manufacturer’s guidelines for specific waiting periods.

Proper pool maintenance involves careful handling and application of pool chemicals to ensure a safe and enjoyable swimming experience. By following these essential safety rules, you can protect yourself and your loved ones from potential health risks associated with swimming after adding pool chemicals. Remember to test your water regularly, follow manufacturer guidelines, and prioritize safety to keep your pool clean and inviting all season long.

The Perfect Balance: Unlocking the Secrets of Free Chlorine and pH Levels in Your Swimming Pool

Attention all pool lovers! Have you ever experienced burning eyes, itchy skin, or an unpleasant odor while swimming? If so, there’s a good chance that the pool’s water chemistry was off. The key to a pristine, crystal-clear swimming pool lies in maintaining the perfect balance between free chlorine and pH levels. So, if you want to become the ultimate pool connoisseur, read on to discover the secrets of these two essential components and how to achieve the perfect swimming experience.

I. The Dynamic Duo: Free Chlorine and pH

  1. The Guardian of Your Pool: Free Chlorine

Free chlorine is the star player in pool water sanitization. It actively fights against harmful bacteria, viruses, and algae to keep your pool clean and safe. But what many people don’t know is that the effectiveness of free chlorine depends on another critical factor: the pH level.

  1. The Unsung Hero: pH Levels

pH levels measure the acidity or alkalinity of your pool water on a scale of 0 to 14, with 7 being neutral. In a swimming pool, the ideal pH range is between 7.2 and 7.8. Maintaining the correct pH level not only ensures bather comfort but also plays a crucial role in free chlorine’s sanitizing ability. If the pH level is off, free chlorine’s superpowers can be drastically diminished.

II. The Perfect Symbiosis: Maximizing Free Chlorine’s Potential

When the pH level of your pool water is within the ideal range, free chlorine works at its peak efficiency. Here’s how they work together:

  1. The pH Sweet Spot

A pH level between 7.2 and 7.8 allows free chlorine to maintain its optimal sanitizing power. At this pH range, free chlorine is in its most effective form, known as hypochlorous acid. However, if the pH level strays too far from this range, free chlorine’s potency drops significantly, jeopardizing your pool’s cleanliness.

  1. When pH Levels Go Haywire

If the pH level is too low (below 7.2), the water becomes acidic, and free chlorine’s sanitizing capabilities decrease. Acidic water can also lead to corrosion of pool equipment and surfaces, as well as skin and eye irritation for swimmers. On the other hand, if the pH level is too high (above 7.8), free chlorine struggles to maintain its sanitizing power, allowing harmful contaminants to thrive. High pH levels can also cause cloudy water and scaling on pool surfaces.

III. Mastering the Art of Balance: Tips for Perfect Pool Chemistry

Ready to become a pool chemistry expert? Follow these tips to maintain the perfect balance between free chlorine and pH levels:

  1. Test Regularly: Use a reliable pool water test kit to measure free chlorine and pH levels at least twice a week, and more frequently during periods of heavy use or after significant rainfall.
  2. Adjust as Needed: Based on your test results, add appropriate chemicals to increase or decrease free chlorine and pH levels. Always follow the manufacturer’s instructions when using pool chemicals.
  3. Keep Your Pool Clean: Regularly skim, brush, and vacuum your pool to remove debris and reduce the demand on your pool’s sanitizer.
  4. Maintain Your Equipment: Ensure your pool’s pump, filter, and other equipment are in proper working order, as they play a vital role in maintaining water quality.

Conclusion:

Now you’re armed with the knowledge to create the ultimate swimming experience in your pool. Remember that the perfect balance between free chlorine and pH levels is key to a clean, clear, and comfortable pool. Spread the word, share the secrets, and help others discover the magic of perfectly balanced pool water. It’s time to dive in and enjoy the fruits of your newfound expertise!

Happy swimming, and don’t forget to share this post with your fellow pool enthusiasts. Let’s make pool care viral and ensure everyone can enjoy the crystal-clear, perfectly balanced swimming experience they deserve. Tag your friends, use the hashtag #PerfectPoolBalance, and let’s get the word out there. Dive in and let the world know that you’re part of the movement towards a better, more enjoyable swimming experience for everyone!

Above Ground Pool Top Rails: An Overview and Replacement Guide

Above ground pools are a popular and affordable option for homeowners looking to add a swimming pool to their property. One essential component of an above ground pool is the top rail, which provides support and stability to the pool structure. In this article, we’ll explain what above ground pool top rails are, when they might need replacement, and how to replace them to maintain a safe and functional swimming pool.

What Are Above Ground Pool Top Rails?

Top rails are horizontal beams that run around the perimeter of an above ground pool at the top edge. They are typically made of metal or resin materials and are designed to provide support and stability to the pool walls. These rails also serve as a finished edge for the pool’s vinyl liner, ensuring a smooth and secure fit.

In addition to their structural role, top rails can also be a decorative element of your pool, with various styles and finishes available to suit your aesthetic preferences.

When to Replace Above Ground Pool Top Rails

There are several reasons why you might need to replace the top rails of your above ground pool:

  1. Damage: Top rails can become damaged due to harsh weather conditions, corrosion, or accidents. Visible signs of damage, such as bending, warping, or rust, may indicate that replacement is necessary to maintain the structural integrity of your pool.
  2. Aging: Over time, top rails may weaken or deteriorate due to exposure to pool chemicals, sunlight, and water. If your pool is more than a few years old, it’s a good idea to inspect the top rails regularly and replace them if necessary.
  3. Aesthetic reasons: If you’re updating the look of your pool, replacing the top rails can be a simple and effective way to improve its appearance.


How to Replace Above Ground Pool Top Rails

Step 1: Gather the necessary tools and materials

Before starting the replacement process, gather the necessary tools and materials, including:

  • Replacement top rails: Ensure they are the correct size and style for your pool.
  • A screwdriver or drill: To remove and install fasteners.
  • A rubber mallet or soft hammer: To help position the new top rails.

Step 2: Drain the pool

Before replacing the top rails, you’ll need to drain the pool water to a level below the top edge of the pool walls. This helps reduce the pressure on the pool walls and prevents water from spilling over during the replacement process.

Step 3: Remove the old top rails

Using a screwdriver or drill, remove the fasteners that secure the top rails to the pool structure. Carefully remove each rail, taking care not to damage the pool walls or liner. Set aside the old rails for disposal or recycling.

Step 4: Inspect the pool walls and liner

With the top rails removed, inspect the pool walls and liner for any signs of damage or wear. If necessary, repair or replace any damaged components before installing the new top rails.

Step 5: Install the new top rails

Position the new top rails on the pool walls, aligning them with the existing holes for the fasteners. Use a rubber mallet or soft hammer to gently tap the rails into place, ensuring a snug and secure fit. Attach the rails using the provided fasteners, tightening them with a screwdriver or drill.

Step 6: Refill the pool

With the new top rails installed, refill the pool to the appropriate water level. Check for any leaks or other issues and address them as necessary.

Conclusion

Above ground pool top rails play a crucial role in maintaining the structural integrity and appearance of your swimming pool. By understanding when and how to replace these components, you can keep your pool safe, functional, and looking its best. Always consult your pool manufacturer’s guidelines and instructions for the specific top rail replacement process and materials, as well as any local regulations that may apply. Regular inspection and maintenance of your above ground pool, including the top rails, will help extend its lifespan and ensure a pleasant swimming experience for you and your loved ones all season long.