Understanding Chlorine Levels in Swimming Pools and Spas: The Ultimate Guide

Chlorine plays a vital role in keeping swimming pools and spas clean, safe, and free of harmful microorganisms. Maintaining the proper chlorine levels is essential for ensuring a comfortable swimming experience and preventing issues such as algae growth and waterborne illnesses. In this article, we will discuss the optimal chlorine levels for swimming pools and spas and why it is crucial to monitor and maintain them consistently.

Ideal Chlorine Levels for Swimming Pools and Spas

  1. Free Chlorine

Free chlorine is the active, sanitizing form of chlorine in pool water. It eliminates bacteria, viruses, and organic contaminants, keeping the water clean and safe. The ideal free chlorine level for swimming pools and spas should fall within the following ranges:

  • Swimming Pools: 1.0 – 3.0 ppm (parts per million)
  • Spas: 3.0 – 5.0 ppm
  1. Combined Chlorine

Combined chlorine, also known as chloramines, forms when free chlorine reacts with organic contaminants, such as sweat, urine, and body oils. Chloramines are less effective sanitizers and can cause eye and skin irritation, as well as a strong chlorine smell. The combined chlorine level should be as close to 0 ppm as possible, but no higher than 0.5 ppm.

  1. Total Chlorine

Total chlorine is the sum of free chlorine and combined chlorine. Ideally, the total chlorine level should be equal to the free chlorine level, indicating that there is no combined chlorine present. If the total chlorine level is significantly higher than the free chlorine level, it may be necessary to shock the pool or spa to eliminate chloramines.

Why Monitoring and Maintaining Chlorine Levels is Important

  1. Swimmer Comfort and Health

Proper chlorine levels prevent the growth of harmful bacteria and algae, ensuring a safe and enjoyable swimming environment. High chlorine levels can cause skin, eye, and respiratory irritation, while low levels increase the risk of waterborne illnesses.

  1. Pool and Spa Surface Protection

Maintaining the appropriate chlorine levels helps protect pool and spa surfaces from staining and deterioration caused by algae and bacteria growth.
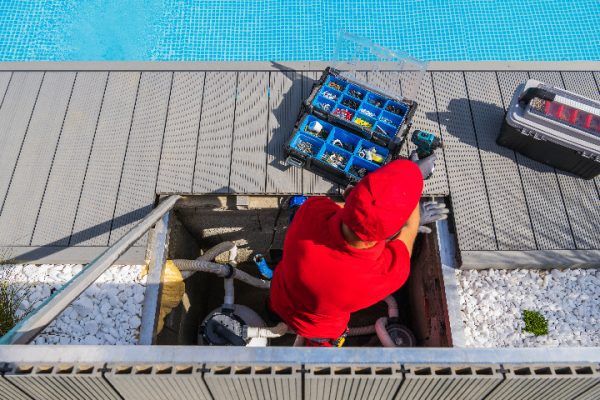
  1. Equipment Longevity

Proper chlorine levels help prevent the buildup of organic material and scale deposits on pool and spa equipment, such as filters and pumps, ensuring their longevity and efficiency.

  1. Water Clarity

Maintaining optimal chlorine levels helps keep pool and spa water clear and inviting. Low chlorine levels can lead to cloudy water and algae blooms, while high levels may cause the water to turn green or develop a strong chlorine odor.

How to Monitor and Maintain Chlorine Levels
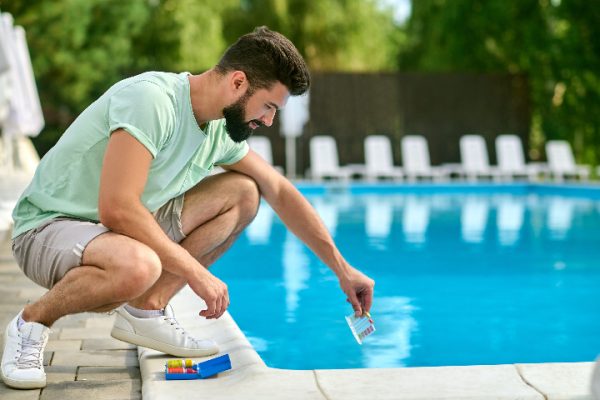
  1. Test Regularly

Use a reliable pool water test kit or test strips to measure chlorine levels at least once a week for swimming pools and twice a week for spas. More frequent testing may be necessary during periods of heavy use, after rainstorms, or when water chemistry is unbalanced.

  1. Adjust Chlorine Levels

If chlorine levels are too low, add a chlorine product, such as tablets, granules, or liquid, following the manufacturer’s recommendations for the appropriate dosage. If chlorine levels are too high, you can lower them by adding a chlorine neutralizer or allowing the sun to naturally dissipate the excess chlorine.

  1. Shock Treatment

Performing a shock treatment, which involves adding a large dose of chlorine, can help eliminate chloramines and restore water clarity. Shock your pool or spa as needed, typically once a week for pools and after every use for spas.

Understanding and maintaining proper chlorine levels in swimming pools and spas is essential for creating a safe, clean, and enjoyable environment for swimmers. By regularly monitoring chlorine levels and making necessary adjustments, you can prevent potential health risks and protect your pool and spa surfaces and equipment. Make sure to invest in a reliable water test kit or test strips and follow the manufacturer’s guidelines for adjusting chlorine levels and performing shock treatments. With consistent attention and care, you can ensure crystal-clear water and a healthy swimming experience for all.

Inground vs. Above Ground Pools: Comparing Costs and Considerations for a 10,000-Gallon Pool

Discover the average costs of installing a 10,000-gallon inground pool vs. an above ground pool, and explore the pros and cons of each option to make an informed decision.

When planning to install a 10,000-gallon swimming pool, one of the most significant decisions you’ll need to make is whether to choose an inground or an above ground pool. Both options have their pros and cons, and costs can vary significantly. In this article, we will break down the average costs of installing a 10,000-gallon inground pool vs. an above ground pool, and provide insight into the advantages and disadvantages of each type.

Comparing Costs: Inground vs. Above Ground Pools

  1. Inground Pool Installation

The cost of installing a 10,000-gallon inground pool can vary widely based on factors such as materials, location, and customization options. On average, homeowners can expect to spend between $35,000 and $65,000 for a 10,000-gallon inground pool. This cost includes excavation, pool materials (concrete, fiberglass, or vinyl liner), pool equipment, and labor. Additional features, such as waterfalls, lighting, and heating systems, can increase the total cost.

  1. Above Ground Pool Installation

Installing a 10,000-gallon above ground pool is typically less expensive than an inground pool. On average, the cost of an above ground pool ranges from $1,500 to $5,000, depending on the materials and quality of the pool. This cost includes the pool kit, installation, and basic pool equipment. However, it does not cover the cost of additional features or decking, which can add several thousand dollars to the overall expense.

Inground Pools: Pros and Cons

Pros:

  • Greater customization options: Inground pools offer more flexibility in terms of design, shape, and size.
  • Enhanced aesthetic appeal: Inground pools often look more attractive and blend seamlessly into the landscape.
  • Increased property value: In many cases, inground pools can increase the value of your home, making them a more appealing option for potential buyers.
  • Longer lifespan: Inground pools, especially those made from concrete, tend to last longer than above ground pools.


Cons:

  • Higher installation and maintenance costs: Inground pools require a more significant upfront investment and can be more expensive to maintain.
  • More complex installation: Installing an inground pool often requires more time and labor compared to above ground options.
  • Permitting and zoning requirements: Inground pool installations may be subject to stricter local regulations, requiring permits and adherence to specific zoning rules.

Above Ground Pools: Pros and Cons

Pros:

  • Lower installation and maintenance costs: Above ground pools are generally less expensive to install and maintain than inground pools.
  • Easier installation: Most above ground pools can be installed more quickly and with less disruption to your property.
  • More accessible for relocation or removal: If you decide to move or no longer want a pool, above ground pools are easier to disassemble and relocate or remove entirely.
  • Fewer permitting and zoning issues: Above ground pools typically have fewer local regulations to navigate, making the installation process smoother.

Cons:

  • Limited customization options: Above ground pools usually come in standard shapes and sizes, offering fewer customization choices.
  • Less aesthetic appeal: Some homeowners may find above ground pools less visually appealing than their inground counterparts.
  • Shorter lifespan: Above ground pools generally have a shorter lifespan, especially if they are made from lower-quality materials.
  • Potential for lower resale value: In some cases, an above ground pool may not add to the property value and may even detract from it in the eyes of potential buyers.

The decision between installing a 10,000-gallon inground pool or an above ground pool depends on your budget, preferences, and long-term plans. In general, inground pools offer greater customization options, a more attractive appearance, and a longer lifespan, but they come with higher installation and maintenance costs. On the other hand, above ground pools are more budget-friendly, easier to install and remove, but may have a shorter lifespan and limited design choices.

When considering which type of pool is best for you, carefully weigh the pros and cons of each option, and factor in the installation and maintenance costs. Consult with pool installation professionals to get a clearer understanding of the specific costs and requirements involved in your area. By doing thorough research and understanding the implications of your decision, you can make the best choice for your home and lifestyle, and enjoy your new pool for years to come.

Above Ground Pool Top Rails: An Overview and Replacement Guide

Above ground pools are a popular and affordable option for homeowners looking to add a swimming pool to their property. One essential component of an above ground pool is the top rail, which provides support and stability to the pool structure. In this article, we’ll explain what above ground pool top rails are, when they might need replacement, and how to replace them to maintain a safe and functional swimming pool.

What Are Above Ground Pool Top Rails?

Top rails are horizontal beams that run around the perimeter of an above ground pool at the top edge. They are typically made of metal or resin materials and are designed to provide support and stability to the pool walls. These rails also serve as a finished edge for the pool’s vinyl liner, ensuring a smooth and secure fit.

In addition to their structural role, top rails can also be a decorative element of your pool, with various styles and finishes available to suit your aesthetic preferences.

When to Replace Above Ground Pool Top Rails

There are several reasons why you might need to replace the top rails of your above ground pool:

  1. Damage: Top rails can become damaged due to harsh weather conditions, corrosion, or accidents. Visible signs of damage, such as bending, warping, or rust, may indicate that replacement is necessary to maintain the structural integrity of your pool.
  2. Aging: Over time, top rails may weaken or deteriorate due to exposure to pool chemicals, sunlight, and water. If your pool is more than a few years old, it’s a good idea to inspect the top rails regularly and replace them if necessary.
  3. Aesthetic reasons: If you’re updating the look of your pool, replacing the top rails can be a simple and effective way to improve its appearance.


How to Replace Above Ground Pool Top Rails

Step 1: Gather the necessary tools and materials

Before starting the replacement process, gather the necessary tools and materials, including:

  • Replacement top rails: Ensure they are the correct size and style for your pool.
  • A screwdriver or drill: To remove and install fasteners.
  • A rubber mallet or soft hammer: To help position the new top rails.

Step 2: Drain the pool

Before replacing the top rails, you’ll need to drain the pool water to a level below the top edge of the pool walls. This helps reduce the pressure on the pool walls and prevents water from spilling over during the replacement process.

Step 3: Remove the old top rails

Using a screwdriver or drill, remove the fasteners that secure the top rails to the pool structure. Carefully remove each rail, taking care not to damage the pool walls or liner. Set aside the old rails for disposal or recycling.

Step 4: Inspect the pool walls and liner

With the top rails removed, inspect the pool walls and liner for any signs of damage or wear. If necessary, repair or replace any damaged components before installing the new top rails.

Step 5: Install the new top rails

Position the new top rails on the pool walls, aligning them with the existing holes for the fasteners. Use a rubber mallet or soft hammer to gently tap the rails into place, ensuring a snug and secure fit. Attach the rails using the provided fasteners, tightening them with a screwdriver or drill.

Step 6: Refill the pool

With the new top rails installed, refill the pool to the appropriate water level. Check for any leaks or other issues and address them as necessary.

Conclusion

Above ground pool top rails play a crucial role in maintaining the structural integrity and appearance of your swimming pool. By understanding when and how to replace these components, you can keep your pool safe, functional, and looking its best. Always consult your pool manufacturer’s guidelines and instructions for the specific top rail replacement process and materials, as well as any local regulations that may apply. Regular inspection and maintenance of your above ground pool, including the top rails, will help extend its lifespan and ensure a pleasant swimming experience for you and your loved ones all season long.

A DIY Guide to Changing the Sand in Your Pool’s Sand Filter

A sand filter is an essential component of many pool filtration systems, working to remove debris and contaminants from the water to keep it clean and safe for swimmers. Over time, the sand in the filter becomes saturated with impurities and loses its effectiveness, requiring replacement. In this article, we will provide a step-by-step guide for DIY homeowners on how to change the sand in a sand filter, ensuring your pool stays clean and clear all season long.

Step 1: Gather the necessary tools and materials

Before beginning the process, gather the necessary tools and materials to change the sand in your sand filter. These may include:

  • Replacement sand: Use only pool filter sand specifically designed for use in sand filters.
  • A large container or wheelbarrow: To dispose of the old sand.
  • A shop vacuum or small bucket: To help remove the sand from the filter.
  • A hose and water source: To rinse the filter.
  • A wrench, screwdriver, or pliers: To open the filter and remove components.
  • New filter O-rings or gaskets: To replace any worn or damaged seals.

Step 2: Turn off the pool pump and filter system

Before opening the sand filter, ensure the pool pump and filter system are turned off. Disconnect the power supply and close any valves connected to the filter to prevent water flow during the sand replacement process.

Step 3: Remove the filter’s top or multiport valve

Consult your filter’s manual to determine the proper method for opening your sand filter. This may involve removing the filter’s top or disconnecting the multiport valve. Use a wrench, screwdriver, or pliers as needed to loosen and remove any fasteners or fittings.


Step 4: Remove the old sand

Using a shop vacuum or a small bucket, carefully remove the old sand from the filter tank. Take care not to damage any internal components, such as the laterals or central standpipe. Dispose of the old sand in a large container or wheelbarrow, following local regulations for disposal.

Step 5: Inspect and clean the filter components

Inspect the filter’s internal components, such as the laterals and central standpipe, for any signs of damage or wear. Replace any damaged parts as necessary. Use a hose to rinse the filter tank and components, removing any remaining sand or debris.

Step 6: Add the new sand

Before adding the new sand, cover the central standpipe with a plastic bag or cap to prevent sand from entering the pipe. Pour the new pool filter sand into the filter tank, taking care to distribute it evenly around the laterals. Fill the tank to the manufacturer’s recommended level, usually about halfway to two-thirds full.

Step 7: Reassemble the filter

Once the new sand has been added, reassemble the filter by reinstalling the filter top or multiport valve. Replace any worn or damaged O-rings or gaskets, and ensure all fittings are securely tightened to prevent leaks.

Step 8: Backwash the new sand

With the filter reassembled, open the necessary valves and turn the multiport valve to the “Backwash” setting. Turn on the pool pump and allow the water to flow through the filter for several minutes, flushing out any dust or fine particles from the new sand. Turn off the pump and return the multiport valve to the “Filter” setting.

Step 9: Restart the pool filtration system

With the sand replacement complete, restart the pool filtration system by reconnecting the power supply and opening any closed valves. Monitor the filter for any leaks or performance issues, addressing any problems as necessary.

Changing the sand in your pool’s sand filter is a straightforward DIY task that can help ensure the continued efficiency and effectiveness of your pool’s filtration system. By following this step-by-step guide, you can successfully replace the sand in your filter and maintain a clean, clear swimming environment for you and your loved ones. Be sure to consult your filter’s manual and seek professional advice if you encounter any difficulties or have questions about the sand replacement process. Regular pool maintenance, including periodically changing the sand in your sand filter, will help prolong the life of your pool equipment and provide an enjoyable swimming experience all season long.

A Step-by-Step Guide to Wiring Your Pool Pump

A pool pump plays a crucial role in maintaining a clean and inviting swimming pool, circulating the water through the filtration system to remove debris and contaminants. Properly wiring your pool pump is essential for its safe and efficient operation. In this article, we’ll provide a step-by-step guide on how to wire a pool pump. However, please note that working with electricity can be dangerous, and it’s always recommended to consult a licensed electrician for any electrical projects.

Disclaimer: This article is for informational purposes only. Always consult a licensed electrician when working with electricity.

Step 1: Gather the necessary tools and materials

Before beginning the wiring process, gather the necessary tools and materials, including:

  • A pool pump compatible with your pool system
  • Wiring diagram or installation manual for the pool pump
  • Electrical cable and conduit appropriate for your pool pump’s power requirements
  • Circuit breaker sized for the pool pump’s amperage
  • A junction box or timer (if applicable)
  • Wire strippers, screwdrivers, and a voltage tester
  • Wire connectors and cable clamps

Step 2: Turn off the power

Before working with any electrical wiring, turn off the power supply at the main electrical panel to prevent the risk of electrocution. Double-check that the power is off by using a voltage tester.

Step 3: Install a dedicated circuit breaker

If you haven’t already, install a dedicated circuit breaker for your pool pump in the main electrical panel. The circuit breaker should be sized according to the pool pump’s amperage requirements. Consult the pump’s installation manual or wiring diagram to determine the proper circuit breaker size.

Step 4: Run the electrical cable and conduit

Run the appropriate electrical cable from the main electrical panel to the pool pump location, ensuring the cable is properly protected with conduit according to your local electrical codes. Secure the conduit to the wall or ground using cable clamps, and connect the conduit to the circuit breaker panel and pool pump junction box or timer.

Step 5: Wire the pool pump junction box or timer (if applicable)

If your pool pump is connected to a junction box or timer, follow the manufacturer’s instructions for wiring the box or timer. Connect the electrical cable from the main panel to the line terminals in the junction box or timer, and tighten the terminal screws.

Step 6: Connect the electrical cable to the pool pump

Consult the pool pump’s installation manual or wiring diagram to determine the proper wiring connections. Use wire strippers to strip the insulation from the ends of the wires. Typically, the black or red wire is the “hot” or “live” wire, the white wire is the neutral wire, and the green or bare wire is the ground wire. Connect the wires to the corresponding terminals on the pool pump, using wire connectors to ensure a secure connection. Tighten the terminal screws, and attach the conduit to the pool pump using a cable clamp.

Step 7: Turn the power back on and test the pool pump

Once the wiring connections are complete and secure, turn the power back on at the main electrical panel. Test the pool pump to ensure it’s operating correctly. If the pump does not turn on or shows signs of malfunction, turn off the power and recheck the wiring connections. If problems persist, consult a licensed electrician.

Properly wiring your pool pump is essential for its safe and efficient operation. This step-by-step guide can provide an overview of the process, but always consult a licensed electrician when working with electricity to ensure your safety and compliance with local electrical codes. Regular maintenance and proper installation of your pool pump will help keep your swimming pool clean and clear, providing a refreshing and enjoyable experience all season long.

Pool Water Delivery: Exploring Options for Filling Your Swimming Pool

Filling a home above-ground or inground swimming pool is an essential step in setting up your pool for a season of fun and relaxation. Choosing the right method for filling your pool can impact the overall cost, water quality, and time required for the process. In this article, we will discuss different pool water delivery options and their pros and cons to help you make an informed decision.

Option 1: Tap Water from a Garden Hose

One of the most common and convenient methods for filling a swimming pool is using tap water from a garden hose connected to your home’s water supply.

Pros:

  • Easy and accessible: Tap water is readily available at most homes, making it a convenient option for filling your pool.
  • Low initial cost: Filling your pool with tap water is typically less expensive upfront than other water delivery options.

Cons:

  • Time-consuming: Filling a pool with a garden hose can take a considerable amount of time, depending on the size of your pool and the water pressure from your tap.
  • Impact on water bill: Using tap water to fill your pool can significantly increase your water bill, depending on the size of the pool and local water rates.
  • Potential water quality issues: Tap water may contain minerals, metals, and other contaminants that can affect your pool’s water quality, requiring additional treatment and balancing.

Option 2: Bulk Water Delivery by a Water Hauling Company

Another option for filling your pool is to hire a water hauling company that specializes in bulk water delivery. These companies typically use tanker trucks to deliver large volumes of water to your location.

Pros:

  • Time-efficient: Water hauling companies can fill your pool much faster than using a garden hose, often in a matter of hours.
  • High-quality water: Many water hauling companies offer treated and filtered water, which can result in better initial water quality for your pool.
  • Reduced strain on local water supply: By using a water hauling company, you avoid placing additional demand on your local water supply, which can be beneficial during periods of drought or water restrictions.

Cons:

  • Higher initial cost: The cost of bulk water delivery can be significantly higher than filling your pool with tap water.
  • Limited availability: Water hauling services may not be available in all areas, and their availability may be subject to local regulations and permitting requirements.
  • Scheduling constraints: You’ll need to coordinate with the water hauling company to schedule the delivery, which may require flexibility on your part.

Option 3: Well Water

If you have access to a well on your property, it may be a viable option for filling your swimming pool.

Pros:

  • Cost-effective: Well water can be an economical choice for filling your pool, as there are no additional water charges.
  • Environmentally friendly: Using well water reduces the demand on municipal water supplies and helps conserve resources.

Cons:

  • Time-consuming: Like filling your pool with a garden hose, filling your pool with well water can be a slow process, depending on the flow rate of your well.
  • Water quality issues: Well water can contain high levels of minerals, metals, and other contaminants that can affect your pool’s water quality and require additional treatment.
  • Potential strain on well: Filling a large pool may put a strain on your well, depending on its capacity and flow rate.

Conclusion:

When it comes to filling your swimming pool, there are several options to consider, each with its pros and cons. Factors such as cost, water quality, availability, and environmental impact will play a role in your decision. By carefully considering these factors and weighing the advantages and disadvantages of each option, you can choose the pool water delivery method that best meets your needs and preferences, ensuring a smooth and successful start to your swimming season.

Draining Your Vinyl Pool: A Balancing Act Between Benefits and Challenges

Draining a vinyl pool might seem like a daunting task, but it’s a necessary one to maintain a clean, healthy, and enjoyable swimming environment. The process, however, is a delicate balance, as there are both benefits and challenges associated with it. In this article, we will discuss why draining your vinyl pool is essential, the potential issues you may encounter, and tips to safely and effectively drain your pool.

  1. Why Drain Your Vinyl Pool? There are several reasons why you might need to drain your vinyl pool:
  • Removing dirt and debris: Over time, dirt, debris, and algae can accumulate, making it difficult to keep your pool water clean and clear. Draining allows you to remove these impurities and start fresh.
  • Repairing or replacing the liner: Draining your pool is necessary if you need to repair or replace the vinyl liner due to wear and tear, leaks, or damage.
  • Balancing chemicals: If your pool’s water chemistry is severely out of balance, it may be more cost-effective to drain and refill the pool rather than adding a large amount of chemicals to correct the issue.
  1. The Challenges of Draining a Vinyl Pool While draining your vinyl pool has its benefits, it also comes with potential issues that you need to be aware of:
  • Structural damage: Draining a vinyl pool can cause the liner to shrink or shift, leading to wrinkles or even tearing. In some cases, the pressure from the water helps maintain the pool’s structural integrity, and removing the water may cause walls to collapse.
  • Groundwater pressure: If you have a high water table, groundwater pressure can push against the empty pool, causing it to lift or float out of the ground.
  • Environmental impact: Draining a large volume of chemically treated water can have negative effects on the environment, particularly if the water finds its way into nearby bodies of water or groundwater.
  1. Tips for Safely and Effectively Draining Your Vinyl Pool To minimize the risks associated with draining your vinyl pool, follow these guidelines:
  • Consult with a professional: Speak with a pool professional to determine the best course of action for your specific situation, especially if you are inexperienced in pool maintenance or are dealing with a complicated issue.
  • Drain slowly: Draining your pool too quickly can cause the liner to shrink or the walls to collapse. Gradually release the water to minimize potential damage.
  • Redirect the water: Ensure that the drained water is properly directed away from your home and nearby bodies of water to minimize environmental impact.
  • Monitor the process: Keep an eye on your pool while draining it to catch any potential issues early and prevent further damage.

Conclusion: Draining your vinyl pool is a delicate process, with both benefits and potential issues that need careful consideration. By understanding the reasons for draining your pool, the potential challenges, and following the recommended tips, you can effectively drain your vinyl pool and enjoy a cleaner, healthier swimming environment. Remember, when in doubt, it’s always best to consult with a pool professional to ensure the best outcome for your pool and its surroundings.

The Ultimate Guide to Safely Shocking Your Above Ground Pool Like a Pro

Hey there, new pool owner! Congratulations on your fabulous above ground pool – it’s time to dive into the wonderful world of pool maintenance. One essential task you’ll need to master is shocking your pool, a process that keeps the water crystal clear and free from harmful bacteria. But don’t worry; with our easy-to-follow guide, you’ll be shocking your pool like a pro in no time. So, grab your safety goggles and let’s get started!

    1. Understand Why Shocking is Necessary Before we get into the nitty-gritty of how to shock your pool, it’s essential to understand why this process is so crucial. Shocking your pool means adding a high dose of chlorine or other sanitizing chemicals to eliminate contaminants, break down chloramines (combined chlorine), and restore the proper balance of free chlorine. Regular shocking prevents algae growth, keeps the water safe for swimmers, and ensures a pleasant pool experience.
  1. Choose the Right Shock Product There are several types of pool shock products on the market, including calcium hypochlorite, sodium dichlor, and non-chlorine shock. Read the labels carefully, and choose a product compatible with your pool type and sanitizing system. If you’re unsure which product to choose, consult your pool retailer or maintenance professional for guidance.
  2. Safety First! Shocking your pool involves handling strong chemicals, so always prioritize safety. Wear protective gloves, goggles, and clothes you don’t mind getting dirty. Also, make sure the area is well-ventilated, and never mix different types of pool chemicals together.
  3. Timing is Everything The best time to shock your pool is in the evening or at night when the sun isn’t blazing. This allows the chemicals to work effectively without being broken down by sunlight. Additionally, shocking your pool at night gives the chemicals time to work their magic before anyone takes a dip the next day.
  4. Test and Balance Your Pool Water Before shocking, test your pool water with a reliable test kit or test strips. Ensure the pH level is between 7.2 and 7.6, and the water is balanced. If necessary, adjust the water chemistry before proceeding.
  5. Follow the Manufacturer’s Instructions Carefully read and follow the instructions on your shock product’s label. This will typically include information on the proper dosage, application method, and any necessary precautions. Remember that more isn’t always better – using too much shock can cause damage to your pool liner and equipment.
  6. Pre-Dissolve the Shock Never pour shock directly into your pool, as this can damage the liner. Instead, pre-dissolve the shock in a large bucket of water, stirring it gently with a plastic or wooden spoon. This helps distribute the chemicals evenly and reduces the risk of damage.
  7. Add the Shock to Your Pool Pour the dissolved shock solution slowly and evenly around the perimeter of your pool. Aim for the edges where the water meets the pool walls to ensure proper circulation.
  8. Keep Your Pump Running After adding the shock, keep your pool pump and filter running for at least 24 hours to circulate the chemicals effectively. This helps to distribute the shock evenly and clean the water more thoroughly.
  9. Test and Swim Once the shocking process is complete, test your pool water again to ensure the chlorine levels have returned to a safe range (1-3 ppm) before anyone goes for a swim. If the levels are still too high, wait a little longer and test again.

Conclusion: Now that you’ve mastered the art of shocking your above ground pool, you can enjoy crystal-clear water and a safe swimming environment all season long. Remember, practice makes perfect, so don’t be afraid to shock your pool regularly to keep it in tip-top shape. With this newfound knowledge, you’ll be the envy of your neighbors and the go-to pool expert in no time. So, grab your floaties, sunscreen, and swimsuit – it’s time to dive into your sparkling oasis and show off your pool-maintenance prowess! Happy swimming!

Fiberglass Pools: Weighing the Pros and Cons for First-Time Pool Owners

Taking the plunge to become a first-time pool owner can be both exciting and overwhelming. With various options to choose from, you might be wondering if a fiberglass pool is the right choice for your backyard oasis. In this article, we’ll discuss the pros and cons of fiberglass pools to help you make an informed decision before diving in.

Pros of Fiberglass Pools

    1. Quick Installation: One of the significant advantages of fiberglass pools is their speedy installation process. Unlike concrete or vinyl liner pools, which can take weeks or even months to install, fiberglass pools can be installed in as little as one to three weeks. This is because the pool shell is manufactured off-site and then transported to your property, where it is simply placed into the excavated hole.
    2. Low Maintenance: Fiberglass pools are known for being low-maintenance compared to other pool types. Their smooth and non-porous surface discourages algae growth, meaning less time and money spent on chemicals and cleaning. Additionally, there’s no need to worry about replacing a liner or re-plastering as with vinyl or concrete pools.
    3. Durability: Fiberglass pools are constructed from a strong, flexible material that is resistant to cracking and damage from shifting ground or changing temperatures. This durability makes them a popular choice for regions with extreme temperature fluctuations or unstable soil.
    4. Energy Efficiency: The insulating properties of fiberglass help to maintain consistent water temperatures, leading to reduced energy costs for heating and cooling your pool. The smooth surface also means less friction for your pool equipment, which can lead to longer life spans and lower electricity bills.

Cons of Fiberglass Pools

  1. Limited Customization: One of the primary drawbacks of fiberglass pools is the limited customization options available. Since the pool shells are pre-manufactured, you are restricted to choosing from a limited range of shapes, sizes, and designs. This might be a downside for homeowners looking for a unique or custom pool design.
  2. Higher Initial Cost: While fiberglass pools can save money on maintenance and energy costs over time, the initial price tag can be higher than vinyl liner or concrete pools. The cost of manufacturing and shipping the pool shell can contribute to a higher upfront investment.
  3. Size Limitations: Due to transportation constraints, fiberglass pools are typically limited in size. If you’re dreaming of an Olympic-sized swimming pool, a fiberglass pool might not be the best option for you.
  4. Potential Repairs: Although fiberglass pools are known for their durability, they are not immune to potential issues. While unlikely, a poorly manufactured pool shell could develop leaks or cracks, leading to costly repairs. It is crucial to select a reputable pool manufacturer and installer to mitigate these risks.

A fiberglass pool can be an excellent option for first-time pool owners looking for a low-maintenance, durable, and energy-efficient swimming pool. However, it is essential to weigh the pros and cons, considering factors such as customization, initial cost, and potential size limitations. By evaluating your needs, budget, and preferences, you can make an informed decision on whether a fiberglass pool is the right fit for your backyard paradise.

How to Choose the Best Above Ground Pool: Factors to Consider, Types, Shapes, and Installation Options

A Comprehensive Guide to Finding the Perfect Above Ground Pool for Your Backyard

Introduction

Above ground pools have become increasingly popular among homeowners due to their affordability, ease of installation, and lower maintenance requirements compared to inground pools. With various types, shapes, and installation options available, choosing the best above ground pool for your backyard can be a daunting task. This article will guide you through the factors to consider when selecting the perfect above ground pool and provide an overview of different pool types, shapes, and installation options.

Factors to Consider When Choosing an Above Ground Pool

  1. Budget: Above ground pools are available at various price points, so it’s essential to determine your budget before making a decision. Consider not only the initial cost of the pool but also the ongoing maintenance expenses and potential upgrades.
  2. Size and Shape: Measure your available backyard space to determine the appropriate pool size and shape. Consider the amount of space needed for pool equipment, as well as areas for lounging and other activities.
  3. Material: Above ground pools are typically made from steel, aluminum, or resin. Steel is the most affordable option but may be prone to rust. Aluminum is lightweight and rust-resistant but may be more susceptible to dents. Resin is a durable and low-maintenance material but may be more expensive.
  4. Pool Depth: Consider the depth of the pool based on your family’s needs. Deeper pools may be more suitable for older children and adults, while shallower pools are better for younger children and families who prefer wading.
  5. Safety Features: Ensure the pool you choose has adequate safety features, such as secure ladders or fencing to prevent unauthorized access.


Types and Shapes of Above Ground Pools

  1. Round: Round pools are the most common and affordable shape, offering a larger swimming area for the same perimeter compared to other shapes.
  2. Oval: Oval pools provide a more extended swimming area, allowing for lap swimming and other water activities. They may require additional support structures, which can increase the cost and installation complexity.
  3. Rectangular: Rectangular pools offer a modern and sleek design, providing ample space for swimming laps and water games. These pools may also require additional support structures.
  4. Semi-Inground: Semi-inground pools are partially buried, offering a more aesthetically pleasing appearance and allowing for easier entry and exit. These pools may be more expensive due to the additional excavation and landscaping work required.

Installation Options

  1. DIY Installation: Some above ground pool models come with detailed installation instructions and can be assembled by handy homeowners. This option can save money on labor costs but may be time-consuming and require a moderate level of skill.
  2. Professional Installation: Hiring a professional pool installer ensures that your pool is correctly and safely installed. This option can be more expensive but may be worth the investment for a hassle-free and efficient installation.


Conclusion

Choosing the perfect above ground pool for your backyard involves considering factors such as budget, size, shape, material, and safety features. By understanding the different types, shapes, and installation options available, you can make an informed decision that best suits your needs and preferences. With careful planning and consideration, you can create a backyard oasis that provides endless enjoyment for you and your family.