Extend Your Swimming Season: A Guide to Above Ground Pool Heating Options

Above ground pools are a fantastic addition to any backyard, offering endless fun and relaxation during the hot summer months. But when the temperature starts to drop, many pool owners are left longing for more swim time. Thankfully, there are several heating options available that can extend your swimming season well into the cooler months. In this article, we will explore the most popular heating solutions for above ground pools and help you determine which option is best suited for your needs.

  1. Solar Heating Systems: Solar heating systems are an eco-friendly and cost-effective way to heat your above ground pool. These systems utilize solar panels to absorb the sun’s energy and transfer it to your pool water. The panels are typically mounted on a nearby roof or a freestanding structure, and the pool water is circulated through the solar collectors, where it is heated before returning to the pool. While the initial cost of a solar heating system can be higher than other options, the long-term savings on energy bills make it a worthwhile investment.

Pros:

  • Environmentally friendly
  • Low operating costs
  • Can extend your swimming season by several months

Cons:

  • Higher upfront cost
  • Requires sunlight for optimal performance
  • May take longer to heat the pool compared to other methods
  1. Gas Pool Heaters: Gas pool heaters are a popular choice for above ground pool owners due to their fast heating capabilities and ability to maintain a consistent temperature. These heaters use natural gas or propane to heat the pool water and can quickly raise the temperature, making them ideal for occasional use or when rapid heating is desired. However, the ongoing cost of fuel can make gas heaters more expensive to operate over time.


Pros:

  • Fast and efficient heating
  • Can maintain a consistent temperature
  • Suitable for pools of varying sizes

Cons:

  • Higher operating costs due to fuel consumption
  • May require professional installation
  • Can produce greenhouse gas emissions
  1. Electric Heat Pumps: Electric heat pumps are an energy-efficient option for heating your above ground pool. These units work by extracting heat from the surrounding air and transferring it to your pool water. While electric heat pumps can be more expensive upfront than gas heaters, they have lower operating costs, making them an economical choice in the long run.

Pros:

  • Energy-efficient
  • Lower operating costs compared to gas heaters
  • Can maintain a consistent temperature

Cons:

  • Higher upfront cost
  • May require professional installation
  • Heating efficiency can be affected by air temperature
  1. Pool Heat Exchangers: A pool heat exchanger is a device that can be connected to an existing home heating system, such as a boiler or furnace, to transfer heat to your pool water. This option can be cost-effective for those who already have a compatible heating system in place. However, it may not be suitable for all homes, and professional installation is typically required.

Pros:

  • Utilizes existing home heating system
  • Can be cost-effective if compatible with current heating setup
  • Can maintain a consistent temperature

Cons:

  • May require professional installation
  • Not suitable for all homes or heating systems
  • May put additional strain on your home heating system

Conclusion: When it comes to heating your above ground pool, several options can help extend your swimming season. The best choice for you will depend on factors such as your budget, desired heating efficiency, and environmental considerations. By carefully considering the pros and cons of each option, you can make an informed decision that will keep your pool warm and inviting for many months to come.

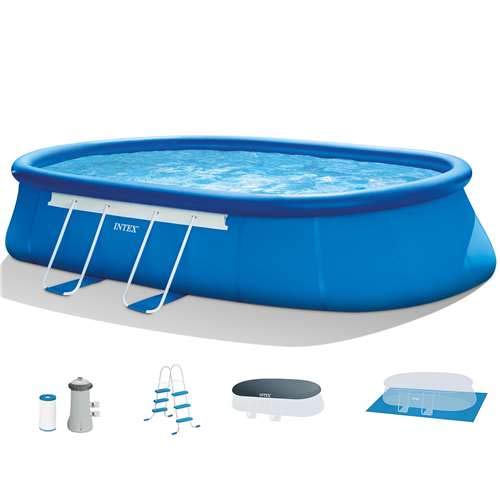
Dive Into the Georgia Sun: A Guide to Opening Your Swimming Pool for the Season

Get ready, Georgia! It’s time to bust out the pool floats, crank up the BBQ, and make a splash with our ultimate guide to opening your swimming pool for the season.

Hello, Georgia pool owners! The birds are chirping, the azaleas are blooming, and the sweet scent of peach blossoms fills the air – all signs that the warm Georgia sun is finally here to stay. But wait, there’s something missing… Aha! It’s time to throw off the winter pool cover and dive into the blissful oasis that is your very own swimming pool.

Whether you’re a seasoned pool pro or a first-time owner, opening your pool for the season can be a hilarious, heartwarming, and occasionally hair-raising experience. So let’s grab our pool nets and chlorine tablets, and embark on this adventure together.

Step 1: Assess the (Pool) Situation

Before you jump headfirst into the pool opening process, take a moment to assess your pool’s current state. Is your pool cover still intact, or did that notorious Georgia raccoon party a little too hard on it during the winter? If you notice any damage, make a note to repair or replace your cover after the pool opening process is complete.

Step 2: The Great Unveiling

It’s time for the big reveal! Slowly and carefully remove your pool cover, making sure to avoid dumping any accumulated debris into the pool. While it’s tempting to simply drag the cover off and be done with it, you’ll thank yourself later for being cautious. Trust us; nobody wants to spend hours fishing out leaves, twigs, and mysterious raccoon leftovers.

Step 3: Get Your Pool Pump Pumpin’

Now that your pool is uncovered, it’s time to get your pool pump and filter system up and running. But first, a quick tip: give your equipment a thorough inspection and cleaning before turning everything on. Ensure all connections are secure and that the pump and filter are debris-free. Remember, a happy pump means a happy pool!

Step 4: Spring Cleaning – Pool Edition

It’s time to tackle the aftermath of winter in your pool. Use a pool skimmer to remove any floating debris, and then break out the pool vacuum to eliminate dirt and sediment from the bottom. No judgment if you hum the Jaws theme while vacuuming – we’ve all been there.

Step 5: Test, Balance, and Shock Your Pool Water

Now comes the real magic: transforming your pool water from a questionable-looking soup into a crystal-clear wonderland. First, test your pool water for pH, chlorine, and alkalinity levels. You’ll want to aim for a pH between 7.4 and 7.6, alkalinity between 80 and 120 ppm, and a free chlorine level between 1 and 3 ppm. Once everything is balanced, give your pool a good shock treatment to eliminate any lingering bacteria and algae.

Step 6: Get Ready to Make a Splash

Congratulations! You’ve successfully opened your swimming pool for the season. But what’s a pool without a little fun? Stock up on pool floats, noodles, and other accessories that scream “Georgia summer.” And don’t forget to fire up that BBQ for the ultimate poolside feast.

It’s time to gather your friends and family, slather on some sunscreen, and dive into the Georgia sun. We hope this hilarious and heartwarming guide to opening your pool has brought a smile to your face and a sense of excitement for the season ahead. Be sure to share your pool opening adventures with the hashtag #GeorgiaPoolParty and let’s make this summer the most epic one yet!

Step 7: Celebrate Your Pool Opening Success

You’ve made it! Your pool is ready for action, and there’s only one thing left to do: celebrate. Invite your neighbors, friends, and family over for the ultimate Georgia pool party. Set the mood with a playlist of summer tunes, fire up the grill for some delicious Southern BBQ, and mix up a batch of peachy cocktails or ice-cold sweet tea.

Step 8: Share Your Pool Opening Adventures

Now that you’ve mastered the art of pool opening, why not share your journey with fellow Georgia pool enthusiasts? Snap some photos of your sparkling pool, your fabulous poolside setup, and the smiling faces of your guests. Post your pictures on social media with the hashtag #GeorgiaPoolParty, and let’s inspire others to create their own summer paradise in the Peach State.

Step 9: Keep the Fun Going All Summer Long

Opening your pool is just the beginning. The real fun begins when you and your loved ones make lasting memories in and around the water. Whether it’s hosting weekly poolside cookouts, teaching your kids to swim, or simply enjoying a serene sunset float, there’s no shortage of ways to make the most of your pool this summer.

In conclusion, opening your swimming pool for the season in Georgia is a fun and engaging experience that brings people together and sets the stage for countless unforgettable moments. With our ultimate guide and a little bit of humor, you’re well on your way to making a splash and enjoying the very best of what a Georgia summer has to offer. Here’s to warm days, cool dips, and a season filled with laughter, love, and poolside relaxation.

A Comprehensive Guide to Leveling an Above Ground Pool: Steps, Tips, and Tools

An above ground pool is an excellent addition to any backyard, providing a fun and refreshing way to cool off during the hot summer months. However, proper installation is crucial to ensure the pool’s stability, longevity, and safety. One of the essential aspects of pool installation is ensuring the pool is level. In this article, we’ll provide a detailed guide on how to level an above ground pool, including the steps, tips, tools, and materials you’ll need.

Tools and Materials

  1. Long wooden stake or metal rebar
  2. String
  3. Line level
  4. Shovel
  5. Tamper or plate compactor (can be rented)
  6. Carpenter’s level
  7. Builder’s sand (optional)
  8. Landscape fabric (optional)

Step-by-Step Guide to Leveling an Above Ground Pool

Step 1: Choose the pool site

Select a flat, open area for your pool, free of rocks, roots, or other obstructions. Consider factors such as sunlight exposure, proximity to electrical outlets, and distance from your house for easy access.


Step 2: Mark the pool’s perimeter

Using the wooden stake or metal rebar, mark the center of your pool area. Attach a string to the stake, and measure out half the pool’s diameter. Walk around the stake, marking the pool’s perimeter with spray paint or by driving small stakes into the ground.


Step 3: Remove sod and level the ground

Using a shovel, remove the sod within the marked pool area. Begin leveling the ground by removing soil from the high areas and adding it to the low areas. It’s essential to level the entire pool area, not just the perimeter.

Step 4: Check the level

Attach a line level to the string and walk around the pool perimeter, making sure the string remains level. If you notice any low or high areas, adjust the soil accordingly. Use a carpenter’s level to verify the ground is level in both the X and Y axes.

Step 5: Compact the ground

Use a tamper or rent a plate compactor to compact the soil firmly. This step is crucial to prevent the ground from settling unevenly once the pool is filled with water.

Step 6: Add a layer of sand (optional)

Although not necessary, some pool owners prefer to add a 1-2 inch layer of builder’s sand to provide a smoother and more forgiving surface for the pool liner. Spread the sand evenly and compact it with the tamper or plate compactor.

Step 7: Install landscape fabric (optional)

To prevent weeds or grass from growing beneath the pool, you may choose to install landscape fabric on the leveled ground. Secure the fabric with landscape staples to prevent shifting.

Step 8: Assemble the pool

Follow the manufacturer’s instructions to assemble your above ground pool on the leveled site.

Step 9: Final level check

Before filling your pool with water, perform a final check to ensure the pool is level. Place a carpenter’s level on the top rail of the pool in multiple locations to verify that it is level.

Tips for Leveling an Above Ground Pool

  1. Take your time: Leveling the ground can be a time-consuming process. Be patient, and make sure you’re thorough in your efforts to ensure a level and stable pool foundation.
  2. Do not build up low areas with sand: Adding sand to low areas can lead to an unstable foundation as the sand shifts over time. Instead, remove soil from high areas to create a level surface.
  3. Consult your pool’s installation manual: Be sure to follow any specific leveling instructions provided by your pool’s manufacturer.

Leveling an above ground pool is a crucial step in the installation process. A level pool ensures a stable foundation, prolongs the pool’s lifespan, and promotes safety. By following this comprehensive guide, you can successfully level your pool site and enjoy a fun and refreshing backyard oasis. Remember, it’s essential to be patient and thorough during the leveling process, as this will pay off in the long run, ensuring many enjoyable seasons with your above ground pool.

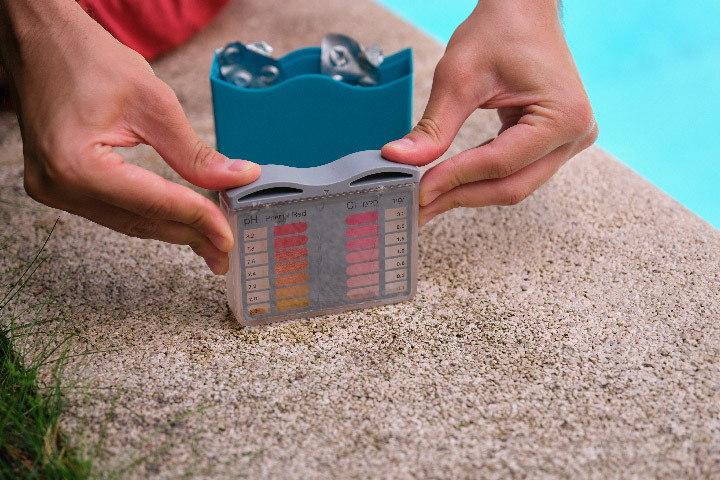
Unstable pH Swings in Inground Swimming Pools: Causes, Troubleshooting, and Solutions

Keep Your Pool Water Balanced and Safe by Managing pH Fluctuations

Introduction

Maintaining the correct pH level in your inground swimming pool is essential for ensuring the comfort and safety of swimmers, as well as protecting your pool equipment. However, unstable pH swings can occur and can cause a variety of problems. In this article, we will explore the causes of unstable pH swings, how to troubleshoot them, and the best solutions to keep your pool water balanced and safe.

Causes of Unstable pH Swings


There are several factors that can contribute to unstable pH swings in your inground swimming pool:

  1. Inconsistent chemical maintenance: Irregular or improper dosing of chemicals can cause fluctuations in pH levels.
  2. High alkalinity: High total alkalinity can cause the pH to be more resistant to change, resulting in instability.
  3. Organic debris: Leaves, grass, and other organic materials can alter the pH balance of your pool water.
  4. Swimmer load: An increase in swimmers can introduce contaminants that affect pH levels.
  5. Rainwater: Heavy rain or storms can dilute the pool water, causing fluctuations in pH levels.

Troubleshooting Unstable pH Swings

To identify the cause of unstable pH swings in your pool, follow these troubleshooting steps:

  1. Test your pool water regularly: Regular water testing allows you to monitor pH levels and other water balance parameters. This helps you identify any imbalances that may be causing pH fluctuations.
  2. Inspect your pool equipment: Check your pool pump, filter, and chemical feeder to ensure they are functioning correctly.


Solutions to Manage Unstable pH Swings

  1. Maintain a consistent chemical maintenance routine: Regularly test and adjust your pool water chemistry to maintain the recommended pH levels (7.4 to 7.6). Consistency in chemical dosing is crucial for maintaining stable pH levels.
  2. Adjust total alkalinity: Test and maintain total alkalinity within the range of 80-120 ppm. This will help to stabilize your pool’s pH levels.
  3. Remove organic debris: Regularly skim, vacuum, and brush your pool to remove leaves, grass, and other organic materials that can affect pH balance.
  4. Balance other water parameters: Ensure all water parameters, such as calcium hardness and sanitizer levels, are within the recommended ranges. This will help to maintain a stable pH level.
  5. Use a pH buffer: A pH buffer, such as sodium bicarbonate, can help stabilize pH levels by increasing the total alkalinity.
  6. Manage swimmer load: Monitor and manage the number of swimmers in your pool to minimize the impact on pH levels.
  7. Protect your pool from rainwater: Use a pool cover during heavy rain or storms to prevent rainwater from diluting the pool water and causing pH fluctuations.

Conclusion

Unstable pH swings in your inground swimming pool can lead to various problems, including discomfort for swimmers, damage to pool equipment, and ineffective sanitization. By understanding the causes of unstable pH swings and implementing proper troubleshooting and solutions, you can maintain a balanced and safe pool environment. Regular pool maintenance and water testing are essential for keeping your pool water crystal clear and ready for swimming all season long.

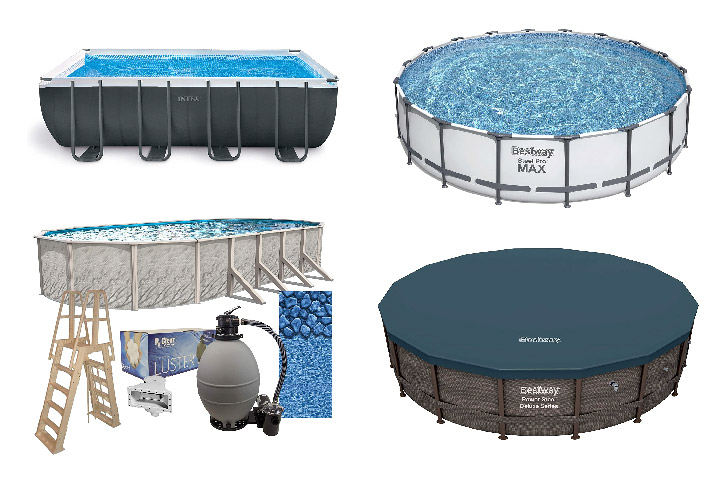
Common Mistakes to Avoid When Buying an Above Ground Pool

Don’t let these pitfalls ruin your pool-buying experience when getting a new above ground pool.

An above ground pool can provide endless hours of fun, relaxation, and family bonding. However, choosing the right pool requires careful consideration and planning. To help you make an informed decision, we’ve compiled a list of common mistakes to avoid when buying an above ground pool.

  1. Not Considering the Pool’s Size and Shape

One of the most common mistakes when buying an above ground pool is not taking into account the size and shape of the pool. Before making a purchase, measure your backyard to ensure that the pool will fit comfortably and still allow for enough space for other activities. Additionally, think about the shape of the pool and how it will affect the layout of your backyard. Round and oval pools are the most popular shapes, but rectangular and square options are also available.

  1. Overlooking Local Regulations and Permits

Before installing an above ground pool, it’s essential to research local regulations and obtain any necessary permits. Failing to do so can result in fines, or you may be required to remove the pool altogether. Check with your local municipality and homeowners’ association to understand the rules and restrictions surrounding pool installations.

  1. Choosing the Wrong Pool Material


Above ground pools are available in a variety of materials, including steel, aluminum, and resin. Each material has its pros and cons, so it’s crucial to choose the right one for your needs. Steel pools are typically the most affordable option but are more prone to rust and corrosion. Aluminum pools are more lightweight and resistant to corrosion, but they can be susceptible to denting. Resin pools are the most durable and resistant to corrosion, but they can be more expensive.

  1. Ignoring Pool Installation Costs

Many people focus solely on the cost of the pool itself, neglecting to consider the installation costs. The installation process can be complex and time-consuming, and hiring a professional installer may be necessary. Make sure to factor in the cost of installation when budgeting for your above ground pool.

  1. Disregarding Maintenance Requirements

Owning a pool requires regular maintenance, including chemical balancing, cleaning, and filter maintenance. Before purchasing an above ground pool, make sure you understand the maintenance requirements and are prepared to invest the time and money necessary to keep your pool in top condition.

  1. Forgetting About Pool Accessories

When budgeting for an above ground pool, don’t forget to account for the cost of necessary accessories, such as a pool ladder, filter system, pool cover, and pool toys. These items can add up quickly and significantly impact the overall cost of your pool.

  1. Focusing Solely on Price


While it’s essential to stick to a budget, focusing solely on price can lead to disappointment in the long run. Cheaper pools may be made from lower-quality materials and may not last as long as more expensive options. Instead of solely focusing on price, consider the pool’s durability, materials, and overall value.

Conclusion

By avoiding these common mistakes, you can make an informed decision when purchasing an above ground pool. Remember to consider factors such as size, shape, materials, and maintenance requirements to ensure you choose the perfect pool for your family and backyard space. By doing your research and understanding the potential pitfalls, you’ll be well on your way to enjoying your new above ground pool for years to come.

Reviving Your Green Above Ground Pool: A Step-by-Step Guide to Opening Season

Transform Your Dirty Green Pool into a Crystal-Clear Oasis for the First Swim of the Season

Opening your above ground pool for the season can be both exciting and daunting, especially when you’re greeted by murky green water. But fear not! With a bit of time, effort, and the right approach, you can transform your dirty green pool into a sparkling oasis, ready for the first swim of the season. This article will provide detailed steps on how to clean and prepare your above ground pool for summer fun.

Step 1: Remove Debris and Clean the Pool Area

Before diving into the process of cleaning your green pool, start by removing any debris, leaves, or dirt from the pool area. Use a pool skimmer or leaf net to remove any floating debris from the water surface. Be sure to clean the surrounding pool deck and equipment as well to prevent any contaminants from re-entering the pool.


Step 2: Check and Clean the Pool Equipment

Inspect your pool equipment, including the pump, filter, and hoses, for any signs of damage or wear. Clean the filter, backwash if necessary, and ensure that all connections are secure. Turn on the pool pump and let it run continuously throughout the cleaning process to help circulate and filter the water.

Step 3: Test and Balance the Water Chemistry

Test the pool water using a test kit or test strips to determine the levels of pH, alkalinity, and sanitizer. Adjust the water chemistry as needed to reach the recommended levels:

  • pH: 7.4 – 7.6
  • Alkalinity: 80 – 120 ppm
  • Chlorine: 2 – 4 ppm

Step 4: Brush and Vacuum the Pool

Using a pool brush, scrub the walls and floor of the pool to dislodge any algae or dirt buildup. Then, use a pool vacuum to remove debris, algae, and other contaminants from the pool’s bottom. Be sure to vacuum slowly and thoroughly to ensure all dirt and debris are removed.

Step 5: Shock the Pool

Shocking the pool with a high dose of chlorine or a non-chlorine shock product will help kill algae and bacteria, as well as oxidize any organic contaminants in the water. Follow the manufacturer’s instructions for the proper dosage, and be sure to wear protective gear such as gloves and goggles while handling pool chemicals. Allow the pool pump to run continuously for at least 24 hours after shocking to ensure proper circulation and filtration.


Step 6: Use an Algaecide

Applying an algaecide to your pool can help prevent future algae growth and ensure a crystal-clear swimming environment. Follow the manufacturer’s instructions for the correct dosage and application method. Allow the pool pump to continue running to circulate the algaecide throughout the pool.

Step 7: Re-test and Fine-tune the Water Chemistry

After 24 hours, test the pool water again to ensure that the water chemistry is balanced. Make any necessary adjustments to pH, alkalinity, and sanitizer levels to maintain a clean and safe swimming environment.


Step 8: Clean and Replace Pool Accessories

Finally, clean any pool accessories, such as ladders, pool toys, and floats, before returning them to the pool. This will help prevent the introduction of contaminants and ensure a clean start to the swimming season.

Conclusion

Opening your green above ground pool for the season may seem overwhelming, but with a systematic approach and some elbow grease, you can transform your pool into a pristine oasis. By following these steps, you can ensure a clean, safe, and enjoyable swimming experience for you and your family all summer long. Happy swimming!