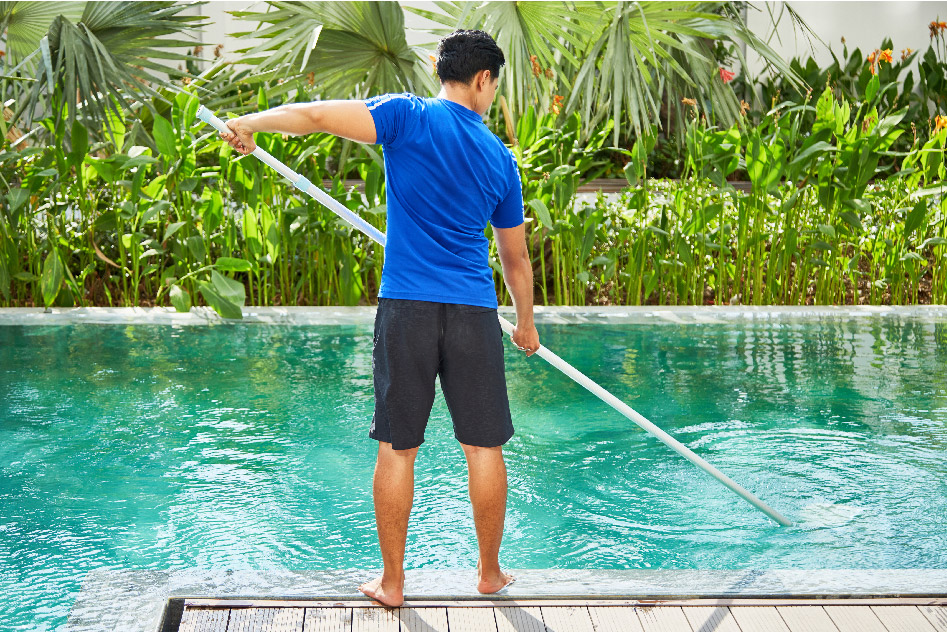
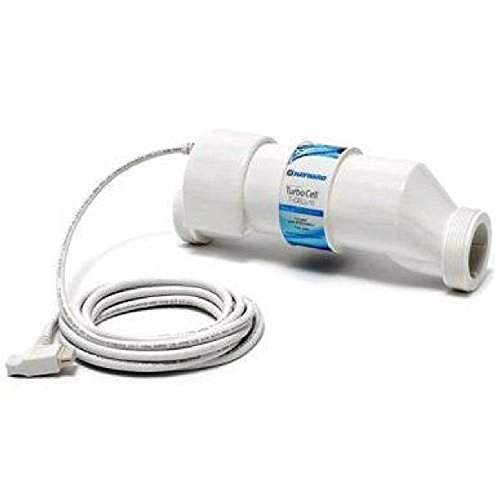
Caring for Your Chlorine Generator Cell: Essential Tips for Optimal Performance and Longevity

Keep Your Salt Water Pool Clean and Clear by Properly Maintaining Your Chlorine Generator Cell

Chlorine generator cells, also known as salt cells, are a critical component of a salt water pool’s sanitation system. They use electrolysis to convert salt into chlorine, providing continuous sanitization to keep pool water clean and clear. Proper care and maintenance of the chlorine generator cell are crucial to ensure optimal performance and extend the lifespan of the cell. In this article, we will discuss the proper way to care for your chlorine generator cell to keep your salt water pool in top shape.

Step 1: Inspect the Cell Regularly

Regularly inspect the chlorine generator cell to identify any issues or signs of wear. Check for buildup, scaling, or damage to the cell’s plates or other components. Monitoring the cell’s performance and keeping an eye on the salt chlorine generator’s output settings will help you determine when it’s time for cleaning or replacement.


Step 2: Clean the Cell as Needed

Over time, mineral deposits and calcium buildup can accumulate on the cell plates, reducing the cell’s efficiency and its ability to produce chlorine. Clean the cell as needed, typically every 3-6 months, or according to the manufacturer’s recommendations. Follow these steps to clean your chlorine generator cell:

  1. Turn off the pool pump and salt chlorine generator.
  2. Disconnect the cell from the generator’s control unit and remove it from the plumbing.
  3. Visually inspect the cell for buildup or scaling. If significant buildup is present, proceed with cleaning.
  4. Mix a cleaning solution of equal parts water and muriatic acid in a plastic container. Always add acid to water, not water to acid, to avoid a dangerous chemical reaction.
  5. Submerge the cell in the cleaning solution and let it soak for 15-30 minutes, or until the buildup has dissolved. Do not leave the cell in the cleaning solution for too long, as excessive exposure to acid can damage the cell.
  6. Use a soft brush or sponge to gently remove any remaining deposits from the cell plates. Avoid using abrasive tools that can damage the cell’s surface.
  7. Thoroughly rinse the cell with fresh water to remove any residual acid.
  8. Reinstall the cell, making sure all connections are secure and watertight.


Step 3: Maintain Proper Water Chemistry

Maintaining balanced water chemistry in your salt water pool is crucial for the health of your chlorine generator cell. Test your pool water regularly and adjust the levels of pH, alkalinity, and salt concentration as needed to keep them within the recommended ranges. Proper water chemistry will help prevent excessive scaling and extend the life of the cell.

Step 4: Monitor the Salt Chlorine Generator’s Output

Regularly check the output settings on your salt chlorine generator to ensure it’s producing the correct amount of chlorine. Adjust the output settings as needed to maintain proper chlorine levels (1-3 ppm) in your pool. This will help prevent excessive wear on the cell and keep your pool water clean and clear.


Step 5: Replace the Cell When Necessary

Chlorine generator cells have a limited lifespan, typically ranging from 3-7 years, depending on usage and maintenance. As the cell reaches the end of its life, it may become less efficient and require more frequent cleaning or higher output settings to maintain proper chlorine levels. When the cell can no longer produce adequate chlorine, it’s time to replace it with a new one.

Proper care and maintenance of your chlorine generator cell are crucial for maintaining optimal performance and extending its lifespan. By regularly inspecting and cleaning the cell, maintaining balanced water chemistry, and monitoring the salt chlorine

Eliminating Pink Slime from Your Above Ground Swimming Pool

A Comprehensive Guide to Identifying, Treating, and Preventing Pink Slime in Home Pools

Introduction

Pink slime is an unsightly and unwelcome guest in many above ground swimming pools. This slimy, gelatinous substance is actually a type of bacteria called Methylobacterium. Pink slime can form on pool surfaces, equipment, and inside pipes, leading to issues such as poor water circulation, unpleasant odors, and an unappealing swimming environment. In this article, we will guide you through the process of identifying, treating, and preventing pink slime in your above ground swimming pool.

Identifying Pink Slime in Your Swimming Pool

Pink slime can appear as a pink or red slimy film on pool surfaces, such as walls, floors, ladders, and steps. It can also be found inside skimmer baskets, pumps, and filters. Pink slime typically thrives in areas with low water circulation and tends to be more prevalent in pools with high phosphate levels or inadequate sanitation.

Treating Pink Slime in Your Above Ground Swimming Pool

  1. Remove Visible Pink Slime: Begin by manually removing as much visible pink slime as possible using a pool brush, skimmer net, or a cloth. Be sure to clean all affected surfaces and equipment, including skimmer baskets, pumps, and filters.
  2. Shock Your Pool: After removing the visible pink slime, shock your pool using a high-quality pool shock treatment. Follow the manufacturer’s instructions for the proper dosage and application procedure. Shocking your pool helps eliminate bacteria and other contaminants, including pink slime.
  3. Balance Your Pool Water: Test and adjust your pool water chemistry to maintain optimal levels:
    • pH: 7.2-7.8
    • Total Alkalinity: 80-120 ppm
    • Free Chlorine: 2-4 ppm
    • Calcium Hardness: 200-400 ppm
  4. Remove Phosphates: High phosphate levels can contribute to the growth of pink slime. Use a phosphate remover to reduce phosphate levels in your pool, following the manufacturer’s instructions for the proper dosage and application procedure.
  5. Vacuum and Brush Your Pool: Thoroughly vacuum and brush your pool to remove any remaining pink slime and debris. Pay special attention to areas where pink slime was previously present.
  6. Clean Pool Equipment: Disassemble and clean any affected pool equipment, such as skimmer baskets, filters, and pumps, to ensure all traces of pink slime are removed.

Preventing Pink Slime in Your Above Ground Swimming Pool

  1. Maintain Proper Water Chemistry: Regularly test and adjust your pool water chemistry to maintain a balanced and sanitary swimming environment.
  2. Maintain Sanitizer Levels: Ensure your pool’s sanitizer levels are within the recommended range, whether you use chlorine or an alternative sanitizer.
  3. Regular Pool Maintenance: Perform routine pool maintenance, including vacuuming, brushing, and skimming, to prevent the accumulation of debris and contaminants that can contribute to pink slime growth.
  4. Manage Phosphate Levels: Regularly test and control phosphate levels in your pool using a phosphate remover to discourage pink slime formation.
  5. Improve Water Circulation: Ensure your pool’s pump and filter system is working efficiently to maintain proper water circulation, which can help prevent pink slime growth in low-flow areas.

Conclusion

While pink slime can be an unwelcome nuisance in your above ground swimming pool, with proper identification, treatment, and prevention techniques, you can effectively eliminate and prevent its return. By maintaining a balanced and clean swimming environment, you can enjoy a clear, sparkling pool free of pink slime and other contaminants, providing endless hours of fun and relaxation for you and your family.

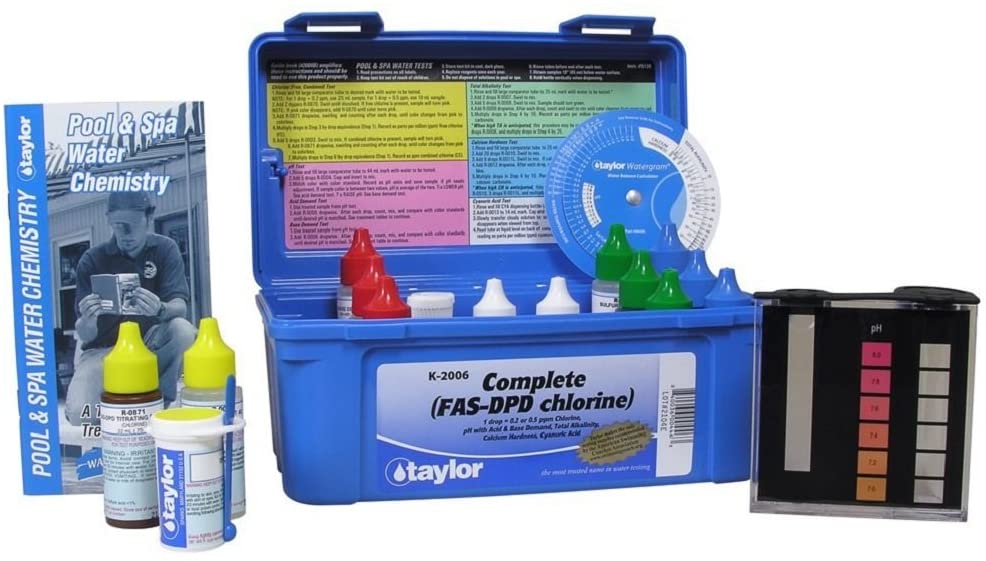
How to Raise pH in a Swimming Pool: A Comprehensive Guide for Pool Owners

Maintain the Perfect pH Balance for a Healthy and Enjoyable Swimming Experience

Introduction

Maintaining the ideal pH level in your swimming pool is crucial to ensuring a comfortable swimming experience, protecting your pool equipment, and promoting effective sanitization. The pH scale ranges from 0 to 14, with 7 being neutral. The optimal pH level for a swimming pool is typically between 7.2 and 7.8. If your pool’s pH is too low, it can lead to corrosion of pool equipment, skin and eye irritation, and reduced effectiveness of sanitizing chemicals. This article will provide you with a comprehensive guide on how to raise the pH level in your swimming pool to achieve a well-balanced and healthy swimming environment.

Step 1: Test Your Pool Water

Begin by testing your pool water to determine the current pH level. You can use a pool test kit or test strips, which are readily available at most pool supply stores. Follow the instructions provided with your testing method to obtain accurate results.

Step 2: Calculate the Required pH Increaser Amount

If your pH level is below 7.2, you will need to add a pH increaser (also known as a pH up or pH plus) to raise the pH. Sodium carbonate (soda ash) and sodium bicarbonate (baking soda) are two common chemicals used as pH increasers.

To calculate the amount of pH increaser required, consult the product label or use an online pool calculator. You will need to know your pool’s volume, the current pH level, and the target pH level.

Step 3: Pre-dissolve the pH Increaser

To ensure even distribution and prevent cloudiness or damage to your pool surfaces, pre-dissolve the pH increaser in a bucket of water before adding it to your pool. Fill a large plastic bucket with water, and gradually add the required amount of pH increaser, stirring continuously until it’s fully dissolved.

Step 4: Add the pH Increaser to Your Pool

Slowly pour the dissolved pH increaser solution into the pool, spreading it evenly around the perimeter. Avoid pouring the solution directly onto pool surfaces or fittings, as this may cause damage.

Step 5: Circulate the Pool Water

Turn on your pool pump and allow it to circulate the water for at least 2-4 hours. This will help to distribute the pH increaser evenly throughout the pool, ensuring the pH level is raised consistently.

Step 6: Retest and Adjust as Needed

After the pool water has circulated for a sufficient time, retest the pH level using your pool test kit or test strips. If the pH level is still below the ideal range, repeat Steps 2-5, adding more pH increaser as necessary. Keep in mind that it’s better to make gradual adjustments to avoid overshooting the target pH level.

Conclusion

Maintaining the optimal pH level in your swimming pool is essential for a healthy and enjoyable swimming environment. By following this comprehensive guide on how to raise the pH in your swimming pool, you can ensure the comfort of swimmers, protect your pool equipment, and maximize the effectiveness of your sanitizing chemicals. Regular testing and adjustments are key to maintaining a well-balanced and inviting pool for you and your family to enjoy.

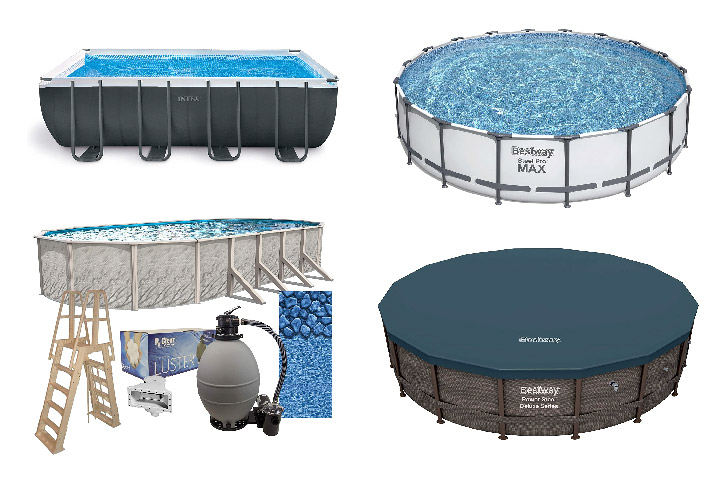
Opening Your Above Ground Swimming Pool for the Season: A Comprehensive Guide

Uncover the Best Date, Detailed Steps, and Tips for a Smooth and Successful Pool Opening

As the warmer months approach, it’s time to think about opening your above ground swimming pool for the season. A well-planned and executed pool opening ensures a safe, clean, and enjoyable swimming environment for you and your family. This article provides guidance on the best date to open your pool, detailed steps for a successful opening, and tips and tricks to make the process smoother and more efficient.

Best Date to Open Your Above Ground Swimming Pool

While the ideal date for opening your pool may vary depending on your location and local climate, a general rule of thumb is to open the pool when the daytime temperatures consistently stay above 70°F (21°C). Opening the pool too early could result in cold water temperatures and increased energy costs, while opening too late can lead to the growth of algae and other contaminants.

Detailed Steps for Opening Your Above Ground Swimming Pool

Step 1: Clean the Pool Area Start by removing any leaves, debris, and trash from around your pool. This will help prevent dirt and debris from entering the water during the opening process.

Step 2: Remove the Pool Cover Carefully remove your winter pool cover, being mindful of any accumulated water or debris. Clean and dry the cover thoroughly before storing it for the season.

Step 3: Inspect the Pool for Damage Check your pool for any signs of damage, such as tears or punctures in the liner, rust, or loose fittings. Address any issues before proceeding with the opening process.

Step 4: Reinstall Pool Equipment Reinstall any pool equipment that was removed or winterized during the off-season, including the ladder, skimmer, filter, pump, and any other accessories.

Step 5: Fill the Pool Using a garden hose, fill your pool to the appropriate water level, typically halfway up the skimmer opening.


Step 6: Prime and Start the Pump Prime your pool pump by filling the pump basket with water and ensuring all valves are open. Turn on the pump and check for proper water flow and circulation.

Step 7: Test and Balance the Water Chemistry Using a pool test kit or test strips, check the levels of pH, chlorine, total alkalinity, and calcium hardness in your pool water. Adjust the chemical levels as needed to achieve optimal balance:

  • pH: 7.2-7.8
  • Chlorine: 1-3 ppm (parts per million) for traditional chlorine pools or 2-4 ppm for saltwater pools
  • Total Alkalinity: 80-120 ppm
  • Calcium Hardness: 200-400 ppm

Step 8: Shock the Pool Shocking your pool involves adding a high dose of chlorine or other sanitizer to eliminate any bacteria, algae, and other contaminants that may have developed during the off-season. Follow the manufacturer’s instructions for the proper dosage and application procedure.

Step 9: Clean the Pool Skim the surface of your pool to remove any debris, brush the pool walls and floor, and vacuum the pool thoroughly to ensure a clean and inviting swimming environment.

Tips and Tricks for a Smooth Pool Opening

  1. Plan ahead: Set a date for your pool opening and gather all necessary supplies, including chemicals, test kits, and cleaning equipment, well in advance.
  2. Enlist help: Pool opening can be a time-consuming process. Recruit family members or friends to assist with tasks such as removing the pool cover and cleaning the pool area.
  3. Be patient: Allow the pool water to circulate for at least 24 hours before testing and adjusting the water chemistry. This will ensure accurate readings and more effective chemical adjustments.
  4. Keep a maintenance log: Document the chemical levels, equipment settings, and any issues encountered during the pool opening process. This information can be helpful for future reference and to track changes in your pool’s condition over time.
  5. Monitor water chemistry closely: In the first few weeks after opening your pool, test the water chemistry more frequently (every 2-3 days) to ensure proper balance and sanitization. As the season progresses and the water stabilizes, you can reduce testing frequency to once per week.
  6. Run the pump and filter longer initially: Running your pool pump and filter for longer periods (12-24 hours) immediately after opening your pool can help clear any cloudiness, debris, or contaminants more quickly.
  7. Consider a professional pool opening service: If you are unsure about the pool opening process or prefer to have an expert handle the task, many pool service companies offer pool opening packages that include equipment installation, water testing, and chemical balancing.


Opening your above ground swimming pool for the season is an essential task that sets the stage for a summer of fun and relaxation. By choosing the best date to open, following the detailed steps outlined in this guide, and applying the tips and tricks for a smooth pool opening, you can ensure a safe, clean, and enjoyable swimming environment for you and your family. With proper planning and attention to detail, your pool will be ready to provide endless hours of entertainment and relaxation all season long.

The Best Way to Clean Your Home Swimming Pool: A Comprehensive Guide for Pool Owners

Keep Your Pool Sparkling Clean and Inviting with These Detailed Steps and Tips

A clean swimming pool is essential for a safe and enjoyable swimming experience. Regular pool maintenance not only keeps the water looking clear and inviting but also helps prolong the life of your pool equipment and reduces the risk of waterborne illnesses. In this article, we provide a comprehensive guide on the best way to clean your home swimming pool, detailing the steps and tips to ensure a well-maintained and inviting pool for you and your family to enjoy.


Step 1: Skim the Surface

Start by skimming the surface of your pool using a leaf skimmer or pool net. This will help remove leaves, insects, and other debris that can affect water quality and clog your pool’s filtration system. For best results, skim the pool daily or as needed to keep the surface clear.


Step 2: Brush the Pool Walls and Floor

Use a pool brush to clean the walls, floor, and any steps or ledges in your pool. Pay special attention to corners, crevices, and areas around the pool’s waterline where algae and dirt can accumulate. Brushing your pool at least once a week will help prevent the buildup of algae and other contaminants.

Step 3: Vacuum the Pool

Vacuuming your pool regularly is essential for removing dirt, debris, and small particles that brushing and skimming may miss. There are various types of pool vacuums available, including manual, automatic, and robotic vacuums. Choose the one that best suits your needs and budget, and follow the manufacturer’s instructions for proper use. Aim to vacuum your pool at least once a week or more frequently if needed.

Step 4: Clean the Pool Filter

A clean pool filter is crucial for maintaining water quality and circulation. Depending on the type of filter you have (sand, cartridge, or diatomaceous earth), the cleaning process will differ. Consult your filter’s owner’s manual for specific cleaning instructions and follow them accordingly. As a general rule, clean your filter every 4-6 weeks or as needed based on pressure gauge readings and overall pool cleanliness.

Step 5: Check and Maintain Water Chemistry

Regularly testing and adjusting your pool’s water chemistry is essential for a safe and comfortable swimming environment. Use a pool test kit or test strips to check the levels of pH, chlorine or other sanitizers, total alkalinity, and calcium hardness. The ideal levels for these parameters are:

  • pH: 7.2-7.8
  • Chlorine: 1-3 ppm (parts per million) for traditional chlorine pools or 2-4 ppm for saltwater pools
  • Total Alkalinity: 80-120 ppm
  • Calcium Hardness: 200-400 ppm


Adjust these levels as needed to maintain optimal water balance and ensure effective sanitization.

Step 6: Shock the Pool

Shocking your pool involves adding a high dose of chlorine or other sanitizer to kill algae, bacteria, and other contaminants. This should be done on a regular basis, typically every 1-2 weeks, or as needed to maintain water clarity and sanitation. Follow the manufacturer’s instructions for the proper dosage and application procedure.

Tips for Maintaining a Clean Swimming Pool

  1. Keep the pool area clean: Remove any leaves, debris, and trash from around your pool to prevent them from being blown into the water.
  2. Maintain proper circulation: Run your pool pump for at least 8-12 hours a day to ensure adequate water circulation and filtration.
  3. Keep the water level consistent: Maintain the water level halfway up the skimmer opening to ensure optimal skimming and filtration.
  1. Regularly inspect and maintain pool equipment: Check your pool pump, filter, skimmer baskets, and other equipment for any signs of wear, damage, or clogging. Address any issues promptly to ensure optimal pool performance.
  2. Utilize a pool cover: Using a pool cover when the pool is not in use can help reduce the amount of debris that enters the water, minimize water evaporation, and maintain consistent water temperature. Choose a pool cover that fits your pool’s shape and size for maximum effectiveness.
  3. Trim overhanging vegetation: Keep trees, bushes, and other vegetation trimmed back from the pool area to reduce the amount of leaves and debris that can fall into the water.
  4. Educate pool users: Encourage family members and guests to shower before entering the pool, avoid wearing heavy lotions or oils, and refrain from bringing food or beverages into the pool area. This can help minimize contaminants and keep your pool cleaner.

Maintaining a clean and well-maintained swimming pool is crucial for a safe, healthy, and enjoyable swimming experience. By following the detailed steps and tips outlined in this comprehensive guide, you can keep your pool sparkling clean and inviting for you and your family to enjoy. Regular pool care not only ensures a pleasant swimming environment but also helps prolong the life of your pool equipment and minimizes the risk of waterborne illnesses. With proper maintenance and attention, your home swimming pool can be a source of relaxation, fun, and enjoyment for years to come.