Muriatic Acid in Swimming Pools: Uses, Applications, and Best Practices

Discover the Role of Muriatic Acid in Maintaining a Safe and Balanced Pool Environment

Introduction

Muriatic acid, also known as hydrochloric acid, is a powerful and versatile chemical often used in swimming pool maintenance. This article will explore the various uses of muriatic acid in pool care, provide guidance on how and when to use it, and offer safety tips for handling this potent chemical.

The Role of Muriatic Acid in Swimming Pools

Muriatic acid plays a crucial role in maintaining a balanced and healthy swimming environment. Its primary uses in pool care include:

  1. Lowering pH Levels: High pH levels can lead to issues such as cloudy water, reduced sanitizer effectiveness, and scaling on pool surfaces. Muriatic acid is an effective and fast-acting solution for lowering pH levels to the optimal range of 7.2 to 7.8.
  2. Reducing Total Alkalinity: High total alkalinity can contribute to imbalanced water chemistry and can cause pH levels to fluctuate. Muriatic acid is commonly used to lower total alkalinity to the ideal range of 80 to 120 parts per million (ppm).
  3. Removing Mineral Stains: Muriatic acid can also be used to clean and remove mineral stains, such as calcium deposits, from pool surfaces.


How and When to Use Muriatic Acid

  1. Lowering pH Levels: To lower pH levels using muriatic acid, follow these steps:

    a. Test your pool water using a test kit or test strips to determine the current pH level. b. Refer to the manufacturer’s instructions or an online calculator to determine the appropriate amount of muriatic acid needed to lower the pH to the desired level. c. Dilute the muriatic acid in a bucket of water, following the recommended dilution ratio. d. Slowly pour the diluted acid solution into the pool, ideally near the return jets for optimal circulation. e. Wait at least 4 hours, then retest the pH level and make any necessary adjustments.

  2. Reducing Total Alkalinity: To lower total alkalinity with muriatic acid, follow these steps:

    a. Test your pool water to determine the current total alkalinity level. b. Calculate the required amount of muriatic acid to lower total alkalinity to the desired range. c. Dilute the muriatic acid in water, as previously described. d. Pour the diluted solution into the deep end of the pool, away from pool walls and fixtures. e. Wait 4 to 6 hours, then retest the total alkalinity level and make any necessary adjustments.

  3. Removing Mineral Stains: To remove mineral stains using muriatic acid, follow these steps:

    a. Turn off the pool pump and filter system. b. Mix a solution of muriatic acid and water, following the recommended dilution ratio for stain removal. c. Wearing proper protective gear, apply the diluted solution to the stained area using a sponge or brush. d. Allow the solution to sit for a few minutes, then scrub the stain until it is removed. e. Thoroughly rinse the treated area with fresh water to neutralize any remaining acid.

Safety Precautions and Best Practices

Muriatic acid is a powerful and potentially hazardous chemical. When using it in your swimming pool, always follow these safety guidelines:

  1. Wear appropriate personal protective equipment, such as gloves, goggles, and a mask, to prevent exposure to skin, eyes, and respiratory system.
  2. Store muriatic acid in a cool, dry, well-ventilated area, away from direct sunlight, heat sources, and other reactive chemicals. 3. Never mix muriatic acid with other chemicals, particularly chlorine, as this can create dangerous reactions and toxic gases.
  3. Always add muriatic acid to water when diluting, not the other way around, to avoid a dangerous exothermic reaction.
  4. Use a plastic or acid-resistant container for diluting and applying muriatic acid, as it can corrode metal.
  5. Keep children and pets away from the pool area when using muriatic acid to ensure their safety.

Conclusion

Muriatic acid is a valuable tool in maintaining a balanced and clean swimming pool environment. Its versatile applications, including lowering pH levels, reducing total alkalinity, and removing mineral stains, make it an essential chemical for pool owners. By understanding how and when to use muriatic acid, and following best practices for safety, you can effectively maintain your pool’s water chemistry and enjoy a healthy, sparkling swimming pool all season long.

A Comprehensive Guide to Pool Vacuums: Types, Functionality, and Usage

Exploring Different Types of Pool Vacuums, How They Operate, and Best Practices for Optimal Pool Cleaning

Introduction

Maintaining a clean and debris-free swimming pool is essential for a healthy and enjoyable swimming environment. Pool vacuums play a crucial role in removing dirt, leaves, and other debris from the pool floor and walls. In this article, we will discuss different types of pool vacuums, how they work, how to use them, and how often to use them for optimal pool cleaning.

Types of Pool Vacuums

  1. Manual Pool Vacuums: Manual pool vacuums are handheld devices that require the user to manually maneuver the vacuum head along the pool’s surfaces. They are typically connected to a telescopic pole and use the pool’s filtration system to collect debris.
  2. Suction-Side Pool Cleaners: Suction-side pool cleaners connect to the pool’s skimmer or dedicated suction line and utilize the pool’s pump to create suction. As the cleaner moves around the pool, debris is sucked up and sent to the pool’s filter.
  3. Pressure-Side Pool Cleaners: Pressure-side cleaners connect to the pool’s return line and use water pressure from the pool pump to propel the cleaner around the pool. These cleaners typically have their own debris collection bag, reducing the load on the pool’s filtration system.
  4. Robotic Pool Cleaners: Robotic pool cleaners are self-contained, automated units that use an internal electric motor to move around the pool. They have built-in filtration systems and can be programmed to clean specific areas or run on a schedule.

How Pool Vacuums Work

  1. Manual Pool Vacuums: Manual vacuums rely on the user to physically move the vacuum head across the pool surfaces. They use the suction power of the pool’s pump to collect debris, which is then captured in the pool’s filter.
  2. Suction-Side Pool Cleaners: These cleaners use the pool’s pump suction to move around the pool, collecting debris as they go. The debris is sent through the hose and into the pool’s filtration system.
  3. Pressure-Side Pool Cleaners: Pressure-side cleaners use water pressure from the pool pump to propel the cleaner and create a venturi effect, which lifts debris into the cleaner’s collection bag.
  4. Robotic Pool Cleaners: Robotic cleaners use an internal electric motor to move and a built-in pump to create suction. The debris is collected in an internal filter bag or cartridge, which can be easily removed and cleaned.

How to Use Pool Vacuums

  1. Manual Pool Vacuums: Connect the vacuum head to a telescopic pole and the vacuum hose to the pool’s skimmer or dedicated vacuum line. Submerge the vacuum head, allowing it to fill with water before starting the pool pump. Carefully guide the vacuum head along the pool’s surfaces, ensuring thorough coverage.
  2. Suction-Side Pool Cleaners: Connect the cleaner to the pool’s skimmer or suction line and adjust any flow control valves or settings as needed. Turn on the pool pump and allow the cleaner to move around the pool, ensuring it covers all areas.
  3. Pressure-Side Pool Cleaners: Connect the cleaner to the pool’s return line, attach the debris collection bag, and turn on the pool pump. Adjust any pressure settings or flow control valves as needed to optimize cleaner performance.
  4. Robotic Pool Cleaners: Place the robotic cleaner in the pool, ensuring the power cable is properly connected and secured. Program the cleaner’s settings or schedule, then turn it on and allow it to clean the pool.


How Often to Use Pool Vacuums

The frequency at which you should use your pool vacuum depends on various factors, such as the amount of debris, pool usage, and the surrounding environment. Here are some general guidelines:

  1. Manual Pool Vacuums: Manual vacuums should be used as needed, based on the amount of debris in the pool. For pools surrounded by trees or in areas prone to dirt and debris, it may be necessary to vacuum once or twice a week. For less debris-prone areas, vacuuming every two weeks or monthly may be sufficient.
  2. Suction-Side Pool Cleaners: Suction-side cleaners can be used more frequently, as they require less manual effort. Running the cleaner every other day or a few times a week can help maintain a debris-free pool environment.
  3. Pressure-Side Pool Cleaners: Similar to suction-side cleaners, pressure-side cleaners can be used every other day or a few times a week to maintain a clean pool.
  4. Robotic Pool Cleaners: Robotic cleaners offer the convenience of automated cleaning on a schedule. Setting the cleaner to run every day or every other day can help maintain a consistently clean pool without much effort.

Conclusion

Pool vacuums are essential tools for maintaining a clean and healthy swimming environment. By understanding the different types of pool vacuums, their functionality, and how to use them effectively, pool owners can optimize their cleaning routine and enjoy a well-maintained pool. Whether you choose a manual vacuum, a suction-side or pressure-side cleaner, or a robotic cleaner, regular use and proper maintenance will help prolong the life of your pool vacuum and ensure a clean and inviting pool for years to come.

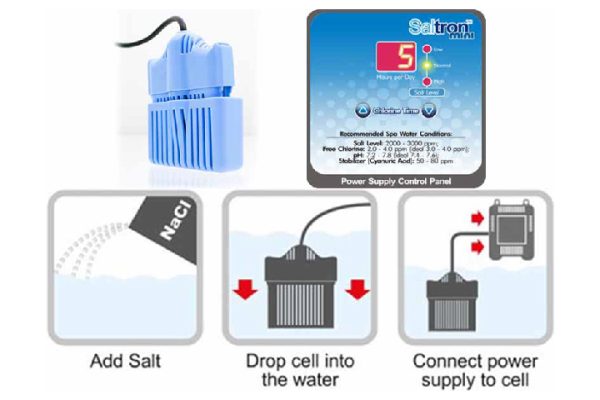
The Saltron Mini Chlorine Generator: Revolutionizing Spa Sanitation and the Benefits of a Salt Water Spa

Keeping your spa clean and safe for users is essential, but traditional sanitation methods can be cumbersome, costly, and may involve harsh chemicals. The Saltron Mini Chlorine Generator, specifically designed for spas, offers an innovative solution for spa sanitation. In this article, we’ll discuss the benefits of the Saltron Mini Chlorine Generator and how it’s changing the game in spa sanitation. Additionally, we’ll delve into the advantages of a saltwater spa and why it might be the perfect choice for your home.

  1. Saltron Mini Chlorine Generator: An Overview

The Saltron Mini Chlorine Generator is a compact, easy-to-use sanitation system designed for use in spas and hot tubs. It works by converting salt into chlorine, maintaining the ideal sanitizer levels to keep your spa clean, clear, and safe for use. The Saltron Mini eliminates the need for traditional chlorine tablets, resulting in a more convenient and eco-friendly spa sanitation method.

  1. Why the Saltron Mini Chlorine Generator Is a Game Changer

There are several reasons why the Saltron Mini Chlorine Generator is revolutionizing spa sanitation:

  • Reduced chemical usage: By producing its own chlorine from salt, the Saltron Mini significantly reduces the need for traditional chlorine tablets, which can be harsh on both the environment and the spa users.
  • Cost-effective: Since the Saltron Mini generates chlorine from salt, you’ll save money on purchasing traditional chemicals and tablets.
  • Easy maintenance: The Saltron Mini features a self-cleaning cell, reducing the time and effort spent on spa maintenance.
  • Improved water quality: Saltwater spas are known for their silky, soft water, which can be more pleasant for users and easier on the skin, eyes, and hair.
  1. The Benefits of a Salt Water Spa

A saltwater spa offers numerous benefits that set it apart from traditional chemically sanitized spas:

  • Enhanced bather comfort: Saltwater is gentler on the skin, eyes, and hair, providing a more comfortable and enjoyable spa experience.
  • Low maintenance: A saltwater system requires less frequent monitoring and adjusting of sanitizer levels, making maintenance less time-consuming and stressful.
  • Environmentally friendly: The reduced reliance on traditional chlorine tablets is better for the environment, as the production of these tablets can be energy-intensive and create waste.
  • Cost savings: Over time, the cost savings from not having to purchase traditional chlorine tablets can offset the initial investment in a saltwater system.
  1. Making the Switch to a Saltron Mini Chlorine Generator and Salt Water Spa

Switching to a Saltron Mini Chlorine Generator and a saltwater spa is a straightforward process:

  • Purchase a Saltron Mini Chlorine Generator that is compatible with your spa’s size and specifications.
  • Add the recommended amount of salt to your spa water according to the Saltron Mini instructions.
  • Install the Saltron Mini following the manufacturer’s guidelines, ensuring that it is securely connected to your spa’s power source and plumbing.
  • Monitor and adjust your spa’s water chemistry as needed, maintaining proper pH and alkalinity levels to ensure optimal performance and longevity of your Saltron Mini and saltwater system.

Conclusion:

The Saltron Mini Chlorine Generator is a groundbreaking innovation in spa sanitation, offering a more convenient, cost-effective, and environmentally friendly solution for maintaining clean and safe spa water. With the added benefits of a saltwater spa, including improved bather comfort and reduced maintenance requirements, there’s no better time to consider making the switch to a Saltron Mini Chlorine Generator and experiencing the difference for yourself. Share this knowledge with fellow spa owners and spread the word about this revolutionary approach to spa sanitation.

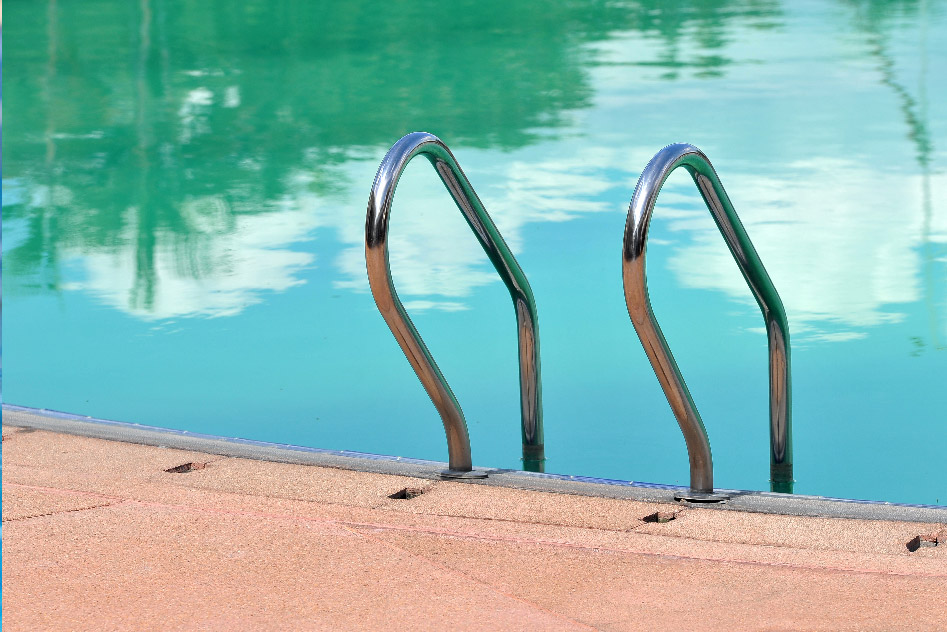
Conquering Black Algae in Your Home Swimming Pool: Causes, Solutions, and Products

Learn How to Identify, Eliminate, and Prevent the Stubborn Invader That Is Black Algae

Introduction

Black algae can be a persistent and challenging issue for many homeowners with swimming pools. This tenacious invader is known for its strong roots and resistance to conventional pool treatments. In this article, we’ll explore the causes of black algae, effective solutions for eliminating it, and the products needed to ensure your pool stays pristine and inviting.


Causes of Black Algae in Swimming Pools

  1. Insufficient Sanitation: Low levels of chlorine or other sanitizing agents in the pool can allow black algae to thrive.
  2. Poor Circulation and Filtration: Inadequate water circulation and filtration can create stagnant areas in the pool, creating a hospitable environment for black algae growth.
  3. Introduction via Contamination: Swimmers, pool equipment, or debris can inadvertently introduce black algae spores into the pool.

Solutions for Eliminating Black Algae

  1. Scrub the Affected Areas: Begin by using a stiff pool brush to vigorously scrub the black algae spots. This will help break up the protective layer and expose the algae to the pool chemicals.
  2. Shock the Pool: Raise the chlorine level in your pool to 10-30 ppm by shocking the water. This will help kill the black algae and sanitize the pool.
  3. Use an Algaecide: Apply a strong algaecide specifically formulated to target black algae. Follow the manufacturer’s instructions for the proper dosage and application method.
  4. Brush and Vacuum: Regularly brush and vacuum the pool to remove dead algae and debris. This will prevent the algae from re-establishing itself in the pool.
  5. Clean the Filter: Thoroughly clean or replace the pool filter to remove any trapped algae spores, ensuring that they do not re-enter the pool.


Products Needed to Remove Black Algae and How to Use Them

  1. Stiff Pool Brush: A stiff-bristled pool brush is essential for breaking up the protective layer of black algae. Use it to vigorously scrub the affected areas before applying chemicals.
  2. Chlorine Shock: Chlorine shock treatment is a concentrated form of chlorine used to raise the sanitizer level quickly. Follow the manufacturer’s guidelines for the proper amount of shock to use based on your pool’s volume and existing chlorine levels.
  3. Black Algae-specific Algaecide: Not all algaecides are effective against black algae, so choose one specifically formulated to combat this stubborn invader. Follow the manufacturer’s instructions for dosage and application.
  4. Pool Vacuum: Use a pool vacuum to remove dead algae and debris from the bottom and walls of the pool. This will help prevent the algae from re-establishing itself.
  5. Filter Cleaner or Replacement Cartridge: Clean your pool filter with a filter cleaner or replace the cartridge to ensure that any trapped algae spores are removed and do not re-enter the pool.

Conclusion

Eliminating black algae from your home swimming pool can be a daunting task, but with the right solutions and products, you can successfully conquer this stubborn invader. By understanding the causes of black algae, implementing effective treatment strategies, and using the appropriate products, you can restore your pool to a pristine and inviting state. Regular pool maintenance, proper sanitation, and diligent water testing will help prevent future black algae outbreaks and keep your pool looking its best.

How to Fix Constantly Low Chlorine in Your Backyard Swimming Pool: Causes, Troubleshooting, and Solutions

Keep Your Pool Safe and Crystal Clear by Understanding and Addressing Low Chlorine Levels

Introduction

Chlorine is an essential chemical for maintaining a clean, safe, and healthy swimming pool. It acts as a sanitizer, killing bacteria, algae, and other harmful microorganisms. However, constantly low chlorine levels can result in an unclean pool and various problems. This article will explore the causes of low chlorine levels, the role of stabilizers, chlorine lock, and combined chlorine, and provide troubleshooting steps and solutions to address this issue.

Causes of High Chlorine Demand

Several factors can contribute to high chlorine demand and low chlorine levels in your pool:

  1. High pool usage: An increase in swimmers can deplete chlorine levels more rapidly.
  2. Excessive organic debris: Leaves, grass, and other organic material can increase chlorine demand.
  3. Algae growth: Algae consume chlorine, leading to a decrease in sanitizer levels.
  4. Improper water balance: Incorrect pH, alkalinity, or calcium hardness levels can affect chlorine’s effectiveness.
  5. Insufficient sunlight protection: Sunlight can break down chlorine, reducing its effectiveness as a sanitizer.


The Role of Stabilizer, Chlorine Lock, and Combined Chlorine

  1. Stabilizer: Also known as cyanuric acid, stabilizers protect chlorine from sunlight degradation, extending its lifespan in the pool. However, high levels of stabilizer can reduce chlorine’s effectiveness.
  2. Chlorine lock: This occurs when high levels of stabilizer prevent free chlorine from sanitizing the pool effectively, resulting in low chlorine levels despite regular dosing.
  3. Combined chlorine: When chlorine binds with contaminants, it forms combined chlorine, which is less effective as a sanitizer. High levels of combined chlorine can contribute to low free chlorine levels.

Problems Resulting from Constantly Low Chlorine

Constantly low chlorine levels can lead to several issues in your pool, such as:

  1. Algae growth: Without sufficient chlorine, algae can thrive, turning your pool water green and murky.
  2. Bacterial growth: Low chlorine levels can result in the proliferation of harmful bacteria, posing health risks to swimmers.
  3. Cloudy water: Insufficient chlorine can cause pool water to become cloudy and uninviting.
  4. Foul odors: Combined chlorine can produce a strong, unpleasant chlorine smell.

Troubleshooting Steps

  1. Test your pool water: Regularly test your pool water for chlorine levels, pH, alkalinity, and stabilizer levels. This will help you identify the cause of low chlorine levels.
  2. Inspect your pool equipment: Ensure your pool pump, filter, and chlorinator are functioning correctly.

Solutions for Fixing Low Chlorine Levels

  1. Shock the pool: Perform a pool shock treatment with a high dose of chlorine to address algae growth, bacteria, and combined chlorine.
  2. Adjust the stabilizer levels: Lower high stabilizer levels by partially draining and refilling your pool with fresh water. Maintain the recommended stabilizer levels to prevent chlorine lock.
  3. Balance your pool water: Ensure your pool water is balanced by adjusting the pH, alkalinity, and calcium hardness levels as needed.
  4. Optimize your chlorinator settings: Adjust your chlorinator settings to increase the rate of chlorine production or dosing.
  5. Remove organic debris: Regularly skim, vacuum, and brush your pool to remove leaves, grass, and other debris that can contribute to high chlorine demand.
  6. Use an algaecide: Regularly use an algaecide to prevent algae growth and maintain optimal chlorine levels.


Conclusion

Constantly low chlorine levels in your backyard swimming pool can lead to several problems, including algae growth, bacterial contamination, and cloudy water. Understanding the causes of low chlorine levels, such as high chlorine demand, the role of stabilizers, chlorine lock, and combined chlorine, is essential in maintaining a clean and safe pool environment.

By implementing proper troubleshooting steps and solutions, such as shocking the pool, adjusting stabilizer levels, balancing pool water, optimizing chlorinator settings, removing organic debris, and using algaecides, you can effectively address and prevent low chlorine levels. Regular pool maintenance and water testing will help you keep your pool crystal clear and ready for swimming all season long.

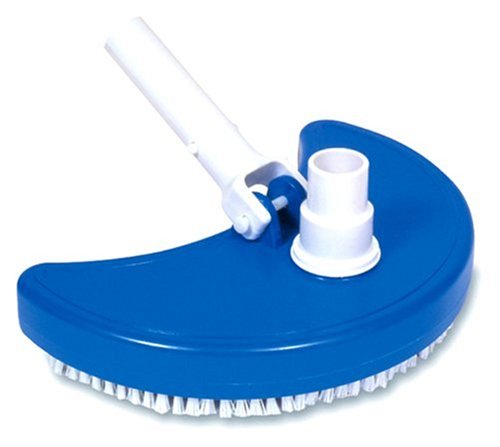
The Art of Brushing Pool Walls: Tips, Techniques, and Essential Tools for Sparkling Clean Swimming Pools

A Comprehensive Guide to Brushing Pool Walls, Best Practices, and Choosing the Right Equipment

Introduction

Regularly brushing pool walls is an essential aspect of swimming pool maintenance that helps maintain a clean and algae-free environment. By eliminating debris, algae, and biofilm buildup, brushing helps maintain water clarity and balance. In this article, we will discuss tips and techniques for brushing pool walls, the best times to brush, different types of brushes, and how often to brush for optimal results.

Tips and Techniques for Brushing Pool Walls

  1. Start at the Top: Begin brushing at the waterline and work your way down the walls, using long, overlapping strokes. This method ensures that debris is pushed downward, making it easier to remove with the pool vacuum.
  2. Brush Around Fittings: Pay special attention to areas around pool fittings, such as return jets, skimmers, and lights. These areas are prone to algae and debris buildup, and thorough brushing helps prevent problems.
  3. Brush Steps and Ledges: Don’t forget to brush pool steps, benches, and ledges, as these surfaces can also harbor algae and debris.
  4. Vacuum After Brushing: After brushing, vacuum the pool to remove the dislodged debris and algae. This step is crucial for maintaining water clarity and preventing debris from settling back onto pool surfaces.

Best Times to Brush

  1. After Chemical Treatments: Brushing the pool walls after adding chemicals helps distribute the treatments evenly, improving their effectiveness.
  2. Before Vacuuming: Brush the walls before vacuuming to dislodge debris and make it easier to remove.
  3. Early Morning or Late Evening: Brushing in the early morning or late evening, when the sun is less intense, can help prevent algae growth by removing any spores that may have settled overnight.


Different Types of Brushes

  1. Nylon Brushes: Nylon brushes are suitable for most pool surfaces, including vinyl, fiberglass, and painted concrete. They have soft bristles that effectively remove debris and algae without damaging delicate surfaces.
  2. Stainless Steel Brushes: Stainless steel brushes are designed for use on unpainted concrete or plaster pools. Their stiff bristles are more effective at removing stubborn algae and debris but can damage softer surfaces, such as vinyl or fiberglass.
  3. Combination Brushes: Combination brushes feature a mix of nylon and stainless steel bristles, offering the best of both worlds. These brushes are ideal for pools with a combination of surfaces or for tackling various types of debris and algae.
  4. Corner Brushes: Corner brushes have angled bristles designed to clean hard-to-reach areas, such as corners and crevices. They can be used in conjunction with other brushes to ensure thorough cleaning.

How Often to Brush

As a general rule, pool walls should be brushed at least once a week to prevent algae and debris buildup. However, during periods of heavy use or in warm, humid climates, more frequent brushing may be necessary to maintain water clarity and balance.

Conclusion

Regularly brushing pool walls is a crucial aspect of pool maintenance that helps keep the water clean and algae-free. By adopting proper techniques, choosing the right brush for your pool’s surfaces, and brushing at the appropriate frequency, you can ensure a well-maintained and enjoyable swimming environment. Don’t underestimate the importance of this simple yet effective maintenance task – your pool will thank you for it.

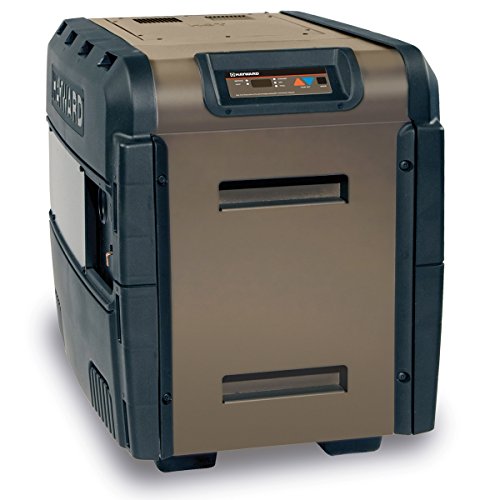
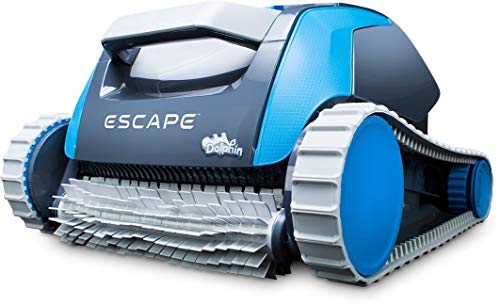
How to Choose the Best Above Ground Pool Heater: A Comprehensive Guide for Pool Owners

Find the Perfect Heater to Keep Your Above Ground Pool Warm and Inviting

Introduction

An above ground pool heater is an excellent investment to extend your swimming season and make your pool more enjoyable on cooler days. With a variety of pool heaters available, selecting the perfect one for your above ground pool can be challenging. This article will provide you with a comprehensive guide to help you choose the best above ground pool heater based on your specific needs and preferences.

Types of Above Ground Pool Heaters

There are several types of pool heaters available for above ground pools, each with its unique features and benefits:

  1. Electric Resistance Heaters: Electric resistance heaters work by using electrical currents to generate heat, which is then transferred to the pool water. They are energy-efficient and produce no emissions, making them environmentally friendly.
  2. Gas Heaters: Gas heaters burn either propane or natural gas to produce heat, which is then transferred to the pool water. They heat the pool water quickly and are suitable for pools that are not used regularly or need rapid heating.
  3. Heat Pumps: Heat pumps transfer heat from the ambient air to the pool water, making them energy-efficient and cost-effective. They work best in warmer climates where the air temperature is consistently above 50°F (10°C).
  4. Solar Heaters: Solar heaters utilize the sun’s energy to heat the pool water, making them environmentally friendly and cost-effective in the long run. They require a solar collector, which can be installed on a roof or other suitable surface.

Factors to Consider When Choosing an Above Ground Pool Heater

  1. Pool Size: The size of your pool will determine the heater’s required capacity. A larger pool requires a more powerful heater to maintain a comfortable water temperature. Check the heater’s specifications to ensure it’s suitable for your pool size.
  2. Climate: The climate where you live will impact the efficiency and suitability of different types of pool heaters. For example, heat pumps work best in warmer climates, while gas heaters may be more suitable for cooler regions.
  3. Energy Efficiency: Energy efficiency is a crucial factor to consider, as it impacts the long-term cost of operating the heater. Heat pumps and solar heaters are generally more energy-efficient than electric resistance heaters and gas heaters.
  4. Installation and Maintenance: Some pool heaters are easier to install and maintain than others. Consider the complexity of installation, ongoing maintenance requirements, and the availability of professional services in your area when choosing a heater.
  5. Budget: Pool heaters vary in price based on their type, capacity, and features. Determine your budget beforehand and choose a heater that meets your needs without breaking the bank. Don’t forget to factor in the long-term operating costs when making your decision.
  6. Warranty and Support: A pool heater is an investment, and a warranty can provide peace of mind in case of defects or issues. Look for pool heaters with a warranty and manufacturers that offer customer support.

Conclusion

Choosing the best above ground pool heater requires careful consideration of factors like pool size, climate, energy efficiency, installation and maintenance, budget, and warranty. By evaluating your specific needs and preferences, you can select the ideal pool heater to keep your above ground pool warm and inviting throughout the swimming season. A well-chosen pool heater can help you enjoy the benefits of your above ground pool, even during cooler days, allowing you to make the most of your investment.

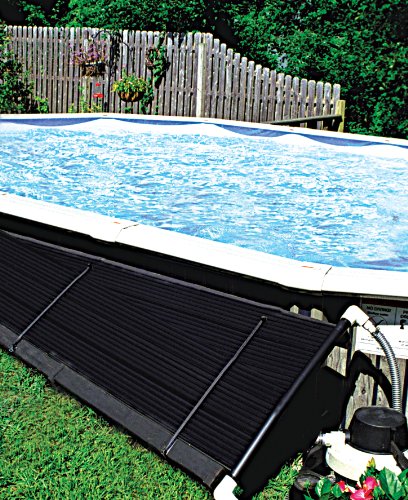
Addressing Leaks in Swimming Pools: A Comprehensive Guide to Detection and Repair

Identifying Leaks, Repair Techniques, and Considerations for Different Pool Surfaces

Leaking swimming pools can lead to significant water loss, increased maintenance costs, and potential damage to the pool’s surroundings. Identifying and repairing leaks in a timely manner is crucial for preserving the pool’s structural integrity and maintaining a safe and enjoyable swimming environment. In this article, we will discuss how to detect leaks in swimming pools, the methods used to fix them, and the considerations for different pool surfaces.

Detecting Leaks in Swimming Pools

  1. The Bucket Test: The bucket test is a simple way to determine if your pool is losing water due to a leak or evaporation. Fill a bucket with water and place it on the pool’s steps, marking the water level inside and outside the bucket. After 24 hours, compare the water levels; if the pool’s water level has dropped significantly more than the bucket’s, there may be a leak.
  2. Inspect Pool Equipment: Check your pool’s equipment, such as the pump, filter, and plumbing, for any visible signs of leaks, including wet spots or damp areas around the equipment pad.
  3. Check Pool Surfaces: Examine the pool’s surfaces for cracks, gaps, or tears that may indicate a leak. Pay particular attention to areas around fittings, skimmers, and return lines.
  4. Dye Test: If you suspect a leak in a specific area, perform a dye test by releasing a small amount of pool-safe dye near the suspected leak site. If the dye is drawn into the leak, it can help confirm its location.
  5. Professional Leak Detection: If you are unable to locate the leak yourself or the leak is not easily accessible, consider hiring a professional pool leak detection service. Professionals use specialized equipment and techniques, such as hydrophones, pressure testing, and electronic leak detection, to pinpoint leaks with precision.


Fixing Leaks in Swimming Pools

  1. Vinyl Liner Pools: Small tears or holes in vinyl liners can often be repaired using a vinyl patch kit. For larger or more complex repairs, it may be necessary to consult a pool professional or replace the liner.
  2. Concrete Pools: Leaks in concrete pools can be repaired using hydraulic cement, epoxy, or pool putty. These materials can be applied directly to the leak site, following the manufacturer’s instructions. In some cases, more extensive repairs or resurfacing may be required.
  3. Fiberglass Pools: Small cracks or leaks in fiberglass pools can be repaired using a fiberglass repair kit, which typically includes resin and fiberglass cloth. For more significant damage, professional repair or resurfacing may be necessary.
  4. Plumbing Leaks: Leaks in pool plumbing should be addressed by a professional, as repairs may involve excavation and replacement of damaged pipes or fittings.
  5. Equipment Leaks: If leaks are found in pool equipment, such as pumps, filters, or heaters, consult the manufacturer or a pool professional for guidance on repair or replacement.


Different Pool Surfaces

When addressing leaks in swimming pools, it’s essential to consider the specific pool surface, as repair techniques and materials may vary.

  1. Vinyl Liner Pools: Vinyl liners are flexible and relatively easy to patch for small leaks. However, they may require professional attention or replacement for larger leaks or tears.
  2. Concrete Pools: Concrete pool surfaces, including gunite and shotcrete, can be repaired with hydraulic cement, epoxy, or pool putty. More extensive damage may require professional repair or resurfacing.
  3. Fiberglass Pools: Fiberglass pool surfaces can be repaired using a fiberglass repair kit for small cracks or leaks. Larger damage may necessitate professional intervention or resurfacing.

Addressing leaks in swimming pools is a critical aspect of pool maintenance, as it helps prevent water loss, reduce costs, and maintain a safe swimming environment. Detecting leaks early on can save time, money, and potential damage to the pool’s structure and surrounding areas. Utilizing methods such as the bucket test, inspecting pool equipment, checking pool surfaces, performing dye tests, and seeking professional assistance when necessary can help identify and resolve leaks in a timely manner.

Repairing leaks requires careful consideration of the pool’s surface type and the use of appropriate repair techniques and materials. Whether you have a vinyl liner, concrete, or fiberglass pool, understanding the specific repair process and when to consult a professional is essential for maintaining the integrity and longevity of your swimming pool. By staying vigilant about leak detection and addressing any issues promptly, pool owners can ensure a well-maintained and enjoyable swimming experience.

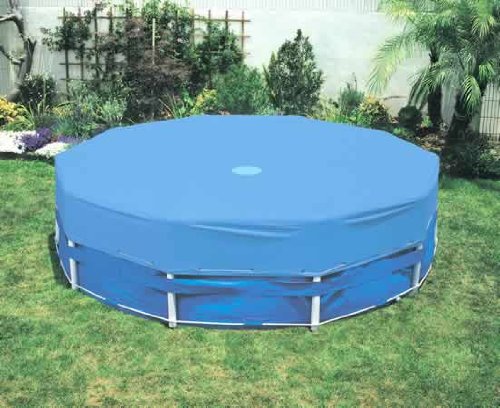
Choosing the Best Pool Cover: A Comprehensive Guide for Pool Owners

Find the Perfect Pool Cover to Protect Your Pool and Maximize Its Benefits

A pool cover is an essential accessory for any pool owner. It serves multiple purposes, from keeping debris and dirt out of the pool to conserving water and reducing evaporation. With a variety of pool cover types on the market, finding the perfect one for your pool can be overwhelming. This article will provide you with a comprehensive guide to help you choose the best pool cover based on your specific needs and preferences.

Types of Pool Covers

There are several types of pool covers available, each with its unique features and benefits:

  1. Solar Pool Covers: Solar pool covers, also known as solar blankets, are designed to trap heat from the sun and transfer it to your pool water. They reduce evaporation and help maintain water temperature, making them energy-efficient and cost-effective.
  2. Winter Pool Covers: Designed to protect your pool during the winter months, these covers prevent debris from entering the pool and help maintain water quality. They are typically made of heavy-duty materials, such as vinyl or polyethylene, to withstand harsh weather conditions.
  3. Safety Pool Covers: Safety covers are designed to prevent accidental drowning by providing a barrier between the water and the surrounding environment. They can be made of solid materials or mesh and are secured to the pool deck with anchors or straps.
  4. Automatic Pool Covers: Automatic pool covers can be opened and closed with the push of a button, providing convenience and ease of use. They can function as safety covers and help maintain water temperature and cleanliness.

Factors to Consider When Choosing a Pool Cover

  1. Purpose: Determine the primary purpose of your pool cover. Are you looking to conserve energy, protect your pool during the winter months, or provide a safety barrier? Your primary goal will help you narrow down the type of pool cover best suited for your needs.
  2. Pool Shape and Size: The shape and size of your pool are essential factors to consider when selecting a pool cover. Custom-made covers are available for irregularly shaped pools, but they may come at a higher cost. Ensure the cover you choose is compatible with your pool’s dimensions.
  3. Material: The material of a pool cover impacts its durability, strength, and effectiveness. Solar pool covers are often made of UV-resistant polyethylene or vinyl, while winter and safety covers can be made of heavy-duty vinyl, polyethylene, or mesh. Consider the material’s longevity and resistance to weather conditions when choosing a pool cover.
  4. Ease of Use: Some pool covers, like automatic pool covers, are more user-friendly than others. If ease of use is important to you, consider investing in an automatic cover or one that can be easily installed and removed by a single person.
  5. Budget: Pool covers vary in price based on their type, material, and features. Determine your budget beforehand and choose a cover that meets your needs without breaking the bank.
  6. Warranty and Support: A pool cover is an investment, and a warranty can provide peace of mind in case of defects or issues. Look for pool covers with a warranty and manufacturers that offer customer support.

Choosing the best pool cover for your swimming pool requires careful consideration of factors like purpose, pool size and shape, material, ease of use, budget, and warranty. By evaluating your specific needs and preferences, you can select the ideal pool cover to protect your pool, conserve energy, and enhance safety. A well-chosen pool cover can help you save time, money, and effort in maintaining your pool, allowing you to enjoy its benefits for years to come.

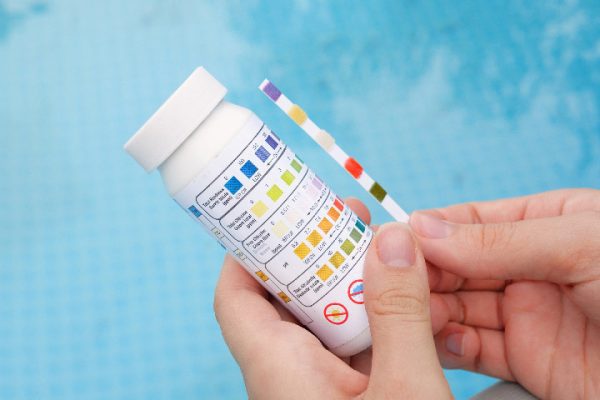
Cyanuric Acid and Its Role in Swimming Pool Maintenance: A Comprehensive Guide for Pool Owners

Understanding the Importance and Proper Usage of Cyanuric Acid for a Well-Maintained Pool

Cyanuric acid, also known as pool stabilizer or conditioner, plays a vital role in maintaining a healthy and enjoyable swimming pool environment. It helps protect chlorine from rapid degradation caused by the sun’s ultraviolet (UV) rays, ensuring effective sanitization and reducing the need for frequent chlorine additions. This article will provide you with a comprehensive guide on the role of cyanuric acid in swimming pool maintenance, its different uses, how to use it, and when to use it for optimal pool care.

Role of Cyanuric Acid in Swimming Pools

Cyanuric acid is a chemical that forms a protective bond with free chlorine in the pool water, shielding it from the sun’s UV rays. Without cyanuric acid, chlorine can be quickly broken down by sunlight, reducing its effectiveness and requiring frequent additions to maintain proper sanitation. By using cyanuric acid, pool owners can maintain a more consistent chlorine level, save on sanitizer costs, and ensure a safer, cleaner pool.


Different Uses of Cyanuric Acid

Cyanuric acid is primarily used in two forms:

  1. Stabilized Chlorine Products: Cyanuric acid is often combined with chlorine in stabilized chlorine products, such as dichlor and trichlor tablets. These products slowly release both chlorine and cyanuric acid into the pool water, providing simultaneous sanitization and stabilization.
  2. Separate Cyanuric Acid Additives: Cyanuric acid is also available as a separate additive, often in granular or liquid form. This allows pool owners to adjust the cyanuric acid level independently of chlorine levels, providing more precise control over pool water chemistry.


How to Use Cyanuric Acid

Follow these steps to use cyanuric acid effectively in your swimming pool:

  1. Test the Cyanuric Acid Level: Before adding cyanuric acid, test the current level in your pool using a test kit or test strips designed for this purpose. The ideal cyanuric acid level for outdoor pools is typically between 30 and 50 ppm (parts per million).
  2. Calculate the Required Amount: Based on your pool’s volume and the desired cyanuric acid level, calculate the amount of cyanuric acid needed. Consult the product label or use an online pool calculator to determine the appropriate amount.
  3. Add Cyanuric Acid: If using granular cyanuric acid, pre-dissolve it in a bucket of water to ensure even distribution and prevent damage to pool surfaces. Slowly pour the dissolved solution into the pool, spreading it evenly around the perimeter. If using a liquid cyanuric acid product, follow the manufacturer’s instructions for proper application.
  4. Circulate the Pool Water: Run your pool pump for at least 24 hours to ensure proper distribution and mixing of the cyanuric acid.

When to Use Cyanuric Acid

Cyanuric acid should be added to your pool whenever the level falls below the recommended range of 30 to 50 ppm. This may occur when:

  1. Filling a new pool or refilling after draining: Add cyanuric acid to establish the proper level for effective chlorine protection.
  2. After heavy rainfall or significant water replacement: Large water replacements can dilute cyanuric acid levels, necessitating adjustment.
  3. Seasonal maintenance: Regularly test and adjust cyanuric acid levels throughout the swimming season to maintain optimal pool water chemistry.

Cyanuric acid plays a crucial role in maintaining a healthy and enjoyable swimming pool environment by protecting chlorine from rapid degradation caused by the sun’s UV rays.