Most Common Pool Opening Mistakes and How to Avoid Them

Ensuring a Smooth Pool Opening Season by Learning from Common Missteps

As the weather starts to warm up, pool owners eagerly prepare to open their swimming pools for the season. However, opening a pool can be a complex process, and mistakes can lead to frustrating and costly issues. To help you avoid common pitfalls, we’ve compiled a list of the most common pool opening mistakes and tips on how to prevent them.

  1. Opening the Pool Too Late

One of the most common mistakes pool owners make is waiting too long to open their pool. Delaying the opening can lead to algae growth, which can be challenging to eliminate and may require additional chemicals and maintenance.

How to avoid: Open your pool when the temperature consistently stays above 60°F (16°C). This helps prevent algae growth and ensures your pool is ready for use as soon as the weather permits.

  1. Not Thoroughly Cleaning the Pool Cover

Failing to clean the pool cover before removing it can introduce dirt, debris, and bacteria into the pool water, affecting water chemistry and clarity.

How to avoid: Before removing the pool cover, use a soft brush or broom to sweep off any debris, and hose it down to remove any lingering dirt or algae.

  1. Neglecting to Properly Balance Water Chemistry


Improper water chemistry can lead to various issues, such as algae growth, cloudy water, and potential damage to your pool equipment and surfaces.

How to avoid: Test your pool water as soon as you open it and adjust the chemicals accordingly. Ensure that the pH, alkalinity, and sanitizer levels are within the recommended ranges. Consult a pool professional if you are unsure about the correct levels for your pool.

  1. Forgetting to Inspect and Reassemble Pool Equipment

Overlooking the inspection and reassembly of pool equipment can lead to leaks, malfunctioning components, and potential damage to the pool system.

How to avoid: Before starting up your pool, inspect all equipment, such as the pump, filter, and heater, for signs of wear or damage. Reassemble all components according to the manufacturer’s instructions and check for leaks or other issues during the initial startup.

  1. Rushing the Pool Opening Process

Trying to open your pool too quickly can lead to mistakes, overlooked issues, and potential damage.

How to avoid: Set aside ample time to open your pool and follow a step-by-step process to ensure you don’t miss any critical tasks. It’s better to take your time and get it right than to rush and potentially cause problems.

  1. Not Brushing and Vacuuming the Pool

Skipping the brushing and vacuuming process can lead to lingering dirt and debris, which can affect water clarity and quality.

How to avoid: After opening your pool, thoroughly brush and vacuum the pool surfaces to remove any dirt, debris, or algae. This helps ensure a clean and clear pool, ready for swimming.

Conclusion

Opening your pool for the season can be an exciting time for pool owners. By being aware of the most common pool opening mistakes and taking steps to avoid them, you can ensure a smooth and trouble-free pool opening process. Properly opening your pool sets the stage for a fun, safe, and enjoyable swimming season.

Understanding Turnover Rate in Swimming Pools: A Comprehensive Guide to Efficient Water Circulation

The Importance of Turnover Rate, Factors That Impact It, How to Modify It, and Measuring Techniques

Turnover rate is a crucial aspect of swimming pool maintenance, as it determines the efficiency of water circulation and filtration. Proper turnover rates ensure clean, clear, and safe water for swimmers by effectively removing debris and contaminants. In this article, we will discuss the importance of turnover rate, the factors that impact it, ways to change it, and how to measure it.

What is Turnover Rate?

Turnover rate refers to the time it takes for a swimming pool’s entire volume of water to pass through the filtration system. It is typically measured in hours and is an essential factor in determining the effectiveness of the pool’s circulation and filtration system.

Why is Turnover Rate Important?

  1. Water Clarity: Proper turnover rates help maintain clear water by effectively removing suspended particles and debris.
  2. Sanitation: Efficient circulation and filtration aid in distributing sanitizers evenly throughout the pool, ensuring a safe and healthy swimming environment.
  3. Chemical Balance: Good turnover rates help maintain balanced water chemistry by facilitating the even distribution of chemicals.
  4. Energy Efficiency: An appropriate turnover rate reduces energy consumption by ensuring that the pool’s circulation system operates efficiently.


Factors Impacting Turnover Rate

  1. Pool Size and Design: The volume and shape of the pool impact the turnover rate, as larger or more complex pools may require longer turnover times.
  2. Filtration System: The type, size, and efficiency of the pool’s filtration system directly influence the turnover rate.
  3. Pump Capacity: The pump’s flow rate, measured in gallons per minute (GPM), affects how quickly water is circulated and filtered.
  4. Bather Load: Higher bather loads introduce more contaminants into the pool, potentially necessitating faster turnover rates to maintain water quality.

Ways to Change Turnover Rate

  1. Adjust Pump Speed: If your pool is equipped with a variable-speed pump, adjusting the pump speed can help modify the turnover rate.
  2. Upgrade Filtration System: Upgrading to a larger or more efficient filtration system can improve the turnover rate by increasing the system’s capacity.
  3. Modify Pump Run Time: Increasing the pump’s run time can help achieve a faster turnover rate, while reducing the run time may conserve energy in pools with lower bather loads or contamination levels.
  4. Regular Maintenance: Cleaning and maintaining the filtration system, skimmers, and pool surfaces can help ensure optimal turnover rates by preventing clogs and enhancing circulation efficiency.


How to Measure Turnover Rate

  1. Calculate Pool Volume: Determine your pool’s volume in gallons using the appropriate formula based on its shape and dimensions.
  2. Determine Pump Flow Rate: Find the flow rate of your pool pump, usually measured in gallons per minute (GPM). This information can be found in the pump’s manual or on the manufacturer’s website.
  3. Convert Flow Rate to Gallons per Hour (GPH): Multiply the pump’s flow rate (GPM) by 60 to convert it to gallons per hour (GPH).
  4. Calculate Turnover Time: Divide your pool’s volume (in gallons) by the pump’s flow rate (in GPH) to find the turnover time in hours.

The turnover rate in a swimming pool is a critical aspect of pool maintenance, affecting water clarity, sanitation, chemical balance, and energy efficiency. Understanding the importance of turnover rate, the factors that impact it, and ways to modify it can help pool owners maintain a safe and enjoyable swimming environment. By measuring the turnover rate and adjusting it as needed, pool owners can ensure efficient water circulation and filtration for a well-maintained swimming pool.

Caring for Your Chlorine Generator Cell: Essential Tips for Optimal Performance and Longevity

Keep Your Salt Water Pool Clean and Clear by Properly Maintaining Your Chlorine Generator Cell

Chlorine generator cells, also known as salt cells, are a critical component of a salt water pool’s sanitation system. They use electrolysis to convert salt into chlorine, providing continuous sanitization to keep pool water clean and clear. Proper care and maintenance of the chlorine generator cell are crucial to ensure optimal performance and extend the lifespan of the cell. In this article, we will discuss the proper way to care for your chlorine generator cell to keep your salt water pool in top shape.

Step 1: Inspect the Cell Regularly

Regularly inspect the chlorine generator cell to identify any issues or signs of wear. Check for buildup, scaling, or damage to the cell’s plates or other components. Monitoring the cell’s performance and keeping an eye on the salt chlorine generator’s output settings will help you determine when it’s time for cleaning or replacement.


Step 2: Clean the Cell as Needed

Over time, mineral deposits and calcium buildup can accumulate on the cell plates, reducing the cell’s efficiency and its ability to produce chlorine. Clean the cell as needed, typically every 3-6 months, or according to the manufacturer’s recommendations. Follow these steps to clean your chlorine generator cell:

  1. Turn off the pool pump and salt chlorine generator.
  2. Disconnect the cell from the generator’s control unit and remove it from the plumbing.
  3. Visually inspect the cell for buildup or scaling. If significant buildup is present, proceed with cleaning.
  4. Mix a cleaning solution of equal parts water and muriatic acid in a plastic container. Always add acid to water, not water to acid, to avoid a dangerous chemical reaction.
  5. Submerge the cell in the cleaning solution and let it soak for 15-30 minutes, or until the buildup has dissolved. Do not leave the cell in the cleaning solution for too long, as excessive exposure to acid can damage the cell.
  6. Use a soft brush or sponge to gently remove any remaining deposits from the cell plates. Avoid using abrasive tools that can damage the cell’s surface.
  7. Thoroughly rinse the cell with fresh water to remove any residual acid.
  8. Reinstall the cell, making sure all connections are secure and watertight.


Step 3: Maintain Proper Water Chemistry

Maintaining balanced water chemistry in your salt water pool is crucial for the health of your chlorine generator cell. Test your pool water regularly and adjust the levels of pH, alkalinity, and salt concentration as needed to keep them within the recommended ranges. Proper water chemistry will help prevent excessive scaling and extend the life of the cell.

Step 4: Monitor the Salt Chlorine Generator’s Output

Regularly check the output settings on your salt chlorine generator to ensure it’s producing the correct amount of chlorine. Adjust the output settings as needed to maintain proper chlorine levels (1-3 ppm) in your pool. This will help prevent excessive wear on the cell and keep your pool water clean and clear.


Step 5: Replace the Cell When Necessary

Chlorine generator cells have a limited lifespan, typically ranging from 3-7 years, depending on usage and maintenance. As the cell reaches the end of its life, it may become less efficient and require more frequent cleaning or higher output settings to maintain proper chlorine levels. When the cell can no longer produce adequate chlorine, it’s time to replace it with a new one.

Proper care and maintenance of your chlorine generator cell are crucial for maintaining optimal performance and extending its lifespan. By regularly inspecting and cleaning the cell, maintaining balanced water chemistry, and monitoring the salt chlorine

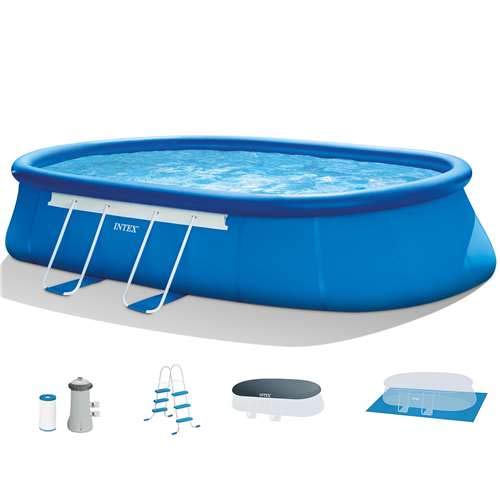
Reviving Your Green Above Ground Pool: A Step-by-Step Guide to Opening Season

Transform Your Dirty Green Pool into a Crystal-Clear Oasis for the First Swim of the Season

Opening your above ground pool for the season can be both exciting and daunting, especially when you’re greeted by murky green water. But fear not! With a bit of time, effort, and the right approach, you can transform your dirty green pool into a sparkling oasis, ready for the first swim of the season. This article will provide detailed steps on how to clean and prepare your above ground pool for summer fun.

Step 1: Remove Debris and Clean the Pool Area

Before diving into the process of cleaning your green pool, start by removing any debris, leaves, or dirt from the pool area. Use a pool skimmer or leaf net to remove any floating debris from the water surface. Be sure to clean the surrounding pool deck and equipment as well to prevent any contaminants from re-entering the pool.


Step 2: Check and Clean the Pool Equipment

Inspect your pool equipment, including the pump, filter, and hoses, for any signs of damage or wear. Clean the filter, backwash if necessary, and ensure that all connections are secure. Turn on the pool pump and let it run continuously throughout the cleaning process to help circulate and filter the water.

Step 3: Test and Balance the Water Chemistry

Test the pool water using a test kit or test strips to determine the levels of pH, alkalinity, and sanitizer. Adjust the water chemistry as needed to reach the recommended levels:

  • pH: 7.4 – 7.6
  • Alkalinity: 80 – 120 ppm
  • Chlorine: 2 – 4 ppm

Step 4: Brush and Vacuum the Pool

Using a pool brush, scrub the walls and floor of the pool to dislodge any algae or dirt buildup. Then, use a pool vacuum to remove debris, algae, and other contaminants from the pool’s bottom. Be sure to vacuum slowly and thoroughly to ensure all dirt and debris are removed.

Step 5: Shock the Pool

Shocking the pool with a high dose of chlorine or a non-chlorine shock product will help kill algae and bacteria, as well as oxidize any organic contaminants in the water. Follow the manufacturer’s instructions for the proper dosage, and be sure to wear protective gear such as gloves and goggles while handling pool chemicals. Allow the pool pump to run continuously for at least 24 hours after shocking to ensure proper circulation and filtration.


Step 6: Use an Algaecide

Applying an algaecide to your pool can help prevent future algae growth and ensure a crystal-clear swimming environment. Follow the manufacturer’s instructions for the correct dosage and application method. Allow the pool pump to continue running to circulate the algaecide throughout the pool.

Step 7: Re-test and Fine-tune the Water Chemistry

After 24 hours, test the pool water again to ensure that the water chemistry is balanced. Make any necessary adjustments to pH, alkalinity, and sanitizer levels to maintain a clean and safe swimming environment.


Step 8: Clean and Replace Pool Accessories

Finally, clean any pool accessories, such as ladders, pool toys, and floats, before returning them to the pool. This will help prevent the introduction of contaminants and ensure a clean start to the swimming season.

Conclusion

Opening your green above ground pool for the season may seem overwhelming, but with a systematic approach and some elbow grease, you can transform your pool into a pristine oasis. By following these steps, you can ensure a clean, safe, and enjoyable swimming experience for you and your family all summer long. Happy swimming!

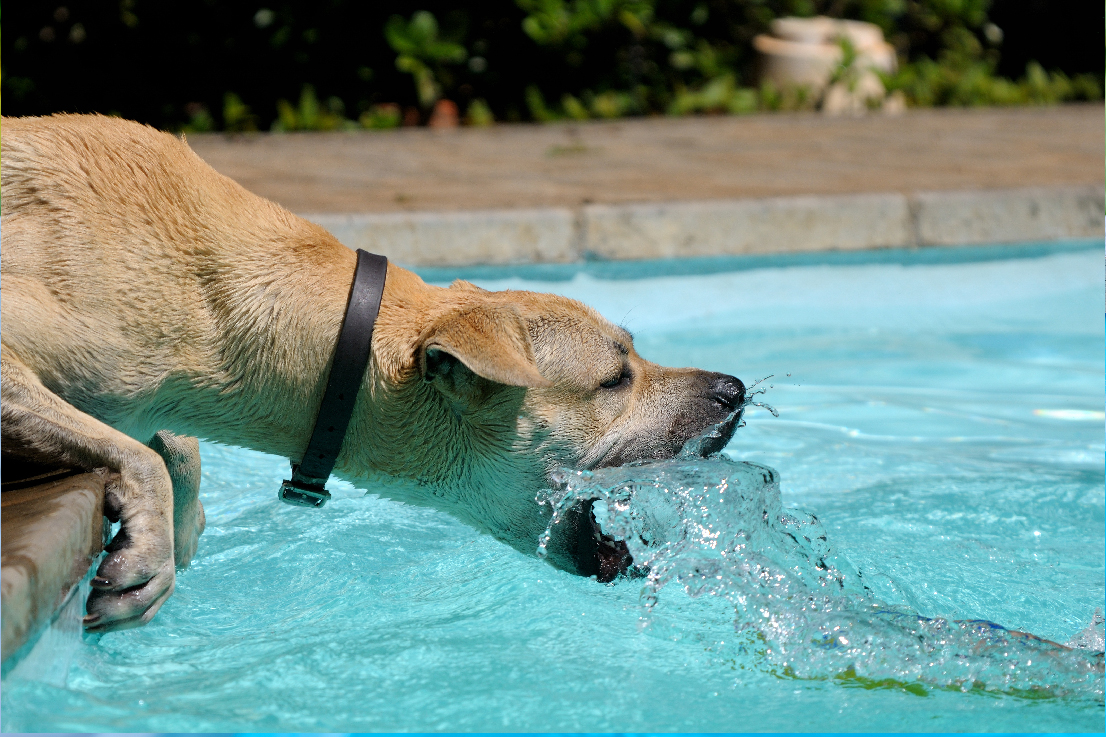
Understanding the Swimming Pool Saturation Index: A Comprehensive Guide to Maintaining Water Balance

The Importance of the Saturation Index, Its Influencing Factors, and How to Correct Imbalances for a Healthy Swimming Environment

The swimming pool saturation index, also known as the Langelier Saturation Index (LSI), is a crucial aspect of pool water chemistry that helps maintain water balance and prevent potential damage to pool surfaces and equipment. In this article, we will discuss what the saturation index is, why it’s important, the chemicals that impact it, the negative consequences of imbalances, and how to correct and maintain a proper saturation index.

What is the Saturation Index?

The saturation index is a calculated value that helps determine the water’s balance by considering various factors such as pH, total alkalinity, calcium hardness, and water temperature. The index measures the water’s tendency to be either corrosive (negative values) or scaling (positive values). A saturation index close to zero indicates balanced water, minimizing the risk of damage to pool surfaces and equipment.


Why is the Saturation Index Important?

  1. Protecting Pool Surfaces: Maintaining a balanced saturation index helps protect pool surfaces from etching, staining, or scaling, preserving their appearance and longevity.
  2. Preventing Equipment Damage: A proper saturation index prevents damage to pool equipment and plumbing systems by minimizing the risk of corrosion or scaling.
  3. Water Quality: A balanced saturation index contributes to overall water quality, ensuring a safe and comfortable swimming environment.

Chemicals Impacting the Saturation Index

  1. pH: The acidity or alkalinity of the water directly influences the saturation index. Ideal pH levels for a swimming pool are between 7.4 and 7.6.
  2. Total Alkalinity: Total alkalinity measures the water’s buffering capacity, which helps maintain stable pH levels. The recommended range for total alkalinity is between 80 and 120 ppm.
  3. Calcium Hardness: Calcium hardness refers to the concentration of calcium ions in the water. Ideal calcium hardness levels for a swimming pool are between 200 and 400 ppm.
  4. Water Temperature: The water’s temperature can also affect the saturation index, with warmer water typically being more susceptible to scaling.

Negative Consequences of Imbalances

  1. Corrosive Water: A negative saturation index indicates corrosive water, which can lead to etching and staining of pool surfaces, as well as damage to metal fixtures and equipment.
  2. Scaling Water: A positive saturation index signifies scaling water, which can cause calcium deposits to form on pool surfaces, clog filters, and reduce circulation.


How to Correct and Maintain a Proper Saturation Index

  1. Test the Water: Regularly test your pool water for pH, total alkalinity, calcium hardness, and temperature to determine the current saturation index.
  2. Adjust pH Levels: If the pH is too high or too low, adjust it using either an acid (e.g., muriatic acid) or a base (e.g., soda ash) according to the manufacturer’s instructions.
  3. Balance Total Alkalinity: If total alkalinity is out of range, use sodium bicarbonate to raise it or muriatic acid to lower it, following the product guidelines.
  4. Manage Calcium Hardness: To adjust calcium hardness, use calcium chloride to raise it or dilute the pool water with fresh water to lower it.
  5. Monitor Temperature: Be aware of how temperature fluctuations may impact the saturation index and adjust other factors accordingly to maintain balance.
  6. Regular Maintenance: Consistently test and adjust water chemistry, maintain the filtration system, and clean the pool surfaces to preserve a balanced saturation index.

The swimming pool saturation index is a critical component of pool water chemistry, helping to maintain water balance and prevent potential damage to pool surfaces and equipment. Understanding the saturation index, its importance, and the chemicals that influence it is essential for pool owners to maintain a safe and healthy swimming environment.

By regularly testing and adjusting pool water parameters, such as pH, total alkalinity, calcium hardness, and temperature, pool owners can correct and, a well-balanced saturation index is key to ensuring the longevity of your pool surfaces and equipment, as well as providing an enjoyable and comfortable swimming experience. By monitoring and maintaining the saturation index, pool owners can enjoy the benefits of a well-maintained swimming pool and avoid costly damage or repairs.

Eliminating Pink Slime from Your Above Ground Swimming Pool

A Comprehensive Guide to Identifying, Treating, and Preventing Pink Slime in Home Pools

Introduction

Pink slime is an unsightly and unwelcome guest in many above ground swimming pools. This slimy, gelatinous substance is actually a type of bacteria called Methylobacterium. Pink slime can form on pool surfaces, equipment, and inside pipes, leading to issues such as poor water circulation, unpleasant odors, and an unappealing swimming environment. In this article, we will guide you through the process of identifying, treating, and preventing pink slime in your above ground swimming pool.

Identifying Pink Slime in Your Swimming Pool

Pink slime can appear as a pink or red slimy film on pool surfaces, such as walls, floors, ladders, and steps. It can also be found inside skimmer baskets, pumps, and filters. Pink slime typically thrives in areas with low water circulation and tends to be more prevalent in pools with high phosphate levels or inadequate sanitation.

Treating Pink Slime in Your Above Ground Swimming Pool

  1. Remove Visible Pink Slime: Begin by manually removing as much visible pink slime as possible using a pool brush, skimmer net, or a cloth. Be sure to clean all affected surfaces and equipment, including skimmer baskets, pumps, and filters.
  2. Shock Your Pool: After removing the visible pink slime, shock your pool using a high-quality pool shock treatment. Follow the manufacturer’s instructions for the proper dosage and application procedure. Shocking your pool helps eliminate bacteria and other contaminants, including pink slime.
  3. Balance Your Pool Water: Test and adjust your pool water chemistry to maintain optimal levels:
    • pH: 7.2-7.8
    • Total Alkalinity: 80-120 ppm
    • Free Chlorine: 2-4 ppm
    • Calcium Hardness: 200-400 ppm
  4. Remove Phosphates: High phosphate levels can contribute to the growth of pink slime. Use a phosphate remover to reduce phosphate levels in your pool, following the manufacturer’s instructions for the proper dosage and application procedure.
  5. Vacuum and Brush Your Pool: Thoroughly vacuum and brush your pool to remove any remaining pink slime and debris. Pay special attention to areas where pink slime was previously present.
  6. Clean Pool Equipment: Disassemble and clean any affected pool equipment, such as skimmer baskets, filters, and pumps, to ensure all traces of pink slime are removed.

Preventing Pink Slime in Your Above Ground Swimming Pool

  1. Maintain Proper Water Chemistry: Regularly test and adjust your pool water chemistry to maintain a balanced and sanitary swimming environment.
  2. Maintain Sanitizer Levels: Ensure your pool’s sanitizer levels are within the recommended range, whether you use chlorine or an alternative sanitizer.
  3. Regular Pool Maintenance: Perform routine pool maintenance, including vacuuming, brushing, and skimming, to prevent the accumulation of debris and contaminants that can contribute to pink slime growth.
  4. Manage Phosphate Levels: Regularly test and control phosphate levels in your pool using a phosphate remover to discourage pink slime formation.
  5. Improve Water Circulation: Ensure your pool’s pump and filter system is working efficiently to maintain proper water circulation, which can help prevent pink slime growth in low-flow areas.

Conclusion

While pink slime can be an unwelcome nuisance in your above ground swimming pool, with proper identification, treatment, and prevention techniques, you can effectively eliminate and prevent its return. By maintaining a balanced and clean swimming environment, you can enjoy a clear, sparkling pool free of pink slime and other contaminants, providing endless hours of fun and relaxation for you and your family.

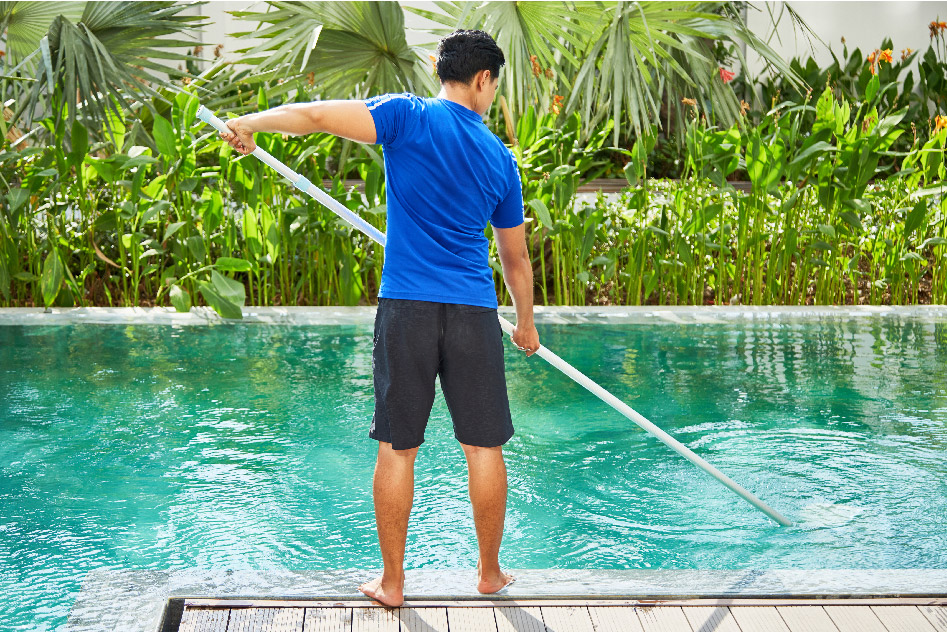
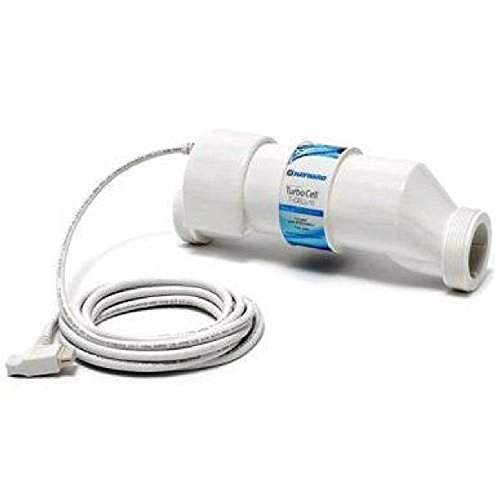
Reviving a Green Salt Water Pool: Steps to Restore Crystal Clear Water

Turn Your Salt Water Pool from Green to Pristine with These Effective Strategies

Introduction

A green salt water pool can be an unwelcome sight for any pool owner. It is often caused by an algae bloom, imbalanced water chemistry, or improper pool maintenance. This article will guide you through the process of fixing a green salt water pool and restoring crystal clear water for a safe and enjoyable swimming experience.


Step 1: Test and Balance Water Chemistry

The first step in addressing a green salt water pool is to test the water chemistry. Use a reliable test kit to check the levels of pH, alkalinity, and salt concentration. Adjust the levels as necessary:

  1. pH: The ideal pH range for a salt water pool is 7.2-7.6. If the pH is too high or too low, it can reduce the effectiveness of the salt chlorine generator and contribute to algae growth. Use a pH increaser or decreaser to bring the pH within the optimal range.
  2. Alkalinity: The recommended alkalinity level for a salt water pool is between 80 and 120 ppm. If the alkalinity is too low, add a total alkalinity increaser. If it’s too high, use muriatic acid or dry acid to lower it.
  3. Salt Concentration: The ideal salt concentration for a salt water pool typically ranges from 2,500 to 4,500 ppm. If the salt level is too low, add the appropriate amount of pool salt to achieve the recommended concentration. If the salt level is too high, partially drain the pool and refill it with fresh water to dilute the salt concentration.

Step 2: Check the Salt Chlorine Generator

Ensure that the salt chlorine generator is functioning properly and producing the required amount of chlorine to keep your pool algae-free. Check the generator’s cell for any buildup or scaling, and clean it as needed following the manufacturer’s instructions. Adjust the generator’s output settings if necessary to produce an adequate amount of chlorine (1-3 ppm).


Step 3: Shock the Pool

Shocking a salt water pool helps to kill algae and break down organic contaminants. Use a powerful pool shock product, such as calcium hypochlorite or a non-chlorine shock, following the manufacturer’s instructions. Make sure that the pool pump is running during this process to distribute the shock evenly.

Step 4: Run the Filter

After shocking the pool, run the pool filter continuously for at least 24 hours to remove dead algae and other particles that contribute to the green color. Make sure to clean or replace the filter cartridge, sand, or DE (diatomaceous earth) media if it’s dirty or clogged.

Step 5: Brush and Vacuum the Pool

Once the pool water starts to clear, use a pool brush to scrub the pool walls, floor, and steps, removing any remaining algae and debris. Then, manually vacuum the pool to remove dead algae and any other debris that may have settled at the bottom.

Step 6: Use an Algaecide

As a preventive measure, consider using an algaecide specifically formulated for salt water pools. This will help to inhibit algae growth and keep your pool water clear. Follow the manufacturer’s instructions for proper application and dosage.

Step 7: Regular Maintenance and Monitoring

To maintain clear pool water and prevent future algae blooms, establish a regular maintenance routine:

  1. Test water chemistry at least once a week to ensure that pH, alkalinity, and salt levels remain within the recommended ranges.
  2. Clean the salt chlorine generator cell as needed to ensure optimal chlorine production.
  3. Shock the pool periodically, especially after heavy usage or severe weather.
  1. Clean the pool filter regularly to ensure optimal filtration performance.
  2. Brush and vacuum the pool surfaces at least once a week to remove dirt, debris, and algae.
  3. Use an algaecide as a preventive measure to inhibit algae growth.
  4. Keep the pool area clean by regularly removing leaves, dirt, and debris that can enter the pool and contribute to algae growth.


Conclusion

Fixing a green salt water pool may seem like a daunting task, but with the right approach and consistent maintenance, you can restore crystal clear water and enjoy a clean, healthy swimming environment. By following the steps outlined in this article and establishing a regular maintenance routine, you can prevent future algae blooms and keep your salt water pool in pristine condition for swimmers to enjoy.

A New Pool Owner’s Guide to Swimming Pool Chlorine Types

Understanding the Pros and Cons of Different Chlorine Products for Pool Sanitation

As a new pool owner, choosing the right type of chlorine for your swimming pool can be a daunting task. Chlorine is a popular pool sanitizer due to its effectiveness, affordability, and ease of use. This article will help you understand the different kinds of swimming pool chlorine and their pros and cons so you can make an informed decision for your pool sanitation needs.

  1. Types of Swimming Pool Chlorine

There are three main types of swimming pool chlorine: liquid chlorine, granular chlorine, and chlorine tablets.

a) Liquid Chlorine: Also known as sodium hypochlorite, liquid chlorine is similar to household bleach but with a higher concentration of chlorine. It is easy to use, as it can be poured directly into the pool or added through an automatic chlorinator.

Pros:

  • Fast-acting and highly effective.
  • Easy to apply.
  • Low cost.

Cons:

  • Short shelf life.
  • Can be corrosive to pool equipment.
  • Requires frequent monitoring and application.

b) Granular Chlorine: This type of chlorine is available in various formulations, such as calcium hypochlorite (Cal-Hypo) and di-chlor. Granular chlorine is typically dissolved in a bucket of water and then poured into the pool.

Pros:

  • Easy to measure and control the dosage.
  • Can be used as a shock treatment or for regular sanitization.
  • Longer shelf life compared to liquid chlorine.


Cons:

  • Can cause cloudiness if not dissolved properly.
  • May require more frequent application than other forms of chlorine.
  • Can be hazardous if not stored and handled correctly.

c) Chlorine Tablets: Chlorine tablets are made from trichloro-s-triazinetrione (Trichlor) and are designed to dissolve slowly in a floating dispenser, skimmer, or automatic chlorinator.

Pros:

  • Slow-release formula provides consistent chlorination.
  • Long shelf life.
  • Easy to handle and store.

Cons:

  • More expensive than liquid and granular chlorine.
  • Can cause damage to pool equipment if not used correctly.
  • May not be suitable for all pool types or situations.
  1. Choosing the Right Chlorine for Your Pool

When selecting a type of chlorine for your pool, consider the following factors:

a) Pool Type: Some chlorine types may be more suitable for specific pool types. For instance, liquid chlorine is often preferred for vinyl liner pools, as it is less likely to cause damage compared to granular chlorine.

b) Maintenance Schedule: Your pool maintenance routine may dictate the type of chlorine you choose. If you are unable to monitor and adjust your pool’s chlorine levels frequently, chlorine tablets may be a better option due to their slow-release formula.

c) Cost: If cost is a significant concern, liquid chlorine and granular chlorine are typically more affordable than chlorine tablets.

d) Storage and Handling: Consider your ability to safely store and handle chlorine products. Chlorine tablets have a longer shelf life and are easier to store, while liquid chlorine can be more hazardous due to its corrosive nature.

Understanding the different types of swimming pool chlorine and their pros and cons is essential for new pool owners. Each chlorine type has its advantages and disadvantages, so consider your specific pool type, maintenance schedule, and personal preferences when making your decision. By selecting the right chlorine product for your needs, you can maintain a clean, safe, and enjoyable swimming environment for you and your family.

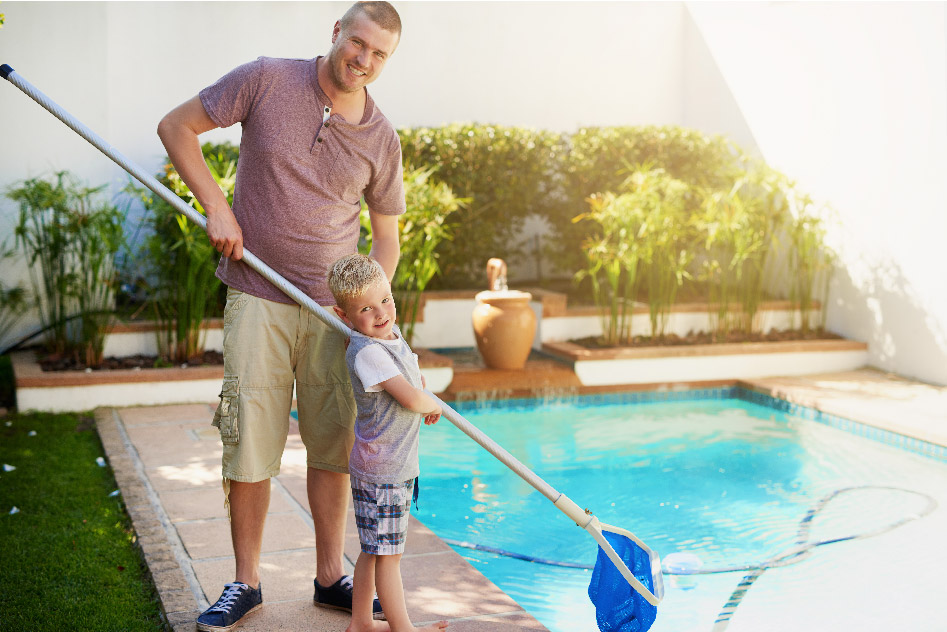
A First-Time Homeowner’s Guide to Opening an Inground Swimming Pool

Discover the Best Date, Detailed Steps, Equipment, and Tips for a Successful Pool Opening Experience

Introduction

Owning an inground swimming pool can provide countless hours of relaxation and enjoyment. However, opening the pool for the season can be a daunting task, especially for first-time homeowners. In this article, we will guide you through the process of opening your inground swimming pool, including the best date to open, detailed steps, necessary equipment, and helpful tips and tricks to ensure a smooth and successful pool opening experience.

Best Date to Open Your Inground Swimming Pool

The ideal date to open your inground swimming pool depends on your location and local climate. Generally, it is best to open your pool when daytime temperatures consistently stay above 70°F (21°C). This helps avoid cold water temperatures and increased energy costs, while also preventing algae growth and other contaminants from developing in the pool.

Detailed Steps for Opening Your Inground Swimming Pool

Step 1: Clean the Pool Area Begin by removing any leaves, debris, and trash from around your pool. This will help prevent dirt and debris from entering the water during the opening process.

Step 2: Remove the Pool Cover Carefully remove your winter pool cover, being mindful of any accumulated water or debris. Clean and dry the cover thoroughly before storing it for the off-season.


Step 3: Inspect the Pool for Damage Examine your pool for any signs of damage, such as cracks in the plaster, loose tiles, or damaged fittings. Address any issues before proceeding with the opening process.

Step 4: Reinstall Pool Equipment Reinstall any pool equipment that was removed or winterized during the off-season, including ladders, handrails, skimmer baskets, filter, pump, and any other accessories.

Step 5: Fill the Pool Using a garden hose, fill your pool to the appropriate water level, typically halfway up the skimmer opening.

Step 6: Prime and Start the Pump Prime your pool pump by filling the pump basket with water and ensuring all valves are open. Turn on the pump and check for proper water flow and circulation.

Step 7: Test and Balance the Water Chemistry Using a pool test kit or test strips, check the levels of pH, chlorine, total alkalinity, and calcium hardness in your pool water. Adjust the chemical levels as needed to achieve optimal balance:

  • pH: 7.2-7.8
  • Chlorine: 1-3 ppm (parts per million) for traditional chlorine pools or 2-4 ppm for saltwater pools
  • Total Alkalinity: 80-120 ppm
  • Calcium Hardness: 200-400 ppm

Step 8: Shock the Pool Shocking your pool involves adding a high dose of chlorine or other sanitizer to eliminate any bacteria, algae, and other contaminants that may have developed during the off-season. Follow the manufacturer’s instructions for the proper dosage and application procedure.

Step 9: Clean the Pool Skim the surface of your pool to remove any debris, brush the pool walls and floor, and vacuum the pool thoroughly to ensure a clean and inviting swimming environment.

Necessary Equipment for Pool Opening

  • Pool cover pump (if applicable)
  • Leaf skimmer or pool net
  • Pool brush
  • Pool vacuum
  • Garden hose
  • Pool test kit or test strips
  • Pool chemicals (pH adjusters, chlorine or alternative sanitizer, shock treatment, etc.)
  • Pool opening supplies (lubricants, o-rings, etc., if needed)

Tips and Tricks for a Smooth Pool Opening

  1. Plan ahead: Set a date for your pool opening and gather all necessary supplies and equipment well in advance. This ensures you’re prepared and can avoid any last-minute surprises.
  2. Enlist help: Pool opening can be a time-consuming process. Recruit family members or friends to assist with tasks such as removing the pool cover and cleaning the pool area.
  3. Be patient: Allow the pool water to circulate for at least 24 hours before testing and adjusting the water chemistry. This will ensure accurate readings and more effective chemical adjustments.
  4. Keep a maintenance log: Document the chemical levels, equipment settings, and any issues encountered during the pool opening process. This information can be helpful for future reference and to track changes in your pool’s condition over time.
  5. Monitor water chemistry closely: In the first few weeks after opening your pool, test the water chemistry more frequently (every 2-3 days) to ensure proper balance and sanitization. As the season progresses and the water stabilizes, you can reduce testing frequency to once per week.
  6. Run the pump and filter longer initially: Running your pool pump and filter for longer periods (12-24 hours) immediately after opening your pool can help clear any cloudiness, debris, or contaminants more quickly.
  7. Consider a professional pool opening service: If you are unsure about the pool opening process or prefer to have an expert handle the task, many pool service companies offer pool opening packages that include equipment installation, water testing, and chemical balancing.


Conclusion

Opening an inground swimming pool for the first time may seem like a challenging task, but with proper planning and guidance, it can be a smooth and successful experience. By following the detailed steps outlined in this article, and applying the tips and tricks for a seamless pool opening, you can ensure a safe, clean, and enjoyable swimming environment for you and your family. Enjoy the benefits of your inground swimming pool all season long by taking the time to properly prepare and open it, setting the stage for endless hours of fun and relaxation.

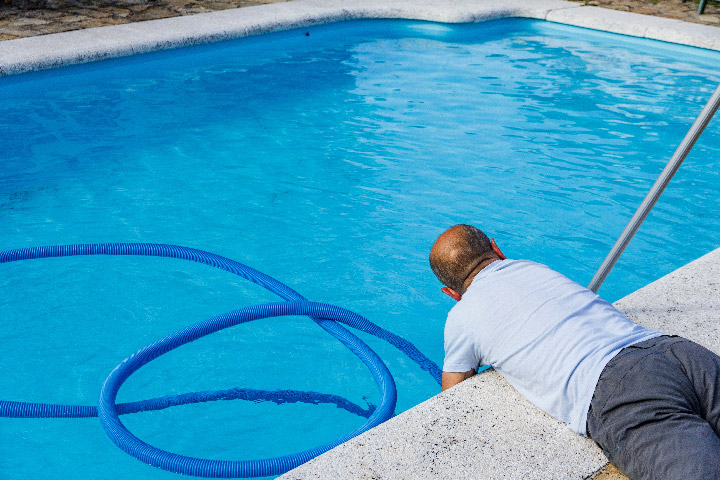
Troubleshooting and Fixing Air in Your Pool Lines: A Comprehensive Guide for Homeowners

Learn about the Possible Causes of Air in Your Pool, How to Troubleshoot, and How to Correct the Problem

Having air in your pool system can lead to various issues, such as reduced water flow, inefficient filtration, and increased wear on your pool equipment. As a homeowner, it’s important to understand the possible causes of air in your pool, how to troubleshoot the issue, and how to correct the problem to ensure the smooth operation of your pool system. In this article, we will discuss the common causes of air in your pool, steps to troubleshoot the issue, and ways to fix the problem.


Possible Causes of Air in Your Pool

  1. Air Leaks in the Pool Equipment: Air may be entering the pool system through leaks in the pool equipment, such as the pump, filter, or plumbing.
  2. Pool Skimmer Issues: A malfunctioning or improperly maintained pool skimmer can introduce air into the system.
  3. Water Level: If the water level in the pool is too low, the skimmer may draw in air, causing bubbles and air pockets in the system.

Troubleshooting Air in Your Pool

  1. Inspect Pool Equipment: Check the pump, filter, and plumbing for any signs of leaks, damage, or loose connections that may be allowing air to enter the system.
  2. Check the Pool Skimmer: Ensure that the skimmer is functioning properly and that the basket and weir are clean and in good condition.
  3. Monitor the Water Level: Make sure the water level in the pool is at the appropriate height, typically halfway up the skimmer opening, to prevent air from being drawn into the system.
  4. Look for Bubbles: Observe the pool returns and look for excessive air bubbles, which may indicate air in the system.


Correcting the Problem

  1. Repair Leaks and Damage: If you discover leaks or damage in your pool equipment, make the necessary repairs or replace the damaged components to prevent air from entering the system.
  2. Maintain the Pool Skimmer: Clean the skimmer basket regularly and ensure the weir is functioning correctly. If the skimmer or its components are damaged, make repairs or replace them as needed.
  3. Adjust the Water Level: If the water level in the pool is too low, add water to bring it up to the appropriate height. Alternatively, if the water level is too high, use a pool siphon or pump to lower it.
  4. Lubricate O-Rings and Gaskets: Check and lubricate the O-rings and gaskets on your pool equipment, such as the pump lid and filter housing, to ensure a proper seal and prevent air from entering the system.
  5. Prime the Pool Pump: If the pool pump has lost its prime due to air in the system, turn off the pump, fill the pump basket with water, and replace the lid. Turn the pump back on and allow it to re-prime itself, which should help remove air from the system.

Air in your pool system can lead to a variety of issues that can affect the performance and longevity of your pool equipment. By understanding the possible causes of air in your pool, taking the time to troubleshoot the issue, and knowing how to correct the problem, you can ensure your pool system operates efficiently and effectively. Regular pool maintenance and inspections will help to prevent air from entering your pool system and keep your pool running smoothly.