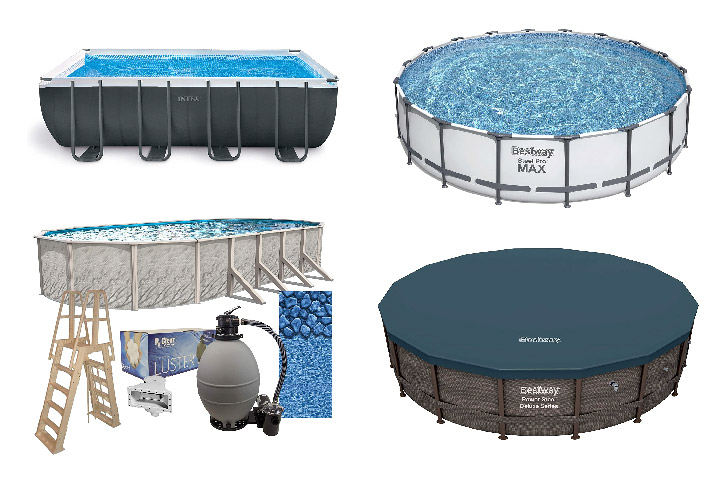
Make a Splash This Spring Break: Your Ultimate Guide to Getting Your Pool Party Ready

Spring break is just around the corner, and there’s no better way to celebrate the warmer weather than by hosting the ultimate pool party for your friends and family. But after a long winter, your pool may need some TLC to get it ready for your guests to dive in. Don’t worry! We’ve got you covered with this easy-to-follow guide that will transform your backyard into the perfect spring break oasis.

  1. Start by Opening Your Pool: It’s time to peel back the pool cover and bring your pool back to life! Be sure to follow the manufacturer’s instructions when removing the cover, and make sure you properly clean and store it for the next winter season. Check the water level and top it off if needed. Don’t forget to turn on your pool equipment and make sure everything is running smoothly.
  2. Clean and Vacuum the Pool: Grab your pool skimmer and remove any debris that may have fallen in over the winter months. Then, give your pool a thorough vacuuming to get rid of any dirt or algae buildup. Be sure to brush the walls, steps, and other surfaces to keep your pool sparkling clean.
  3. Test and Balance the Water Chemistry: Before your guests dive in, you’ll want to ensure the water chemistry is perfectly balanced. Test the pH, alkalinity, and sanitizer levels in your pool using a reliable test kit. Adjust the levels accordingly to keep your pool water safe and inviting.
  4. Inspect Pool Equipment and Accessories: Now is the perfect time to inspect your pool equipment and accessories for any signs of wear and tear. Check for leaks, cracks, or other damage to your pump, filter, and heater. Make sure your pool ladder, diving board, and any other poolside features are safe and secure.
  5. Add Some Fun Pool Floats and Games: Nothing says “spring break” quite like a collection of colorful pool floats and exciting pool games. Invest in some fun inflatables and pool toys to entertain your guests and create a lively atmosphere.
  6. Set the Scene with Outdoor Decor and Lighting: Transform your backyard into a tropical paradise by adding some festive outdoor decor and lighting. String lights, tiki torches, and lanterns can create a warm and inviting ambiance, while colorful cushions and outdoor rugs add comfort and style to your poolside lounge area.
  7. Prep the Grill and Plan Your Poolside Menu: No pool party is complete without some tasty snacks and refreshing beverages. Fire up the grill and plan a delicious poolside menu that your guests will love. Don’t forget to stock up on ice-cold drinks to keep everyone hydrated and happy!


Conclusion: With these simple steps, your swimming pool will be ready for the ultimate spring break celebration. So, slip on your sunglasses, crank up your favorite tunes, and get ready to make a splash with your friends and family! Happy spring break!

Dive Into the Georgia Sun: A Guide to Opening Your Swimming Pool for the Season

Get ready, Georgia! It’s time to bust out the pool floats, crank up the BBQ, and make a splash with our ultimate guide to opening your swimming pool for the season.

Hello, Georgia pool owners! The birds are chirping, the azaleas are blooming, and the sweet scent of peach blossoms fills the air – all signs that the warm Georgia sun is finally here to stay. But wait, there’s something missing… Aha! It’s time to throw off the winter pool cover and dive into the blissful oasis that is your very own swimming pool.

Whether you’re a seasoned pool pro or a first-time owner, opening your pool for the season can be a hilarious, heartwarming, and occasionally hair-raising experience. So let’s grab our pool nets and chlorine tablets, and embark on this adventure together.

Step 1: Assess the (Pool) Situation

Before you jump headfirst into the pool opening process, take a moment to assess your pool’s current state. Is your pool cover still intact, or did that notorious Georgia raccoon party a little too hard on it during the winter? If you notice any damage, make a note to repair or replace your cover after the pool opening process is complete.

Step 2: The Great Unveiling

It’s time for the big reveal! Slowly and carefully remove your pool cover, making sure to avoid dumping any accumulated debris into the pool. While it’s tempting to simply drag the cover off and be done with it, you’ll thank yourself later for being cautious. Trust us; nobody wants to spend hours fishing out leaves, twigs, and mysterious raccoon leftovers.

Step 3: Get Your Pool Pump Pumpin’

Now that your pool is uncovered, it’s time to get your pool pump and filter system up and running. But first, a quick tip: give your equipment a thorough inspection and cleaning before turning everything on. Ensure all connections are secure and that the pump and filter are debris-free. Remember, a happy pump means a happy pool!

Step 4: Spring Cleaning – Pool Edition

It’s time to tackle the aftermath of winter in your pool. Use a pool skimmer to remove any floating debris, and then break out the pool vacuum to eliminate dirt and sediment from the bottom. No judgment if you hum the Jaws theme while vacuuming – we’ve all been there.

Step 5: Test, Balance, and Shock Your Pool Water

Now comes the real magic: transforming your pool water from a questionable-looking soup into a crystal-clear wonderland. First, test your pool water for pH, chlorine, and alkalinity levels. You’ll want to aim for a pH between 7.4 and 7.6, alkalinity between 80 and 120 ppm, and a free chlorine level between 1 and 3 ppm. Once everything is balanced, give your pool a good shock treatment to eliminate any lingering bacteria and algae.

Step 6: Get Ready to Make a Splash

Congratulations! You’ve successfully opened your swimming pool for the season. But what’s a pool without a little fun? Stock up on pool floats, noodles, and other accessories that scream “Georgia summer.” And don’t forget to fire up that BBQ for the ultimate poolside feast.

It’s time to gather your friends and family, slather on some sunscreen, and dive into the Georgia sun. We hope this hilarious and heartwarming guide to opening your pool has brought a smile to your face and a sense of excitement for the season ahead. Be sure to share your pool opening adventures with the hashtag #GeorgiaPoolParty and let’s make this summer the most epic one yet!

Step 7: Celebrate Your Pool Opening Success

You’ve made it! Your pool is ready for action, and there’s only one thing left to do: celebrate. Invite your neighbors, friends, and family over for the ultimate Georgia pool party. Set the mood with a playlist of summer tunes, fire up the grill for some delicious Southern BBQ, and mix up a batch of peachy cocktails or ice-cold sweet tea.

Step 8: Share Your Pool Opening Adventures

Now that you’ve mastered the art of pool opening, why not share your journey with fellow Georgia pool enthusiasts? Snap some photos of your sparkling pool, your fabulous poolside setup, and the smiling faces of your guests. Post your pictures on social media with the hashtag #GeorgiaPoolParty, and let’s inspire others to create their own summer paradise in the Peach State.

Step 9: Keep the Fun Going All Summer Long

Opening your pool is just the beginning. The real fun begins when you and your loved ones make lasting memories in and around the water. Whether it’s hosting weekly poolside cookouts, teaching your kids to swim, or simply enjoying a serene sunset float, there’s no shortage of ways to make the most of your pool this summer.

In conclusion, opening your swimming pool for the season in Georgia is a fun and engaging experience that brings people together and sets the stage for countless unforgettable moments. With our ultimate guide and a little bit of humor, you’re well on your way to making a splash and enjoying the very best of what a Georgia summer has to offer. Here’s to warm days, cool dips, and a season filled with laughter, love, and poolside relaxation.

SLAM – Shock Level and Maintain: A Comprehensive Guide to Pool Sanitation

Maintaining the cleanliness and safety of your swimming pool is crucial for both the health of swimmers and the longevity of your pool. One popular and effective sanitation method is SLAM, which stands for Shock Level and Maintain. In this article, we will explore the SLAM process, explain its importance, and provide a step-by-step guide to implementing this method to achieve a sparkling, sanitized pool.

What is SLAM?

SLAM (Shock Level and Maintain) is a pool sanitation method that involves raising the free chlorine level in your swimming pool to a high enough level to effectively kill off algae, bacteria, and other contaminants. This process, known as shocking, is then followed by maintaining the elevated chlorine levels until the pool water is clear and free of contaminants. SLAM is a proactive approach to pool sanitation and is particularly useful in addressing algae blooms, cloudy water, or visible pool contaminants.

The Importance of SLAM

Implementing the SLAM method in your pool sanitation routine has several benefits:

  1. Eliminates algae and bacteria: SLAM effectively kills off algae, bacteria, and other harmful microorganisms that can compromise water quality and pose health risks to swimmers.
  2. Restores water clarity: By targeting and eliminating contaminants, the SLAM method helps restore the water’s clarity, ensuring a more enjoyable swimming experience.
  3. Prevents damage to pool surfaces and equipment: Algae and bacteria can cause staining, discoloration, and even damage to pool surfaces and equipment if left unaddressed. SLAM helps prevent these issues, prolonging the life of your pool and its components.
  4. Efficient and cost-effective: The SLAM method is an efficient and cost-effective way to sanitize your pool compared to alternative methods or products that may require ongoing use or expense.

Step-by-Step Guide to SLAM

Before implementing the SLAM process, consult your pool’s operating manual and seek professional advice to ensure the method is compatible with your specific pool type, equipment, and chemical requirements.

Step 1: Test and balance your pool water

Before starting the SLAM process, test your pool water’s pH, alkalinity, and cyanuric acid levels using a reliable pool testing kit. Adjust these levels as necessary to achieve the recommended balance for your pool. A properly balanced pool will allow the SLAM process to be more effective.

Step 2: Determine the shock level of chlorine

Consult a chlorine-to-cyanuric acid chart to determine the appropriate shock level of free chlorine for your pool based on the current cyanuric acid level. The shock level is the minimum free chlorine concentration required to effectively kill off algae and bacteria.

Step 3: Add the appropriate amount of chlorine

Using a liquid or granular chlorine product, carefully add the required amount of chlorine to your pool to reach the determined shock level. Always follow the manufacturer’s instructions for dosing and application.

Step 4: Circulate the water

Run your pool’s circulation system for at least 30 minutes to help distribute the chlorine evenly throughout the pool.

Step 5: Maintain the shock level

Frequently test the free chlorine levels in your pool, aiming to maintain the shock level for as long as it takes for the water to clear up and become free of contaminants. This may require adding more chlorine as needed to maintain the shock level.

Step 6: Monitor the progress

Keep a close eye on the pool’s water clarity and appearance. The SLAM process is complete when the water is clear, the free chlorine level remains stable overnight, and the combined chlorine (chloramines) level is 0.5 ppm or lower.

Step 7: Return to normal operation

Once the SLAM process is complete, adjust the chlorine levels back to the normal operating range for your pool, typically between 1-3 ppm for a residential pool. Continue to monitor and adjust the pool water chemistry as needed, following your regular pool maintenance routine.

Step 8: Clean and maintain the pool filter

Throughout the SLAM process, your pool filter will be working hard to remove dead algae, bacteria, and other debris from the water. Once the SLAM is complete, clean and maintain your pool filter according to the manufacturer’s instructions. This may involve backwashing a sand filter, rinsing a cartridge filter, or performing a deep clean of a diatomaceous earth (DE) filter.

Tips for a Successful SLAM

  1. Use a high-quality pool testing kit: Accurate water testing is crucial to the success of the SLAM process. Invest in a high-quality pool testing kit, and ensure it is not expired or damaged.
  2. Be patient: The SLAM process can take anywhere from a few days to a few weeks, depending on the severity of the contamination and the pool’s size. Be patient and persistent, maintaining the shock level until the water is clear and free of contaminants.
  3. Keep the pool’s circulation system running: Run your pool’s circulation system continuously throughout the SLAM process to ensure proper distribution of the chlorine and removal of contaminants.
  4. Brush and vacuum the pool: Regularly brush and vacuum the pool to help dislodge and remove algae and debris from surfaces and assist the filter in clearing the water.

Conclusion

The SLAM (Shock Level and Maintain) method is an effective, proactive approach to pool sanitation that can help restore water clarity, eliminate algae and bacteria, and prevent damage to pool surfaces and equipment. By following this step-by-step guide and maintaining a consistent pool maintenance routine, you can enjoy a clean, healthy, and inviting swimming environment for you and your loved ones. Always consult with a pool professional if you have any concerns or questions about the SLAM process or your specific pool type and requirements.

Most Common Pool Opening Mistakes and How to Avoid Them

Ensuring a Smooth Pool Opening Season by Learning from Common Missteps

As the weather starts to warm up, pool owners eagerly prepare to open their swimming pools for the season. However, opening a pool can be a complex process, and mistakes can lead to frustrating and costly issues. To help you avoid common pitfalls, we’ve compiled a list of the most common pool opening mistakes and tips on how to prevent them.

  1. Opening the Pool Too Late

One of the most common mistakes pool owners make is waiting too long to open their pool. Delaying the opening can lead to algae growth, which can be challenging to eliminate and may require additional chemicals and maintenance.

How to avoid: Open your pool when the temperature consistently stays above 60°F (16°C). This helps prevent algae growth and ensures your pool is ready for use as soon as the weather permits.

  1. Not Thoroughly Cleaning the Pool Cover

Failing to clean the pool cover before removing it can introduce dirt, debris, and bacteria into the pool water, affecting water chemistry and clarity.

How to avoid: Before removing the pool cover, use a soft brush or broom to sweep off any debris, and hose it down to remove any lingering dirt or algae.

  1. Neglecting to Properly Balance Water Chemistry


Improper water chemistry can lead to various issues, such as algae growth, cloudy water, and potential damage to your pool equipment and surfaces.

How to avoid: Test your pool water as soon as you open it and adjust the chemicals accordingly. Ensure that the pH, alkalinity, and sanitizer levels are within the recommended ranges. Consult a pool professional if you are unsure about the correct levels for your pool.

  1. Forgetting to Inspect and Reassemble Pool Equipment

Overlooking the inspection and reassembly of pool equipment can lead to leaks, malfunctioning components, and potential damage to the pool system.

How to avoid: Before starting up your pool, inspect all equipment, such as the pump, filter, and heater, for signs of wear or damage. Reassemble all components according to the manufacturer’s instructions and check for leaks or other issues during the initial startup.

  1. Rushing the Pool Opening Process

Trying to open your pool too quickly can lead to mistakes, overlooked issues, and potential damage.

How to avoid: Set aside ample time to open your pool and follow a step-by-step process to ensure you don’t miss any critical tasks. It’s better to take your time and get it right than to rush and potentially cause problems.

  1. Not Brushing and Vacuuming the Pool

Skipping the brushing and vacuuming process can lead to lingering dirt and debris, which can affect water clarity and quality.

How to avoid: After opening your pool, thoroughly brush and vacuum the pool surfaces to remove any dirt, debris, or algae. This helps ensure a clean and clear pool, ready for swimming.

Conclusion

Opening your pool for the season can be an exciting time for pool owners. By being aware of the most common pool opening mistakes and taking steps to avoid them, you can ensure a smooth and trouble-free pool opening process. Properly opening your pool sets the stage for a fun, safe, and enjoyable swimming season.

Reviving Your Green Above Ground Pool: A Step-by-Step Guide to Opening Season

Transform Your Dirty Green Pool into a Crystal-Clear Oasis for the First Swim of the Season

Opening your above ground pool for the season can be both exciting and daunting, especially when you’re greeted by murky green water. But fear not! With a bit of time, effort, and the right approach, you can transform your dirty green pool into a sparkling oasis, ready for the first swim of the season. This article will provide detailed steps on how to clean and prepare your above ground pool for summer fun.

Step 1: Remove Debris and Clean the Pool Area

Before diving into the process of cleaning your green pool, start by removing any debris, leaves, or dirt from the pool area. Use a pool skimmer or leaf net to remove any floating debris from the water surface. Be sure to clean the surrounding pool deck and equipment as well to prevent any contaminants from re-entering the pool.


Step 2: Check and Clean the Pool Equipment

Inspect your pool equipment, including the pump, filter, and hoses, for any signs of damage or wear. Clean the filter, backwash if necessary, and ensure that all connections are secure. Turn on the pool pump and let it run continuously throughout the cleaning process to help circulate and filter the water.

Step 3: Test and Balance the Water Chemistry

Test the pool water using a test kit or test strips to determine the levels of pH, alkalinity, and sanitizer. Adjust the water chemistry as needed to reach the recommended levels:

  • pH: 7.4 – 7.6
  • Alkalinity: 80 – 120 ppm
  • Chlorine: 2 – 4 ppm

Step 4: Brush and Vacuum the Pool

Using a pool brush, scrub the walls and floor of the pool to dislodge any algae or dirt buildup. Then, use a pool vacuum to remove debris, algae, and other contaminants from the pool’s bottom. Be sure to vacuum slowly and thoroughly to ensure all dirt and debris are removed.

Step 5: Shock the Pool

Shocking the pool with a high dose of chlorine or a non-chlorine shock product will help kill algae and bacteria, as well as oxidize any organic contaminants in the water. Follow the manufacturer’s instructions for the proper dosage, and be sure to wear protective gear such as gloves and goggles while handling pool chemicals. Allow the pool pump to run continuously for at least 24 hours after shocking to ensure proper circulation and filtration.


Step 6: Use an Algaecide

Applying an algaecide to your pool can help prevent future algae growth and ensure a crystal-clear swimming environment. Follow the manufacturer’s instructions for the correct dosage and application method. Allow the pool pump to continue running to circulate the algaecide throughout the pool.

Step 7: Re-test and Fine-tune the Water Chemistry

After 24 hours, test the pool water again to ensure that the water chemistry is balanced. Make any necessary adjustments to pH, alkalinity, and sanitizer levels to maintain a clean and safe swimming environment.


Step 8: Clean and Replace Pool Accessories

Finally, clean any pool accessories, such as ladders, pool toys, and floats, before returning them to the pool. This will help prevent the introduction of contaminants and ensure a clean start to the swimming season.

Conclusion

Opening your green above ground pool for the season may seem overwhelming, but with a systematic approach and some elbow grease, you can transform your pool into a pristine oasis. By following these steps, you can ensure a clean, safe, and enjoyable swimming experience for you and your family all summer long. Happy swimming!

A First-Time Homeowner’s Guide to Opening an Inground Swimming Pool

Discover the Best Date, Detailed Steps, Equipment, and Tips for a Successful Pool Opening Experience

Introduction

Owning an inground swimming pool can provide countless hours of relaxation and enjoyment. However, opening the pool for the season can be a daunting task, especially for first-time homeowners. In this article, we will guide you through the process of opening your inground swimming pool, including the best date to open, detailed steps, necessary equipment, and helpful tips and tricks to ensure a smooth and successful pool opening experience.

Best Date to Open Your Inground Swimming Pool

The ideal date to open your inground swimming pool depends on your location and local climate. Generally, it is best to open your pool when daytime temperatures consistently stay above 70°F (21°C). This helps avoid cold water temperatures and increased energy costs, while also preventing algae growth and other contaminants from developing in the pool.

Detailed Steps for Opening Your Inground Swimming Pool

Step 1: Clean the Pool Area Begin by removing any leaves, debris, and trash from around your pool. This will help prevent dirt and debris from entering the water during the opening process.

Step 2: Remove the Pool Cover Carefully remove your winter pool cover, being mindful of any accumulated water or debris. Clean and dry the cover thoroughly before storing it for the off-season.


Step 3: Inspect the Pool for Damage Examine your pool for any signs of damage, such as cracks in the plaster, loose tiles, or damaged fittings. Address any issues before proceeding with the opening process.

Step 4: Reinstall Pool Equipment Reinstall any pool equipment that was removed or winterized during the off-season, including ladders, handrails, skimmer baskets, filter, pump, and any other accessories.

Step 5: Fill the Pool Using a garden hose, fill your pool to the appropriate water level, typically halfway up the skimmer opening.

Step 6: Prime and Start the Pump Prime your pool pump by filling the pump basket with water and ensuring all valves are open. Turn on the pump and check for proper water flow and circulation.

Step 7: Test and Balance the Water Chemistry Using a pool test kit or test strips, check the levels of pH, chlorine, total alkalinity, and calcium hardness in your pool water. Adjust the chemical levels as needed to achieve optimal balance:

  • pH: 7.2-7.8
  • Chlorine: 1-3 ppm (parts per million) for traditional chlorine pools or 2-4 ppm for saltwater pools
  • Total Alkalinity: 80-120 ppm
  • Calcium Hardness: 200-400 ppm

Step 8: Shock the Pool Shocking your pool involves adding a high dose of chlorine or other sanitizer to eliminate any bacteria, algae, and other contaminants that may have developed during the off-season. Follow the manufacturer’s instructions for the proper dosage and application procedure.

Step 9: Clean the Pool Skim the surface of your pool to remove any debris, brush the pool walls and floor, and vacuum the pool thoroughly to ensure a clean and inviting swimming environment.

Necessary Equipment for Pool Opening

  • Pool cover pump (if applicable)
  • Leaf skimmer or pool net
  • Pool brush
  • Pool vacuum
  • Garden hose
  • Pool test kit or test strips
  • Pool chemicals (pH adjusters, chlorine or alternative sanitizer, shock treatment, etc.)
  • Pool opening supplies (lubricants, o-rings, etc., if needed)

Tips and Tricks for a Smooth Pool Opening

  1. Plan ahead: Set a date for your pool opening and gather all necessary supplies and equipment well in advance. This ensures you’re prepared and can avoid any last-minute surprises.
  2. Enlist help: Pool opening can be a time-consuming process. Recruit family members or friends to assist with tasks such as removing the pool cover and cleaning the pool area.
  3. Be patient: Allow the pool water to circulate for at least 24 hours before testing and adjusting the water chemistry. This will ensure accurate readings and more effective chemical adjustments.
  4. Keep a maintenance log: Document the chemical levels, equipment settings, and any issues encountered during the pool opening process. This information can be helpful for future reference and to track changes in your pool’s condition over time.
  5. Monitor water chemistry closely: In the first few weeks after opening your pool, test the water chemistry more frequently (every 2-3 days) to ensure proper balance and sanitization. As the season progresses and the water stabilizes, you can reduce testing frequency to once per week.
  6. Run the pump and filter longer initially: Running your pool pump and filter for longer periods (12-24 hours) immediately after opening your pool can help clear any cloudiness, debris, or contaminants more quickly.
  7. Consider a professional pool opening service: If you are unsure about the pool opening process or prefer to have an expert handle the task, many pool service companies offer pool opening packages that include equipment installation, water testing, and chemical balancing.


Conclusion

Opening an inground swimming pool for the first time may seem like a challenging task, but with proper planning and guidance, it can be a smooth and successful experience. By following the detailed steps outlined in this article, and applying the tips and tricks for a seamless pool opening, you can ensure a safe, clean, and enjoyable swimming environment for you and your family. Enjoy the benefits of your inground swimming pool all season long by taking the time to properly prepare and open it, setting the stage for endless hours of fun and relaxation.

Opening Your Above Ground Swimming Pool for the Season: A Comprehensive Guide

Uncover the Best Date, Detailed Steps, and Tips for a Smooth and Successful Pool Opening

As the warmer months approach, it’s time to think about opening your above ground swimming pool for the season. A well-planned and executed pool opening ensures a safe, clean, and enjoyable swimming environment for you and your family. This article provides guidance on the best date to open your pool, detailed steps for a successful opening, and tips and tricks to make the process smoother and more efficient.

Best Date to Open Your Above Ground Swimming Pool

While the ideal date for opening your pool may vary depending on your location and local climate, a general rule of thumb is to open the pool when the daytime temperatures consistently stay above 70°F (21°C). Opening the pool too early could result in cold water temperatures and increased energy costs, while opening too late can lead to the growth of algae and other contaminants.

Detailed Steps for Opening Your Above Ground Swimming Pool

Step 1: Clean the Pool Area Start by removing any leaves, debris, and trash from around your pool. This will help prevent dirt and debris from entering the water during the opening process.

Step 2: Remove the Pool Cover Carefully remove your winter pool cover, being mindful of any accumulated water or debris. Clean and dry the cover thoroughly before storing it for the season.

Step 3: Inspect the Pool for Damage Check your pool for any signs of damage, such as tears or punctures in the liner, rust, or loose fittings. Address any issues before proceeding with the opening process.

Step 4: Reinstall Pool Equipment Reinstall any pool equipment that was removed or winterized during the off-season, including the ladder, skimmer, filter, pump, and any other accessories.

Step 5: Fill the Pool Using a garden hose, fill your pool to the appropriate water level, typically halfway up the skimmer opening.


Step 6: Prime and Start the Pump Prime your pool pump by filling the pump basket with water and ensuring all valves are open. Turn on the pump and check for proper water flow and circulation.

Step 7: Test and Balance the Water Chemistry Using a pool test kit or test strips, check the levels of pH, chlorine, total alkalinity, and calcium hardness in your pool water. Adjust the chemical levels as needed to achieve optimal balance:

  • pH: 7.2-7.8
  • Chlorine: 1-3 ppm (parts per million) for traditional chlorine pools or 2-4 ppm for saltwater pools
  • Total Alkalinity: 80-120 ppm
  • Calcium Hardness: 200-400 ppm

Step 8: Shock the Pool Shocking your pool involves adding a high dose of chlorine or other sanitizer to eliminate any bacteria, algae, and other contaminants that may have developed during the off-season. Follow the manufacturer’s instructions for the proper dosage and application procedure.

Step 9: Clean the Pool Skim the surface of your pool to remove any debris, brush the pool walls and floor, and vacuum the pool thoroughly to ensure a clean and inviting swimming environment.

Tips and Tricks for a Smooth Pool Opening

  1. Plan ahead: Set a date for your pool opening and gather all necessary supplies, including chemicals, test kits, and cleaning equipment, well in advance.
  2. Enlist help: Pool opening can be a time-consuming process. Recruit family members or friends to assist with tasks such as removing the pool cover and cleaning the pool area.
  3. Be patient: Allow the pool water to circulate for at least 24 hours before testing and adjusting the water chemistry. This will ensure accurate readings and more effective chemical adjustments.
  4. Keep a maintenance log: Document the chemical levels, equipment settings, and any issues encountered during the pool opening process. This information can be helpful for future reference and to track changes in your pool’s condition over time.
  5. Monitor water chemistry closely: In the first few weeks after opening your pool, test the water chemistry more frequently (every 2-3 days) to ensure proper balance and sanitization. As the season progresses and the water stabilizes, you can reduce testing frequency to once per week.
  6. Run the pump and filter longer initially: Running your pool pump and filter for longer periods (12-24 hours) immediately after opening your pool can help clear any cloudiness, debris, or contaminants more quickly.
  7. Consider a professional pool opening service: If you are unsure about the pool opening process or prefer to have an expert handle the task, many pool service companies offer pool opening packages that include equipment installation, water testing, and chemical balancing.


Opening your above ground swimming pool for the season is an essential task that sets the stage for a summer of fun and relaxation. By choosing the best date to open, following the detailed steps outlined in this guide, and applying the tips and tricks for a smooth pool opening, you can ensure a safe, clean, and enjoyable swimming environment for you and your family. With proper planning and attention to detail, your pool will be ready to provide endless hours of entertainment and relaxation all season long.

The Best Way to Clean Your Home Swimming Pool: A Comprehensive Guide for Pool Owners

Keep Your Pool Sparkling Clean and Inviting with These Detailed Steps and Tips

A clean swimming pool is essential for a safe and enjoyable swimming experience. Regular pool maintenance not only keeps the water looking clear and inviting but also helps prolong the life of your pool equipment and reduces the risk of waterborne illnesses. In this article, we provide a comprehensive guide on the best way to clean your home swimming pool, detailing the steps and tips to ensure a well-maintained and inviting pool for you and your family to enjoy.


Step 1: Skim the Surface

Start by skimming the surface of your pool using a leaf skimmer or pool net. This will help remove leaves, insects, and other debris that can affect water quality and clog your pool’s filtration system. For best results, skim the pool daily or as needed to keep the surface clear.


Step 2: Brush the Pool Walls and Floor

Use a pool brush to clean the walls, floor, and any steps or ledges in your pool. Pay special attention to corners, crevices, and areas around the pool’s waterline where algae and dirt can accumulate. Brushing your pool at least once a week will help prevent the buildup of algae and other contaminants.

Step 3: Vacuum the Pool

Vacuuming your pool regularly is essential for removing dirt, debris, and small particles that brushing and skimming may miss. There are various types of pool vacuums available, including manual, automatic, and robotic vacuums. Choose the one that best suits your needs and budget, and follow the manufacturer’s instructions for proper use. Aim to vacuum your pool at least once a week or more frequently if needed.

Step 4: Clean the Pool Filter

A clean pool filter is crucial for maintaining water quality and circulation. Depending on the type of filter you have (sand, cartridge, or diatomaceous earth), the cleaning process will differ. Consult your filter’s owner’s manual for specific cleaning instructions and follow them accordingly. As a general rule, clean your filter every 4-6 weeks or as needed based on pressure gauge readings and overall pool cleanliness.

Step 5: Check and Maintain Water Chemistry

Regularly testing and adjusting your pool’s water chemistry is essential for a safe and comfortable swimming environment. Use a pool test kit or test strips to check the levels of pH, chlorine or other sanitizers, total alkalinity, and calcium hardness. The ideal levels for these parameters are:

  • pH: 7.2-7.8
  • Chlorine: 1-3 ppm (parts per million) for traditional chlorine pools or 2-4 ppm for saltwater pools
  • Total Alkalinity: 80-120 ppm
  • Calcium Hardness: 200-400 ppm


Adjust these levels as needed to maintain optimal water balance and ensure effective sanitization.

Step 6: Shock the Pool

Shocking your pool involves adding a high dose of chlorine or other sanitizer to kill algae, bacteria, and other contaminants. This should be done on a regular basis, typically every 1-2 weeks, or as needed to maintain water clarity and sanitation. Follow the manufacturer’s instructions for the proper dosage and application procedure.

Tips for Maintaining a Clean Swimming Pool

  1. Keep the pool area clean: Remove any leaves, debris, and trash from around your pool to prevent them from being blown into the water.
  2. Maintain proper circulation: Run your pool pump for at least 8-12 hours a day to ensure adequate water circulation and filtration.
  3. Keep the water level consistent: Maintain the water level halfway up the skimmer opening to ensure optimal skimming and filtration.
  1. Regularly inspect and maintain pool equipment: Check your pool pump, filter, skimmer baskets, and other equipment for any signs of wear, damage, or clogging. Address any issues promptly to ensure optimal pool performance.
  2. Utilize a pool cover: Using a pool cover when the pool is not in use can help reduce the amount of debris that enters the water, minimize water evaporation, and maintain consistent water temperature. Choose a pool cover that fits your pool’s shape and size for maximum effectiveness.
  3. Trim overhanging vegetation: Keep trees, bushes, and other vegetation trimmed back from the pool area to reduce the amount of leaves and debris that can fall into the water.
  4. Educate pool users: Encourage family members and guests to shower before entering the pool, avoid wearing heavy lotions or oils, and refrain from bringing food or beverages into the pool area. This can help minimize contaminants and keep your pool cleaner.

Maintaining a clean and well-maintained swimming pool is crucial for a safe, healthy, and enjoyable swimming experience. By following the detailed steps and tips outlined in this comprehensive guide, you can keep your pool sparkling clean and inviting for you and your family to enjoy. Regular pool care not only ensures a pleasant swimming environment but also helps prolong the life of your pool equipment and minimizes the risk of waterborne illnesses. With proper maintenance and attention, your home swimming pool can be a source of relaxation, fun, and enjoyment for years to come.