Winning the Battle Against Mustard Algae in Your Above-Ground Pool

There’s nothing quite like enjoying a refreshing dip in your above-ground pool during the sweltering summer months. However, pool owners know that maintaining a pristine pool is not always smooth sailing, particularly when dealing with pesky mustard algae. Fear not, for we’ve got you covered with this exciting and informative guide on how to combat mustard algae and reclaim your above-ground pool.

  1. Identifying Mustard Algae

Mustard algae (also known as yellow algae) is a persistent and unsightly pool nuisance that appears as a yellowish-green, slimy layer on pool surfaces. Its stubborn nature makes it resistant to regular sanitization efforts, but with a strategic battle plan, you’ll be well-equipped to defeat this unwelcome invader.

  1. Assemble Your Algae-Fighting Arsenal

Before diving into the fray, ensure you have the right tools to tackle mustard algae effectively:

  • A pool brush with stiff bristles, suitable for your pool’s surface material
  • A pool vacuum or manual vacuum hose and head
  • A large leaf net or skimmer
  • Mustard algae-specific algaecide
  • Chlorine shock product
  • Pool water test kit
  1. Unmasking the Enemy: Thoroughly Brush the Pool

Start by removing any visible mustard algae from the pool surfaces using the pool brush, paying special attention to corners, steps, and behind ladders. Mustard algae can hide in the smallest crevices, so be thorough in your efforts to expose it.

  1. Capture and Contain: Skim and Vacuum the Pool

Use a large leaf net or skimmer to remove as much debris and algae as possible from the pool. Follow up by vacuuming the entire pool, making sure to capture all the dislodged algae particles. If possible, vacuum to waste to avoid reintroducing algae spores into the pool through the filtration system.

  1. Call in the Reinforcements: Shock the Pool

Shocking the pool with a high dose of chlorine effectively destroys algae and other organic matter. Follow the manufacturer’s instructions for your specific shock product, using the appropriate dosage based on your pool size. After shocking the pool, let the pump and filter run continuously for at least 24 hours.

  1. Unleash the Secret Weapon: Apply Mustard Algae Algaecide

Mustard algae-specific algaecides are formulated to target this stubborn foe. Apply the algaecide as directed, ensuring you follow the recommended dosage for your pool’s volume. Allow the algaecide to circulate for at least 24 hours for maximum effectiveness.

  1. Pool Equipment Quarantine: Clean and Sanitize

Mustard algae can linger on pool equipment, so it’s essential to clean and sanitize all accessories, including pool brushes, vacuum heads, and toys. Immerse them in a chlorine solution to eliminate any residual algae spores.

  1. Fortify Your Defenses: Maintain Proper Water Chemistry

Preventing future mustard algae invasions is crucial. Regularly test your pool water and maintain the ideal water chemistry levels: pH 7.4-7.6, alkalinity 80-120 ppm, and free chlorine 2-4 ppm. A well-balanced pool environment is less conducive to algae growth.

  1. Stay Vigilant: Regular Pool Maintenance

Adopt a regular pool maintenance routine, including brushing, vacuuming, and skimming, to keep mustard algae at bay. Keep an eye out for any signs of algae re-emergence, and act swiftly if you spot trouble.

Conclusion

With these exciting and effective strategies, you’re well-prepared to combat mustard algae and reclaim your above-ground pool. By maintaining proper water chemistry and adhering to a consistent maintenance routine, you can ensure a crystal-clear and inviting pool for the entire swimming season. Don’t let mustard algae ruin your summer fun – equip yourself with the right tools, techniques, and knowledge to win the battle and keep your pool an algae-free oasis. So, gear up, take charge, and enjoy your triumphant victory over mustard algae!

A Step-by-Step Guide to Cleaning Your Home Swimming Pool Cartridge Filter

Maximize Your Cartridge Filter’s Efficiency and Keep Your Pool Crystal Clear

Introduction

Cartridge filters are a popular choice for home swimming pool owners due to their ease of use and low maintenance requirements. However, proper cleaning is essential to ensure the filter performs at its best, maintaining water clarity and preventing potential issues. This article will guide you through the process of cleaning your home swimming pool cartridge filter and offer essential tips for optimal performance.

Understanding Cartridge Filters

A cartridge filter works by using a pleated polyester or paper filter element to capture debris and impurities as water passes through it. Over time, the accumulated debris can reduce water flow and impact the filter’s efficiency. Regular cleaning is necessary to maintain the filter’s performance and prolong its lifespan.

How to Clean Your Swimming Pool Cartridge Filter

Step 1: Turn Off the Pool Pump Before starting the cleaning process, ensure the pool pump is turned off. This is crucial for your safety and to prevent damage to the pump.

Step 2: Open the Filter Housing Consult your filter’s manual for specific instructions on opening the filter housing. Typically, this involves removing a clamp or band that holds the two halves of the filter housing together. Be prepared for some water to spill out when opening the filter housing.

Step 3: Remove the Cartridge Carefully lift the cartridge out of the filter housing. Inspect the cartridge for any signs of damage, such as tears or excessive wear. If you notice any issues, it’s time to replace the cartridge.


Step 4: Clean the Cartridge Using a garden hose with a high-pressure nozzle, thoroughly rinse the cartridge from top to bottom, working from the inside out. Be sure to clean between the pleats to remove any trapped debris. For stubborn dirt or algae, use a soft-bristle brush to gently scrub the pleats.

Step 5: Inspect the Filter Housing With the cartridge removed, inspect the filter housing for any debris or damage. Clean the housing with a sponge or cloth, if necessary.

Step 6: Reinstall the Cartridge Place the clean cartridge back into the filter housing, ensuring it is properly seated. Double-check that the cartridge is correctly positioned before proceeding.

Step 7: Close the Filter Housing Reassemble the filter housing by securing the clamp or band that holds the two halves together. Make sure the housing is properly sealed to prevent water leaks.

Step 8: Turn On the Pool Pump With the cartridge filter reassembled, turn the pool pump back on and check for any leaks around the filter housing. The filter is now clean and ready to function at peak efficiency.

Tips for Cartridge Filter Maintenance

  1. Cleaning Frequency: Clean your cartridge filter every 4-6 weeks or when the pressure gauge reads 8-10 psi above the normal operating pressure.
  2. Replace the Cartridge: Depending on usage and maintenance, cartridge filters typically last between 1-3 years. Inspect the cartridge during cleaning and replace it if you notice any damage or excessive wear.
  3. Maintain Proper Pool Chemistry: Balanced pool water chemistry will help prolong the life of your cartridge filter and keep your pool water clear and safe.

Conclusion

Cleaning your swimming pool cartridge filter is an essential part of maintaining a healthy and clear pool. By following the steps outlined in this guide, you can ensure your cartridge filter performs at its best, providing clean and safe water for you and your family to enjoy. Regular maintenance, along with proper pool chemistry, will prolong the life of your pool equipment and help you avoid costly repairs or replacements in the future. Keep your pool sparkling clean and ready for fun by taking care of your cartridge filter and staying on top of your

Understanding Pool Skimmers: Their Importance, Care, and Troubleshooting

A Comprehensive Guide to Pool Skimmers for Optimal Pool Maintenance

Introduction

Pool skimmers are essential components of any swimming pool, playing a crucial role in maintaining water quality and cleanliness. Skimmers are designed to remove floating debris from the pool’s surface before it sinks, which keeps your pool looking clean and inviting. This article will cover the purpose of pool skimmers, why they are needed, how to care for them, and common problems and solutions to ensure optimal pool maintenance.

What is a Pool Skimmer?

A pool skimmer is a device installed on the pool’s edge, designed to catch and remove debris such as leaves, twigs, and insects from the pool’s surface. Skimmers work in conjunction with the pool’s circulation system, drawing water through the skimmer and passing it through a filter before returning it to the pool. Skimmers typically consist of a skimmer basket, weir door, and a connection point to the pool’s circulation system.

Why Pool Skimmers are Important

  1. Maintain Water Clarity: Pool skimmers help maintain water clarity by removing debris from the surface before it sinks and decomposes, which can lead to cloudy water and algae growth.
  2. Reduce Strain on the Pool Filter: By capturing debris before it reaches the filter, skimmers reduce the strain on the pool filter, prolonging its lifespan and improving efficiency.
  3. Improve Circulation: Skimmers help improve water circulation by continually drawing water from the pool’s surface, ensuring even distribution of chemicals and maintaining balanced water chemistry.


Caring for Your Pool Skimmer

  1. Regularly Empty the Skimmer Basket: To ensure optimal performance, empty the skimmer basket regularly, especially during heavy debris seasons. Removing debris from the basket ensures proper water flow and prevents the skimmer from becoming clogged.
  2. Check the Weir Door: The weir door is a flap that helps regulate water flow into the skimmer. Ensure it is functioning correctly and is not damaged or obstructed.
  3. Clean the Skimmer Line: Periodically check the skimmer line for blockages and clean it if necessary. A clogged skimmer line can lead to poor water circulation and reduced skimmer efficiency.
  4. Inspect and Maintain the Skimmer Lid: Ensure the skimmer lid is secure and free from cracks or damage. A damaged lid can allow debris to enter the skimmer system and potentially cause blockages.

Common Skimmer Problems and Solutions

  1. Clogged Skimmer Basket: A clogged skimmer basket can reduce water flow and hinder skimmer performance. Regularly empty and clean the basket to ensure optimal operation.
  2. Damaged Weir Door: A damaged weir door can lead to poor water circulation and reduced skimmer efficiency. Inspect the weir door regularly and replace it if damaged.
  3. Cracked or Damaged Skimmer Housing: Inspect the skimmer housing for cracks or damage. Damaged housing can cause water leaks and reduced skimmer performance. Repair or replace the housing as needed.
  4. Air Leaks: Air leaks in the skimmer system can lead to poor water circulation and reduced skimmer performance. Check all connections and seals for leaks, tightening or replacing components as necessary.

Conclusion

Pool skimmers are essential for maintaining a clean and healthy swimming pool. Understanding the importance of skimmers, how to care for them, and how to troubleshoot common problems ensures optimal pool maintenance and water quality. By regularly inspecting and maintaining your pool skimmer, you can enjoy a crystal-clear pool with minimal effort.

Swimming Pools and Itchy Skin: Causes, Treatment, and Prevention

Swimming in a pool can be a refreshing and fun experience, but for some people, it can also lead to itchy skin. This common issue can cause discomfort and frustration, but understanding the causes, treatments, and prevention strategies can help you enjoy your time in the water without any unwanted side effects. In this article, we’ll explore the reasons behind swimming pool-induced itchiness and offer tips to keep your skin healthy and irritation-free.

Causes of Itchy Skin from Swimming Pools

Several factors can contribute to itchy skin after swimming in a pool:

  1. Chlorine and other pool chemicals: Pools are treated with chlorine and other chemicals to kill bacteria and prevent the growth of harmful microorganisms. However, these chemicals can also strip away the natural oils from your skin, leading to dryness and itching.
  2. pH imbalance: An improperly balanced pool can cause skin irritation. A healthy pool should have a pH level between 7.2 and 7.6. If the pH level is too high or too low, it can disrupt your skin’s natural pH balance and cause itching.
  3. Over-chlorination: Excess chlorine in the pool can cause skin irritation, including redness, itchiness, and even rashes.
  4. Swimmer’s itch: Also known as cercarial dermatitis, swimmer’s itch is a rash caused by an allergic reaction to microscopic parasites that infest some pools. These parasites are typically found in freshwater sources, but they can occasionally be present in inadequately treated swimming pools.

Treating Itchy Skin from Swimming Pools


If you’re experiencing itchy skin after swimming, there are several remedies to alleviate the discomfort:

  1. Rinse off: After exiting the pool, shower with soap and warm water to remove any residual chlorine and chemicals from your skin.
  2. Moisturize: Apply a fragrance-free, hypoallergenic moisturizer to your skin immediately after showering to help replenish lost moisture and soothe irritation.
  3. Over-the-counter treatments: Anti-itch creams containing hydrocortisone or calamine lotion can help relieve itchiness and reduce inflammation. Follow the instructions on the product’s packaging and consult with a healthcare professional if you’re unsure about using a particular treatment.
  4. Cold compress: Applying a cold compress to the affected area can help reduce itchiness and inflammation.
  5. Avoid scratching: Scratching can worsen the irritation and even lead to infection. Try to resist the urge to scratch, and consider using an over-the-counter treatment to alleviate the itchiness.

Preventing Itchy Skin from Swimming Pools

To minimize the risk of itchy skin while swimming, follow these preventive measures:

  1. Test pool water: Regularly check your pool’s chemical levels and pH balance to ensure a safe and comfortable swimming environment.
  2. Shower before swimming: Rinsing off before entering the pool can help remove any substances on your skin that could react with pool chemicals and cause irritation.
  3. Apply a barrier cream: Applying a waterproof barrier cream or petroleum jelly to your skin before swimming can help protect it from the drying effects of chlorine and other pool chemicals.
  4. Wear appropriate swimwear: Choose swimwear made from materials that are less likely to irritate your skin, such as polyester or nylon. Avoid swimwear made from materials like spandex, which can cause friction and exacerbate itchiness.
  5. Stay hydrated: Drinking water before, during, and after swimming can help keep your skin hydrated and reduce the risk of itchiness.

Conclusion

Itchy skin from swimming pools is a common issue, but understanding the causes and implementing proper treatment and prevention strategies can help you enjoy the water without discomfort. Always pay attention to your skin’s reaction after swimming and take appropriate steps to maintain its health. Consult with a healthcare professional or dermatologist if you’re concerned about persistent or severe skin irritation, as they can provide expert advice and recommend appropriate treatments. By following these tips, you can ensure a comfortable and enjoyable swimming experience for yourself and others.

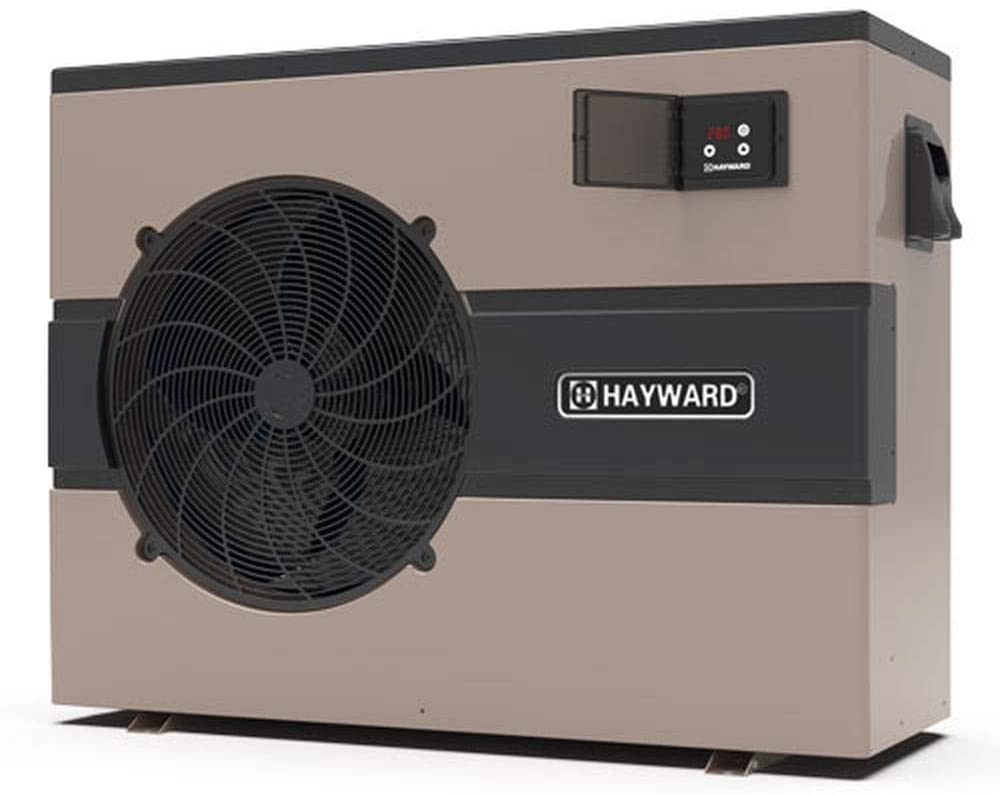
Troubleshooting Your Swimming Pool Heat Pump: A Step-by-Step Guide to Diagnosing and Repairing Common Issues

Keep Your Pool Warm and Comfortable by Properly Maintaining Your Heat Pump

Introduction

A swimming pool heat pump is an energy-efficient and cost-effective way to maintain a comfortable water temperature in your pool. However, like any other equipment, heat pumps can experience issues that may affect their performance. This article will guide you through the process of troubleshooting, diagnosing, and repairing common swimming pool heat pump problems.

Step 1: Understand How Your Heat Pump Works

Before troubleshooting your heat pump, it’s essential to understand how it operates. A pool heat pump works by transferring heat from the surrounding air to the pool water. The heat pump’s key components include the compressor, evaporator, condenser, and expansion valve. Understanding these components and their functions will help you identify and fix any issues that may arise.

Step 2: Identify Common Heat Pump Problems

Several common issues can affect a swimming pool heat pump’s performance. Some of these problems include:

  • No power or insufficient power supply
  • Low or high refrigerant levels
  • Dirty or clogged components
  • Faulty sensors or controls
  • Insufficient airflow

Step 3: Troubleshooting and Diagnosing Issues

Once you’ve identified the possible issues affecting your heat pump, follow these steps to diagnose and repair the problem:

  1. Check the power supply: Ensure that the heat pump is connected to a reliable power source and that the circuit breaker is not tripped. If the breaker has tripped, reset it and monitor the heat pump to see if the issue recurs.
  2. Inspect for refrigerant leaks: Low refrigerant levels can cause the heat pump to work inefficiently or not at all. Check for any visible leaks or ice buildup around the unit. If you suspect a refrigerant leak, contact a professional technician to repair the leak and recharge the system.
  3. Clean the evaporator and condenser coils: Dirty or clogged coils can reduce the heat pump’s efficiency and cause it to overheat. Regularly clean the coils with a soft brush or gentle stream of water to remove dirt and debris. Be careful not to damage the fins while cleaning.
  4. Check the airflow: Ensure that the area around the heat pump is clear of debris and that there is sufficient airflow around the unit. Insufficient airflow can cause the heat pump to overheat and shut down. Trim any overgrown vegetation and remove any obstructions around the heat pump to improve airflow.
  5. Test the sensors and controls: Faulty sensors or controls can prevent the heat pump from operating correctly. Use a multimeter to test the sensors and controls for proper function. Replace any faulty components as needed.

Step 4: Consult a Professional Technician

If you’re unable to diagnose or repair the issue yourself, or if the problem persists, consult a professional pool technician. They will have the expertise and tools necessary to identify and fix any issues with your heat pump efficiently and safely.

Conclusion

By understanding the basics of how your swimming pool heat pump works and being familiar with common issues, you can effectively troubleshoot and diagnose problems that may arise. Regular maintenance and proper care of your heat pump will ensure its longevity and optimal performance, keeping your pool warm and inviting for years to come.

Crunching the Numbers: The Average Annual Cost of Pool Maintenance for Standard Size Pools

Get a detailed breakdown of the average annual cost of pool maintenance for a standard size pool, and learn how to budget for your swimming pool’s upkeep effectively.

Owning a swimming pool can provide endless entertainment and relaxation during the warmer months. However, it’s essential to understand and budget for the associated maintenance costs to keep your pool clean, safe, and enjoyable. In this article, we will explore the average annual cost of pool maintenance for a standard size pool (approximately 15,000 to 30,000 gallons), helping you make informed decisions about your pool’s upkeep.

Breaking Down the Annual Pool Maintenance Costs

The average annual cost of pool maintenance can vary greatly depending on factors such as pool size, location, climate, and maintenance preferences. However, for a standard size pool, homeowners can generally expect to spend between $1,200 and $3,000 per year on maintenance.

  1. Chemicals: The cost of chemicals, such as chlorine, pH adjusters, and algaecides, can range between $300 and $800 per year. The exact amount will depend on the pool’s size, usage, and water chemistry.
  2. Water and Utilities: Running your pool’s circulation system, heating, and lighting can contribute significantly to your utility bills. On average, homeowners can expect to spend between $400 and $1,200 per year on water and utilities for their pool.
  3. Pool Cleaning: Regular pool cleaning, including skimming, vacuuming, and brushing, is essential for maintaining a clean swimming environment. Homeowners who prefer to hire a professional pool cleaning service can expect to pay between $80 and $150 per month, or $960 to $1,800 per year.
  4. Pool Equipment Maintenance: Properly maintaining your pool equipment, such as the pump, filter, and heater, can prolong their lifespan and ensure optimal performance. On average, homeowners can expect to spend between $100 and $500 per year on pool equipment maintenance, including routine servicing, repairs, and replacements.
  5. Pool Opening and Closing: Opening your pool at the beginning of the season and closing it at the end typically involves tasks such as removing and installing the pool cover, adjusting the water chemistry, and cleaning the pool. Professional pool opening and closing services typically cost between $150 and $300 each, for a total of $300 to $600 per year.
  6. Additional Maintenance Costs: Other maintenance tasks, such as replacing or repairing pool accessories, resurfacing the pool, or addressing issues like leaks and cracks, can also contribute to the overall annual cost. These costs can vary greatly depending on the specific maintenance needs of your pool.

How to Budget for Pool Maintenance

To budget effectively for your pool’s annual maintenance costs:

  1. Assess your pool’s unique needs: Consider factors such as pool size, type, age, and usage to determine the specific maintenance requirements of your pool.
  2. Shop around for services and products: Compare prices from different pool service providers and retailers to find the best deals on maintenance services and pool chemicals.
  3. DIY or hire a professional: Weigh the benefits of performing maintenance tasks yourself against the convenience and expertise offered by professional pool service providers.
  4. Plan for long-term expenses: Set aside funds for larger maintenance tasks, such as resurfacing or replacing equipment, which may arise over the lifespan of your pool.


The average annual cost of pool maintenance for a standard size pool can range from $1,200 to $3,000, with variations depending on factors such as pool size, location, and maintenance preferences. By understanding and budgeting for these costs, you can ensure that your pool remains clean, safe, and enjoyable for years to come. Regular pool maintenance not only contributes to a better swimming experience but also helps prolong the lifespan of your pool and its equipment. By assessing your pool’s unique needs, shopping around for services and products, deciding between DIY or professional services, and planning for long-term expenses, you can effectively manage your pool maintenance budget and enjoy a stress-free swimming season.

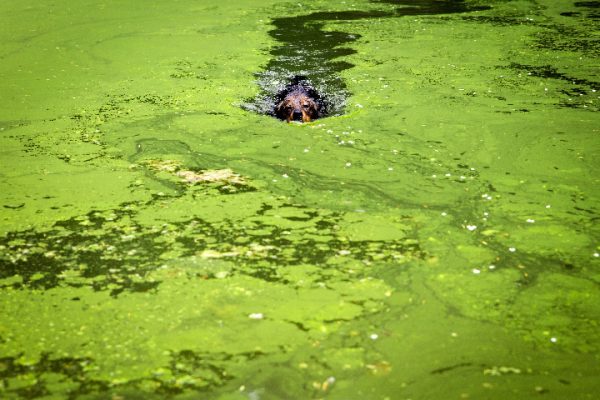
Pool Algaecides and Algae Control Methods: The Facts You Need to Know

Discover the facts about pool algaecides and explore various algae control methods to maintain a clean, clear, and algae-free swimming pool.

Algae infestations in swimming pools can be both unsightly and unhealthy, causing water discoloration, unpleasant odors, and potentially creating a slippery and hazardous surface. Proper algae control is crucial for maintaining a clean and safe swimming environment. In this article, we will discuss the facts about pool algaecides and explore different algae control methods to help you keep your swimming pool clear and algae-free.

Understanding Pool Algaecides

Pool algaecides are chemicals specifically formulated to kill or prevent the growth of algae in swimming pools. These products work by disrupting the algae’s cellular structure or inhibiting their reproduction. There are several types of algaecides available, each with its unique characteristics and applications:

  1. Quaternary Ammonium Compounds (Quats): Quats are cationic surfactants that work by penetrating and disrupting the cell walls of algae. These algaecides are widely available, affordable, and effective against a broad range of algae species. However, they may cause foaming in the pool if used in excessive amounts.
  2. Polymeric Quaternary Ammonium Compounds (Polyquats): Polyquats are an advanced version of quats, offering the same algae-fighting properties without the risk of foaming. They are also effective against various algae species, though they may be slightly more expensive than quats.
  3. Copper-Based Algaecides: Copper-based algaecides, such as copper sulfate or chelated copper compounds, are effective in controlling and preventing algae growth, particularly against stubborn black and mustard algae. However, excessive use of copper-based algaecides can cause water discoloration and staining of pool surfaces.
  4. Silver-Based Algaecides: Silver-based algaecides, such as silver nitrate or silver sulfate, are less common but can be effective against specific types of algae. However, like copper-based algaecides, they can also cause staining and water discoloration if used improperly.

Algae Control Methods for Swimming Pools

  1. Maintain Proper Water Chemistry: Regularly testing and adjusting your pool’s water chemistry is essential for preventing algae growth. Ensure that your pool’s pH, alkalinity, and sanitizer levels are within the recommended ranges to maintain a clean and balanced swimming environment.
  2. Use an Algaecide: Apply a pool algaecide according to the manufacturer’s instructions as a preventive measure or to treat an existing algae infestation. Consider the type of algae present in your pool and choose an algaecide formulated to target that specific species.
  3. Shock Your Pool: Regularly shocking your pool with a chlorine or non-chlorine shock treatment helps eliminate any existing algae and restore water clarity. Follow the manufacturer’s guidelines for proper dosage and application.
  4. Regularly Clean and Brush Your Pool: Regularly cleaning your pool, including brushing the walls, floors, and any other surfaces, helps remove algae spores and prevents their growth. Ensure that you are using the appropriate brush type for your pool’s surface material.
  5. Improve Water Circulation: Proper water circulation in your pool helps distribute sanitizing chemicals and discourages algae growth. Ensure that your pool’s circulation system is functioning properly, and clean the skimmer and pump baskets regularly to prevent clogs.
  6. Utilize a Pool Cover: Using a pool cover when your pool is not in use helps prevent debris from entering the pool, reducing the chances of algae growth. Pool covers also help maintain water chemistry and reduce evaporation, which can contribute to algae growth
  1. Remove Phosphates: Phosphates are nutrients that can promote algae growth in your pool. Use a phosphate remover to eliminate this potential food source for algae and help prevent their growth.
  2. Install UV or Ozone Sanitation Systems: Installing a UV or ozone sanitation system in your pool can provide an additional layer of protection against algae growth. These systems use ultraviolet light or ozone gas to kill algae and other microorganisms in the water, reducing the need for chemical sanitizers.
  3. Regularly Inspect and Clean Pool Equipment: Algae can cling to pool equipment, such as ladders, pool toys, and cleaning tools. Regularly inspect and clean these items to prevent algae from re-entering the pool.

Understanding the facts about pool algaecides and employing effective algae control methods are crucial for maintaining a clean, clear, and algae-free swimming pool. By focusing on proper water chemistry, regular pool maintenance, and using appropriate algaecides and treatments, you can successfully prevent and eliminate algae infestations in your pool. Ultimately, a proactive approach to algae control will help you enjoy a safe and pleasant swimming environment all season long.

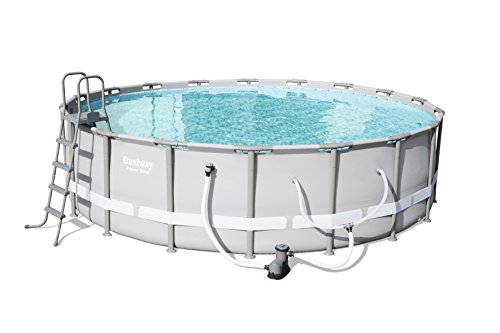
Cyanuric Acid: A First-Time Above Ground Pool Owner’s Guide

Understanding the Importance, Usage, and Application of Cyanuric Acid in Your Above Ground Pool

As a first-time above ground pool owner, you’ll quickly discover that maintaining proper water chemistry is essential for ensuring a clean, safe, and enjoyable swimming environment. One important chemical that plays a crucial role in your pool’s upkeep is cyanuric acid (CYA), also known as pool stabilizer or conditioner. This article will provide an overview of cyanuric acid’s importance, its uses, and guidance on how to use it effectively in your above ground pool.

Why is Cyanuric Acid Important?

Cyanuric acid serves as a stabilizer for the chlorine in your pool water, helping to protect it from the sun’s ultraviolet (UV) rays. UV light can rapidly break down free chlorine, reducing its effectiveness as a sanitizer and causing you to use more chlorine to maintain the appropriate levels. By using cyanuric acid, you can prolong the life of chlorine in your pool, reduce overall chlorine consumption, and maintain a more stable and consistent sanitizer level.


What is Cyanuric Acid Used For?

Cyanuric acid is primarily used to stabilize chlorine levels in outdoor swimming pools, including above ground pools. By shielding the chlorine from UV light, CYA helps maintain a proper balance of sanitizer, preventing algae growth, bacteria, and other contaminants. Additionally, it can help reduce the frequency of pool shock treatments and minimize fluctuations in chlorine levels, providing a more consistent and comfortable swimming experience.

How to Use Cyanuric Acid in Your Above Ground Pool

  1. Test the water: Before adding cyanuric acid to your pool, it’s essential to test the water to determine the current CYA levels. You can use test strips or a liquid test kit designed to measure cyanuric acid levels. The ideal range for CYA in an above ground pool is typically between 30 and 50 parts per million (ppm).
  2. Determine the amount needed: Based on your pool’s current CYA levels and volume, calculate the amount of cyanuric acid needed to reach the desired range. Many pool supply stores and online resources offer calculators to help you determine the appropriate amount.
  3. Pre-dissolve the cyanuric acid: Cyanuric acid can take some time to dissolve, so it’s best to pre-dissolve it in a bucket of water before adding it to your pool. This will help ensure even distribution and prevent damage to your pool liner. Slowly add the cyanuric acid to the bucket while stirring to aid in dissolving.
  4. Add cyanuric acid to the pool: Slowly pour the dissolved cyanuric acid solution into the pool while the pump is running to ensure proper circulation. Distribute the solution around the perimeter of the pool to ensure even distribution. Avoid pouring the solution directly onto the pool liner, as this may cause damage.
  5. Retest and adjust as needed: Wait at least 24 hours for the cyanuric acid to circulate and stabilize in your pool. Retest the water to ensure the proper CYA levels have been achieved. If necessary, add more cyanuric acid following the same process until the desired levels are reached.

Conclusion

As a first-time above ground pool owner, understanding the importance and usage of cyanuric acid can help you maintain a clean, safe, and enjoyable swimming environment. By properly testing, calculating, and applying cyanuric acid, you can protect your pool’s chlorine levels, reduce sanitizer consumption, and provide a more consistent and comfortable swimming experience for you and your family. Remember to regularly monitor your pool’s water chemistry and adjust as needed to keep your above ground pool

Pool Shock 101: A Homeowner’s Guide to Different Pool Shock Methods

Discover the various methods to shock your swimming pool, understand their benefits, and learn how to choose the right one for your pool maintenance needs.

Regularly shocking your swimming pool is an essential part of proper pool maintenance. Pool shock treatments help eliminate contaminants, restore water clarity, and maintain a safe and healthy swimming environment. As a homeowner, understanding the different pool shock methods available can help you choose the most suitable one for your pool’s unique needs. In this article, we will explore the various ways to shock your pool and provide guidance on selecting the best method for your pool maintenance routine.

Different Methods to Shock Your Swimming Pool

  1. Calcium Hypochlorite (Cal-Hypo) Shock

Calcium hypochlorite, also known as Cal-Hypo, is a popular and powerful pool shock method. Cal-Hypo contains high levels of chlorine, typically around 65-75%, making it effective at killing bacteria, algae, and other organic contaminants.

Pros:

  • Strong oxidizing properties
  • Effective against a wide range of contaminants
  • Available in various strengths


Cons:

  • Can increase water hardness and calcium levels
  • Requires pre-dissolving in water before application
  • Must be added at night to prevent sunlight from breaking down the active chlorine
  1. Dichloro-S-Triazinetrione (Dichlor) Shock

Dichlor shock is a stabilized form of chlorine that contains cyanuric acid, which protects the chlorine from being broken down by sunlight. This makes it an excellent choice for outdoor pools that receive a lot of sun exposure.

Pros:

  • Stabilized chlorine resists UV degradation
  • Fast-dissolving and easy to apply
  • Compatible with most pool types

Cons:

  • May increase cyanuric acid levels with repeated use
  • Lower chlorine content compared to Cal-Hypo
  • More expensive than other shock methods
  1. Potassium Monopersulfate (Non-Chlorine) Shock

Potassium monopersulfate, also known as non-chlorine shock or MPS, is an oxygen-based shock treatment that does not contain chlorine. This type of shock is ideal for those who want to avoid using chlorine or need a shock treatment compatible with alternative sanitizers like bromine or biguanide.

Pros:

  • No chlorine odor
  • Compatible with alternative sanitizers
  • Can be used during the day, as it is not affected by sunlight

Cons:

  • Less effective against algae and bacteria than chlorine-based shocks
  • May be less compatible with certain pool surfaces or equipment
  • More expensive than chlorine-based shock options
  1. Liquid Chlorine Shock

Liquid chlorine, or sodium hypochlorite, is another option for shocking your pool. This method is easy to apply, as it can be poured directly into the pool without the need for pre-dissolving.

Pros:

  • Easy to apply, no pre-dissolving required
  • Works quickly and effectively
  • Less likely to increase calcium hardness

Cons:

  • Lower concentration of chlorine compared to Cal-Hypo
  • Can degrade quickly if not stored properly
  • Can be more expensive than other shock methods

How to Choose the Right Shock Method for Your Pool

To determine the best pool shock method for your needs, consider the following factors:

  1. Pool Type: Consider your pool’s surface material, as some shock treatments may be less compatible with certain surfaces or equipment.
  2. Sanitizing System: If you use an alternative sanitizer, like bromine or biguanide, choose a shock method compatible with your system, such as potassium monopersulfate.
  3. Sun Exposure: For outdoor pools with significant sun exposure, consider a stabilized shock treatment like Dichlor or a non-chlorine shock that is not affected by sunlight.
  1. Existing Water Chemistry: Analyze your pool’s current water chemistry, such as calcium hardness and cyanuric acid levels, and choose a shock treatment that will not exacerbate existing imbalances.
  2. Budget: Consider your budget and the cost of the shock treatments available, as some methods may be more expensive than others.
  3. Frequency of Use: If you use your pool frequently or host large gatherings, a stronger shock treatment like Cal-Hypo may be more appropriate to ensure proper sanitization.

Understanding the various pool shock methods available is crucial for any homeowner looking to maintain a clean and safe swimming environment. By considering your pool type, sanitizing system, sun exposure, existing water chemistry, budget, and usage, you can make an informed decision about which pool shock method best suits your needs. Regularly shocking your pool with the appropriate method will help you eliminate contaminants, maintain water clarity, and enjoy a healthy and enjoyable swimming experience.

Mastering Pool Alkalinity: How to Test, Raise, and Lower Levels for Optimal Swimming Conditions

Learn how to test, raise, and lower your swimming pool’s alkalinity to maintain the ideal water chemistry for a safe, comfortable, and enjoyable swimming experience.

Introduction

Maintaining proper alkalinity levels in your swimming pool is essential for ensuring a balanced, healthy, and comfortable swimming environment. Alkalinity acts as a buffer to prevent rapid pH fluctuations, which can cause damage to pool equipment, irritate swimmers’ skin and eyes, and reduce the effectiveness of sanitizing chemicals. In this article, we will guide you through the process of testing, raising, and lowering your pool’s alkalinity levels to maintain optimal water chemistry.

Testing Pool Alkalinity

Regular testing is crucial to monitoring your pool’s alkalinity levels and making necessary adjustments. Alkalinity levels should be maintained between 80 and 120 parts per million (ppm) for most pools, although some pool manufacturers may have slightly different recommendations.

  1. Choose a testing method: To test your pool’s alkalinity, you can use either a liquid test kit or test strips. Both methods are readily available at pool supply stores and online.
  2. Collect a water sample: Using a clean container or the provided vial, collect a water sample from at least 12 inches below the surface and away from return jets.
  3. Follow the testing instructions: Carefully follow the instructions provided with your chosen test kit or test strips. This will typically involve adding a specific number of drops of testing solution to the water sample or dipping a test strip into the sample for a specified time.
  4. Read the results: Compare the color of the water sample or test strip to the provided color chart to determine your pool’s current alkalinity level.


Raising Pool Alkalinity

If your pool’s alkalinity level is below the recommended range, you will need to raise it using an alkalinity increaser, typically a sodium bicarbonate-based product.

  1. Determine the required amount: Refer to the instructions on your chosen alkalinity increaser to calculate the amount needed based on your pool’s current alkalinity level and volume.
  2. Pre-dissolve the product: To avoid cloudiness and promote even distribution, dissolve the alkalinity increaser in a bucket of warm water before adding it to the pool.
  3. Add the increaser: Slowly pour the dissolved alkalinity increaser into the pool, distributing it evenly around the perimeter.
  4. Circulate the water: Run your pool’s circulation system for at least 4 hours to ensure thorough mixing and distribution.
  5. Re-test and adjust: Wait 24 hours before re-testing your pool’s alkalinity level and making any further adjustments as necessary.

Lowering Pool Alkalinity

If your pool’s alkalinity level is too high, you can lower it using a pH reducer or muriatic acid.

  1. Determine the required amount: Follow the instructions on your chosen pH reducer or muriatic acid product to calculate the amount needed based on your pool’s current alkalinity level and volume.
  2. Pre-dilute the product: For safety and even distribution, dilute the pH reducer or muriatic acid in a bucket of water according to the manufacturer’s guidelines.
  3. Add the reducer: Slowly pour the diluted pH reducer or muriatic acid into the pool, distributing it evenly around the perimeter.
  4. Circulate the water: Run your pool’s circulation system for at least 4 hours to ensure thorough mixing and distribution.
  5. Re-test and adjust: Wait 24 hours before re-testing your pool’s alkalinity level and making any further adjustments as necessary.

Conclusion

Maintaining proper alkalinity levels in your swimming pool is crucial