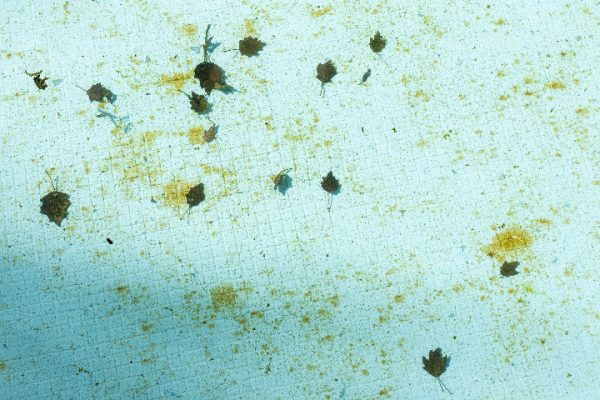
Natural Ways to Banish Algae from Your Home Swimming Pool

Maintaining a clean and clear swimming pool is a top priority for pool owners, but not everyone is keen on using chemicals to achieve this goal. Fortunately, there are several natural methods to eliminate algae from your home swimming pool. In this article, we’ll explore eco-friendly and cost-effective alternatives to traditional pool treatments that will keep your pool algae-free and looking pristine.

  1. Circulation and Filtration

One of the most effective ways to prevent algae growth in your pool is by ensuring proper water circulation and filtration. Algae thrive in stagnant water, so running your pool pump and filter system for at least 8-12 hours a day will help keep algae at bay. Additionally, regularly cleaning and maintaining your filter will optimize its performance in capturing algae and other contaminants.

  1. Regular Pool Maintenance

Adopt a consistent pool maintenance routine that includes brushing, vacuuming, and skimming. Brushing the pool’s walls, steps, and corners with a pool brush will dislodge algae and prevent them from taking hold. Vacuuming the pool floor and skimming the water surface will remove any debris that could encourage algae growth.

  1. Balanced Water Chemistry

Maintaining proper water chemistry is vital for a healthy pool environment. While this doesn’t involve directly using chemicals to kill algae, it does involve regular testing and adjustment of your pool’s pH, alkalinity, and calcium hardness levels to create an environment less conducive to algae growth. Aim for a pH level of 7.4-7.6, alkalinity of 80-120 ppm, and calcium hardness of 200-400 ppm.

  1. Solar Pool Ionizers

Solar pool ionizers are an eco-friendly and chemical-free solution to combat algae. These devices float on the pool’s surface and use solar power to generate a low-voltage electric current, which releases copper and silver ions into the water. These ions have algaecidal properties, killing algae while being safe for swimmers and the environment.

  1. Barley Straw

Barley straw is an unconventional yet effective natural algae inhibitor. When placed in a mesh bag and floated in the pool, barley straw releases enzymes and compounds that inhibit algae growth without affecting water chemistry. Replace the barley straw every few months for continuous protection against algae.

  1. Biological Algae Inhibitors

Another natural way to combat algae in your swimming pool is by using biological algae inhibitors. These products contain beneficial bacteria that compete with algae for nutrients, effectively reducing algae populations. Add the biological algae inhibitor to your pool according to the manufacturer’s instructions, ensuring you use the correct dosage for your pool size.

  1. Shade Management

Algae thrive in sunlight, so controlling the amount of sunlight your pool receives can help reduce algae growth. Install shading options, such as umbrellas or shade sails, to limit sunlight exposure. Additionally, trimming overhanging trees and bushes will minimize the amount of debris falling into the pool, reducing the nutrient availability for algae.

Conclusion

By embracing natural and eco-friendly methods, you can keep your home swimming pool algae-free and sparkling clean. Proper water circulation, filtration, and balanced water chemistry, combined with natural algae inhibitors, will ensure your pool remains a refreshing and inviting haven for friends and family all season long. Give these natural solutions a try, and enjoy the benefits of a greener, healthier swimming pool.

Unstable pH Swings in Inground Swimming Pools: Causes, Troubleshooting, and Solutions

Keep Your Pool Water Balanced and Safe by Managing pH Fluctuations

Introduction

Maintaining the correct pH level in your inground swimming pool is essential for ensuring the comfort and safety of swimmers, as well as protecting your pool equipment. However, unstable pH swings can occur and can cause a variety of problems. In this article, we will explore the causes of unstable pH swings, how to troubleshoot them, and the best solutions to keep your pool water balanced and safe.

Causes of Unstable pH Swings


There are several factors that can contribute to unstable pH swings in your inground swimming pool:

  1. Inconsistent chemical maintenance: Irregular or improper dosing of chemicals can cause fluctuations in pH levels.
  2. High alkalinity: High total alkalinity can cause the pH to be more resistant to change, resulting in instability.
  3. Organic debris: Leaves, grass, and other organic materials can alter the pH balance of your pool water.
  4. Swimmer load: An increase in swimmers can introduce contaminants that affect pH levels.
  5. Rainwater: Heavy rain or storms can dilute the pool water, causing fluctuations in pH levels.

Troubleshooting Unstable pH Swings

To identify the cause of unstable pH swings in your pool, follow these troubleshooting steps:

  1. Test your pool water regularly: Regular water testing allows you to monitor pH levels and other water balance parameters. This helps you identify any imbalances that may be causing pH fluctuations.
  2. Inspect your pool equipment: Check your pool pump, filter, and chemical feeder to ensure they are functioning correctly.


Solutions to Manage Unstable pH Swings

  1. Maintain a consistent chemical maintenance routine: Regularly test and adjust your pool water chemistry to maintain the recommended pH levels (7.4 to 7.6). Consistency in chemical dosing is crucial for maintaining stable pH levels.
  2. Adjust total alkalinity: Test and maintain total alkalinity within the range of 80-120 ppm. This will help to stabilize your pool’s pH levels.
  3. Remove organic debris: Regularly skim, vacuum, and brush your pool to remove leaves, grass, and other organic materials that can affect pH balance.
  4. Balance other water parameters: Ensure all water parameters, such as calcium hardness and sanitizer levels, are within the recommended ranges. This will help to maintain a stable pH level.
  5. Use a pH buffer: A pH buffer, such as sodium bicarbonate, can help stabilize pH levels by increasing the total alkalinity.
  6. Manage swimmer load: Monitor and manage the number of swimmers in your pool to minimize the impact on pH levels.
  7. Protect your pool from rainwater: Use a pool cover during heavy rain or storms to prevent rainwater from diluting the pool water and causing pH fluctuations.

Conclusion

Unstable pH swings in your inground swimming pool can lead to various problems, including discomfort for swimmers, damage to pool equipment, and ineffective sanitization. By understanding the causes of unstable pH swings and implementing proper troubleshooting and solutions, you can maintain a balanced and safe pool environment. Regular pool maintenance and water testing are essential for keeping your pool water crystal clear and ready for swimming all season long.

Identifying and Removing Pool Stains: A Comprehensive Guide

Keep Your Pool Surface Sparkling Clean with Effective Stain Identification and Removal Techniques

Introduction

Pool stains can be an eyesore and may affect the overall aesthetics of your swimming pool. They can be caused by various factors such as metals, organic materials, and improper water chemistry. To keep your pool looking its best, it’s essential to identify the type of stain and use the appropriate products and methods to remove it. In this article, we’ll discuss the common causes of pool stains, how to identify them, and the most effective solutions to eliminate them.

Common Causes of Pool Stains

  1. Metals: Metals like iron, copper, and manganese can cause unsightly stains on your pool surfaces. These metals can be introduced through source water, corroding pool equipment, or certain chemicals.
  2. Organic Materials: Organic stains result from materials like leaves, algae, and other plant debris that settle on the pool surface, causing discoloration.
  3. Calcium Deposits: High levels of calcium hardness in your pool water can lead to calcium deposits on your pool surface, also known as scaling.
  4. Improper Water Chemistry: Unbalanced pool water chemistry can cause various types of stains, including metal stains and calcium deposits.


Identifying Pool Stains

  1. Metal Stains: Metal stains are typically caused by iron, copper, or manganese. Iron stains tend to be reddish-brown, while copper stains are usually green, blue, or teal. Manganese stains may appear as dark brown or black spots.
  2. Organic Stains: Organic stains are usually brown, green, or dark in color and often have irregular shapes. They can be caused by leaves, algae, or other plant debris.
  3. Calcium Deposits: Calcium deposits appear as white, gray, or chalky areas on the pool surface, usually in areas with high water circulation.

Removing Pool Stains

  1. Metal Stains: To remove metal stains, use a metal sequestrant to bind and remove metals from the water. Follow the product’s instructions and ensure that your pool water chemistry is balanced. For stubborn stains, you may need to use a stain remover product specifically formulated for metal stains.
  2. Organic Stains: For organic stains, start by manually removing any visible debris and brushing the pool surface. Shock your pool with a high dose of chlorine to eliminate any organic material. For persistent stains, consider using an enzyme-based pool stain remover that can break down organic materials.
  3. Calcium Deposits: To remove calcium deposits, adjust your pool water chemistry, lowering the calcium hardness and pH levels. You can use a calcium deposit remover or a pumice stone to scrub away deposits gently. Be cautious not to damage the pool surface while scrubbing.


Preventing Pool Stains

  1. Maintain Balanced Water Chemistry: Regularly test and adjust your pool water chemistry to prevent staining caused by metals, calcium deposits, or imbalanced water conditions.
  2. Use a Metal Sequestrant: If you have metals in your source water, use a metal sequestrant to prevent staining.
  3. Clean Your Pool Regularly: Regularly skim, vacuum, and brush your pool to remove debris and organic materials that can cause staining.
  4. Cover Your Pool: Use a pool cover to minimize the introduction of debris and organic materials, which can cause stains.

Conclusion

Identifying and removing pool stains requires understanding the cause of the stain and using the appropriate products and methods for effective removal. By maintaining balanced pool water chemistry, using a metal sequestrant when necessary, and regularly cleaning your pool, you can keep your pool surface stain-free and looking its best.

Troubleshooting Robotic Pool Cleaners: A Comprehensive Guide to Diagnosing and Fixing Common Issues

Keep Your Pool Immaculate with a Properly Functioning Robotic Pool Cleaner

Introduction

Robotic pool cleaners are an efficient and convenient way to keep your swimming pool clean and free of debris. However, like any other equipment, they can experience issues that may affect their performance. This article will guide you through the process of troubleshooting, diagnosing, and fixing common problems with robotic pool cleaners.

Step 1: Understand How Robotic Pool Cleaners Work

Before troubleshooting your robotic pool cleaner, it’s essential to understand how it operates. These cleaners are self-contained units that move around the pool using built-in motors and collect debris in an internal filter. The key components of a robotic pool cleaner include the motor, wheels or tracks, brushes, filter, and any sensors or controls that dictate its movement.

Step 2: Identify Common Robotic Pool Cleaner Problems

Several common issues can affect the performance of a robotic pool cleaner. Some of these problems include:

  • Loss of power or battery issues
  • Motor or drive system malfunctions
  • Worn or damaged brushes, wheels, or tracks
  • Clogged or dirty filter
  • Faulty sensors or controls


Step 3: Troubleshooting and Diagnosing Issues

Once you’ve identified the possible issues affecting your robotic pool cleaner, follow these steps to diagnose and repair the problem:

  1. Check the power supply or battery: Ensure that your robotic pool cleaner is properly charged or connected to a reliable power source. If the cleaner is battery-operated, inspect the battery for any visible damage or swelling and replace it if necessary.
  2. Inspect the motor and drive system: Motor or drive system malfunctions can prevent the cleaner from moving around the pool effectively. Listen for any unusual sounds or grinding noises that may indicate a problem with the motor or drive system. Consult your cleaner’s owner’s manual for information on accessing and inspecting these components, and replace any damaged parts as needed.
  3. Examine the brushes, wheels, or tracks: Worn or damaged brushes, wheels, or tracks can affect the cleaner’s ability to move and clean the pool effectively. Check these components for signs of wear or damage, such as missing bristles or visible cracks, and replace them as needed.
  4. Clean the filter: A clogged or dirty filter can reduce the cleaner’s efficiency and cause it to stop functioning. Regularly clean the filter according to the manufacturer’s recommendations to ensure optimal performance.
  5. Test the sensors and controls: Faulty sensors or controls can prevent the cleaner from navigating the pool correctly or cause it to become stuck. Consult your cleaner’s owner’s manual for information on testing and resetting these components. Replace any faulty sensors or controls as needed.

Step 4: Consult a Professional Technician

If you’re unable to diagnose or repair the issue yourself, or if the problem persists, consult a professional pool technician. They will have the expertise and tools necessary to identify and fix any issues with your robotic pool cleaner efficiently and safely.

Conclusion

By understanding the basics of how your robotic pool cleaner works and being familiar with common issues, you can effectively troubleshoot and diagnose problems that may arise. Regular maintenance and proper care of your cleaner will ensure its longevity and optimal performance, keeping your pool clean and inviting for years to come.

Conquering Black Algae in Your Home Swimming Pool: Causes, Solutions, and Products

Learn How to Identify, Eliminate, and Prevent the Stubborn Invader That Is Black Algae

Introduction

Black algae can be a persistent and challenging issue for many homeowners with swimming pools. This tenacious invader is known for its strong roots and resistance to conventional pool treatments. In this article, we’ll explore the causes of black algae, effective solutions for eliminating it, and the products needed to ensure your pool stays pristine and inviting.


Causes of Black Algae in Swimming Pools

  1. Insufficient Sanitation: Low levels of chlorine or other sanitizing agents in the pool can allow black algae to thrive.
  2. Poor Circulation and Filtration: Inadequate water circulation and filtration can create stagnant areas in the pool, creating a hospitable environment for black algae growth.
  3. Introduction via Contamination: Swimmers, pool equipment, or debris can inadvertently introduce black algae spores into the pool.

Solutions for Eliminating Black Algae

  1. Scrub the Affected Areas: Begin by using a stiff pool brush to vigorously scrub the black algae spots. This will help break up the protective layer and expose the algae to the pool chemicals.
  2. Shock the Pool: Raise the chlorine level in your pool to 10-30 ppm by shocking the water. This will help kill the black algae and sanitize the pool.
  3. Use an Algaecide: Apply a strong algaecide specifically formulated to target black algae. Follow the manufacturer’s instructions for the proper dosage and application method.
  4. Brush and Vacuum: Regularly brush and vacuum the pool to remove dead algae and debris. This will prevent the algae from re-establishing itself in the pool.
  5. Clean the Filter: Thoroughly clean or replace the pool filter to remove any trapped algae spores, ensuring that they do not re-enter the pool.


Products Needed to Remove Black Algae and How to Use Them

  1. Stiff Pool Brush: A stiff-bristled pool brush is essential for breaking up the protective layer of black algae. Use it to vigorously scrub the affected areas before applying chemicals.
  2. Chlorine Shock: Chlorine shock treatment is a concentrated form of chlorine used to raise the sanitizer level quickly. Follow the manufacturer’s guidelines for the proper amount of shock to use based on your pool’s volume and existing chlorine levels.
  3. Black Algae-specific Algaecide: Not all algaecides are effective against black algae, so choose one specifically formulated to combat this stubborn invader. Follow the manufacturer’s instructions for dosage and application.
  4. Pool Vacuum: Use a pool vacuum to remove dead algae and debris from the bottom and walls of the pool. This will help prevent the algae from re-establishing itself.
  5. Filter Cleaner or Replacement Cartridge: Clean your pool filter with a filter cleaner or replace the cartridge to ensure that any trapped algae spores are removed and do not re-enter the pool.

Conclusion

Eliminating black algae from your home swimming pool can be a daunting task, but with the right solutions and products, you can successfully conquer this stubborn invader. By understanding the causes of black algae, implementing effective treatment strategies, and using the appropriate products, you can restore your pool to a pristine and inviting state. Regular pool maintenance, proper sanitation, and diligent water testing will help prevent future black algae outbreaks and keep your pool looking its best.

How to Fix Constantly Low Chlorine in Your Backyard Swimming Pool: Causes, Troubleshooting, and Solutions

Keep Your Pool Safe and Crystal Clear by Understanding and Addressing Low Chlorine Levels

Introduction

Chlorine is an essential chemical for maintaining a clean, safe, and healthy swimming pool. It acts as a sanitizer, killing bacteria, algae, and other harmful microorganisms. However, constantly low chlorine levels can result in an unclean pool and various problems. This article will explore the causes of low chlorine levels, the role of stabilizers, chlorine lock, and combined chlorine, and provide troubleshooting steps and solutions to address this issue.

Causes of High Chlorine Demand

Several factors can contribute to high chlorine demand and low chlorine levels in your pool:

  1. High pool usage: An increase in swimmers can deplete chlorine levels more rapidly.
  2. Excessive organic debris: Leaves, grass, and other organic material can increase chlorine demand.
  3. Algae growth: Algae consume chlorine, leading to a decrease in sanitizer levels.
  4. Improper water balance: Incorrect pH, alkalinity, or calcium hardness levels can affect chlorine’s effectiveness.
  5. Insufficient sunlight protection: Sunlight can break down chlorine, reducing its effectiveness as a sanitizer.


The Role of Stabilizer, Chlorine Lock, and Combined Chlorine

  1. Stabilizer: Also known as cyanuric acid, stabilizers protect chlorine from sunlight degradation, extending its lifespan in the pool. However, high levels of stabilizer can reduce chlorine’s effectiveness.
  2. Chlorine lock: This occurs when high levels of stabilizer prevent free chlorine from sanitizing the pool effectively, resulting in low chlorine levels despite regular dosing.
  3. Combined chlorine: When chlorine binds with contaminants, it forms combined chlorine, which is less effective as a sanitizer. High levels of combined chlorine can contribute to low free chlorine levels.

Problems Resulting from Constantly Low Chlorine

Constantly low chlorine levels can lead to several issues in your pool, such as:

  1. Algae growth: Without sufficient chlorine, algae can thrive, turning your pool water green and murky.
  2. Bacterial growth: Low chlorine levels can result in the proliferation of harmful bacteria, posing health risks to swimmers.
  3. Cloudy water: Insufficient chlorine can cause pool water to become cloudy and uninviting.
  4. Foul odors: Combined chlorine can produce a strong, unpleasant chlorine smell.

Troubleshooting Steps

  1. Test your pool water: Regularly test your pool water for chlorine levels, pH, alkalinity, and stabilizer levels. This will help you identify the cause of low chlorine levels.
  2. Inspect your pool equipment: Ensure your pool pump, filter, and chlorinator are functioning correctly.

Solutions for Fixing Low Chlorine Levels

  1. Shock the pool: Perform a pool shock treatment with a high dose of chlorine to address algae growth, bacteria, and combined chlorine.
  2. Adjust the stabilizer levels: Lower high stabilizer levels by partially draining and refilling your pool with fresh water. Maintain the recommended stabilizer levels to prevent chlorine lock.
  3. Balance your pool water: Ensure your pool water is balanced by adjusting the pH, alkalinity, and calcium hardness levels as needed.
  4. Optimize your chlorinator settings: Adjust your chlorinator settings to increase the rate of chlorine production or dosing.
  5. Remove organic debris: Regularly skim, vacuum, and brush your pool to remove leaves, grass, and other debris that can contribute to high chlorine demand.
  6. Use an algaecide: Regularly use an algaecide to prevent algae growth and maintain optimal chlorine levels.


Conclusion

Constantly low chlorine levels in your backyard swimming pool can lead to several problems, including algae growth, bacterial contamination, and cloudy water. Understanding the causes of low chlorine levels, such as high chlorine demand, the role of stabilizers, chlorine lock, and combined chlorine, is essential in maintaining a clean and safe pool environment.

By implementing proper troubleshooting steps and solutions, such as shocking the pool, adjusting stabilizer levels, balancing pool water, optimizing chlorinator settings, removing organic debris, and using algaecides, you can effectively address and prevent low chlorine levels. Regular pool maintenance and water testing will help you keep your pool crystal clear and ready for swimming all season long.

The Best Pool Alarms for Home Swimming Pools: A Comprehensive Guide

Understanding the Importance, Types, and Features of Pool Alarms to Keep Your Family Safe

Introduction

Pool alarms are essential safety devices for home swimming pools, helping to prevent accidents and ensure the wellbeing of your family and guests. With numerous types and styles of pool alarms available, it can be challenging to determine which one is right for your needs. In this article, we will discuss the purpose of pool alarms, explore the different styles, explain how to use them, and outline the pros and cons of each type.

The Purpose of Pool Alarms

Pool alarms are designed to alert you when there is unexpected movement or entry into your swimming pool. They can provide an added layer of protection for children, pets, and non-swimmers, helping to prevent accidental drowning and other pool-related incidents.

Different Styles of Pool Alarms

  1. Surface Wave Sensors: These pool alarms detect disturbances on the water’s surface, sounding an alarm when significant waves are created, such as when someone enters the pool. They are easy to install and typically float on the water’s surface or attach to the pool’s edge.
  2. Subsurface Alarms: Subsurface alarms use advanced technology to monitor changes in water pressure or movement beneath the water’s surface. These alarms are generally more accurate and less prone to false alarms than surface wave sensors.
  3. Gate Alarms: Gate alarms are installed on the pool’s surrounding fence or barrier, alerting you when someone opens the gate or attempts to bypass it. These alarms can be an excellent addition to other pool alarm systems, ensuring a comprehensive safety net.
  4. Personal Immersion Alarms: These wearable devices are designed to be worn by children or pets, triggering an alarm when they become submerged in water. Personal immersion alarms can provide an added layer of protection and peace of mind, especially for families with young children or pets.


How to Use Pool Alarms

  1. Choose the Right Alarm: Select a pool alarm that suits your specific needs and pool setup. Consider factors such as pool size, type of pool (above ground or in-ground), and potential users (children, pets, or adults).
  2. Installation: Follow the manufacturer’s instructions for installing your chosen pool alarm. This may involve attaching the alarm to the pool’s edge, installing it on a gate, or properly positioning a floating sensor.
  3. Testing: Regularly test your pool alarm to ensure it is functioning correctly. This may involve creating disturbances in the pool water or attempting to open a gate alarm to check if the alarm sounds as expected.
  4. Maintenance: Keep your pool alarm clean and well-maintained to ensure optimal performance. Replace batteries as needed and store the alarm safely during the off-season if you close your pool.

Pros and Cons of Pool Alarms

Pros:

  • Pool alarms provide an added layer of safety for your swimming pool, helping to prevent accidents and drownings.
  • They can offer peace of mind for families with young children, pets, or non-swimmers.
  • Many pool alarms are relatively affordable and easy to install.
  • They can complement other pool safety measures, such as fences, pool covers, and supervision.

Cons:

  • Some pool alarms may be prone to false alarms, which can be disruptive and lead to reduced sensitivity to genuine threats.
  • No pool alarm can guarantee complete safety, and they should not replace adult supervision or other safety precautions.
  • Certain pool alarms may require regular maintenance or battery replacements to ensure they remain functional.

Conclusion

Pool alarms are a valuable addition to any home swimming pool, helping to enhance safety and provide peace of mind for families and pool owners. By understanding the different types of pool alarms available, their uses, and their pros and cons, you can make an informed decision what will work best for your pool.

How to Calculate the Volume of a Swimming Pool: From Simple to Complex Shapes

Calculating the volume of your swimming pool is an essential task, whether you are a pool owner or a professional. Knowing the volume is crucial for determining the right amount of chemicals to use, heating or cooling requirements, and filtration needs. This article will guide you through the process of calculating the volume of swimming pools, starting with simple shapes and moving on to more complex ones. Grab your measuring tape, a pen, and some paper – let’s dive in!

I. Simple Shapes:

  1. Rectangular Pools

The most straightforward pool shape to calculate the volume for is a rectangular pool. Follow these steps:

a. Measure the length, width, and depth of the pool (in feet or meters). b. Multiply these measurements together to find the volume in cubic feet (or cubic meters): Volume = Length × Width × Depth

  1. Circular Pools

Circular pools are also relatively simple to calculate. Here are the steps:

a. Measure the diameter (across the widest part) and depth of the pool (in feet or meters). b. Calculate the radius by dividing the diameter by 2. c. Use the formula for the volume of a cylinder: Volume = π × Radius² × Depth, where π is a mathematical constant (approximately 3.14159).

II. Complex Shapes:

  1. Oval Pools


For an oval pool, follow these steps:

a. Measure the major axis (longest diameter) and minor axis (shortest diameter) of the pool, as well as the depth (in feet or meters). b. Calculate the volume using the following formula: Volume = π × (Major Axis / 2) × (Minor Axis / 2) × Depth

  1. Kidney-Shaped Pools

Calculating the volume of a kidney-shaped pool involves a few more steps:

a. Measure the lengths of the two axes (longest and shortest diameters) and the depth at the deepest and shallowest points of the pool. b. Calculate the average depth by adding the deepest and shallowest depths and dividing by 2: Average Depth = (Deepest Depth + Shallowest Depth) / 2 c. Use the formula for an oval pool (from above) with the average depth to calculate the volume.

  1. Free-Form Pools

For free-form pools, the best way to estimate the volume is by dividing the pool into smaller sections (such as rectangles, circles, or triangles) and calculating the volume of each section separately. Afterward, add the volumes together to find the total pool volume. Remember to use the appropriate formulas for each shape and to account for varying depths by using average depths when needed.

III. Considerations for Varying Depths

Many swimming pools have varying depths, such as a shallow end and a deep end. In these cases, it is essential to measure the depths at the shallowest and deepest points and use average depths in the volume calculations. For rectangular and oval pools, follow the steps mentioned earlier for calculating average depths. For more complex shapes, you might need to divide the pool into smaller sections and apply the same concept.

Conclusion:

Calculating the volume of a swimming pool is crucial for proper maintenance and operation. By following the steps and formulas outlined in this article, you can determine the volume of various pool shapes, from simple rectangles to more intricate free-form designs. Remember to consider the varying depths and always measure carefully to ensure accurate calculations. Happy swimming!

Changing Your Pool Light Bulb: A Step-By-Step Guide for a Safe and Efficient Replacement

Illuminate Your Pool with Ease by Following These Simple Steps to Replace Your Pool Light Bulb

Introduction

A well-lit swimming pool not only enhances its aesthetic appeal but also ensures safety during nighttime swims. Pool light bulbs can eventually burn out, and replacing them is a crucial part of pool maintenance. This article will provide you with a step-by-step guide on how to change a pool light bulb safely and efficiently.

Caution: Working with electricity and water can be dangerous. If you’re not comfortable or experienced with electrical work, it’s best to consult a professional electrician or pool technician to replace the pool light bulb for you.

Step 1: Gather the Necessary Tools and Supplies

Before you start, gather the following tools and supplies:

  1. A replacement pool light bulb compatible with your pool light fixture
  2. A flathead screwdriver or a Phillips screwdriver, depending on your fixture
  3. A multimeter to test for electrical voltage (optional, but recommended)
  4. A clean, dry towel
  5. Waterproof silicone grease (optional)


Step 2: Turn Off the Power

Safety is paramount when working with electrical components. Turn off the power to the pool light at the circuit breaker or switch. To ensure the power is off, you can use a multimeter to test for voltage at the light switch.

Step 3: Remove the Light Fixture

Locate the pool light fixture, typically mounted on the pool wall below the waterline. Depending on your pool’s design, you may need to lower the water level to access the fixture.

Remove the single screw or multiple screws that secure the light fixture to the pool wall using a screwdriver. Carefully pull the fixture out of the niche, lifting it up and onto the pool deck. Most pool light fixtures have enough cable coiled behind them to allow you to set the fixture on the pool deck for easy access.

Step 4: Remove the Light Fixture Lens

With the light fixture on the pool deck, locate and remove the screws or clips holding the lens or faceplate in place. Carefully lift the lens or faceplate off the fixture, exposing the light bulb.

Step 5: Remove the Old Light Bulb

Before removing the old light bulb, take note of its type, wattage, and base to ensure you have the correct replacement. Unscrew the old light bulb by turning it counterclockwise and dispose of it safely.

Step 6: Install the New Light Bulb

Carefully screw the new light bulb into the socket by turning it clockwise. Avoid touching the glass with your bare hands, as oils from your skin can create hot spots on the bulb and reduce its lifespan. Use a clean, dry towel to handle the bulb if necessary.

Step 7: Reassemble the Light Fixture

Before reassembling the light fixture, inspect the lens gasket for any signs of wear or damage. If needed, replace the gasket to ensure a watertight seal. Optionally, you can apply a thin layer of waterproof silicone grease to the gasket to improve the seal and make it easier to remove in the future.

Place the lens or faceplate back onto the light fixture and secure it with the screws or clips.

Step 8: Test the New Light Bulb

Before reinstalling the light fixture in the pool, turn the power back on at the circuit breaker or switch and test the new light bulb to ensure it’s functioning properly. If the light does not turn on, double-check your connections and ensure the bulb is correctly seated in the socket.

Step 9: Reinstall the Light Fixture

With the new light bulb tested and confirmed to be working, turn off the power again at the circuit breaker or switch. Carefully guide the light fixture back into the niche, ensuring the cable is coiled neatly behind it. Secure the fixture to the pool wall by reinstalling the screw(s) that were removed in Step 3.

Step 10: Turn the Power Back On


Once the light fixture is securely in place, turn the power back on at the circuit breaker or switch. Test the pool light one final time to ensure it’s functioning correctly.

Conclusion

Changing a pool light bulb may seem like a daunting task, but by following this step-by-step guide, you can safely and efficiently replace the bulb and enjoy a well-lit pool once again. Always prioritize safety when working with electrical components, and consult a professional electrician or pool technician if you’re unsure about any steps in the process. With the proper precautions and guidance, you can keep your pool illuminated and inviting for nighttime swims.

Reviving Your Green Above Ground Pool: A Step-by-Step Guide to Opening Season

Transform Your Dirty Green Pool into a Crystal-Clear Oasis for the First Swim of the Season

Opening your above ground pool for the season can be both exciting and daunting, especially when you’re greeted by murky green water. But fear not! With a bit of time, effort, and the right approach, you can transform your dirty green pool into a sparkling oasis, ready for the first swim of the season. This article will provide detailed steps on how to clean and prepare your above ground pool for summer fun.

Step 1: Remove Debris and Clean the Pool Area

Before diving into the process of cleaning your green pool, start by removing any debris, leaves, or dirt from the pool area. Use a pool skimmer or leaf net to remove any floating debris from the water surface. Be sure to clean the surrounding pool deck and equipment as well to prevent any contaminants from re-entering the pool.


Step 2: Check and Clean the Pool Equipment

Inspect your pool equipment, including the pump, filter, and hoses, for any signs of damage or wear. Clean the filter, backwash if necessary, and ensure that all connections are secure. Turn on the pool pump and let it run continuously throughout the cleaning process to help circulate and filter the water.

Step 3: Test and Balance the Water Chemistry

Test the pool water using a test kit or test strips to determine the levels of pH, alkalinity, and sanitizer. Adjust the water chemistry as needed to reach the recommended levels:

  • pH: 7.4 – 7.6
  • Alkalinity: 80 – 120 ppm
  • Chlorine: 2 – 4 ppm

Step 4: Brush and Vacuum the Pool

Using a pool brush, scrub the walls and floor of the pool to dislodge any algae or dirt buildup. Then, use a pool vacuum to remove debris, algae, and other contaminants from the pool’s bottom. Be sure to vacuum slowly and thoroughly to ensure all dirt and debris are removed.

Step 5: Shock the Pool

Shocking the pool with a high dose of chlorine or a non-chlorine shock product will help kill algae and bacteria, as well as oxidize any organic contaminants in the water. Follow the manufacturer’s instructions for the proper dosage, and be sure to wear protective gear such as gloves and goggles while handling pool chemicals. Allow the pool pump to run continuously for at least 24 hours after shocking to ensure proper circulation and filtration.


Step 6: Use an Algaecide

Applying an algaecide to your pool can help prevent future algae growth and ensure a crystal-clear swimming environment. Follow the manufacturer’s instructions for the correct dosage and application method. Allow the pool pump to continue running to circulate the algaecide throughout the pool.

Step 7: Re-test and Fine-tune the Water Chemistry

After 24 hours, test the pool water again to ensure that the water chemistry is balanced. Make any necessary adjustments to pH, alkalinity, and sanitizer levels to maintain a clean and safe swimming environment.


Step 8: Clean and Replace Pool Accessories

Finally, clean any pool accessories, such as ladders, pool toys, and floats, before returning them to the pool. This will help prevent the introduction of contaminants and ensure a clean start to the swimming season.

Conclusion

Opening your green above ground pool for the season may seem overwhelming, but with a systematic approach and some elbow grease, you can transform your pool into a pristine oasis. By following these steps, you can ensure a clean, safe, and enjoyable swimming experience for you and your family all summer long. Happy swimming!