Why Water Bugs in Your Swimming Pool: Causes and Solutions

Discover why water bugs are attracted to your swimming pool and learn effective strategies for preventing and eliminating these unwelcome guests to maintain a clean and enjoyable swimming environment.

Introduction

Swimming pools provide the perfect environment for relaxation and fun. However, the presence of water bugs can be an unwelcome sight and a nuisance for pool owners. Understanding why water bugs are attracted to your swimming pool and how to address the issue is essential for maintaining a clean and enjoyable swimming environment. In this article, we will explore the reasons water bugs find their way into your pool and provide effective solutions for preventing and eliminating them.

Why Water Bugs Are Attracted to Your Swimming Pool

  1. Algae Growth: Algae blooms create an ideal habitat for various water bugs, including water boatmen and backswimmers. These bugs feed on algae, so a pool with an algae problem is an attractive food source for them.
  2. Poor Water Circulation: Stagnant water or poor circulation in your swimming pool can also contribute to water bug infestations, as it creates a favorable environment for algae growth and reduces the effectiveness of sanitizing chemicals.
  3. Exterior Factors: Water bugs can also be attracted to your swimming pool due to exterior factors, such as nearby vegetation or lighting. Bugs may find their way to the pool while searching for food or be drawn to the lights around the pool area during nighttime hours.


How to Prevent and Eliminate Water Bugs in Your Swimming Pool

  1. Maintain Proper Water Chemistry: Regularly testing and adjusting your pool’s water chemistry is essential for preventing algae growth, which attracts water bugs. Ensure that your pool’s pH, alkalinity, and sanitizer levels are within the recommended ranges to maintain a clean and balanced swimming environment.
  2. Improve Water Circulation: Make sure your pool’s circulation system is functioning properly, and regularly clean the skimmer and pump baskets to prevent clogs. Proper circulation helps distribute sanitizing chemicals and discourages algae growth, making your pool less appealing to water bugs.
  3. Remove Algae: If your pool already has an algae problem, it is crucial to address it immediately. Brush the pool walls, floors, and any other surfaces where algae are present. Use an algaecide according to the manufacturer’s instructions and follow up with a pool shock treatment to eliminate any remaining algae and restore water clarity.
  4. Clean Pool Surroundings: Keep the area around your pool clean by removing fallen leaves, debris, and any other potential food sources for water bugs. Trim back any overhanging vegetation to reduce the chances of bugs finding their way into your pool.
  5. Install Pool Covers: Using a pool cover when your pool is not in use can help prevent water bugs from entering the pool, especially during the night when bugs are more active. Pool covers also help maintain water chemistry and reduce evaporation, which can contribute to algae growth.
  6. Use Pool Nets or Skimmers: Regularly skim the surface of your pool with a pool net to remove any visible water bugs. For more persistent infestations, consider using a pool skimmer with a fine mesh net to capture smaller water bugs.
  7. Manage Pool Lighting: Bugs are attracted to lights, so consider turning off or reducing the brightness of your pool lights during nighttime hours. You can also use yellow bug lights or LED lights, which are less attractive to insects.

Conclusion

Water bugs in your swimming pool can be an unwelcome nuisance, but understanding why they are attracted to your pool and taking proactive steps to prevent and eliminate them can help maintain a clean and enjoyable swimming environment. By ensuring proper water chemistry, improving water circulation, and addressing exterior factors, you can effectively keep water bugs at bay and enjoy a bug-free pool experience.

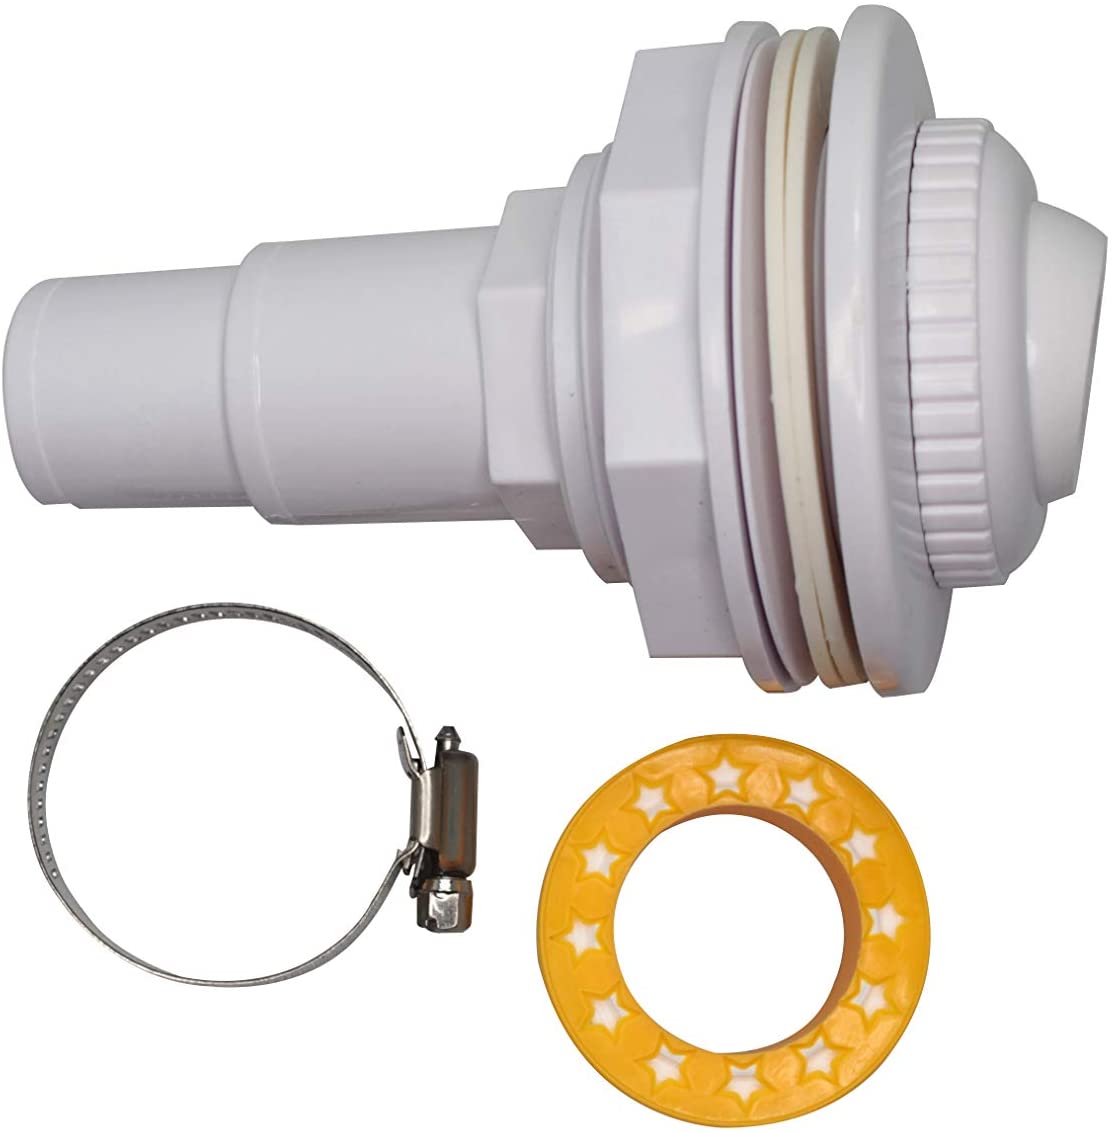
A Guide to Swimming Pool Return Jets for New Pool Owners

Understanding the Importance of Pool Return Jets, Maintenance, and Troubleshooting

Introduction

As a new pool owner, you may be curious about the various components that make your pool function effectively. One such element is the swimming pool return jet. Return jets play a critical role in circulating the water and maintaining a clean and healthy pool environment. This article will explain the purpose of pool return jets, how to care for them, and potential issues you may encounter along with their solutions.

The Role of Swimming Pool Return Jets

Swimming pool return jets are the small, circular openings located along the sides of your pool, responsible for returning filtered and treated water back into the pool. These jets ensure proper circulation of water, preventing stagnation and promoting even distribution of chemicals, which is crucial for maintaining a balanced and clean pool.

Caring for Your Pool Return Jets


To keep your pool return jets functioning optimally, regular maintenance is necessary. Follow these steps to care for your return jets:

  1. Clean the jets: Periodically check for debris, such as leaves or dirt, that may have become lodged in the jet openings. Remove any blockages to ensure proper water flow.
  2. Adjust the jets: For optimal water circulation, aim the return jets at a downward angle to create a circular water movement in your pool. This will help distribute chemicals evenly and prevent debris from settling at the bottom.
  3. Inspect for leaks: Regularly check the area around the return jets for signs of water leaks. If you notice any water loss, consult a pool professional to diagnose and fix the issue.

Common Issues and Solutions

  1. Reduced water flow: If you notice a significant decrease in water flow from your return jets, there may be a blockage in your pool’s circulation system. Check the skimmer and pump baskets for debris and clean them as needed. If the problem persists, consult a pool professional to inspect your pool’s plumbing and equipment.
  2. Air in the system: If you notice air bubbles coming from the return jets, there may be a suction-side leak in your pool’s plumbing. Inspect the pump, filter, and plumbing connections for any visible leaks and tighten or replace any faulty components.
  3. Uneven flow between jets: If you observe uneven water flow among your return jets, it may be due to clogged or improperly adjusted jets. Clean and adjust the jets as needed to ensure even water distribution.

Conclusion

Swimming pool return jets are essential components for maintaining a clean and well-balanced pool. By understanding their function and performing regular maintenance, you can ensure that your pool remains in optimal condition for years to come. Keep an eye out for potential issues, and don’t hesitate to consult a pool professional if you encounter problems beyond your expertise. With proper care and attention, your pool’s return jets will continue to provide efficient water circulation and a healthy swimming environment.

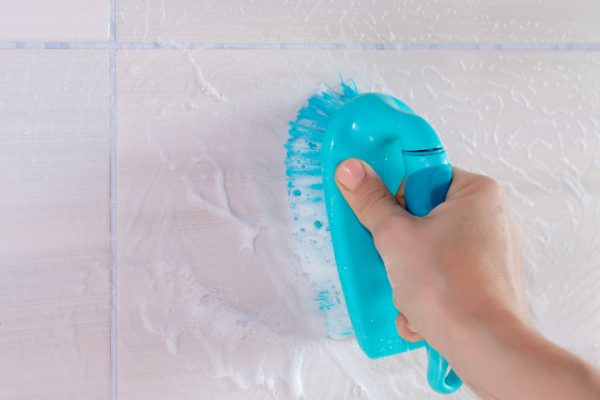
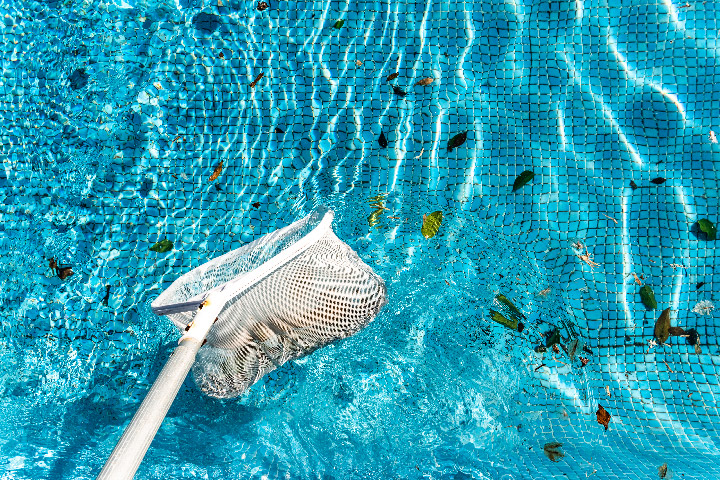
Can You Use a Magic Eraser in a Pool Skimmer? Uncovering the Facts

Keeping your pool clean and free of debris is essential for maintaining a safe and enjoyable swimming environment. Skimmers play a significant role in this process by collecting leaves, dirt, and other debris from the water’s surface. While pool skimmers are designed to capture larger debris, smaller particles like fine dirt, oils, and sunscreen can sometimes slip through. An unconventional solution that has gained popularity is using a Magic Eraser in the pool skimmer. In this article, we will explore the effectiveness and safety of this method and discuss its benefits and potential drawbacks.

How Magic Erasers Work

Magic Erasers, originally developed by Procter & Gamble under the brand name Mr. Clean, are melamine foam cleaning pads. These pads have a unique structure with microscopic abrasive fibers, which work as tiny scrubbers to lift and remove dirt, stains, and grime from various surfaces.

Using a Magic Eraser in a Pool Skimmer

Some pool owners have found success using a Magic Eraser as an additional filter in their pool skimmers. Placing the Magic Eraser in the skimmer basket can help to capture smaller particles and contaminants that might otherwise escape the skimmer’s main filtration system. This method is particularly effective in capturing oils, sunscreen residue, and fine debris.

Benefits of Using a Magic Eraser in a Pool Skimmer

  1. Enhanced Filtration: The micro-abrasive fibers of the Magic Eraser can capture finer particles than a traditional skimmer basket, resulting in cleaner and clearer water.
  2. Easy to Use: Simply place a Magic Eraser in the skimmer basket, and it will start capturing debris and contaminants as the water passes through.
  3. Cost-Effective: Magic Erasers are relatively inexpensive compared to specialized pool products, making them an affordable option for enhancing your pool’s filtration system.

Potential Drawbacks

  1. Chemical Composition: Magic Erasers are made of melamine foam, which is a type of microplastic. Although there is no evidence to suggest that using a Magic Eraser in a pool skimmer poses a risk to swimmers, the potential for microplastic contamination in the water should be considered.
  2. Frequent Replacement: Magic Erasers are not designed for long-term use in water and will break down over time. Frequent replacement will be necessary to maintain their effectiveness.
  3. Limited Compatibility: Some pool owners may find that using a Magic Eraser in their skimmer is not as effective, depending on the specific design of their pool’s filtration system.

Using a Magic Eraser in a pool skimmer can be an effective and budget-friendly method to enhance your pool’s filtration system and capture smaller particles and contaminants. However, it is essential to consider the potential drawbacks, such as the chemical composition and the need for frequent replacement. Ultimately, the decision to use a Magic Eraser in a pool skimmer will depend on your individual pool setup and personal preferences. Be sure to consult with a pool professional if you have any concerns or need guidance on maintaining your pool’s water quality.

A Comprehensive Guide to Swimming Pool Tiles

Exploring the Various Tile Options, Pros and Cons, Maintenance Considerations, and More

Introduction

Swimming pool tiles are an essential aspect of pool design and functionality, contributing to both the aesthetics and durability of your pool. With numerous options available in the market, selecting the right pool tile can be overwhelming. This article aims to provide a comprehensive guide to various pool tile options, their pros and cons, maintenance considerations, and other relevant information to help you make an informed decision.

Types of Swimming Pool Tiles

  1. Ceramic Tiles: Ceramic tiles are a popular choice for swimming pools due to their affordability and versatility. They come in various colors, designs, and finishes, allowing for endless customization.

Pros:

  • Affordable
  • Wide variety of designs and colors
  • Easy to install

Cons:

  • Less durable than other tile options
  • Can be slippery if not properly finished


  1. Porcelain Tiles: Porcelain tiles are similar to ceramic tiles but denser and more durable. They are ideal for pools with high foot traffic and require low maintenance.

Pros:

  • Durable and long-lasting
  • Low maintenance
  • Resistant to staining and fading

Cons:

  • More expensive than ceramic tiles
  • Can be slippery if not properly finished
  1. Glass Tiles: Glass tiles are a luxurious and modern option for swimming pools. They come in various colors and styles, reflecting light to create a stunning visual effect.


Pros:

  • Visually appealing and versatile
  • Highly durable and resistant to staining, fading, and chemical damage
  • Non-slip surface

Cons:

  • Expensive
  • More challenging to install than other tile options
  1. Stone Tiles: Stone tiles, such as travertine, slate, or granite, offer a natural and timeless appearance. These tiles are ideal for creating a cohesive look between your pool and surrounding landscape.

Pros:

  • Natural and aesthetically pleasing
  • Durable and long-lasting
  • Slip-resistant

Cons:

  • Expensive
  • Require regular sealing to maintain appearance and prevent staining
  1. Mosaic Tiles: Mosaic tiles consist of small pieces of glass, ceramic, porcelain, or stone arranged in a decorative pattern. They are perfect for adding a unique and artistic touch to your pool.


Pros:

  • Customizable and visually striking
  • Available in various materials, including glass, ceramic, and stone
  • Can create intricate designs and patterns

Cons:

  • Expensive, especially for custom designs
  • Can be challenging to install and maintain

Maintenance Considerations

  1. Cleaning: Regularly clean your pool tiles to prevent the buildup of algae, calcium, and other deposits. Use a pool tile cleaner and a soft-bristle brush to gently scrub the surface. Avoid using abrasive or harsh chemicals that may damage the tile finish.
  2. Sealing: For porous tiles, such as stone or unglazed ceramic, apply a sealant periodically to protect the tiles from staining and water damage.
  3. Repair and Replacement: Inspect your pool tiles regularly for cracks, chips, or loose pieces. Promptly repair or replace damaged tiles to prevent further deterioration and maintain the pool’s appearance.

Conclusion

Selecting the right swimming pool tile involves considering factors such as durability, aesthetics, cost, and maintenance. By understanding the various tile options and their pros and cons, you can make an informed decision that best suits your needs and preferences. Proper maintenance and care will ensure your pool tiles remain in excellent condition, providing a beautiful and functional swimming environment for years to come.

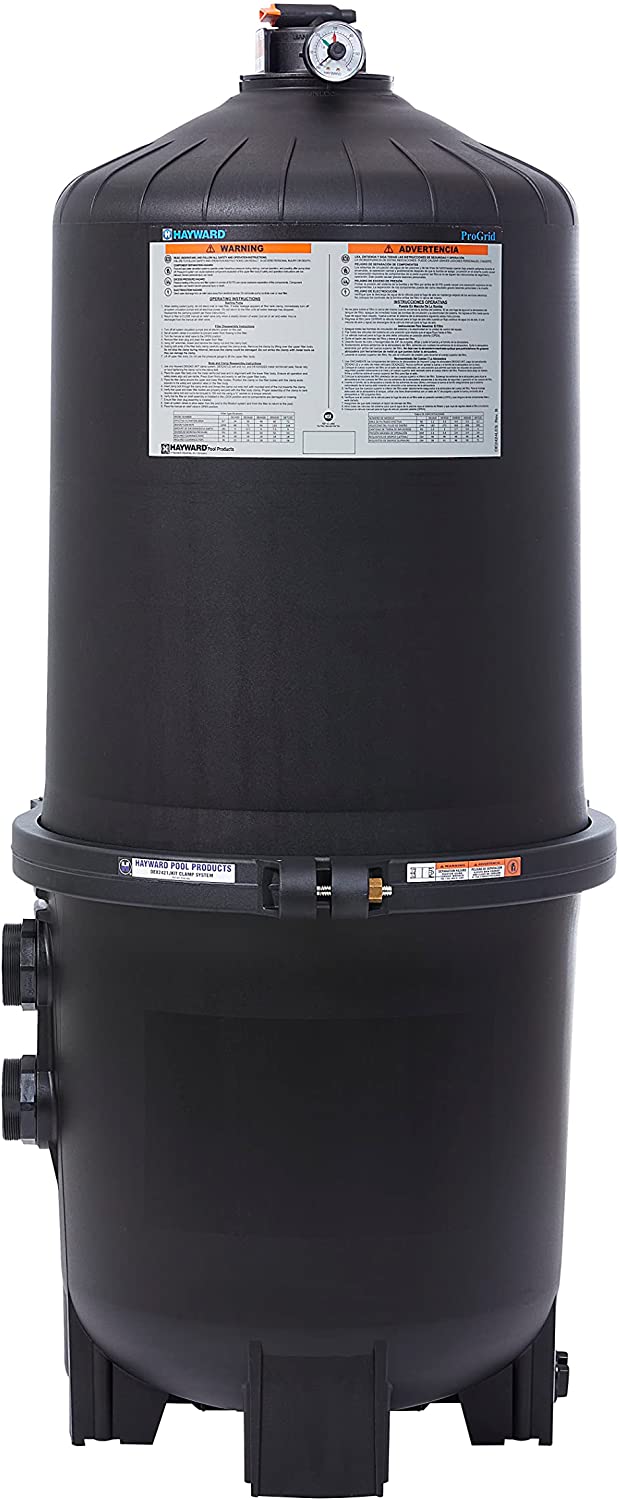
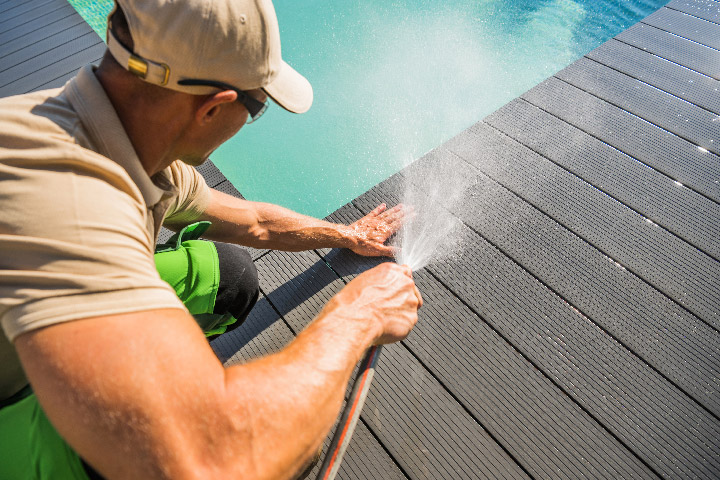
A Comprehensive Guide to Cleaning Your Home Swimming Pool DE Filter

Maintain Your DE Filter’s Efficiency and Keep Your Pool Crystal Clear

Diatomaceous Earth (DE) filters are known for their superior filtration capabilities, making them a popular choice for many swimming pool owners. However, regular cleaning is essential to ensure optimal performance and maintain water clarity. This article will guide you through the process of cleaning your home swimming pool DE filter and offer essential tips for optimal performance.

Understanding DE Filters

DE filters utilize a fine, powdery substance called diatomaceous earth to capture microscopic particles and impurities as water passes through the filter grid. Over time, the accumulated debris can reduce water flow and impact the filter’s efficiency. Regular cleaning and maintenance are necessary to maintain the filter’s performance and prolong its lifespan.

How to Clean Your Swimming Pool DE Filter

Step 1: Turn Off the Pool Pump Before starting the cleaning process, ensure the pool pump is turned off. This is crucial for your safety and to prevent damage to the pump.

Step 2: Backwash the DE Filter To remove the majority of debris and spent DE, perform a backwash of the filter. Consult your filter’s manual for specific instructions on the backwash procedure.

Step 3: Open the Filter Housing After backwashing, open the filter housing to access the filter grids. This typically involves removing a clamp or band that holds the two halves of the filter housing together. Be prepared for some water to spill out when opening the filter housing.

Step 4: Remove the Filter Grid Assembly Carefully lift the filter grid assembly out of the filter housing. Inspect the grids for any signs of damage, such as tears or excessive wear. If you notice any issues, it’s time to replace the grids.


Step 5: Clean the Filter Grids Using a garden hose with a high-pressure nozzle, thoroughly rinse the filter grids from top to bottom, ensuring all spent DE and debris are removed. For stubborn dirt or algae, use a soft-bristle brush to gently scrub the grids.

Step 6: Inspect the Filter Housing With the filter grid assembly removed, inspect the filter housing for any debris or damage. Clean the housing with a sponge or cloth, if necessary.

Step 7: Reinstall the Filter Grid Assembly Place the clean filter grid assembly back into the filter housing, ensuring it is properly seated. Double-check that the assembly is correctly positioned before proceeding.

Step 8: Close the Filter Housing Reassemble the filter housing by securing the clamp or band that holds the two halves together. Make sure the housing is properly sealed to prevent water leaks.

Step 9: Recharge the DE Filter With the filter reassembled, it’s time to recharge the DE filter with fresh diatomaceous earth. Consult your filter’s manual for the correct amount of DE to use. Slowly add the DE to the pool skimmer while the pump is running to ensure proper distribution.

Step 10: Turn On the Pool Pump With the DE filter reassembled and recharged, turn the pool pump back on and check for any leaks around the filter housing. The filter is now clean and ready to function at peak efficiency.

Tips for DE Filter Maintenance

  1. Cleaning Frequency: Clean your DE filter every 4-6 weeks or when the pressure gauge reads 8-10 psi above the normal operating pressure.
  2. Replace the Filter Grids: Depending on usage and maintenance, filter grids typically last between 3-5 years. Inspect the grids during cleaning and replace them if you notice any damage or excessive wear.
  3. Maintain Proper Pool Chemistry: Balanced pool water chemistry will help prolong the life of your DE filter and keep your pool water clear and safe.

A Comprehensive Guide to Cleaning Your Home Swimming Pool Sand Filter

Keep Your Pool Crystal Clear with Proper Sand Filter Maintenance

A sand filter is a popular choice for home swimming pool owners due to its durability and low maintenance requirements. However, regular cleaning is essential to ensure the filter performs at its best, maintaining water clarity and preventing potential issues. This article will guide you through the process of cleaning your home swimming pool sand filter and offer essential tips for optimal performance.

Understanding Sand Filters

A sand filter works by using a bed of specially graded sand to trap debris and impurities as water passes through it. Over time, the accumulated debris can cause reduced water flow and impact the filter’s efficiency. Cleaning the sand filter, also known as backwashing, is a necessary part of regular pool maintenance.

How to Clean Your Swimming Pool Sand Filter

Step 1: Turn Off the Pool Pump Before starting the cleaning process, ensure the pool pump is turned off. This is crucial for your safety and to prevent damage to the pump.

Step 2: Set the Filter Valve to “Backwash” Locate the filter’s multiport valve, usually located on top of the filter, and set it to the “backwash” position. This setting will reverse the flow of water through the filter, dislodging debris trapped in the sand.


Step 3: Turn On the Pool Pump With the valve set to “backwash,” turn on the pool pump. Water will flow in reverse through the filter, flushing out debris and impurities. Keep an eye on the sight glass or backwash hose (if applicable) to monitor the clarity of the water being discharged.

Step 4: Backwash Until the Water Runs Clear Continue backwashing until the water being discharged appears clear. This typically takes 2-5 minutes, depending on the amount of debris in the filter.

Step 5: Turn Off the Pump and Set the Valve to “Rinse” After backwashing is complete, turn off the pool pump and set the valve to the “rinse” position. This setting will help resettle the sand and remove any remaining debris.

Step 6: Turn On the Pump and Rinse the Filter Turn the pool pump back on and let it run for about 30 seconds to 1 minute, allowing the water to rinse through the filter. This step ensures that any loosened debris is flushed out and that the sand bed is properly resettled.

Step 7: Turn Off the Pump and Reset the Valve to “Filter” After rinsing is complete, turn off the pool pump and set the valve back to the “filter” position. This setting will return the filter to normal operation.

Step 8: Turn On the Pool Pump and Resume Normal Operation With the valve set to “filter,” turn the pool pump back on and resume normal operation. Your sand filter is now clean and ready to function at peak efficiency.

Tips for Sand Filter Maintenance

  1. Backwash Frequency: As a general rule, backwash your sand filter every 4-6 weeks or when the pressure gauge reads 8-10 psi above the normal operating pressure.
  2. Replace the Sand: Over time, the sand in your filter will become less effective at trapping debris. It is recommended to replace the sand every 5-7 years, depending on the filter’s usage and maintenance.
  3. Inspect the Multiport Valve: Regularly inspect the multiport valve for leaks or damage, and replace any worn or damaged parts as needed.
  4. Monitor Filter Pressure: Keep an eye on the filter pressure gauge to ensure optimal performance. If the pressure is consistently high or low, it may indicate a problem with the filter or circulation system.

Conclusion

Cleaning your swimming pool sand filter is a crucial part of maintaining a healthy and clear pool. By following the steps outlined in this guide, you can ensure your sand filter performs at its best, providing clean and safe water for you and your family to enjoy. Regular maintenance, along with proper pool chemistry, will prolong the life of your pool equipment and help you avoid costly repairs or replacements in the future. Keep your pool sparkling clean and ready for fun by taking care of your sand filter and staying on top of your pool maintenance routine. Happy swimming!

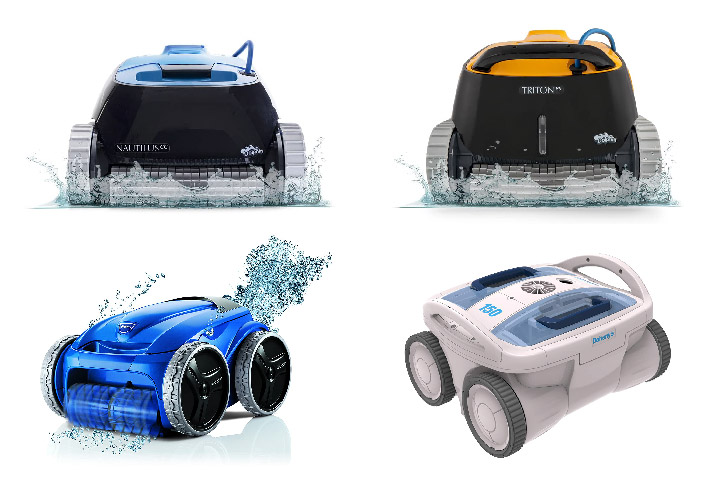
How to Choose the Best Robotic Pool Cleaner: A Comprehensive Guide

Tips for Selecting the Perfect Robotic Pool Cleaner for Your Swimming Pool

Introduction

Robotic pool cleaners have become increasingly popular due to their efficiency, convenience, and advanced features. These innovative devices can save you time and effort by automating the pool cleaning process, allowing you to enjoy a sparkling clean pool with minimal effort. With numerous models and features available in the market, choosing the best robotic pool cleaner can be overwhelming. This article will guide you through the factors to consider when selecting the perfect robotic pool cleaner for your swimming pool.


Factors to Consider When Choosing a Robotic Pool Cleaner

  1. Pool Size and Shape: Consider the size and shape of your pool when selecting a robotic pool cleaner. Some cleaners are designed for specific pool sizes, so ensure the cleaner you choose can efficiently navigate and clean your pool.
  2. Pool Surface: Different robotic pool cleaners are designed for various pool surfaces, such as concrete, vinyl, fiberglass, or tile. Make sure the cleaner you choose is suitable for your pool’s surface to prevent potential damage.
  3. Cleaning Features: Robotic pool cleaners offer a range of cleaning features, such as floor, wall, and waterline cleaning. Consider your pool’s specific cleaning needs and choose a cleaner that offers the necessary features.
  4. Filtration System: Robotic pool cleaners use different types of filtration systems, such as fine or ultra-fine filters, to capture debris and contaminants. Choose a cleaner with a suitable filtration system for your pool’s needs to ensure optimal cleaning performance.
  5. Cord Length: The cord length of a robotic pool cleaner is crucial for maneuverability and coverage. Ensure the cleaner’s cord is long enough to reach all areas of your pool without difficulty.
  6. Energy Efficiency: Robotic pool cleaners consume electricity during their operation. Consider energy-efficient models that consume less power without compromising performance, reducing your energy costs.
  7. Warranty and Customer Support: Choose a cleaner with a reliable warranty and responsive customer support to ensure a hassle-free ownership experience.
  8. Budget: Robotic pool cleaners are available at various price points. Determine your budget and choose a cleaner that offers the best combination of features, performance, and value for your investment.


Popular Features of Robotic Pool Cleaners

  1. Smart Navigation: Advanced robotic pool cleaners use smart navigation technology to efficiently map and navigate your pool, ensuring thorough cleaning without missing any spots.
  2. Programmable Timer: Some cleaners offer programmable timers that allow you to schedule cleaning cycles at convenient times, ensuring your pool remains clean with minimal effort.
  3. Remote Control: Some models come with a remote control that enables you to manually guide the cleaner or adjust settings from a distance.
  4. Swivel Cord: A swivel cord helps prevent the cleaner’s cord from tangling during operation, ensuring smooth and uninterrupted cleaning.
  5. Easy-to-Clean Filter: Choose a cleaner with an easy-to-clean filter to minimize maintenance and keep your cleaner functioning at optimal performance.

Conclusion

Selecting the best robotic pool cleaner involves considering factors such as pool size and shape, pool surface, cleaning features, filtration system, cord length, energy efficiency, warranty, and budget. By understanding your pool’s specific needs and the popular features of robotic pool cleaners, you can make an informed decision and invest in a cleaner that keeps your pool sparkling clean with minimal effort. With the right robotic pool cleaner, you can spend more time enjoying your pool and less time maintaining it.

Pool Shock 101: A Homeowner’s Guide to Different Pool Shock Methods

Discover the various methods to shock your swimming pool, understand their benefits, and learn how to choose the right one for your pool maintenance needs.

Regularly shocking your swimming pool is an essential part of proper pool maintenance. Pool shock treatments help eliminate contaminants, restore water clarity, and maintain a safe and healthy swimming environment. As a homeowner, understanding the different pool shock methods available can help you choose the most suitable one for your pool’s unique needs. In this article, we will explore the various ways to shock your pool and provide guidance on selecting the best method for your pool maintenance routine.

Different Methods to Shock Your Swimming Pool

  1. Calcium Hypochlorite (Cal-Hypo) Shock

Calcium hypochlorite, also known as Cal-Hypo, is a popular and powerful pool shock method. Cal-Hypo contains high levels of chlorine, typically around 65-75%, making it effective at killing bacteria, algae, and other organic contaminants.

Pros:

  • Strong oxidizing properties
  • Effective against a wide range of contaminants
  • Available in various strengths


Cons:

  • Can increase water hardness and calcium levels
  • Requires pre-dissolving in water before application
  • Must be added at night to prevent sunlight from breaking down the active chlorine
  1. Dichloro-S-Triazinetrione (Dichlor) Shock

Dichlor shock is a stabilized form of chlorine that contains cyanuric acid, which protects the chlorine from being broken down by sunlight. This makes it an excellent choice for outdoor pools that receive a lot of sun exposure.

Pros:

  • Stabilized chlorine resists UV degradation
  • Fast-dissolving and easy to apply
  • Compatible with most pool types

Cons:

  • May increase cyanuric acid levels with repeated use
  • Lower chlorine content compared to Cal-Hypo
  • More expensive than other shock methods
  1. Potassium Monopersulfate (Non-Chlorine) Shock

Potassium monopersulfate, also known as non-chlorine shock or MPS, is an oxygen-based shock treatment that does not contain chlorine. This type of shock is ideal for those who want to avoid using chlorine or need a shock treatment compatible with alternative sanitizers like bromine or biguanide.

Pros:

  • No chlorine odor
  • Compatible with alternative sanitizers
  • Can be used during the day, as it is not affected by sunlight

Cons:

  • Less effective against algae and bacteria than chlorine-based shocks
  • May be less compatible with certain pool surfaces or equipment
  • More expensive than chlorine-based shock options
  1. Liquid Chlorine Shock

Liquid chlorine, or sodium hypochlorite, is another option for shocking your pool. This method is easy to apply, as it can be poured directly into the pool without the need for pre-dissolving.

Pros:

  • Easy to apply, no pre-dissolving required
  • Works quickly and effectively
  • Less likely to increase calcium hardness

Cons:

  • Lower concentration of chlorine compared to Cal-Hypo
  • Can degrade quickly if not stored properly
  • Can be more expensive than other shock methods

How to Choose the Right Shock Method for Your Pool

To determine the best pool shock method for your needs, consider the following factors:

  1. Pool Type: Consider your pool’s surface material, as some shock treatments may be less compatible with certain surfaces or equipment.
  2. Sanitizing System: If you use an alternative sanitizer, like bromine or biguanide, choose a shock method compatible with your system, such as potassium monopersulfate.
  3. Sun Exposure: For outdoor pools with significant sun exposure, consider a stabilized shock treatment like Dichlor or a non-chlorine shock that is not affected by sunlight.
  1. Existing Water Chemistry: Analyze your pool’s current water chemistry, such as calcium hardness and cyanuric acid levels, and choose a shock treatment that will not exacerbate existing imbalances.
  2. Budget: Consider your budget and the cost of the shock treatments available, as some methods may be more expensive than others.
  3. Frequency of Use: If you use your pool frequently or host large gatherings, a stronger shock treatment like Cal-Hypo may be more appropriate to ensure proper sanitization.

Understanding the various pool shock methods available is crucial for any homeowner looking to maintain a clean and safe swimming environment. By considering your pool type, sanitizing system, sun exposure, existing water chemistry, budget, and usage, you can make an informed decision about which pool shock method best suits your needs. Regularly shocking your pool with the appropriate method will help you eliminate contaminants, maintain water clarity, and enjoy a healthy and enjoyable swimming experience.

Sand in Your Swimming Pool: Causes, Prevention, and Removal

Learn How Sand Gets into Your Pool, Tips for Preventing It, and Effective Methods for Removing It

Introduction

Having sand in your swimming pool can be a frustrating and potentially damaging issue. Sand can make your pool water look dirty, clog your filtration system, and even damage pool surfaces over time. As a pool owner, it’s important to understand how sand gets into your pool, how to prevent it from happening, and how to remove it effectively. In this article, we will discuss the common causes of sand in your pool, tips for preventing sand from entering your pool, and effective methods for removing sand.

Causes of Sand in Your Swimming Pool

  1. Surrounding Environment: If your pool is located near a sandy area, such as a beach or desert, sand can easily be blown into your pool by wind or tracked in by swimmers.
  2. Sand Filter Issues: If your pool uses a sand filter, a malfunction or damage to the filter can cause sand to enter your pool water.
  3. Construction or Landscaping Work: If there is construction or landscaping work happening near your pool, sand or dirt may be inadvertently introduced into the pool water.


Preventing Sand from Entering Your Pool

  1. Install a Pool Fence or Barrier: Installing a pool fence or barrier can help to block windblown sand from entering your pool area.
  2. Use a Pool Cover: Using a pool cover when your pool is not in use can help to keep sand and other debris out of your pool water.
  3. Regularly Inspect and Maintain Your Sand Filter: Ensure that your sand filter is functioning properly and that there is no damage that could cause sand to enter your pool water. Replace the sand in your filter according to the manufacturer’s recommendations.
  4. Maintain a Clean Pool Deck: Keep the area around your pool clean by sweeping or hosing down the pool deck regularly. Encourage swimmers to rinse their feet before entering the pool to reduce the amount of sand they track in.
  5. Be Mindful of Nearby Construction or Landscaping: If possible, schedule construction or landscaping work during times when your pool is closed or covered to minimize the risk of sand entering your pool.


Removing Sand from Your Pool

  1. Use a Pool Vacuum: A manual pool vacuum or an automatic pool cleaner can help to remove sand from the bottom of your pool. Be sure to vacuum slowly and thoroughly to ensure all sand is removed.
  2. Skim the Pool Surface: Use a pool skimmer to remove any sand that may be floating on the surface of your pool water.
  3. Backwash Your Sand Filter: If sand is entering your pool through a malfunctioning sand filter, backwashing the filter can help to remove sand and improve the filter’s performance.
  4. Replace Damaged Filter Components: If your sand filter is damaged, replace any damaged components, such as the filter laterals or sand, to prevent sand from entering your pool water.

Conclusion

Sand in your swimming pool can be both unsightly and potentially damaging to your pool equipment. By understanding the common causes of sand in your pool and taking steps to prevent it, you can maintain a clean and inviting pool environment. If sand does find its way into your pool, using effective removal methods, such as vacuuming and skimming, will help to restore your pool to its pristine condition. Regular pool maintenance and attention to your pool’s surroundings will help to minimize the risk of sand and other debris entering your pool.

Keeping Mosquitoes Away from Your Backyard Swimming Pool

Tips and Products for a Healthier, More Enjoyable Experience

Introduction

As the warmer months approach, backyard swimming pool owners look forward to spending quality time with family and friends in their own private oasis. However, mosquitoes can quickly turn this enjoyable experience into a bothersome and potentially hazardous one. In this article, we’ll discuss why it’s crucial to reduce mosquitoes around your swimming pool, the possible health risks they pose, and the products and methods available to mitigate their presence.

The Importance of Reducing Mosquitoes

Mosquitoes are more than just a nuisance; they are known carriers of several diseases that can pose serious health risks to humans. These include West Nile virus, Zika virus, dengue fever, and malaria. Reducing the mosquito population around your swimming pool not only improves your overall experience but also protects you and your loved ones from potential health hazards.


Products and Methods for Mosquito Control

  1. Remove Standing Water: Mosquitoes breed in standing water, so it’s essential to eliminate any sources of stagnant water around your pool area. Check for and empty any containers that may hold water, such as flower pots, toys, or pool equipment.
  2. Maintain Proper Pool Chemistry: Keeping your pool water clean and balanced is crucial in preventing mosquito infestations. Regularly test your pool water and adjust the chemical levels as needed to ensure a healthy and mosquito-free environment.
  3. Mosquito Dunks or Bits: These products contain a natural bacteria called Bacillus thuringiensis israelensis (BTI), which is toxic to mosquito larvae but safe for humans, pets, and other wildlife. Place these dunks or bits in your pool skimmers or other standing water sources to prevent mosquito larvae from developing into adult mosquitoes.
  4. Mosquito Traps: There are various mosquito traps available on the market that use CO2, heat, and other attractants to lure mosquitoes in and eliminate them. Place these traps strategically around your pool area to minimize the mosquito population.
  5. Mosquito Repellent Plants: Some plants, such as citronella, lavender, and marigolds, are known to naturally repel mosquitoes. Plant these in your pool area or place potted plants nearby to help deter mosquitoes.
  6. Insect Repellent Sprays and Lotions: Applying insect repellent on exposed skin when spending time around the pool can help keep mosquitoes at bay. Look for products containing DEET, picaridin, or oil of lemon eucalyptus, which are proven to be effective against mosquitoes.
  7. Mosquito Netting: If your pool area has a gazebo or pergola, consider installing mosquito netting around it to create a mosquito-free zone. This not only keeps mosquitoes away but also adds an extra layer of comfort and privacy.


Conclusion

By taking proactive measures to reduce mosquitoes around your backyard swimming pool, you can create a more enjoyable and healthier environment for you and your loved ones. Regular pool maintenance, using mosquito-repelling products, and implementing natural deterrents will go a long way in keeping mosquitoes at bay and ensuring that you can make the most of your pool experience.