Pool Filter Leaking From Top: Causes, Fixes, and When to Call a Pro
Quick Answer: A pool filter leaking from the top usually means a worn or dry tank O-ring, a loose clamp band, a cracked lid, or a faulty air relief valve. The fix often costs under $20 and takes 30 minutes. Turn off your pump and release pressure before inspecting anything — pressurized filter tanks can cause serious injury.
Quick answer
Pool Filter Leaking From Top: Causes, Fixes, and When to Call a Pro: Quick Answer: A pool filter leaking from the top usually means a worn or dry tank O-ring, a loose clamp band, a cracked lid, or a faulty air relief valve. The fix often costs under $20 and takes 30 minutes. Turn off.
Finding water spraying or dripping from the top of your pool filter is frustrating. You’re losing water, wasting energy, and potentially damaging your equipment pad. But here’s the good news: a pool filter leaking from top components is one of the most common — and most fixable — problems you’ll face as a pool owner.
I’ve seen hundreds of these leaks over the years. About 80% come down to three culprits: a dried-out O-ring, a loose clamp, or a cracked plastic component. The other 20%? Usually a pressure gauge that’s given up or an air bleeder assembly that’s seen better days.
Let’s figure out what’s causing your leak and get it fixed.
Why Your Pool Filter Leaks From the Top
Before grabbing tools, you need to understand what you’re dealing with. Your filter tank operates under pressure — typically 10-25 PSI during normal operation. That pressure constantly pushes against every seal, gasket, and connection point.
The top half of your filter has several potential leak points:
- Tank O-ring (the main seal between the tank halves)
- Clamp band or bolts (what holds the tank together)
- Air relief valve/bleeder assembly
- Pressure gauge and its threads
- Lid or top manifold (the plastic housing)
- Internal standpipe O-rings (on some models)
Think of your filter like a pressure cooker. Every seal point must be perfect, or steam (in this case, water) escapes. And unlike your kitchen, this “cooker” runs 8-12 hours daily, 7 months a year.
Common Causes by Filter Type
Cartridge Filters
Cartridge filters have the simplest design — a tank, a lid, a clamp, and an O-ring. The most common leak source? That main tank O-ring. It sits in a groove and compresses when you tighten the clamp band.
Over 2-3 seasons, this O-ring flattens, cracks, or dries out. UV exposure during off-season storage accelerates the damage. You might notice the leak starts small, then gets worse over weeks.
Sand Filters
Sand filters add complexity with a multiport valve on top. Leaks often originate from:
- The valve-to-tank connection
- The pressure gauge port
- Internal spider gasket failure (which causes water to exit the wrong port)
- Cracked valve bodies from winter freeze damage
If water leaks from the multiport valve itself, check out our guide on how to backwash your pool filter — improper backwashing can damage internal seals.
DE Filters
DE (diatomaceous earth) filters are the most complex. They have the same tank O-ring issues as cartridge filters, plus:
- Air bleeder assemblies that crack
- Bump handle seals that wear out
- Manifold connections that loosen
DE filters also run at slightly higher pressures than cartridge filters, which stresses seals more.
⚠️ Safety First: Before You Touch Anything
This part isn’t optional. Pool filter tanks operate under significant pressure. A clamp band flying off a pressurized tank can cause permanent injury or death. I’m not being dramatic — it happens.
Before any inspection or repair:
- Turn off the pump at the breaker, not just the timer
- Open the air relief valve on top of the filter and wait for water to stop spraying
- Wait 30 seconds after the spray stops before touching anything
- Never loosen a clamp band if the system might be under pressure
- Don’t operate a leaking pressure vessel — fix it before running the system
If your air relief valve is the thing that’s leaking, turn off the pump and let the system sit for 5 minutes before working on it. The pressure will dissipate through the leak itself.
Step-by-Step Troubleshooting Guide
Step 1: Identify the Exact Leak Location
With the pump running (briefly, for diagnosis only), watch the filter top carefully. Where exactly is water coming from?
- Around the entire clamp/seam: Tank O-ring or loose clamp
- One spot on the seam: Debris in the O-ring groove or damaged O-ring section
- Pressure gauge area: Gauge threads or Teflon tape failure
- Air relief valve: Cracked housing or failed internal O-ring
- Crack in plastic: Lid or manifold damage
Mark the spot with tape or a marker. Then turn off the pump and release pressure before proceeding.
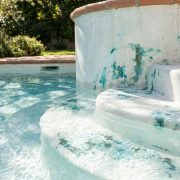
Step 2: Inspect and Service the Tank O-Ring
The tank O-ring causes about 60% of top-seal leaks. Here’s how to check it:
- Release all pressure through the air relief valve
- Remove the clamp band or bolts (varies by model)
- Lift off the top half of the tank
- Pull the O-ring from its groove
- Check for cracks, flat spots, dry/hard sections, or visible damage
- Clean the groove thoroughly — debris here causes leaks even with new O-rings
- Inspect the groove itself for cracks or damage
If your O-ring looks questionable, replace it. A quality replacement O-ring costs $15-40 depending on your filter model. Measure your existing O-ring diameter and cross-section thickness before ordering.
Pro tip: Always apply silicone O-ring lubricant before reinstalling. This helps the O-ring seat properly and extends its life by 50% or more. Never use petroleum-based lubricants — they destroy rubber.
Step 3: Check and Tighten the Clamp Band
Your clamp band should be snug but not over-tightened. Here’s the test:
- With the O-ring properly seated and lubricated, place the top half on the tank
- Position the clamp band over the seam
- Tighten the band bolt until snug, then add 1/4 turn
- The band should sit evenly all the way around — no gaps, no tilting
- You should be able to slide a piece of paper under the band in spots, but not your finger
If your clamp band is corroded, bent, or won’t tighten evenly, replace it. A failing clamp is a safety hazard, not just a leak source.
Step 4: Inspect the Air Relief Valve and Pressure Gauge
These small components fail more often than people expect.
Air relief valve check:
- Look for cracks in the plastic housing
- Check the internal O-ring by unscrewing the valve body
- Make sure the spring mechanism moves freely
- Replace the whole assembly if cracked — they’re $10-15
Pressure gauge check:
- Look for water behind the gauge face (internal leak)
- Check threads for corrosion or stripping
- Remove the gauge and wrap threads with new Teflon tape (4-5 wraps clockwise)
- If the gauge reads incorrectly or leaks persistently, install a new one
A functioning pressure gauge matters. It tells you when to clean your filter. Speaking of which — if you’re unsure how often that should happen, check our guide on how often to clean your pool filter.
Step 5: Look for Cracks and Physical Damage
Plastic components crack for three main reasons:
- UV degradation — years of sun exposure makes plastic brittle
- Over-tightening — too much torque on clamp bands or bolts
- Overpressure — running with a dirty filter or closed valve
Check the lid, manifold, and any plastic fittings for hairline cracks. Run your finger along seams and edges. Even tiny cracks leak under pressure.
If you find cracks, you have two options:
- Small crack in non-structural area: Pool-rated epoxy might buy you a season
- Any crack in the lid, manifold, or structural area: Replace the part
Cracked components don’t get better. They get worse. And a catastrophic failure at 25 PSI isn’t something you want to witness.
Step 6: Address Overpressure Issues
Sometimes the leak itself isn’t the root problem — excessive pressure is.
Normal filter pressure ranges from 10-25 PSI depending on your system. If your gauge shows numbers above your normal “clean filter” reading by 8-10 PSI, you have restricted flow.
Common overpressure causes:
- Dirty filter (cartridge needs cleaning, sand needs backwashing)
- Closed or partially closed return valve
- Obstructed return lines
- Undersized plumbing for your pump
High pressure stresses every seal on your filter. Fix the pressure problem, and your seals last years longer. Our guide on pool filter pressure too high covers this in detail.
Step 7: Test Your Repair
After making repairs:
- Double-check that everything is reassembled correctly
- Open the air relief valve
- Turn on the pump at the breaker
- Watch for leaks while pressure builds (stay back from the filter)
- Close the air relief valve once water sprays steadily (no more air)
- Let the system run 10-15 minutes
- Re-inspect all repair areas for weeping or dripping
No leaks? You’re done. Still leaking? Re-trace your steps. Make sure the O-ring didn’t pinch or twist during reassembly.
When to Replace vs. Repair
Here’s my general rule:
| Situation | Action |
|———–|——–|
| O-ring worn or cracked | Replace O-ring ($15-40) |
| Clamp band corroded/bent | Replace clamp ($30-60) |
| Pressure gauge leaking | Replace gauge ($15-25) |
| Air relief valve cracked | Replace valve ($10-20) |
| Hairline crack in lid | Try epoxy, plan to replace |
| Major crack in tank | Replace entire filter |
| Filter is 10+ years old with multiple issues | Consider full replacement |
A new filter costs $300-800 depending on type and size. If your filter needs $150+ in parts and it’s older than 8 years, replacement often makes more sense.
Calculating Your Pool’s Needs
While you’ve got the filter open, it’s a perfect time to make sure you’re using the right size. Calculate your pool volume if you don’t know it — your filter should be rated to turn over that volume at least once every 8-12 hours.
And once your filter is back in action, keep your water chemistry dialed in. The Pool Chemical Calculator takes the guesswork out of dosing and helps you avoid the cloudy water and algae that make your filter work overtime.
Frequently Asked Questions
Can I use plumber’s tape on pool filter threads?
Yes, but use the right kind. Standard white Teflon tape works for pressure gauge and air relief valve threads. Apply 4-5 wraps in a clockwise direction (when looking at the fitting end-on). Don’t use pipe dope or thread sealant — they can contaminate pool water and damage plastic threads over time.
Why does my pool filter leak only when the pump is running?
That’s normal behavior for a pressure-related leak. When the pump runs, it creates 10-25 PSI inside the filter tank. This pressure pushes water through any compromised seal. When the pump stops, pressure drops to zero and the leak stops. This actually helps you diagnose — the leak location is definitely above the water line inside the tank and is pressure-driven, not a drain or fitting issue.
How often should I replace my pool filter O-ring?
Most O-rings last 3-5 years with proper care. “Proper care” means lubricating with silicone lube once per season, storing the filter with the O-ring removed during winter (if applicable), and avoiding over-tightening the clamp band. If your O-ring feels stiff, looks cracked, or doesn’t bounce back when squeezed, replace it regardless of age.
Is it safe to run my pool pump with a small filter leak?
No. Even a small leak indicates a compromised seal. That small leak can suddenly become a large leak — or worse, a complete seal failure. The water loss and energy waste also add up fast. A leak dripping once per second loses 5 gallons daily. Fix it before running the system.
My filter leaked after I cleaned it. What did I do wrong?
The most common cause: the O-ring got pinched, twisted, or debris got in the groove. Disassemble again, remove the O-ring completely, clean the groove with a rag, inspect the O-ring for damage, apply fresh lubricant, and carefully reseat it. Make sure it sits flat in the groove with no kinks before replacing the top half.
Keep Your Pool Running Smoothly
A leaking filter is annoying, but it’s usually an easy fix once you know where to look. The key is proper diagnosis, quality parts, and taking safety seriously.
Ready to take full control of your pool maintenance? The Pool Chemical Calculator app helps you balance chemicals, track filter cleaning schedules, and keep your water crystal clear — all from your phone. It’s like having a pool expert in your pocket.
Get exact pool chemical doses
Pool Chemical Calculator turns your test readings, pool volume, and target levels into exact treatment amounts for chlorine, pH, alkalinity, calcium, stabilizer, salt, and more.
Open the Pool Chemical Calculator app for iOS, Android, or web.