
Pool Pump Won’t Turn On With Timer: Troubleshooting Guide
⚠️ Critical Safety Warnings
Electricity and water are a deadly combination. Pool equipment operates on 240V circuits in most cases — enough to kill you instantly.
Quick answer
Pool Pump Won't Turn On With Timer: Troubleshooting Guide: ⚠️ Critical Safety Warnings Electricity and water are a deadly combination. Pool equipment operates on 240V circuits in most cases — enough to kill you instantly. Before ANY troubleshooting: Turn off the circuit.
Before ANY troubleshooting:
- Turn off the circuit breaker at your main panel — not just the timer switch
- Verify power is off using a non-contact voltage tester like the Klein Tools NCVT-1 before touching any wires
- Never work in wet conditions — wait for dry weather if your equipment pad is soaked
- Call a licensed electrician if you’re uncomfortable with electrical work or see any burned, melted, or damaged wiring
I’m not being dramatic here. Pool pump electrical work causes injuries every year. When in doubt, call a pro. A $150 service call beats a hospital visit.
Understanding How Pool Timers Work
Your pool timer is a clock that controls when power flows to your pump. Understanding the type you have determines how you troubleshoot it.
Mechanical Timers
These are the most common type — that round dial with the little metal or plastic pins. A small motor rotates the dial once every 24 hours. The tripper pins push a lever that opens or closes the electrical circuit to your pump.
The timer motor uses very little electricity (about 4 watts), but it must run continuously to keep accurate time. If it stops, your whole schedule goes out the window.
Digital Timers
Digital timers use electronic circuits instead of mechanical parts. They’re more precise but can be more complicated to troubleshoot. Power outages often reset them, and the programming can be confusing.
Automation Systems
If you have a Pentair, Hayward, or Jandy automation system, your pump schedule is controlled by a circuit board. These systems have their own troubleshooting procedures, which I’ll cover briefly at the end.
Step-by-Step Troubleshooting
Work through these in order. Each step rules out a potential cause before moving to more complex issues.
Step 1: Check the Obvious Stuff First
I know this sounds condescending, but I’ve been called out to “fix” timers that just had the switch in manual-off position. Happens more than you’d think.
Verify these basics:
- Timer switch position: Most timers have a three-position switch — OFF, ON, and AUTO (sometimes labeled TIMER). Make sure it’s set to AUTO or TIMER.
- Time dial accuracy: Open the timer door and check if the current time shown matches actual time. If it’s 2 PM but the dial shows 9 AM, your timer motor has stopped.
- Tripper pin positions: Those little tabs around the dial? They need to be pushed OUT (toward the edge) for “on” periods and pulled IN for “off” periods. Each pin typically represents 15-30 minutes depending on your model.
Step 2: Verify the Timer Motor Is Running
With the breaker still ON (but not touching any wires), listen closely to your timer. You should hear a faint humming or ticking sound. The dial should move — though it’s so slow you won’t notice by staring at it.
Test it this way:
- Note the exact position of the dial
- Mark it with tape or a marker if needed
- Come back in 2 hours
- The dial should have moved approximately 1/12 of its rotation (30 degrees)
If the timer motor isn’t running, it needs replacement. Timer motors cost $20-40 and are usually easy to swap without rewiring the whole unit.
Step 3: Check the Tripper Mechanism
Worn tripper pins are a sneaky problem. They look fine but don’t engage the switch properly.
Signs of tripper problems:
- Pins are cracked, broken, or don’t snap into position firmly
- The on/off lever doesn’t move when you manually rotate the dial past a tripper
- Trippers are missing entirely (they can fall off over time)
Replacement tripper sets like the Intermatic Timer Tripper Kit cost under $10 and take 5 minutes to install. If your timer is an Intermatic T104 (the most common pool timer), these are a perfect fit.
Step 4: Test for Power at the Timer
⚠️ This step involves working near live electricity. If you’re not comfortable, skip to “When to Call an Electrician.”
Turn the breaker OFF before opening the timer enclosure.
Once open, you’re looking for:
- Burned or melted wire connections
- Loose wires that have wiggled free from terminals
- Corroded terminals (green or white crusty buildup)
- Scorch marks on the timer mechanism
If everything looks clean and tight, you need to test whether power is actually reaching the timer.
Turn the breaker back ON, then:
- Use a non-contact voltage tester near the incoming line wires (usually marked L1 and L2 or LINE)
- If no power at the timer, the problem is upstream — breaker, wiring, or GFCI
- If power is present at LINE but not at LOAD (motor side) when trippers are engaged, the timer switch mechanism is faulty
A digital multimeter gives you more precise readings than a non-contact tester. For 240V pool equipment, you should read approximately 240V between L1 and L2.
Step 5: Check the Circuit Breaker
Head to your main electrical panel and find the pump circuit breaker. It’s usually a double-pole breaker (two switches connected together) labeled “Pool Pump” or “Pool Equipment.”
What to look for:
- Tripped position: The handle will be in the middle position, not fully ON or OFF. Turn it fully OFF, then back ON.
- Won’t stay on: If the breaker immediately trips when you reset it, you have a short circuit. Do not keep resetting it. Call an electrician.
- Feels hot: A warm breaker is normal. A HOT breaker indicates a problem. Call an electrician.
- Burning smell: Turn it off and call an electrician immediately.
Breakers do wear out. If yours is more than 15 years old and trips frequently, replacement costs about $10-30 for the part plus electrician labor.
Step 6: Locate and Test the GFCI
Many pool pumps are protected by a GFCI (Ground Fault Circuit Interrupter). This might be:
- A GFCI breaker in your main panel (has a TEST button on the breaker itself)
- A GFCI outlet near your pool equipment
- A GFCI disconnect box between the house and the pump
GFCI devices trip when they detect even tiny current leaks — which is great for safety but annoying when they trip for no apparent reason.
Press the RESET button on any GFCI in the pump circuit. If it won’t reset or immediately trips again, you either have:
- A faulty GFCI (they last about 10 years)
- An actual ground fault somewhere in the system
This is electrician territory. Ground faults can indicate dangerous wiring problems.
Beyond the Timer: Motor and Capacitor Issues
So your timer seems fine, power is reaching the motor, but the pump still won’t run? The problem might be the pump itself.
Signs of a Bad Capacitor
The capacitor is that oval or cylindrical canister mounted on top of your pump motor. It gives the motor an extra “kick” to start spinning.
Symptoms of capacitor failure:
- Motor hums loudly but doesn’t spin
- Motor starts slowly or hesitantly
- Capacitor looks swollen, bulging, or has oily residue
- Burn marks around the capacitor
Testing a capacitor requires a multimeter with capacitance function. A pool pump capacitor typically reads between 25-50 microfarads (µF). If it’s dead or way off spec, replacement costs $15-40.
⚠️ Warning: Capacitors store electrical charge even when power is off. Discharge it by shorting across the terminals with an insulated screwdriver before handling.
Signs of a Seized or Burned Motor
Sometimes the motor itself is the problem.
Check for:
- Seized shaft: Turn off power, then try to rotate the motor shaft (visible through the back vent holes). It should spin freely. If it’s stuck, the bearings are seized.
- Burned smell: A sharp electrical burning smell means fried motor windings.
- Visible damage: Look through the motor vents for blackened or melted components.
Motor replacement runs $200-600 depending on horsepower. Sometimes it’s worth it; sometimes a new pump makes more sense.
Freeze Protection and Automation Systems
If you live in an area with freezing temperatures, your pump might have a freeze protection device. These override normal timer settings when temperatures drop below 35-38°F.
Freeze protection can cause confusion because:
- The pump runs when you don’t expect it
- Or it won’t turn OFF when you want it to
- Some systems have separate sensors that can fail
Check your freeze protection thermostat if pump behavior seems random during cold weather.
Automation System Issues
Pentair IntelliCenter, Hayward OmniLogic, Jandy AquaLink, and similar systems have their own diagnostic screens and error codes.
Common automation timer problems:
- Schedule programming errors (check your app or control panel)
- Communication loss between indoor control and outdoor equipment
- Relay board failures
- Firmware glitches (try a system reboot)
These systems are complex. The troubleshooting steps above still apply for checking power to the equipment, but programming issues usually require consulting your specific system’s manual.
When to Call an Electrician
Call a licensed electrician if:
- The breaker trips repeatedly
- You see any burned, melted, or damaged wiring
- You smell electrical burning
- The GFCI won’t reset
- You’re uncomfortable working with 240V electricity
- You’ve worked through all steps and can’t find the problem
A service call typically costs $75-150 for diagnosis. That’s money well spent compared to electrocution or house fires.
Keeping Your Chemistry Balanced During Downtime
While you’re sorting out timer issues, your pump isn’t running — which means no filtration and no circulation. This lets algae gain a foothold fast, especially in warm weather.
Minimize the damage:
- Test your water daily using the Pool Chemical Calculator to keep chemistry in check
- Manually brush the pool walls and floor daily
- Run the pump manually (bypass the timer temporarily) for at least 8 hours daily
- Shock the pool if you see any cloudiness or green tint — use our Chlorine Calculator to get the dosage right
- Check pH levels since stagnant water pH tends to drift
Once your timer is fixed, run the pump for 24-48 hours straight to fully turn over and filter the water.
Preventing Future Timer Problems
A few simple maintenance steps prevent most timer failures:
- Annual inspection: Open the timer box once a year, check for spider webs, wasp nests, and corrosion
- Tripper check: Make sure all pins are secure and engaging properly
- Power surge protection: Install a surge protector on your pool equipment circuit
- Timer motor replacement: Consider proactive replacement every 5-7 years (they’re cheap)
- Keep it dry: Make sure the timer enclosure gasket seals properly
Final Thoughts
Most timer problems come down to a few simple causes: misset trippers, stopped timer motors, or tripped breakers. Work through the troubleshooting steps systematically, and you’ll find the culprit.
But always respect electricity. If you’re uncertain at any point, stop and call a professional. Your pool will still be there tomorrow.
Need help calculating chemicals after getting your pump running again? Download the Pool Chemical Calculator app and check out our full suite of calculators to get your water back in perfect balance.
Frequently Asked Questions
Why does my pool pump run on manual but not on timer?
If the pump runs when you flip the timer switch to manual ON but not in AUTO/TIMER mode, the timer mechanism itself is faulty. Either the timer motor has stopped (so the dial isn’t rotating), the tripper pins aren’t engaging the switch properly, or the internal switch contacts are worn. Try spinning the dial manually — if the pump kicks on when a tripper passes the switch lever, you’ve confirmed the timer motor is the problem.
How do I reset my mechanical pool timer?
Turn the dial clockwise (never counterclockwise — this can damage the gears) until the time indicator matches the current time of day. Check that tripper pins are in the correct positions: pushed out for run periods, pulled in for off periods. If your timer was stopped for a while, give the motor 30 minutes to confirm it’s advancing again.
Can a bad capacitor cause my pump not to start with the timer?
Yes. A failed capacitor prevents the motor from starting regardless of whether it’s controlled by a timer or manual switch. The telltale sign is a loud humming sound with no shaft rotation. The motor gets power but can’t generate enough starting torque without the capacitor. This isn’t a timer problem — it’s a motor component failure.
How long do pool timer motors last?
Most timer motors last 5-10 years with average use. Exposure to moisture, dust, and heat shortens their lifespan. If your timer is more than 7 years old and stops keeping accurate time, budget $25-40 for a replacement motor. It’s a 10-minute swap that’s much cheaper than replacing the entire timer assembly.
My digital pool timer lost its programming — what happened?
Digital timers lose their programming when they lose power (even briefly) unless they have battery backup. Power outages, tripped breakers, and even brief voltage fluctuations can wipe the schedule. Check if your timer has a backup battery compartment — many do, and the battery needs replacement every 2-3 years. Reprogram your schedule and consider adding a surge protector to prevent future resets.
Recommended pool supplies
As an Amazon Associate, Pool Chemical Calculator earns from qualifying purchases.
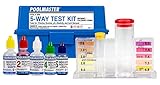
Accurate readings make every chlorine, pH, alkalinity, calcium, and CYA dose safer.
View on Amazon
Useful for algae cleanup, cloudy water, high bather load, and weekly oxidation routines.
View on Amazon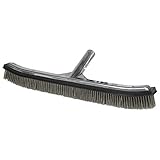
Brushing breaks up algae films, dead spots, and wall buildup so chemicals and filtration work.
View on AmazonGet exact pool chemical doses
Pool Chemical Calculator turns your test readings, pool volume, and target levels into exact treatment amounts for chlorine, pH, alkalinity, calcium, stabilizer, salt, and more.
Open the Pool Chemical Calculator app for iOS, Android, or web.