
Pool Pump Timer Loses Time: Why It Happens and How to Fix It
Why Your Pool Pump Timer Can’t Keep Time
You set your pump to run 8 AM to 4 PM. A week later, it’s starting at 10:30 AM. Sound familiar?
Quick answer
Pool Pump Timer Loses Time: Why It Happens and How to Fix It: Why Your Pool Pump Timer Can't Keep Time You set your pump to run 8 AM to 4 PM. A week later, it's starting at 10:30 AM. Sound familiar? A pool pump timer loses time for reasons ranging from simple (power blip during a.
A pool pump timer loses time for reasons ranging from simple (power blip during a storm) to serious (failing motor or electrical issues). Understanding the cause saves you from replacing a $100 timer when a $3 tripper adjustment fixes the problem.
Let’s work through each possibility so you can diagnose yours.
Common Causes of Timer Drift (And What to Do About Each)
Power Interruptions
This is the most common reason your timer clock is off. Every power outage resets mechanical timers to the wrong time — they simply stop until power returns, then resume from wherever they left off.
The math: A 3-hour power outage means your timer runs 3 hours behind. Had two outages this month? You might be 6+ hours off.
Signs it’s power-related:
- Timer is off by whole hours (not minutes)
- You recently had storms or flickering lights
- Neighbors mention their clocks needed resetting
The fix: Reset your timer clock dial to the current time. That’s it. If you’re getting frequent outages, consider upgrading to a digital timer with battery backup.
Worn Timer Motor
The small motor inside your timer spins a gear train that moves the clock dial. After 5-10 years, this motor wears out. It still runs, but slower than it should.
Signs it’s the motor:
- Timer loses time gradually (minutes per day, not hours)
- You hear humming but the dial barely moves
- Motor feels hot to the touch
- Drift happens even without power outages
The fix: Replace the timer motor. On Intermatic T104 timers (the most common brand), the motor swaps out in 10 minutes. You don’t need to replace the whole timer enclosure.
Intermatic Timer Motor Replacement on Amazon
Loose or Corroded Wiring
Loose wire connections cause intermittent power delivery. The motor gets voltage, loses it, gets it again. Each interruption means lost time.
Signs it’s wiring:
- Timer works sometimes, not others
- You see arcing marks or blackened wire ends
- Connections feel loose when (safely) inspected
- Timer dial moves in jerks rather than smoothly
⚠️ SAFETY WARNING: Before touching any wiring, turn off the breaker feeding your timer. Use a non-contact voltage tester to verify power is dead. If you see burned wires, melted plastic, or aren’t 100% confident, call a licensed electrician. Timer boxes run 120V or 240V — both can kill you.
Wrong Voltage Supply
Timer motors are voltage-specific. A 120V motor on 208V power runs fast. A 240V motor on 208V runs slow. Commercial properties and some residential setups have 208V power that looks like 240V but isn’t.
Signs it’s voltage:
- Timer consistently runs fast OR slow
- Motor hums louder than normal
- You’re in a condo/apartment complex or commercial property
The fix: Check your timer motor’s voltage rating against your actual supply voltage. An electrician can measure this in seconds. Replace the motor with the correct voltage version if mismatched.
Gear Train Problems
Mechanical timers use plastic or metal gears. Over time, teeth wear down, gears crack, or the mechanism gets gunked up with dust and debris.
Signs it’s the gears:
- You hear clicking or grinding sounds
- Dial moves unevenly (fast, then slow, then fast)
- Timer works fine for hours, then suddenly jumps forward
The fix: Sometimes a blast of electrical contact cleaner gets things moving again. More often, you’ll need to replace the timer motor assembly or the entire timer.
Trippers Binding or Stuck
Those little metal tabs (trippers) that turn your pump on and off can interfere with the dial’s movement if bent, loose, or improperly positioned.
Signs it’s the trippers:
- Timer stops at the same position repeatedly
- Trippers are bent or damaged
- Multiple trippers are jammed together
The fix: Straighten bent trippers with pliers. Replace missing or broken ones — they’re cheap and easy to snap into place.
Timer Tripper Replacement Set on Amazon
Moisture and Corrosion Inside the Enclosure
Pool equipment lives outdoors. Rain, humidity, and irrigation overspray find ways inside timer boxes. Moisture causes corrosion on contacts, motor windings, and gear mechanisms.
Signs it’s moisture:
- Visible rust or green corrosion
- Water droplets inside the enclosure
- Timer works better on dry days than humid ones
- Musty smell when you open the box
The fix: Dry out the enclosure thoroughly. Replace corroded components. If corrosion is extensive, replace the entire timer. And fix whatever’s letting water in — usually a damaged gasket or improper mounting.
Breaker or GFCI Problems
A breaker that trips and resets (without you noticing) causes the same symptoms as power outages. GFCI outlets protecting the timer can trip from moisture or load spikes.
Signs it’s breaker-related:
- Timer loses time in large chunks
- Breaker feels warm or loose
- GFCI shows “tripped” indicator
- Other equipment on the same circuit has issues
The fix: Reset the GFCI. If the breaker keeps tripping, that’s a separate electrical issue requiring professional diagnosis.
Step-by-Step Troubleshooting Guide
Ready to figure out what’s wrong with your timer? Follow this sequence.
Step 1: Reset and Observe
- Turn off the breaker feeding your pool timer
- Open the timer enclosure
- Set the clock dial to the correct time
- Check that trippers are positioned for your desired run schedule
- Close enclosure and turn breaker back on
- Mark the current time with tape or a marker on the dial
- Check again in exactly 24 hours
If the timer is off by more than 2 minutes in 24 hours, you have a mechanical problem. Less than that is normal drift.
Step 2: Inspect for Visible Problems
With the breaker OFF and verified dead:
- Open the timer enclosure fully
- Look for moisture, corrosion, or water stains
- Check for burned or melted wire insulation
- Examine trippers for damage or binding
- Look at the motor — is it discolored or melted?
- Gently wiggle wire connections (do they move?)
Document what you find with photos before touching anything.
Step 3: Listen to the Motor
With power ON (enclosure open but hands away from components):
- Listen for humming — this means the motor is getting power
- Watch the dial — it should move very slowly but visibly over 5-10 minutes
- Note any grinding, clicking, or irregular sounds
No hum = no power to motor (wiring issue)
Hum but no movement = seized motor (replace it)
Grinding/clicking = gear problem (replace motor or timer)
Step 4: Check Voltage (Optional, Requires Multimeter)
If you’re comfortable using a multimeter:
- Set meter to AC voltage
- With power ON, measure voltage at motor terminals
- Compare to motor’s rated voltage (printed on motor)
- Voltage should be within 10% of rating
Outside that range? You have a supply problem or wrong motor.
Step 5: Decide — Fix or Replace
Replace just the motor if:
- Timer enclosure and wiring are in good shape
- Motor is clearly the problem
- Your timer is a common brand (Intermatic, Tork, etc.)
Replace the entire timer if:
- Enclosure is corroded or damaged
- Multiple components have failed
- Timer is 15+ years old
- Parts for your model aren’t available
- You want to upgrade to digital
Pool Pump Timer (Complete Replacement) on Amazon
Electrical Safety: What You Can and Can’t DIY
Some timer work is homeowner-friendly. Some isn’t.
You Can Safely Handle:
- Resetting the clock dial
- Adjusting or replacing trippers
- Replacing the motor (if you’re comfortable with basic electrical work and the breaker is OFF and verified)
- Cleaning debris from the enclosure
Call a Licensed Electrician For:
- Any work inside your main electrical panel
- Burned, melted, or damaged wiring
- Water intrusion near live wires
- Voltage testing if you’re unsure of 120V vs 240V
- Installing a new timer where none existed
- Anything that makes you nervous
⚠️ Pool equipment runs on 120V or 240V. Both voltages cause serious injury or death. When in doubt, hire it out.
When Your Timer Works But Your Chemistry Doesn’t
Here’s something most pool owners miss: even a perfectly timed pump can’t fix chemical problems.
If your pump runs 8-12 hours daily but your water is still cloudy, green, or irritating — your chemistry needs attention, not your timer.
Use our free pool chemical calculator to dial in exactly what your water needs. Not sure about your pool’s size? The pool volume calculator helps you get accurate measurements.
For specific adjustments:
- Chlorine calculator — dose chlorine precisely
- pH calculator — balance your pH without guesswork
Preventing Future Timer Problems
A few simple habits extend your timer’s life:
- Check the time monthly — catch drift before it becomes a problem
- Inspect the enclosure seasonally — look for moisture, corrosion, or pest intrusion
- Keep sprinklers pointed away — irrigation is a leading cause of timer box water damage
- Replace trippers when worn — bent trippers stress the motor
- Consider a digital upgrade — modern timers hold time through outages and offer smartphone control
FAQ
Why does my pool timer lose time after a power outage?
Mechanical pool timers have no memory — when power stops, the motor stops, and the clock freezes. When power returns, it resumes from wherever it stopped. A 4-hour outage means your timer runs 4 hours behind. Digital timers with battery backup avoid this problem entirely.
How much time drift is normal for a pool timer?
Mechanical timers typically drift 1-5 minutes per week under normal conditions. Losing more than 10 minutes weekly suggests a failing motor, voltage issue, or intermittent power problem. If you’re resetting your timer more than once a month, something’s wrong.
Can I replace just the timer motor, or do I need a whole new timer?
Most popular timers (especially Intermatic T104 series) have replaceable motors. The motor costs $25-40 versus $75-150 for a complete timer. If your enclosure, wiring, and mechanism are in good shape, replacing just the motor makes sense. Budget about 15 minutes for the job.
Should I upgrade from mechanical to digital pool timer?
Digital timers cost more upfront ($100-200 vs $50-100) but offer real advantages: battery backup holds time during outages, multiple on/off cycles per day, easier programming, and some models offer WiFi control. If you’re replacing a failed mechanical timer anyway, upgrading is worth considering.
How do I know if my timer motor is 120V or 240V?
Check the label on the timer motor itself — voltage rating is always printed there. You can also check your timer’s documentation or the breaker feeding it (a 15-20A single breaker usually indicates 120V; a double breaker indicates 240V). When in doubt, have an electrician verify before ordering replacement parts.
Take Control of Your Pool Maintenance
A working timer keeps your pump running on schedule. But the pump alone doesn’t guarantee clean, balanced water.
Use our free Pool Chemical Calculator to know exactly how much chlorine, acid, or other chemicals your pool needs. No guessing, no wasting money on unnecessary treatments.
Just enter your test results and pool size — you’ll get precise dosing instructions in seconds.
Recommended pool supplies
As an Amazon Associate, Pool Chemical Calculator earns from qualifying purchases.
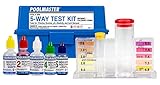
Accurate readings make every chlorine, pH, alkalinity, calcium, and CYA dose safer.
View on Amazon
Useful for algae cleanup, cloudy water, high bather load, and weekly oxidation routines.
View on Amazon
Slow-dissolving tablets help keep routine free chlorine steady in floaters or chlorinators.
View on AmazonGet exact pool chemical doses
Pool Chemical Calculator turns your test readings, pool volume, and target levels into exact treatment amounts for chlorine, pH, alkalinity, calcium, stabilizer, salt, and more.
Open the Pool Chemical Calculator app for iOS, Android, or web.