
Pool Pump Timer Wiring Problems: Troubleshooting Guide for Homeowners
Your pool pump stopped running on schedule. Or maybe it won’t turn off. Perhaps the timer makes a clicking sound but nothing happens. Pool pump timer wiring problems frustrate homeowners every summer, and the causes range from a simple loose wire to dangerous electrical faults that need professional attention.
Quick answer
Pool Pump Timer Wiring Problems: Troubleshooting Guide for Homeowners: Your pool pump stopped running on schedule. Or maybe it won't turn off. Perhaps the timer makes a clicking sound but nothing happens. Pool pump timer wiring problems frustrate homeowners every summer, and the causes.
Here’s the thing: your pump timer handles serious voltage. Most pool pumps run on 240V — the same power that feeds your electric dryer or oven. One wrong move and you’re dealing with severe injury or fire. So while this guide walks you through diagnosis, know your limits. There’s no shame in calling a pro.
That said, many timer issues stem from problems you can identify yourself, even if you hire someone else to fix them. Understanding what’s wrong saves you money on diagnostic fees and helps you avoid getting oversold on unnecessary repairs.
Before You Touch Anything: Electrical Safety Rules
I can’t stress this enough: 240V electricity can kill you. It won’t just hurt — it can stop your heart. Follow these rules without exception:
- Turn off the breaker at your main electrical panel before opening the timer box
- Verify power is dead using a non-contact voltage tester — never assume the breaker actually worked
- Lock out the breaker if possible, or tape it and leave a note
- Test your tester on a known-live outlet before and after checking the timer
- Work in dry conditions — never troubleshoot electrical with wet hands or standing on wet ground
If any of the following apply, stop and call a licensed electrician:
- You see burned, melted, or charred wires
- There’s a burning smell
- Water has entered the timer enclosure
- You’re not 100% confident identifying wire voltages
- Your local code requires permits for electrical work
Step-by-Step Diagnosis: Finding Your Wiring Problem
1. Check for Loose Terminal Connections
This is the most common issue. Vibration from the pump, temperature cycling, and age all loosen wire connections over time.
Symptoms:
- Pump works intermittently
- Timer clicks but pump doesn’t always start
- Pump runs sometimes when manually switched but not on timer
How to check (with power OFF and verified dead):
- Remove the timer cover
- Visually inspect all wire connections
- Gently tug each wire — it shouldn’t move in the terminal
- Look for blackened or discolored terminals (signs of arcing)
- Check the wire lugs going to the pump and coming from the breaker
The fix: Tighten all terminal screws to manufacturer specs (typically 20-25 inch-pounds for most timers). If terminals look burned, the timer likely needs replacement.
2. Verify the 120V or 240V Wiring Configuration
Pool pump timers typically handle both 120V and 240V, but they must be wired correctly for your specific pump voltage. Getting this wrong causes immediate failure — or worse, damage to your pump motor.
Symptoms:
- Pump hums but won’t start
- Breaker trips immediately when timer engages
- New timer installation doesn’t work
- Pump runs weak or hot
How to check:
- Verify your pump voltage — look at the motor nameplate (it’ll say 115V, 230V, or dual-voltage)
- Check your timer wiring diagram (inside the timer cover)
- Compare your actual wiring to the correct diagram
Common mistake: Running both hot legs to a 120V pump, or only running one hot leg to a 240V pump.
For 240V pumps, you need two hot wires (usually red and black) plus a ground. For 120V pumps, you need one hot, one neutral (white), and ground.
The fix: Rewire according to the correct diagram. If you’re not certain which wires are which, this is electrician territory.
3. Inspect the Timer Contacts
Timer contacts are mechanical switches that physically connect and disconnect power. After years of operation — typically 50,000+ cycles — they wear out, pit, or weld together.
Symptoms:
- Timer motor runs (you can hear it humming), but pump never activates
- Pump runs 24/7 regardless of timer position
- Visible arcing or sparking when timer engages
- Burned smell from timer box
How to check:
- With power off, examine the contact points inside the timer
- Look for pitting, blackening, or corrosion on contact surfaces
- Check that the timer mechanism physically moves the contacts
The fix: Contact replacement isn’t practical. Replace the entire timer. Intermatic T104 timers (the most common type) run about $60-80 and last 10-15 years with normal use.
While you’re at it, replace worn timer trippers — those little tabs that turn your pump on and off at set times.
4. Check for a Missing or Disconnected Neutral Wire
This problem specifically affects 120V pump installations and timers with clock motors that need 120V to run.
Symptoms:
- Timer clock doesn’t advance (frozen at one time)
- Timer display is dead
- Clock runs slow or erratically
- Pump works on manual override but timer never activates
How to check:
- Verify white (neutral) wire is connected to the neutral terminal
- Trace the neutral back to ensure it’s connected at the breaker panel
- Check for neutral continuity with a multimeter (power off)
The fix: Reconnect the neutral wire. If neutral is damaged, run a new wire from the panel. This job typically requires a permit and electrician.
5. Test the Breaker or GFCI
Sometimes the problem isn’t the timer at all — it’s upstream.
Symptoms:
- Timer appears to work normally but pump doesn’t run
- Breaker trips repeatedly
- GFCI outlet keeps tripping
- Multiple pool equipment items dead simultaneously
How to check:
- Look at the breaker — is it tripped or in the middle position?
- Feel the breaker — warm is okay, hot indicates a problem
- Reset any GFCIs in the circuit
- Check for water in conduit or junction boxes (a common GFCI trip cause)
The fix: Reset the breaker firmly (push to OFF, then ON). If it trips immediately, you have a short circuit — don’t keep resetting it. Call an electrician.
If the breaker trips under load after the pump runs for a few seconds, suspect a failing pump motor or incorrect breaker amperage.
6. Inspect Corroded Conduit and Wire Nuts
Pool equipment lives outdoors in a harsh environment. Moisture, chlorine fumes, and temperature swings destroy electrical connections over time.
Symptoms:
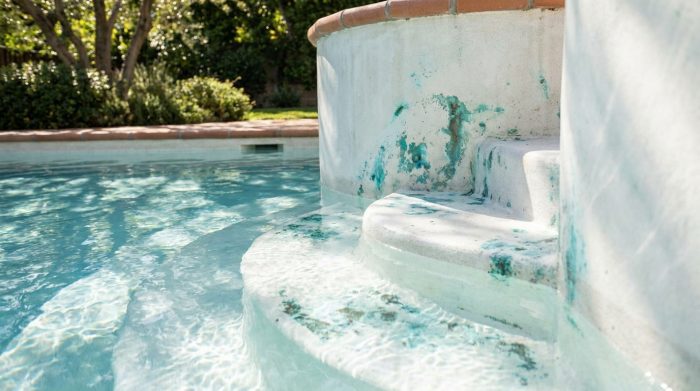
- Green corrosion visible on connections
- White crusty deposits on wire nuts
- Intermittent operation that worsens over time
- Problems that started gradually rather than suddenly
How to check:
- Open all junction boxes between panel and pump
- Inspect wire nuts for corrosion or moisture
- Check conduit connections for water entry points
- Look inside the timer enclosure for signs of moisture damage
The fix: Replace corroded wire nuts with waterproof connectors rated for outdoor use. Seal conduit penetrations. Consider upgrading to a weatherproof outdoor timer enclosure if yours is failing.
7. Confirm the Pump and Timer Ratings Match
Your timer must be rated for your pump’s electrical load. An undersized timer will fail prematurely — or immediately.
Symptoms:
- New timer burns out quickly
- Contacts show heavy damage despite low usage
- Timer gets hot during operation
How to check:
- Find your pump motor’s amperage rating (on the nameplate)
- Check your timer’s amp rating (on the timer or spec sheet)
- Timer should be rated for at least 125% of pump motor amps
Example: A 10-amp pump motor needs a timer rated for 12.5+ amps minimum.
The fix: Install a properly rated timer. For large pumps (2HP+), you may need a timer with a contactor relay to handle the load.
When Your Pump Runs Again
Once you’ve solved your wiring issues and the pump runs on schedule, you’ll probably notice your water chemistry needs attention. Pumps that run intermittently or not at all let sanitizer levels crash and allow algae to take hold.
Use our pool volume calculator to verify your pool’s capacity, then check your chlorine levels and pH balance. If chemistry drifted badly while the pump was down, you may need to adjust total alkalinity first to stabilize everything.
For ongoing maintenance, our chemistry forecast tool predicts when you’ll need to add chemicals based on weather and usage.
FAQ: Pool Pump Timer Wiring Questions
Can I replace a pool pump timer myself, or do I need an electrician?
Legally, it depends on your jurisdiction — some areas require permits and licensed electricians for any 240V work. Practically, if you’re comfortable with electrical work and understand the safety requirements, timer replacement is straightforward. But if you’re uncertain about anything, hire a pro. The cost of an electrician visit is much less than an electrical fire or injury.
Why does my timer click but the pump doesn’t start?
The click means the timer mechanism works, but power isn’t reaching the pump. Check for failed timer contacts (the most common cause), loose terminal connections, a tripped breaker, or a wire break between timer and pump. The contacts inside the timer may look fine but have invisible pitting that prevents good electrical contact.
My pool pump timer runs slow and loses time. What’s wrong?
Timer clock motors need 120V to run. If yours is losing time, you likely have a voltage problem — either a poor neutral connection or voltage drop from undersized wiring. Check the neutral wire first. If that’s solid, measure incoming voltage with a multimeter. It should read 118-122V.
Can I use a smart/digital timer instead of my mechanical timer?
Yes, but make sure the digital timer is rated for the same voltage and amperage as your pump. Many smart home timers only handle 120V and low amperages — not suitable for pool pumps. Look for timers specifically designed for pool equipment if you want smart control.
Why does my timer keep blowing fuses or tripping the breaker?
Something in the circuit is drawing too much current. Possible causes: shorted wiring somewhere in the conduit, failing pump motor drawing excessive amps, incorrectly sized breaker (too small), water infiltration causing shorts, or timer contacts welded closed. Start by inspecting all visible wiring for damage, then check pump motor amp draw with a clamp meter.
Keep Your Pool Running Right
Electrical problems are frustrating, but with systematic troubleshooting, you can usually identify what’s wrong — even if you hire someone else to fix it.
Once your pump runs reliably, maintaining water chemistry becomes predictable again.
Try our free Pool Calculator app to get personalized chemical dosing recommendations based on your pool’s exact volume and current water test results. No more guessing, no more overadding — just clear, balanced water all season long.
Recommended pool supplies
As an Amazon Associate, Pool Chemical Calculator earns from qualifying purchases.

Raises total alkalinity so pH is less likely to bounce around after treatment.
View on Amazon
Accurate readings make every chlorine, pH, alkalinity, calcium, and CYA dose safer.
View on Amazon
Useful for algae cleanup, cloudy water, high bather load, and weekly oxidation routines.
View on AmazonGet exact pool chemical doses
Pool Chemical Calculator turns your test readings, pool volume, and target levels into exact treatment amounts for chlorine, pH, alkalinity, calcium, stabilizer, salt, and more.
Open the Pool Chemical Calculator app for iOS, Android, or web.