Pool Skimmer Suction Low? Here’s How to Fix It Fast
Quick Answer: Low pool skimmer suction is usually caused by a clogged skimmer basket, dirty pump strainer basket, a full filter, air leaks in the suction line, or a low water level. Start by checking your skimmer basket and pump strainer — these two culprits account for about 70% of weak suction problems. If those are clear, work through the diagnostic steps below to pinpoint the issue.
Quick answer
Pool Skimmer Suction Low? Here's How to Fix It Fast: Quick Answer: Low pool skimmer suction is usually caused by a clogged skimmer basket, dirty pump strainer basket, a full filter, air leaks in the suction line, or a low water level. Start by checking your skimmer.
There’s nothing more frustrating than watching leaves float right past your skimmer while it barely creates a ripple. When your pool skimmer suction is low, your entire circulation system suffers. Debris stays in the water longer, chemicals distribute unevenly, and your filter works overtime trying to compensate.
I’ve seen homeowners spend hundreds calling pool techs for what turned out to be a $0 fix — a stuck skimmer weir door or a basket stuffed with oak pollen. Before you pick up the phone, work through this troubleshooting guide. You’ll likely solve the problem yourself in under 30 minutes.
Understanding Normal vs. Weak Skimmer Suction
Before troubleshooting, you need to know what “normal” looks like. A properly functioning skimmer should:
- Create a visible water swirl at the opening
- Pull floating debris (leaves, bugs, pollen) from 2-3 feet away
- Produce a gentle but steady pull when you place your hand near the opening
- Keep the weir door (that flappy thing) tilted inward at roughly 15-20 degrees
If your skimmer is barely moving water or the weir door sits flat, you’ve got a suction problem.
What Causes Low Skimmer Suction?
Your pool’s circulation system works like your lungs — it pulls water in through the skimmer, pushes it through the filter, and returns clean water through the jets. Any obstruction or air leak disrupts this flow.
The most common causes break down like this:
- Clogged baskets (skimmer or pump strainer) — 40% of cases
- Dirty or overloaded filter — 25% of cases
- Air leaks in suction lines — 15% of cases
- Low water level — 10% of cases
- Pump issues (impeller clog, worn impeller, bad capacitor) — 7% of cases
- Valve problems — 3% of cases
Now let’s fix it.
Step-by-Step Diagnostic and Fix Sequence
Work through these steps in order. Each builds on the previous one, and you’ll isolate the problem systematically.
Step 1: Check Your Water Level
This sounds obvious, but I can’t count how many “broken pumps” were actually just low water. Your pool’s water level should sit at the midpoint of your skimmer opening — that’s typically 1/3 to 1/2 up the skimmer faceplate.
What to do:
- Look at where the waterline hits your skimmer
- If it’s below the bottom of the skimmer opening, your pump is sucking air
- Add water with a garden hose until it reaches the middle of the skimmer opening
- Wait 10 minutes and check suction again
Pro tip: After heavy swimming, backwashing, or using a pool forecast tool that predicts rain, water levels can drop fast. Get in the habit of checking weekly.
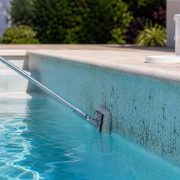
Step 2: Empty and Inspect the Skimmer Basket
Your skimmer basket is the first line of defense against debris. When it fills up, water can’t flow through efficiently.
What to do:
- Turn off the pool pump
- Remove the skimmer lid
- Lift out the basket
- Dump all debris — leaves, bugs, pollen clumps, hair elastics, everything
- Inspect the basket for cracks or holes (debris bypassing the basket clogs your impeller)
- Replace the basket, making sure it sits flat in the housing
- Turn the pump back on
Check this too: Look inside the skimmer throat (below the basket) for debris buildup. Sometimes leaves slip past and accumulate there, blocking the pipe entrance.
If your basket is cracked or warped, replace it. A quality skimmer basket like the U.S. Pool Supply Universal Skimmer Basket fits most standard skimmers and costs less than $15.
Step 3: Clean the Pump Strainer Basket
The pump strainer basket (located at your pool equipment pad, inside the clear pump housing) catches debris that makes it past the skimmer. It clogs faster than most homeowners realize.
What to do:
- Turn off the pump
- Release pressure by opening the air relief valve on your filter (if you have one)
- Remove the pump lid (twist counterclockwise on most models)
- Pull out the strainer basket
- Rinse thoroughly with a hose — use a stiff brush if needed
- Check for cracks and replace if damaged
- Reinstall the basket and lid
- Make sure the O-ring on the pump lid is lubricated and properly seated
- Turn the pump back on
Important: Watch the pump housing for 2-3 minutes after restarting. You should see it fill with water. If you see lots of air bubbles continuously, you may have a suction-side air leak (covered in Step 6).
Step 4: Check Your Filter Pressure
A dirty filter creates back pressure that reduces suction throughout the system. This is where most homeowners miss the problem.
What to do:
- Check your filter pressure gauge while the pump is running
- Compare the reading to your “clean” baseline pressure
Understanding filter pressure:
- Most pools run between 8-15 PSI when the filter is clean
- When pressure rises 8-10 PSI above your clean baseline, it’s time to clean the filter
- Example: If your clean pressure is 10 PSI, clean the filter when it hits 18-20 PSI
Don’t have a baseline? Write down your pressure right after cleaning the filter and stick it on your equipment pad.
If your gauge reads zero or seems stuck, it’s probably broken. Replace it with a reliable pool filter pressure gauge — they’re under $10 and essential for monitoring your system.
Cleaning your filter:
- Cartridge filters: Remove and hose off the pleats, or soak overnight in filter cleaner
- Sand filters: Backwash for 2-3 minutes until sight glass runs clear
- DE filters: Backwash and recharge with fresh DE powder
Step 5: Inspect the Skimmer Weir Door
That hinged flap at the front of your skimmer opening (the weir door) serves an important purpose — it creates a one-way gate that traps debris inside the skimmer and prevents it from floating back into the pool when the pump shuts off.
What to do:
- With the pump running, watch the weir door
- It should pivot freely and tilt inward toward the skimmer
- Push it gently with your hand — it should swing easily
- Check the hinge pins for corrosion or damage
- Look for cracks in the door itself
Common weir problems:
- Door stuck in vertical position (restricts flow)
- Broken hinge pins (door falls out or sits crooked)
- Warped door (from sun damage or improper chemical storage)
A stuck weir can reduce skimmer suction by 30-40%. Replacements cost $8-15 and take 30 seconds to install.
Step 6: Hunt for Suction-Side Air Leaks
Air leaks are sneaky. Your pump can work fine yet lose significant suction because it’s pulling air instead of water. Common leak locations include:
- Pump lid O-ring (dried out, cracked, or poorly seated)
- Union fittings in front of the pump
- Drain plugs on the pump housing
- Cracked pump housing
- Underground pipe joints (rare but possible)
Signs of an air leak:
- Continuous air bubbles in the pump strainer basket
- Gurgling sounds from the pump
- Air bubbles shooting from return jets
- Pump loses prime frequently
What to do:
- Turn off the pump
- Inspect the pump lid O-ring — clean it and apply silicone lubricant (not petroleum jelly)
- Check that the lid seats properly with no gaps
- Examine union fittings and hand-tighten if loose
- Look for cracks in PVC pipes and fittings visible above ground
- Turn the pump back on and observe
Leak detection trick: With the pump running, spray shaving cream around suspected leak areas. If the foam gets sucked inward at any spot, you’ve found your leak.
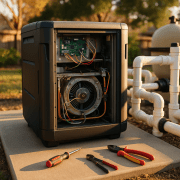
Step 7: Check for Impeller Clogs
The pump impeller is the spinning part inside your pump that actually moves water. When debris bypasses your baskets (usually through a cracked basket), it can wrap around the impeller and reduce water flow dramatically.
Symptoms of a clogged impeller:
- Pump strainer basket fills but suction remains weak
- Pump runs but sounds labored or different than usual
- Normal filter pressure but weak skimmer pull
What to do:
- Turn off the pump and release system pressure
- Remove the pump strainer basket
- Reach into the pump throat and feel for the impeller (you’ll feel the vanes)
- Pull out any debris wrapped around it — hair, leaves, pine needles, and plastic are common culprits
- Use needle-nose pliers or a bent coat hanger for stubborn debris
- Reassemble and test
Warning: Never reach into the pump with the power on. Pool pumps can start automatically on a timer.
Step 8: Verify Valve Positions
If you have multiple skimmers, a main drain, or a suction-side pool cleaner, you’ll have valves controlling flow from each source. Incorrect valve positions starve your skimmer.
What to do:
- Locate your suction-side valves (usually near the pump)
- Identify which valve controls which line
- Make sure the skimmer valve is fully open
- If you have a suction cleaner, its valve may be taking too much flow — try closing it partially
Valve rule of thumb: Your skimmer should receive at least 60-70% of total suction flow. If your main drain valve is wide open and your skimmer is half-closed, that’s your problem.
When to Call a Professional
Some issues require expert help:
- Underground pipe leaks or breaks — requires pressure testing and possibly excavation
- Pump motor failure — humming but not starting, or not running at all
- Cracked pump housing — usually requires full pump replacement
- Persistently low suction after all troubleshooting — could indicate partial pipe collapse or root intrusion
A pool service call typically runs $75-150 for diagnosis. Worth it if you’ve worked through every step above with no improvement.
Preventing Future Suction Problems
Once you’ve fixed the issue, keep it from coming back:
Weekly maintenance:
- Empty skimmer basket at least twice per week (daily during heavy leaf season)
- Check pump strainer basket weekly
- Monitor filter pressure and log it
- Verify water level hasn’t dropped
Monthly maintenance:
- Inspect skimmer weir door operation
- Lubricate pump lid O-ring
- Check for early signs of basket cracks
Seasonal maintenance:
- Deep clean filter at the start and end of swim season
- Inspect all visible plumbing for cracks or deterioration
- Replace worn O-rings before they fail
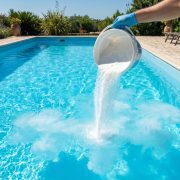
Proper water chemistry also protects your equipment. Balanced pH (7.2-7.6) and correct chlorine levels prevent damage to plastic components and O-rings. Use the Pool Chemical Calculator app to keep everything dialed in.
How Water Chemistry Affects Your Equipment
Here’s something most troubleshooting guides skip: unbalanced water chemistry accelerates equipment failure.
Low pH (acidic water):
- Corrodes metal components in pumps and heaters
- Degrades rubber O-rings and gaskets
- Weakens plastic basket materials
High calcium hardness:
- Causes scale buildup inside pipes, reducing diameter
- Clogs impellers over time
- Creates rough surfaces where debris catches
Knowing your pool’s exact volume helps you dose chemicals accurately. Overdosing is just as harmful as underdosing.
Stay updated on equipment care and chemical management through the Pool Calculator news section.
Frequently Asked Questions
Why does my skimmer have no suction but my pump is running?
Your pump can run perfectly while producing zero skimmer suction. The most likely causes are: a closed or partially closed valve on the skimmer line, a massive air leak preventing the pump from pulling water effectively, or a completely clogged impeller. With the pump running, check that the skimmer valve is fully open. Then look for continuous air bubbles in the pump housing — that indicates an air leak upstream.
How do I increase suction to my pool skimmer?
To increase skimmer suction: clean both baskets (skimmer and pump strainer), backwash or clean your filter, ensure water level is at the middle of the skimmer opening, close or partially close the main drain valve to redirect more suction to the skimmer, and verify no air leaks exist in the suction line. If you have a suction-side cleaner, reducing its valve position will increase skimmer pull.
Can a bad impeller cause low skimmer suction?
Absolutely. A worn impeller with eroded vanes can reduce water flow by 50% or more. Impellers wear out over time, especially if your water chemistry runs acidic (low pH). If your pump sounds normal and nothing is clogged but suction remains weak across the entire system, the impeller may need replacement. This is a $30-50 part but requires disassembling the pump — most homeowners hire a tech for this repair.
Why does my skimmer only have weak suction sometimes?
Intermittent suction problems usually point to an air leak that only occurs under certain conditions, fluctuating water level (drops overnight due to evaporation or a small leak), or a variable-speed pump running at too low an RPM during certain programmed periods. Also check if your suction-side cleaner operates on a timer — when it activates, it pulls suction away from the skimmer.
Should both skimmers have equal suction?
Not necessarily. If your skimmers are at different distances from the pump, the closer one will naturally have slightly stronger suction. However, a dramatic difference indicates a problem — likely a clog or air leak in the weak skimmer’s line, or a valve positioned incorrectly. Close the strong skimmer’s valve partially and see if the weak one improves.
Get Your Pool Running Right
Low skimmer suction is frustrating, but it’s usually fixable without professional help. Work through the steps above methodically, and you’ll pinpoint the problem in most cases.
Once your circulation is flowing properly, maintaining balanced chemistry becomes much easier. Your filter works more efficiently, chemicals distribute evenly, and your water stays clear with less effort.
Use the free Pool Chemical Calculator to take the guesswork out of chemical dosing. Enter your pool size and current readings, and get exact amounts for chlorine, pH adjustment, alkalinity, and more.
As an Amazon Associate, Pool Chemical Calculator earns from qualifying purchases. Accurate readings make every chlorine, pH, alkalinity, calcium, and CYA dose safer. Raises calcium hardness to reduce corrosive water risk in plaster, concrete, and equipment. Raises free chlorine quickly without adding stabilizer, which is useful when CYA is already high.Recommended pool supplies


Get exact pool chemical doses
Pool Chemical Calculator turns your test readings, pool volume, and target levels into exact treatment amounts for chlorine, pH, alkalinity, calcium, stabilizer, salt, and more.
Open the Pool Chemical Calculator app for iOS, Android, or web.