White Flakes in Pool Water: What They Are and How to Get Rid of Them
You’re floating in your pool on a sunny Saturday afternoon when you notice something unsettling — tiny white flakes drifting through the water like underwater snow. They’re sticking to your skin, clogging your filter, and making your crystal-clear pool look like a shaken snow globe. If you’re dealing with white flakes in pool water, you’re not alone. This is one of the most common (and frustrating) problems pool owners face, especially after adding calcium-based chemicals or when water chemistry gets out of balance.
Quick answer
White Flakes in Pool Water: What They Are and How to Get Rid of Them: You’re floating in your pool on a sunny Saturday afternoon when you notice something unsettling — tiny white flakes drifting through the water like underwater snow. They’re sticking to your skin, clogging your filter.
Here’s the good news: those mysterious flakes aren’t dangerous, and you can eliminate them with the right approach. The tricky part? Figuring out what type of flakes you’re dealing with. Because that white stuff floating around could be one of three completely different things — and each requires a different fix.
Let’s figure out exactly what’s contaminating your pool and get your water back to pristine condition.
What Are Those White Flakes? The Three Main Culprits
Before you start dumping chemicals into your pool or panic-calling a professional, you need to identify what you’re actually looking at. White flakes typically fall into three categories, and a simple home test can tell you which one you’re dealing with.
Calcium Scale (Calcium Carbonate)
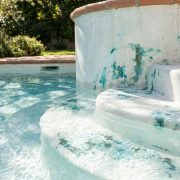
This is the most common cause of white flakes in residential pools. When your water’s calcium hardness climbs above 400 ppm or your pH exceeds 7.8, calcium can’t stay dissolved anymore. It precipitates out of the water and forms those annoying white particles.
Think of it like sugar in iced tea. You can dissolve a lot of sugar in hot tea, but once it cools down, some of that sugar falls out and settles at the bottom. Same concept with calcium — when conditions change, it can’t stay dissolved.
Signs it’s calcium scale:
– Flakes feel gritty or chalky between your fingers
– You notice white buildup on your tile line
– Your pool surfaces feel rough or sandpapery
– Water has been consistently over 82°F
Biofilm Flakes (White Water Mold)
This one’s a bit grosser. White water mold is a naturally occurring fungus that forms slimy, tissue-like flakes. It’s not algae, and it won’t turn your pool green. But it loves hiding in your plumbing, filter, and anywhere water sits stagnant.
Signs it’s biofilm:
– Flakes feel slimy or mucus-like (sorry, there’s no pleasant way to describe it)
– You smell a musty odor near your pool equipment
– Flakes reappear within days of removal
– You’ve recently had your pool closed for a while or dealt with low chlorine
Efflorescence Deposits
If you have a plaster, pebble, or concrete pool surface, efflorescence might be your issue. This happens when water seeps through your pool’s surface, picks up calcium from the concrete, and deposits it back into the water as flakes.
Signs it’s efflorescence:
– You have a newer plaster pool (less than 2 years old)
– Flakes appear mostly near walls or the floor
– White streaks or patches visible on pool surfaces
– Problem started shortly after resurfacing
The Vinegar Test: Identify Your Flakes in 60 Seconds
Here’s a quick way to figure out what you’re dealing with. Grab a small cup, scoop up some flakes, and add a splash of white vinegar.
If the flakes fizz and dissolve: You’ve got calcium scale. The acid in vinegar reacts with calcium carbonate, causing that fizzing action.
If the flakes don’t react and stay slimy: That’s biofilm/white water mold. Time for a different approach.
If the flakes partially dissolve but leave residue: Likely efflorescence mixed with other minerals.
Now that you know what you’re fighting, let’s fix it.
How to Remove Calcium Scale Flakes
Calcium scale is stubborn, but it’s absolutely manageable with the right process. Plan to spend about 3-4 hours on this project, spread over a day or two.
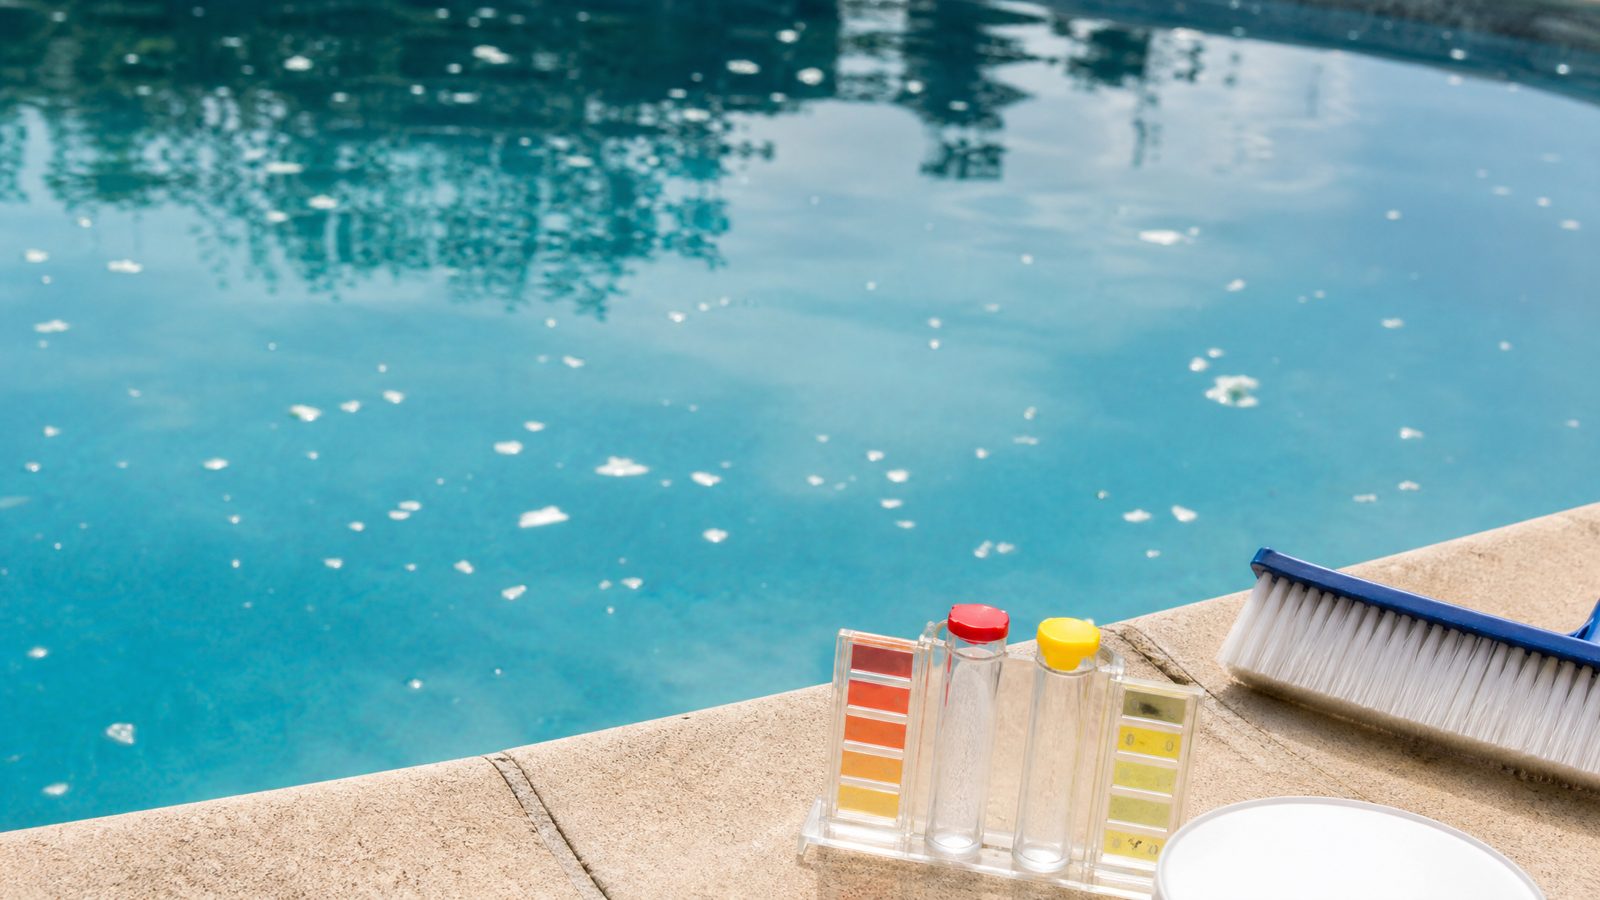
Step 1: Test and Record Your Current Levels
You can’t fix what you can’t measure. Test for:
- pH (ideal: 7.2-7.6)
- Calcium hardness (ideal: 200-400 ppm)
- Total alkalinity (ideal: 80-120 ppm)
- Cyanuric acid (ideal: 30-50 ppm)
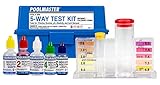
A quality test kit like the Taylor K-2006 Complete Test Kit gives you accurate readings for all these levels. The cheap test strips from the dollar store? They’ll get you in the ballpark, but they’re not precise enough for troubleshooting problems like this.
Step 2: Lower Your pH
High pH is usually the main trigger for calcium precipitation. You want to bring it down to around 7.2 — the lower end of the safe range.
Add muriatic acid or dry acid (sodium bisulfate) according to your pool’s volume. For a 15,000-gallon pool with pH at 7.8, you’ll need approximately 26 oz of muriatic acid to drop it to 7.2. Run your pump for 2 hours, then retest.
Step 3: Brush Everything
Those flakes didn’t just appear in the water — they’re also coating your pool surfaces. Grab a stiff nylon brush (or stainless steel for plaster pools) and brush the walls, floor, steps, and especially the waterline.
Brush toward the main drain so your filter can capture the loosened particles. Spend at least 15-20 minutes on this step. Your arms will complain, but thorough brushing makes a huge difference.
Step 4: Run Your Filter Continuously
Keep your pump running 24/7 until the water clears. Check your filter pressure gauge — when it rises 8-10 psi above normal, it’s time to clean or backwash.
For severe cases, you might need to clean your filter 2-3 times during this process. Cartridge filters in particular can get overwhelmed by calcium flakes.
Step 5: Consider a Clarifier or Flocculant
If flakes are too fine for your filter to catch, a clarifier helps clump them together into larger particles. Add the recommended dose based on your pool volume and run the pump for 8 hours.
For really stubborn cases, flocculant (also called “drop-out” or “pool floc”) makes particles sink to the bottom where you can vacuum them directly to waste — bypassing the filter entirely.
Step 6: Address the Root Cause
Removing existing flakes is only half the battle. You need to prevent them from coming back:
- If calcium hardness exceeds 400 ppm: Partially drain and refill with fresh water. There’s no chemical that removes calcium — dilution is the only solution.
- If your source water is hard: Consider using a hose filter when adding water, or look into a reverse osmosis service for your pool.
- If pH keeps climbing: Check your total alkalinity. High TA (above 120 ppm) constantly pushes pH upward.
How to Eliminate White Water Mold (Biofilm)
This requires a more aggressive approach because biofilm isn’t just floating in your water — it’s hiding in your plumbing, filter housing, and every nook of your equipment.
Step 1: Quadruple Shock Your Pool
Biofilm laughs at normal chlorine levels. You need to hit it hard. Add enough chlorine to reach 30 ppm — yes, really. For a 15,000-gallon pool, that’s about 5 pounds of calcium hypochlorite shock.
Keep the pump running continuously for at least 24 hours. This isn’t a normal shock treatment; it’s chemical warfare against fungus.
Step 2: Clean Every Single Thing
While your shock treatment circulates:
- Remove and soak all ladders, rails, and removable equipment in a 10:1 water-to-bleach solution
- Clean skimmer baskets in the same solution
- Open your pump strainer basket and scrub it out
- Remove pool toys, floats, and cleaning equipment for separate sanitization
Biofilm spreads through contact. Anything that touches your pool water is potentially contaminated.
Step 3: Deep Clean Your Filter
Your filter is biofilm’s favorite hiding spot.
For cartridge filters: Remove the cartridge and soak it overnight in a filter cleaning solution. Consider replacing it if it’s over 12 months old.
For sand filters: Backwash thoroughly, then add a sand filter cleaner through the skimmer with the pump off. Let it soak for 8 hours before backwashing again.
For DE filters: Completely disassemble, clean each grid manually, and replace the DE powder.
Step 4: Maintain High Chlorine for 72 Hours
Keep your free chlorine at 20+ ppm for three full days. Test every 12 hours and add more shock as needed — chlorine depletes quickly when fighting biofilm.
After 72 hours, let chlorine naturally drop to normal levels (1-3 ppm) before swimming.
Step 5: Add a Preventive Enzyme Treatment
Enzyme-based products like Natural Chemistry Pool Perfect + PHOSfree break down organic compounds that feed biofilm. Add weekly as a maintenance dose to prevent recurrence.
How to Handle Efflorescence Flakes
Efflorescence from plaster or concrete surfaces requires patience more than aggressive treatment.
For New Plaster Pools (Under 2 Years)
Some efflorescence is normal during the curing process. Your plaster is still releasing calcium as it hardens. This typically resolves within 6-12 months.
In the meantime:
– Brush your pool walls and floor daily for the first month
– Keep pH between 7.2-7.4 (slightly lower than normal)
– Maintain calcium hardness at 200-250 ppm
– Run your pump 12+ hours daily
For Older Pools with New Efflorescence
If your established pool suddenly develops efflorescence, you might have a leak or crack allowing water penetration. Inspect for:
- Hairline cracks in plaster
- Deteriorating grout around tiles
- Gaps where fittings meet the pool surface
Small cracks can be patched with underwater pool putty. Larger issues need professional assessment.
Prevention: Keep White Flakes Gone for Good
Once you’ve cleared up your flake problem, these habits prevent recurrence:
Test Weekly (Minimum)
Check pH, chlorine, and alkalinity every week without exception. Test calcium hardness and cyanuric acid monthly. It takes 5 minutes and saves you from repeating this entire process.
Balance Calcium Hardness Proactively
Keep calcium between 200-400 ppm. If you live in an area with hard water, test your tap water before adding it to your pool. In some regions, tap water comes out at 400+ ppm calcium — meaning every top-off pushes your levels higher.
Maintain Proper Saturation Index
The Langelier Saturation Index (LSI) tells you whether your water wants to deposit scale or corrode your surfaces. Ideal LSI falls between -0.3 and +0.3.
Calculating LSI manually involves temperature, pH, alkalinity, calcium hardness, and TDS. Or you can use a free pool calculator that does the math for you.
Don’t Let Chlorine Crash
Biofilm and white water mold thrive when chlorine drops below 1 ppm. This happens more than you’d think — after heavy rain, lots of swimmers, or forgetting to add chlorine for a week (no judgment, it happens).
A floating chlorine dispenser like the U.S. Pool Supply Floating Dispenser provides steady chlorination between your regular treatments.
When to Call a Professional
Most white flake problems are totally DIY-solvable. But consider calling in help if:
- Flakes return within 2 weeks despite proper treatment
- You suspect plaster damage or structural issues
- Your water stays cloudy even after filtration and chemical balancing
- You’re adding chemicals correctly but levels won’t stabilize
A professional pool service can identify issues you might miss, like a cracked plumbing line harboring biofilm or equipment problems affecting water chemistry.
Get Your Water Back on Track
White flakes in pool water look alarming, but they’re fixable. The key is correct identification — use that vinegar test — followed by the right treatment for your specific situation.
For calcium scale, lower your pH and address calcium hardness. For biofilm, shock hard and sanitize everything. For efflorescence, maintain patience and proper water balance while your surfaces cure.
Need help calculating exactly how much chemical to add for your pool size? Use Pool Chemical Calculator to take the guesswork out of water balancing. Enter your current readings and pool volume, and you’ll get precise dosing recommendations for pH, alkalinity, calcium hardness, chlorine, stabilizer, salt, and more in seconds. No more math, no more over-adding chemicals, no more wasted money.
???? iPhone / iPad: https://itunes.apple.com/us/app/pool-chem-calculator/id1453351222
???? Android: https://play.google.com/store/apps/details?id=com.poolchemicalcalculator.poolcalc
???? Full guide: https://poolchemicalcalculator.com/news/white-flakes-in-pool-water/
Your pool should be for relaxing — not for floating science experiments.
Frequently Asked Questions
Are white flakes in my pool dangerous to swim in?
Calcium scale flakes aren’t harmful — they’re just calcium carbite minerals. You might notice dry skin or irritation, but there’s no health risk. White water mold isn’t toxic either, but it indicates sanitation problems and can harbor bacteria. Address mold quickly not because the flakes themselves are dangerous, but because the conditions allowing them to grow could let harmful bacteria thrive too.
Can I vacuum up white flakes without draining my pool?
Yes, but vacuum to waste rather than through your filter. Set your multiport valve to “waste” position (bypassing the filter) and vacuum flakes directly out of the pool. You’ll lose some water in the process — typically 1-2 inches — but you won’t clog your filter or circulate the flakes back into the pool.
How long does it take for white flakes to clear up completely?
Calcium scale typically clears within 3-7 days with proper treatment and continuous filtration. Biofilm takes longer — expect 7-14 days of treatment and monitoring before you’re confident it’s eliminated. Efflorescence from new plaster may continue intermittently for 6-12 months as the surface cures.
Why do white flakes keep coming back after I clean them?
Recurring flakes mean you’re treating symptoms, not causes. For calcium scale, your water chemistry is still unbalanced — likely high pH, high calcium hardness, or both. For biofilm, there’s probably a contaminated zone you haven’t sanitized (check pool toys, cleaning equipment, and inside your filter housing). Address the root cause, not just the visible flakes.
Does pool shock cause white flakes?
It can. Calcium hypochlorite shock (the most common type) adds calcium to your pool. If your calcium hardness is already high and you shock frequently, you’re pushing levels toward scale formation. Consider using dichlor or liquid chlorine for shocking instead — neither adds calcium. Check your calcium hardness before shocking if you’ve had flake issues.
As an Amazon Associate, Pool Chemical Calculator earns from qualifying purchases. Accurate readings make every chlorine, pH, alkalinity, calcium, and CYA dose safer. Lowers high pH and helps bring alkalinity down when used carefully. Fast daily checks between full liquid tests, especially during heavy swim season.Recommended pool supplies

Get exact pool chemical doses
Pool Chemical Calculator turns your test readings, pool volume, and target levels into exact treatment amounts for chlorine, pH, alkalinity, calcium, stabilizer, salt, and more.
Open the Pool Chemical Calculator app or download it from the App Store and Google Play.