How to Lower CYA Levels: The Ultimate Guide to Fixing Over-Stabilization

If you’ve been following our 2025 guide to pool chemistry, you know that Cyanuric Acid (CYA) is basically “sunscreen” for your chlorine. It’s essential for protecting your sanitizer from being evaporated by the sun’s UV rays. But there is a very real tipping point where “a little bit of help” turns into a “chemical lockdown.”

When your CYA levels climb too high—a condition known as over-stabilization—your chlorine becomes trapped. It’s still in the water, but it’s chemically “handcuffed” and unable to kill algae or bacteria. If you’re staring at a green pool despite having “high” chlorine readings, you likely have a CYA problem.

In this guide, we’ll look at the safest, most effective ways to lower your stabilizer levels and get your pool back into the safety zone.

The Over-Stabilization Trap: Why High CYA is a Maintenance Nightmare

In the world of the Model Aquatic Health Code (MAHC), the recommended limit for CYA is often 50 ppm, with some residential pros suggesting up to 30–50 ppm for standard pools. Once you cross the 100 ppm mark, you are in the danger zone.

The problem is that most common chlorine products—specifically “Trichlor” pucks and “Dichlor” shock—are “stabilized.” This means they contain CYA. Every time you add a puck to your feeder, you are permanently increasing your CYA level. Unlike water, CYA does not evaporate. It only leaves your pool through splash-out, backwashing, or a physical drain.

High CYA leads to:

  • Chlorine Ineffectiveness: You might need 10 ppm of chlorine just to do the work that 2 ppm would do at lower CYA levels.

  • Cloudy Water: Fine particles aren’t filtered as easily when the chemistry is out of whack.

  • Algae Blooms: Even with chlorine present, algae can thrive because the sanitizer is too slow to react.

How to Test for High CYA Accurately

Before you take drastic measures, you need an accurate reading. Many “test strips” struggle to differentiate between 100 ppm and 150 ppm. For a true “source of truth,” use a DPD test kit with a turbidimetric (cloudy water) test or a digital kit like the LaMotte SpinTouch.

Pro Tip: If your test shows the maximum reading immediately, perform a “dilution test.” Mix one part pool water with one part tap water, test that mixture, and multiply the result by two. This gives you a much clearer picture of just how high your levels actually are.

The Gold Standard: The Drain and Refill Method

Currently, the only 100% reliable way to lower CYA is to remove a portion of the high-CYA water and replace it with fresh water.

1. Calculate the Percentage

If your CYA is at 100 ppm and you want it at 50 ppm, you need to replace 50% of your water. The Pool Chemical Calculator can help you determine your total pool volume so you know exactly how much water you’re moving.

2. The Safe Way to Drain

  • Never drain a pool completely without professional guidance. Hydrostatic pressure from the ground can literally pop a pool out of the earth or cause liners to shrink and tear.

  • The “Salami Slice” Approach: If you need to replace 50%, do it in two or three smaller sessions (20% at a time). Drain a foot or two, refill, circulate for 24 hours, and repeat. This is much safer for your pool’s structural integrity.

3. Use the “Water Exchange” Method

If you have a concrete pool, you can sometimes “exchange” water by placing a garden hose in the deep end while simultaneously pumping water out from the surface. Since high-CYA water is often cooler and denser, it tends to settle, allowing you to pull out the “bad” water while adding the “good.”

Alternative Solutions: CYA Reducers and Reverse Osmosis

You may see “CYA Reducer” packets at the store. These use specialized enzymes to “eat” the cyanuric acid.

  • The Catch: These are notoriously finicky. They require specific water temperatures (usually above 70°F), a pH around 7.2, and zero chlorine in the water to work. For most homeowners, the cost and the narrow window of success make draining and refilling the more practical choice.

  • Reverse Osmosis (RO) Filtration: In drought-prone areas like Arizona or California, mobile RO trailers can filter your water at the curb, removing CYA and calcium without wasting water. It’s expensive but eco-friendly.

How to Prevent CYA from Climbing Again

Once you’ve hit that target 30–50 ppm range, keep it there by changing your habits:

  • Switch to Unstabilized Chlorine: Use Liquid Chlorine (Sodium Hypochlorite) or Cal-Hypo for your weekly sanitization. Neither of these contains CYA.

  • Limit the Pucks: Use Trichlor pucks only when you’re going on vacation or if you specifically need to raise your CYA.

  • Monitor Monthly: Use the Pool Chemical Calculator to log your CYA levels once a month. Catching a climb early is much easier than fixing a 150 ppm disaster.

Conclusion: Take Control of Your Stabilizer

High CYA is the “silent killer” of pool clarity. It’s frustrating to spend money on chlorine that isn’t working, but by following a disciplined drain-and-refill schedule, you can reset your chemistry and enjoy a safer, clearer swim.

Don’t guess your dosage. Use the Pool Chemical Calculator to track your CYA trends and calculate exactly how much water you need to exchange to hit your goals.

Ready to fix your water? Download the Pool Chemical Calculator today to get your pool back in balance! Download on the Google Play Store


Internal Links to Explore:


Recommended Products

As an Amazon Associate, we earn from qualifying purchases.

The LSI Calculator Guide: Protecting Your Pool Surface from the Inside Out

In our previous deep dives into pool chemistry, we covered the “Big Three”—pH, Chlorine, and Alkalinity. But if you really want to graduate from “pool owner” to “water master,” there is one metric that rules them all: the Langelier Saturation Index (LSI).

Have you ever noticed white, crusty deposits on your tile line? That’s scale. Or perhaps you’ve seen “pitting” or rough patches on your plaster? That’s etching. Both are signs that your water is “unbalanced,” and no, pH alone won’t tell you the whole story. The LSI is the true measure of whether your water is corrosive, scale-forming, or perfectly neutral.

What is the LSI? The Science of “Hungry” Water

The Langelier Saturation Index was developed to predict whether water will deposit calcium carbonate or dissolve it. Think of your pool water like a cup of coffee. You can only dissolve so much sugar into that coffee before it starts settling at the bottom.

Your pool water has a “saturation point” for calcium.

  • Aggressive Water (Negative LSI): The water is “under-saturated.” It is hungry for calcium and will literally eat the plaster or grout out of your pool walls to satisfy its appetite.

  • Scale-Forming Water (Positive LSI): The water is “over-saturated.” It has more calcium than it can hold, so it spits the excess out onto your pipes, heaters, and tiles.

The Six Factors of the LSI Equation

Unlike pH, which is a single measurement, the LSI is a calculation based on six different variables. This is why a digital Pool Chemical Calculator is your best friend—doing this math by hand is a headache!

  1. pH: The most volatile factor. Even a small change in pH significantly swings your LSI.

  2. Water Temperature: Cold water is more corrosive; hot water is more scale-forming. This is why pools often etch in the winter and scale in the summer.

  3. Calcium Hardness: The amount of dissolved calcium already in the water.

  4. Total Alkalinity: The “buffer” that keeps your pH stable.

  5. Cyanuric Acid (CYA): High stabilizer levels actually affect your alkalinity reading, requiring a “correction” in the LSI formula.

  6. Total Dissolved Solids (TDS): The sum of everything dissolved in the water (salts, minerals, etc.).

Why the “Standard Range” Can Be Deceptive

Most pool stores tell you to keep your pH at 7.4. But did you know that if your water is 50°F in the winter, a pH of 7.4 might actually be corrosive? Conversely, in a 90°F hot tub, that same 7.4 might cause scaling.

The LSI teaches us that “ideal levels” are relative. The goal is a final LSI score between -0.30 and +0.30.

  • 0.00 is perfect equilibrium.

  • Below -0.30: You risk permanent damage to your pool surface and equipment (think leaking heaters).

  • Above +0.30: You risk clogged filters and “sandpaper” walls.

Using the LSI to Save Money and Equipment

By balancing for LSI rather than just chasing individual numbers, you extend the life of your pool significantly.

  • Protect Your Heater: Scale acts as an insulator, making your heater work harder and eventually causing the copper heat exchanger to fail.

  • Preserve Your Plaster: A high-quality plaster job should last 15–20 years. Corrosive water can ruin it in under five.

  • Salt Cell Efficiency: For saltwater pools, keeping a slightly negative LSI can help prevent the salt cell from “scaling up,” which means less cleaning with harsh acids.

How to Master LSI with the Pool Chemical Calculator

Manually calculating the LSI involves complex charts and “factor constants.” Fortunately, we live in 2025.

When you use the Pool Chemical Calculator, you simply input your latest test results. The app automatically applies the temperature and CYA corrections and gives you an instant LSI score. If you’re in the “red zone,” it tells you exactly which chemical to adjust to bring the water back into a “neutral” state.

Conclusion: Stop Chasing Bubbles, Start Balancing

Mastering the LSI is the ultimate way to be a proactive pool owner. It moves you away from “fixing problems” and toward “preventing damage.” Whether you are winterizing your pool or prepping for a summer heatwave, your LSI score is the only number that truly tells you if your water is healthy for your pool’s “bones.”

Take the guesswork out of your pool’s health. Download the Pool Chemical Calculator today to get your real-time LSI score and protect your investment for years to come.

Download on the Google Play Store


Internal Links to Explore:


Recommended Products

As an Amazon Associate, we earn from qualifying purchases.

Mastering Pool Chemistry: The Ultimate 2026 Guide to Perfect Water Balance


Have you ever pulled off the pool cover only to find a cloudy, green mess staring back at you? Or perhaps you’ve spent a fortune on chemicals, yet the water still irritates your eyes and smells like a chemistry lab. Maintaining a swimming pool can feel like a full-time job, but it doesn’t have to be a guessing game. In 2025, the intersection of public health standards and digital technology has made it easier than ever to achieve crystal-clear water.

Whether you are a new homeowner or a seasoned pro, understanding the “why” behind your water tests is the secret to a stress-free swim season. Let’s dive into the essential pillars of pool maintenance and how you can simplify the process using modern digital tools.

The Regulatory Framework: Evolution of the Model Aquatic Health Code and Industry Standards

Aquatic safety in the United States isn’t just about clear water; it’s about public health. The foundational guidelines are set by the Centers for Disease Control and Prevention (CDC) through the Model Aquatic Health Code (MAHC). The most recent updates, including the 5th Edition released in late 2024, emphasize a scientific approach to preventing recreational water illnesses and injuries.

For the average pool owner, this means that “good enough” is no longer the standard. These regulations guide the manufacturing of the chemicals you buy and the testing protocols used by professionals. Following these standards ensures that your sanitizer is actually working to kill bacteria and that your water is safe for your family’s skin and eyes.

The Three Pillars of Pool Water Chemistry: Sanitization, pH, and Total Alkalinity


To keep your water healthy, you must manage three core components. Think of these as a tripod; if one leg is off, the whole thing falls over.

  1. Sanitization (Chlorine): Chlorine is your primary defense against algae and bacteria. You need to maintain a “Free Chlorine” level that is high enough to kill germs but low enough to be safe for swimmers. Remember, “Total Chlorine” isn’t the same as “Free Chlorine”—total includes “Combined Chlorine,” which is the “used up” chlorine that causes that strong chemical smell and eye irritation.

  2. pH Balance: This measures how acidic or basic your water is. Your goal is a pH of 7.4 to 7.6, which is the same as the human eye. If the pH is too high, your chlorine becomes less effective; if it’s too low, the water becomes “aggressive” and can corrode your pool equipment.

  3. Total Alkalinity (TA): Alkalinity acts as a buffer for your pH. It prevents “pH bounce,” where your levels swing wildly after a rainstorm or heavy use. Keeping TA in the 80–120 ppm range ensures your pH stays stable.

Advanced Metrics: Understanding LSI, CYA, and Calcium Hardness

Once you master the basics, you need to look at the factors that protect your pool’s physical structure.

  • Cyanuric Acid (CYA): Also known as “stabilizer,” this acts as sunscreen for your chlorine. Without it, the sun can burn off your chlorine in hours. However, too much CYA (over 50 ppm) leads to “over-stabilization,” making your chlorine effectively useless.

  • Calcium Hardness: This measures the amount of dissolved calcium in the water. If it’s too low, the water becomes “hungry” and will leach calcium out of your pool’s plaster or grout, causing permanent damage.

  • The Langelier Saturation Index (LSI): This is the ultimate “balance” score. It uses an equation involving pH, temperature, and calcium to tell you if your water is aggressive (leaching) or scale-forming (leaving crusty white deposits).

Digital Transformation: The Rise of Smart Testing and Automated Monitoring

Gone are the days of trying to match a tiny strip of paper to a color chart while squinting in the sun. The market for pool water quality testing is shifting toward digital solutions, with a projected value of $615 million by 2031.

Digital test kits and apps, like the Pool Chemical Calculator, remove the human error associated with visual color comparison. For commercial operators, tools like the LaMotte WaterLink SpinTouch provide professional-grade accuracy in under 60 seconds. For homeowners, having a digital “source of truth” means you stop over-treating your pool and start saving money on chemicals.

Common Testing Mistakes and How to Avoid Them

Even with the best kit, small errors can lead to big problems. Avoid these “water test fails”:

  • Sampling from the surface: Always take your water sample from at least 12 inches deep, away from return jets, to get a representative mix of the water.

  • Using expired reagents: Liquid reagents typically last about a year; if they are stored in the sun or heat, they expire even faster.

  • Improper storage: Chemicals and test kits should be kept in a cool, dry place to maintain their chemical integrity.

Economic Drivers and Market Trends in the Water Quality Sector

The pool industry is a significant part of the $563.7 billion outdoor recreation economy. Because of this, we are seeing a massive push toward efficiency. Pool owners are looking for ways to reduce the “cost of ownership,” which has led to a surge in demand for saltwater systems and variable-speed pumps. By using a digital calculator to maintain precise levels, you can extend the life of these expensive components, preventing premature scale buildup or corrosion.

Conclusion: Making Waves with Data-Driven Pool Care

Maintaining a pool shouldn’t feel like a science experiment gone wrong. By focusing on the “Four Pillars” of proactive care—balancing your water, managing your LSI, and using accurate digital tools—you can spend less time testing and more time swimming.

Modern pool care is about being proactive rather than reactive. Instead of waiting for the water to turn green, use the data at your fingertips to keep it perfect year-round.

Ready to stop the guesswork? Take the “math” out of pool maintenance today. Download the Pool Chemical Calculator for precise dosing, easy-to-follow instructions, and a crystal-clear pool all season long. Download on the Google Play Store


Internal Links to Explore:


Recommended Products

As an Amazon Associate, we earn from qualifying purchases.

Understanding the Timing: When to Shock Your Pool After Adding Algaecide

Maintaining a clean and algae-free pool requires a combination of preventive measures and reactive treatments. Algaecide and shock treatments are two essential components of pool maintenance, but understanding the proper timing between these treatments is crucial for maximizing their effectiveness. In this article, we’ll delve into the question of how long you should wait after adding algaecide before shocking your pool, providing insights to help you keep your pool water clean, clear, and algae-free.

The Role of Algaecide and Shock in Pool Maintenance:

Algaecide is a chemical treatment specifically designed to prevent and control algae growth in pool water. It works by disrupting algae cell membranes, inhibiting photosynthesis, and preventing algae from thriving and multiplying. Algaecide is typically added to the pool water on a regular basis as part of routine maintenance to prevent algae outbreaks and maintain water clarity.

Shock treatments, on the other hand, are powerful oxidizing agents that help eliminate organic contaminants, bacteria, and algae spores from pool water. Shocking the pool involves adding a concentrated dose of chlorine or other oxidizing agents to rapidly raise the chlorine level and sanitize the water. Shock treatments are used as a reactive measure to address existing algae blooms, cloudy water, or chlorine demand spikes.

Timing Considerations: When to Shock After Adding Algaecide

  1. Follow Manufacturer’s Instructions: The timing between adding algaecide and shocking your pool may vary depending on the specific products used. Always read and follow the manufacturer’s instructions on the product labels carefully for guidance on application rates, dosing intervals, and compatibility with other pool chemicals.
  2. Wait at Least 24 Hours: In general, it’s advisable to wait at least 24 hours after adding algaecide before shocking your pool. This allows sufficient time for the algaecide to disperse and circulate throughout the pool water, maximizing its effectiveness in controlling algae growth.
  3. Consider Algaecide Type: The type of algaecide used may influence the timing of shock treatments. Quaternary ammonium-based algaecides, for example, may require longer waiting periods before shocking the pool compared to copper-based algaecides. Refer to the manufacturer’s instructions for specific guidance based on the algaecide type.
  4. Monitor Water Conditions: Pay close attention to water conditions and visual cues to determine if and when shock treatment is needed after adding algaecide. If algae growth persists or water clarity issues persist despite algaecide treatment, it may be necessary to shock the pool to eliminate remaining algae spores and organic contaminants.

Best Practices for Pool Maintenance:

  1. Regular Testing and Monitoring: Maintain proper pool water balance and sanitation levels by regularly testing water chemistry parameters, including pH, chlorine, alkalinity, and cyanuric acid. Monitor water clarity and appearance for signs of algae growth or contamination.
  2. Preventative Maintenance: Incorporate algaecide treatments into your regular pool maintenance routine to prevent algae growth and maintain water clarity. Follow a consistent schedule for adding algaecide and shock treatments as recommended by the manufacturer.
  3. Address Issues Promptly: Address any signs of algae growth, cloudy water, or water chemistry imbalances promptly to prevent further deterioration and potential algae outbreaks. Act quickly to treat and resolve issues using appropriate pool chemicals and treatments.

Conclusion:

Maintaining a clean and algae-free pool requires proper timing and coordination between algaecide and shock treatments. While it’s generally advisable to wait at least 24 hours after adding algaecide before shocking the pool, specific timing may vary depending on the products used and water conditions. By following manufacturer’s instructions, monitoring water conditions closely, and addressing issues promptly, you can effectively control algae growth, maintain water clarity, and enjoy a clean and inviting swimming environment all season long.

???? Recommended Products

Based on the topics covered in this article, here are our top product picks to help you maintain a healthy, sparkling pool:

As an Amazon Associate, we earn from qualifying purchases. Prices are approximate and may vary.

Keeping Ducks Out of Your Pool: Effective Strategies for a Cleaner Pool Environment

Ducks can be charming visitors to your backyard, but when they decide to take a dip in your pool, they can leave behind a messy and potentially unsanitary situation. Duck droppings not only create an unappealing sight but can also introduce bacteria and contaminants to your pool water. In this article, we’ll explore effective strategies for keeping ducks out of your pool and maintaining a cleaner and safer pool environment for you and your family.

Understanding the Attraction of Ducks to Pools:

Ducks are naturally drawn to water sources for bathing, drinking, and foraging for food. Residential pools can be particularly attractive to ducks due to their calm, open water surfaces and surrounding vegetation. Additionally, pools may offer a refuge from predators or harsh weather conditions, making them an appealing destination for ducks seeking shelter.

Effective Strategies for Keeping Ducks Out:

  1. Install Pool Covers or Nets: One of the most effective ways to deter ducks from entering your pool is to install a pool cover or net when the pool is not in use. A sturdy pool cover or net creates a physical barrier that prevents ducks from accessing the water, reducing the likelihood of them landing or swimming in the pool.
  2. Use Visual Deterrents: Visual deterrents, such as floating decoys or reflective objects, can help deter ducks from approaching your pool. Place decoy predators, such as floating alligator or hawk decoys, in and around the pool to create the impression of a potential threat. Additionally, shiny objects like aluminum foil or CDs hung around the pool perimeter can create reflections that may discourage ducks from landing.
  3. Install Motion-Activated Sprinklers or Alarms: Motion-activated sprinklers or alarms can startle ducks and deter them from entering the pool area. These devices detect motion and emit a burst of water or sound when triggered, creating an unpleasant experience for ducks without causing harm.
  4. Trim Vegetation and Remove Attractants: Ducks are attracted to pools surrounded by lush vegetation or areas with food sources nearby. Trim back vegetation around the pool perimeter and remove any food sources, such as fallen fruits or seeds, to make your pool less inviting to ducks.
  5. Maintain Water Quality: Ducks are more likely to be attracted to dirty or stagnant water, as it provides an ideal habitat for feeding and bathing. Maintain proper pool water chemistry and circulation to keep the water clean and clear, reducing the likelihood of ducks visiting your pool.

Conclusion:

Keeping ducks out of your pool requires a combination of proactive measures and deterrent strategies to create an environment that is unappealing to these feathered visitors. By installing pool covers or nets, using visual deterrents, and implementing motion-activated devices, you can effectively discourage ducks from entering your pool area. Additionally, maintaining water quality and removing attractants can further reduce the likelihood of ducks visiting your pool. With these strategies in place, you can enjoy a cleaner and safer pool environment while minimizing the presence of unwanted guests.

???? Recommended Products

Based on the topics covered in this article, here are our top product picks to help you maintain a healthy, sparkling pool:

As an Amazon Associate, we earn from qualifying purchases. Prices are approximate and may vary.

Dealing with Low Cyanuric Acid Levels in Your Pool: Causes and Solutions

Maintaining proper cyanuric acid levels in your pool is crucial for ensuring effective chlorine stabilization and protection against UV degradation. When cyanuric acid levels drop too low, it can compromise the efficiency of chlorine and leave your pool vulnerable to bacterial growth and algae infestation. In this article, we’ll explore the causes of low cyanuric acid levels in pools and provide actionable solutions to address this issue and restore optimal water balance.

Understanding Cyanuric Acid in Pool Water:

Cyanuric acid, also known as stabilizer or conditioner, is a chemical compound commonly used in outdoor pools to stabilize chlorine and protect it from degradation caused by UV sunlight. It forms a protective shield around chlorine molecules, prolonging their lifespan and enhancing their effectiveness in sanitizing pool water. The ideal cyanuric acid level for most pools is between 30 to 50 parts per million (ppm).

Causes of Low Cyanuric Acid Levels:

  1. Dilution from Heavy Rainfall or Backwashing: Heavy rainfall or frequent backwashing can dilute cyanuric acid levels in pool water, leading to a decrease in concentration over time. This is especially common in outdoor pools exposed to weather elements.
  2. Overdilution from Excessive Water Replacement: If you frequently drain and refill your pool water or have a high rate of water evaporation, it can result in the loss of cyanuric acid and other pool chemicals. Over time, this can lead to low cyanuric acid levels in the pool.
  3. Use of Unstabilized Chlorine Products: Using unstabilized chlorine products, such as liquid chlorine or calcium hypochlorite, without supplemental cyanuric acid can contribute to low cyanuric acid levels in the pool. These products do not contain cyanuric acid and can deplete existing levels over time.

Solutions for Increasing Cyanuric Acid Levels:

  1. Add Cyanuric Acid Directly: The most direct solution for increasing cyanuric acid levels is to add cyanuric acid directly to the pool water. Cyanuric acid is typically available in granular or powdered form and can be added directly to the pool according to the manufacturer’s instructions. Be sure to distribute it evenly across the pool surface and allow time for it to dissolve completely.
  2. Use Stabilized Chlorine Products: Switching to stabilized chlorine products, such as dichlor or trichlor, can help maintain cyanuric acid levels in the pool while simultaneously sanitizing the water. These products contain cyanuric acid as an active ingredient, providing ongoing stabilization and protection against chlorine degradation.
  3. Reduce Water Replacement: Minimize the frequency of draining and refilling your pool water to prevent excessive loss of cyanuric acid and other pool chemicals. Implement water conservation measures and address leaks or evaporation issues to reduce the need for water replacement.
  4. Monitor and Adjust Regularly: Test cyanuric acid levels in your pool water regularly using a reliable pool water test kit. Adjust cyanuric acid levels as needed to maintain the recommended range of 30 to 50 ppm, especially during periods of heavy rainfall or water replacement.

Conclusion:

Low cyanuric acid levels in your pool can compromise water balance and chlorine effectiveness, leaving your pool vulnerable to bacterial growth and algae infestation. By understanding the causes of low cyanuric acid levels and implementing appropriate solutions, you can restore optimal water balance and ensure a clean and safe swimming environment for yourself and your family. Be proactive in monitoring cyanuric acid levels and take necessary steps to maintain them within the recommended range, protecting your pool investment and enhancing your swimming experience.

???? Recommended Products

Based on the topics covered in this article, here are our top product picks to help you maintain a healthy, sparkling pool:

As an Amazon Associate, we earn from qualifying purchases. Prices are approximate and may vary.

What to Do If You Find a Tear in Your Pool Liner: A Step-by-Step Guide for Pool Owners

Discovering a tear in your pool liner can be a cause for concern for any pool owner. Whether the tear is small or large, addressing it promptly is essential to prevent further damage and ensure the continued enjoyment of your pool. In this blog post, we’ll provide a comprehensive guide on what to do if you find a tear in your pool liner, including steps to assess the damage, temporary solutions to prevent water loss, and options for repair or replacement.

1. Assess the Damage:

The first step is to assess the extent of the tear and determine whether it can be repaired or if the liner needs to be replaced. Carefully inspect the area around the tear for any signs of stretching, pulling, or additional damage. Small tears or punctures may be repairable, while larger tears or extensive damage may require professional intervention.

2. Temporarily Patch the Tear:

If the tear is small and manageable, you can temporarily patch it to prevent water loss and further damage until a permanent solution can be implemented. Options for temporary patches include waterproof tape, vinyl patch kits, or pool liner repair patches specifically designed for underwater use. Apply the patch carefully and securely over the tear, ensuring a watertight seal.

3. Monitor Water Levels:

After patching the tear, monitor the water level in your pool closely to ensure that the patch is holding and preventing water leakage. If you notice a significant drop in water level or continued leakage despite the patch, it may indicate that the tear is larger than initially thought or that additional repairs are needed.

4. Consider Professional Repair or Replacement:

For larger tears or damage beyond simple patching, it’s advisable to seek professional assistance from a pool repair technician or installer. They can assess the extent of the damage, recommend appropriate repair options, and perform the necessary repairs or replacement of the pool liner. Professional repair ensures that the job is done correctly and effectively, minimizing the risk of future issues.

5. Prevent Future Damage:

Once the tear has been repaired or the liner replaced, take steps to prevent future damage and prolong the lifespan of your pool liner. Avoid sharp objects or rough surfaces that could puncture or tear the liner, and be cautious when handling pool equipment or accessories near the pool walls. Regularly inspect the pool liner for signs of wear, damage, or deterioration, and address any issues promptly to prevent further damage.

Conclusion:

Discovering a tear in your pool liner can be a stressful experience, but with prompt action and proper repair techniques, you can address the issue effectively and ensure the continued enjoyment of your pool. By assessing the damage, temporarily patching the tear, and seeking professional assistance if needed, you can restore your pool liner to optimal condition and prevent future damage. Remember to monitor water levels closely and take precautions to prevent future tears or damage, ensuring that your pool remains a source of relaxation and enjoyment for years to come.

???? Recommended Products

Based on the topics covered in this article, here are our top product picks to help you maintain a healthy, sparkling pool:

As an Amazon Associate, we earn from qualifying purchases. Prices are approximate and may vary.

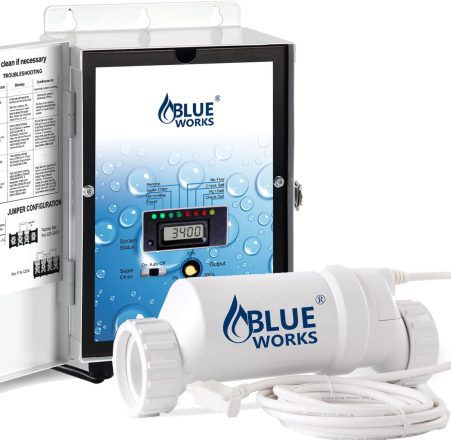
The Benefits of Adding Salt to Your Freshwater Pool: Exploring a Safer and More Comfortable Swimming Experience

When it comes to pool maintenance, many homeowners seek alternatives to traditional chlorine-based systems. One increasingly popular option is converting a freshwater pool into a saltwater pool by adding salt. While it may seem counterintuitive to add salt to a freshwater pool, the benefits of doing so are numerous. In this article, we’ll explore why someone might consider adding salt to their freshwater pool and the advantages it offers for a safer, more comfortable, and lower-maintenance swimming experience.

1. Gentler on Skin and Eyes:

One of the primary reasons for converting to a saltwater pool is the softer feel of the water. Saltwater pools have lower chlorine concentrations compared to traditional chlorine pools, resulting in water that is gentler on the skin and eyes. Swimmers are less likely to experience skin irritation, redness, or dryness after swimming in a saltwater pool, making it a more comfortable experience overall.

2. Reduced Chlorine Smell and Taste:

Saltwater pools produce chlorine through electrolysis, resulting in a more consistent and controlled release of chlorine into the water. This means there is less chloramine formation, which is responsible for the strong chlorine smell and taste often associated with traditional chlorine pools. As a result, swimmers in saltwater pools are less likely to experience unpleasant odors or tastes, enhancing the swimming experience.

3. Lower Maintenance Requirements:

Saltwater pools require less frequent monitoring and maintenance compared to traditional chlorine pools. Once the salt level is properly balanced, the salt chlorinator system automatically generates chlorine as needed, eliminating the need for manual chlorine additions. This can save homeowners time and effort in maintaining their pool, allowing them to spend more time enjoying it.

4. Cost Savings Over Time:

While the initial cost of installing a salt chlorinator system may be higher than traditional chlorine systems, saltwater pools can lead to cost savings over time. With fewer chemical additions and lower maintenance requirements, homeowners can reduce their spending on pool chemicals and maintenance products in the long run. Additionally, the extended lifespan of pool equipment due to reduced exposure to harsh chemicals can further contribute to cost savings.

5. Eco-Friendly Option:

Saltwater pools are often considered a more environmentally friendly option compared to traditional chlorine pools. With fewer chemical additions and lower chlorine concentrations, saltwater pools produce fewer harmful byproducts and reduce the overall environmental impact associated with pool maintenance. Additionally, salt is a natural and abundant resource, making it a sustainable choice for pool sanitation.

Conclusion:

Adding salt to a freshwater pool to convert it into a saltwater pool offers numerous benefits for homeowners seeking a safer, more comfortable, and lower-maintenance swimming experience. From gentler water that is easier on the skin and eyes to reduced chlorine smell and taste, saltwater pools provide a more enjoyable swimming environment for the whole family. With lower maintenance requirements and cost savings over time, saltwater pools are an attractive option for homeowners looking to enhance their pool experience while minimizing the environmental impact. If you’re considering converting your freshwater pool to a saltwater pool, explore the benefits further and consult with a pool professional to determine if it’s the right choice for you.

???? Recommended Products

Based on the topics covered in this article, here are our top product picks to help you maintain a healthy, sparkling pool:

As an Amazon Associate, we earn from qualifying purchases. Prices are approximate and may vary.

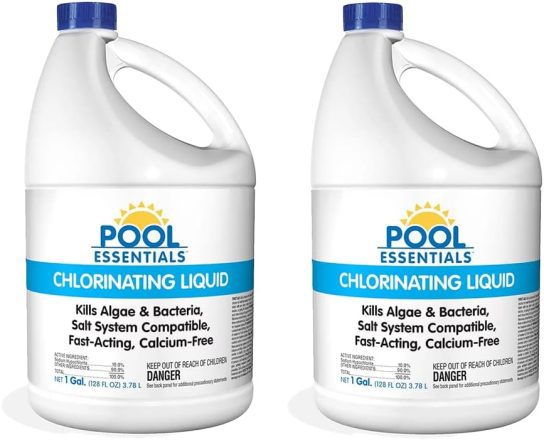
How Much Liquid Chlorine to Add to Pool

Maintaining proper chlorine levels is essential for ensuring clean and safe swimming pool water. Liquid chlorine is a popular choice for pool owners due to its convenience and effectiveness in sanitizing pool water. However, knowing how much liquid chlorine to add and how to add it properly is crucial to avoid over chlorination or under chlorination. In this article, we’ll provide a comprehensive guide on determining the correct dosage of liquid chlorine for your pool and the best practices for adding it to maintain optimal water quality.

Calculating the Proper Dosage of Liquid Chlorine:

    1. Test Your Pool Water: Before adding liquid chlorine to your pool, use a reliable pool water test kit to measure the current chlorine level. The ideal chlorine range for most pools is between 1.0 to 3.0 parts per million (ppm).
    2. Determine Required Dosage: Calculate the amount of liquid chlorine needed to raise the chlorine level to the desired range based on your pool’s volume. Refer to a chlorine dosing chart or use an online calculator to determine the appropriate dosage. https://poolchemicalcalculator.com/Pool-Free-Chlorine-Calculator.html
    3. Consider Chlorine Demand: Factors such as sunlight exposure, bather load, and water temperature can affect chlorine demand. Adjust your dosage accordingly to compensate for these factors and maintain adequate sanitation.

How to Add Liquid Chlorine to Your Pool:

  1. Choose the Right Time: It’s best to add liquid chlorine to your pool in the evening or at night to minimize sunlight exposure, which can cause rapid chlorine degradation. This allows the chlorine to work more effectively and last longer in the water.
  2. Pre-Dilute for Even Distribution: To ensure even distribution of chlorine throughout the pool water, pre-dilute the liquid chlorine in a bucket of water before adding it to the pool. This helps prevent localized over chlorination and minimizes the risk of damaging pool surfaces or equipment.
  3. Pour Diluted Chlorine Slowly: With the pool pump running, slowly pour the diluted liquid chlorine solution around the perimeter of the pool while walking around the edge. Avoid pouring the chlorine directly into the skimmer or near pool fixtures to prevent damage.
  4. Brush Pool Surfaces: After adding liquid chlorine to the pool, use a pool brush to gently brush the pool surfaces, including walls and floors. This helps distribute the chlorine evenly and ensures thorough mixing with the pool water.
  5. Wait Before Swimming: Allow sufficient time for the liquid chlorine to disperse and mix with the pool water before swimming. This typically takes about 30 minutes to 1 hour, depending on the circulation and filtration system.
  6. Monitor Chlorine Levels: After adding liquid chlorine to the pool, retest the chlorine levels periodically to ensure they remain within the recommended range. Adjust the dosage as needed to maintain proper sanitation and water quality.

Safety Precautions:

  • Wear appropriate protective gear, including gloves and eye protection, when handling liquid chlorine to avoid skin and eye irritation.
  • Store liquid chlorine in a cool, well-ventilated area away from direct sunlight and heat sources.
  • Keep liquid chlorine out of reach of children and pets, and never mix it with other pool chemicals.

Conclusion:

Adding liquid chlorine to your pool is a straightforward process that requires careful calculation and proper dosing to maintain optimal water quality and safety. By following the guidelines outlined in this guide and taking necessary safety precautions, you can effectively sanitize your pool water and enjoy a clean and inviting swimming environment all season long. Remember to test chlorine levels regularly and adjust dosage as needed to keep your pool water balanced and crystal clear.


Recommended Products

As an Amazon Associate, we earn from qualifying purchases.

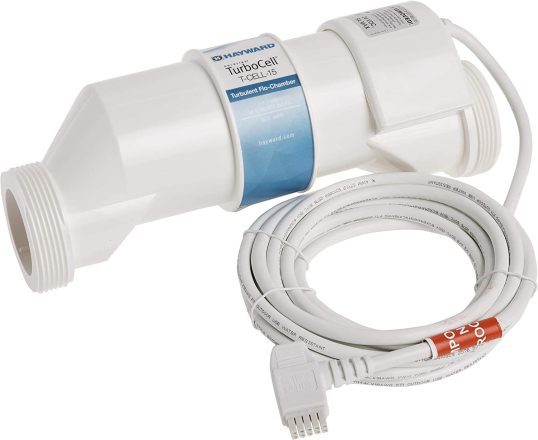
The Complete Guide to Saltwater Pool Maintenance: Tips for Crystal-Clear Water All Season Long

Saltwater pools have gained popularity in recent years due to their softer feel and lower chemical maintenance requirements compared to traditional chlorine pools. However, proper maintenance is still essential to
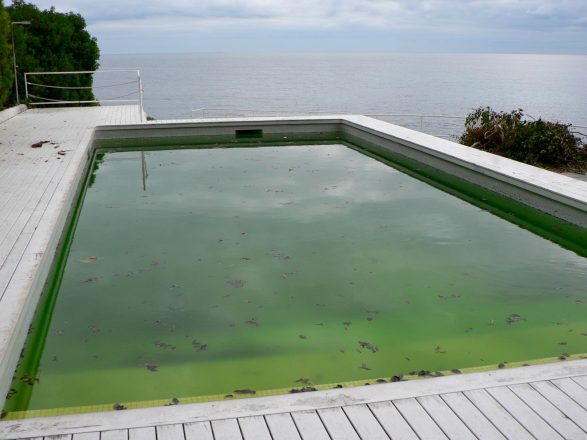
 keep your saltwater pool clean, clear, and inviting for swimming. In this comprehensive guide, we’ll explore the ins and outs of saltwater pool maintenance, including tips and best practices to help you enjoy crystal-clear water all season long.

Understanding Saltwater Pool Maintenance:

Unlike traditional chlorine pools, saltwater pools use a chlorine generator, also known as a salt chlorinator, to produce chlorine from dissolved salt in the water. While saltwater pools require less frequent additions of chlorine compared to traditional pools, they still require regular maintenance to ensure optimal water quality and safety.

Tips for Saltwater Pool Maintenance:

  1. Monitor Salt Levels: Regularly test the salt levels in your pool using a salt test kit or electronic salt meter. The ideal salt level for most saltwater pools is between 2,500 to 3,500 parts per million (ppm). Add salt as needed to maintain the recommended range.
  2. Check Chlorine Levels: Although salt chlorinators generate chlorine automatically, it’s important to monitor chlorine levels regularly using a test kit or electronic tester. Aim for a chlorine level between 1 to 3 ppm to ensure effective sanitation.
  3. Balance pH Levels: Maintain proper pH levels in your pool by testing the water weekly and adjusting as needed using pH increaser (sodium carbonate) or pH decreaser (muriatic acid). The ideal pH range for saltwater pools is between 7.2 to 7.6.
  4. Inspect and Clean the Chlorine Generator: Periodically inspect the salt chlorinator cell for any buildup of scale or debris. Clean the cell as needed using a mild acid solution (vinegar or muriatic acid) to remove scale and maintain efficient chlorine production.
  5. Backwash and Clean the Filter: Regularly backwash or clean your pool filter according to the manufacturer’s recommendations to remove dirt, debris, and contaminants from the water. Clean cartridge filters with a hose or filter cleaner solution, and backwash sand filters as needed to maintain proper filtration.
  6. Skim and Vacuum Debris: Use a skimmer net to remove leaves, insects, and other debris from the surface of the pool regularly. Additionally, vacuum the pool floor and walls weekly to remove sediment and prevent algae growth.
  7. Shock the Pool Periodically: Occasionally shock the pool with a non-chlorine shock or oxidizing shock treatment to oxidize organic contaminants and maintain water clarity. Follow the manufacturer’s instructions for dosage and application.
  8. Inspect and Maintain Equipment: Check pool equipment, including pumps, motors, and valves, regularly for signs of wear or damage. Lubricate o-rings and gaskets as needed, and schedule routine maintenance or repairs as necessary.
  9. Winterize the Pool: If you live in a region with cold winters, winterize your saltwater pool to protect it from freezing temperatures. Lower the water level, clean and winterize the equipment, and add winterizing chemicals as recommended by a pool professional.

Conclusion:

Maintaining a saltwater pool requires regular attention to ensure optimal water quality and safety for swimmers. By following these tips and best practices for saltwater pool maintenance, you can enjoy crystal-clear water and a hassle-free swimming experience all season long. Remember to test water chemistry regularly, clean and maintain equipment, and address any issues promptly to keep your saltwater pool in top condition. With proper care and maintenance, your saltwater pool will provide endless enjoyment for years to come.

???? Recommended Products

Based on the topics covered in this article, here are our top product picks to help you maintain a healthy, sparkling pool:

As an Amazon Associate, we earn from qualifying purchases. Prices are approximate and may vary.