Warm Goodbyes: The Ultimate Guide to Winterizing Your Pool Heater

As the sun-kissed days of summer fade and cooler winds blow in, every pool owner knows it’s time to prep for the off-season. While you might be adept at winterizing your pool, your pool heater – the unsung hero that’s provided you with countless warm swims – needs special attention. Here’s how to ensure it braves the chill and is all set for the next dive season.

1. Why Winterize Your Pool Heater?
Your pool heater is a significant investment and susceptible to damage from frost and freezing conditions. Winterizing it protects the internal components from expanding ice, potential cracks, and ensures its longevity.

2. Steps to Ensuring a Toasty Pool Heater Through Winter:

  • Turn It Off: Begin by turning off the pool heater at the circuit breaker. This ensures safety while you proceed with the winterization process.
  • Cool It Down: If you’ve been using the heater, let it cool down completely. This can take several hours, so be patient.
  • Gas Heaters: If you’re using a natural gas or propane heater, turn off the gas supply. It’s vital to ensure no gas leakage occurs during the colder months.
  • Disconnect & Drain: Disconnect the heater from the plumbing system. Open all drain valves and remove any drain plugs to let out any remaining water. Remember, even a small amount of water can freeze and cause damage.
  • Blow Out the Lines: Using a shop vac, blow out any residual water from the inlet and outlet lines. This step is crucial as water left in the lines can freeze, expand, and crack the heater exchanger.
  • Cover Up: While many pool heaters are built to withstand the elements, covering them can prevent dirt, debris, and especially snow accumulation. Use a breathable cover to avoid condensation buildup, which could lead to corrosion.
  • Check the Manual: Different heater models may have specific winterizing instructions. Always refer to the manufacturer’s manual to ensure you haven’t missed any model-specific steps.

3. Pro Tips for Winter Love:

  • Inspections Are Key: Before winterizing, inspect your heater for any existing damage or issues. This off-season is an excellent time for repairs, ensuring a smooth start come spring.
  • Avoid Fully Sealing: When covering your pool heater, avoid sealing it too tightly. Allow for some airflow to prevent condensation and mildew growth.
  • Winter Checks: Even during the off-season, periodically check your pool heater for signs of pests, which might consider your heater a cozy winter home.

Conclusion:
Giving your pool heater the winter care it deserves ensures that when the sun’s out again, you’re ready for those perfectly warm swims. As with most things in life, a little prevention goes a long way, and with these steps, you’re not just saying goodbye to your heater for the winter; you’re ensuring a warm welcome in the spring. Dive in confidently, knowing you’ve secured many more seasons of delightful warmth!

???? Recommended Products

Based on the topics covered in this article, here are our top product picks to help you maintain a healthy, sparkling pool:

As an Amazon Associate, we earn from qualifying purchases. Prices are approximate and may vary.

Brrr-illiant Pool Care: A Step-by-Step Guide to Winterizing Your Inground Pool

Winter’s frosty embrace may evoke images of cozy firesides and snow-covered landscapes, but for pool owners, it’s also the season to think about protecting their beloved aquatic retreat. With winter approaching, safeguarding your inground pool is essential to avoid damage from freezing temperatures and to ensure a smooth reopening come spring. Dive into this guide to discover the secrets to a perfect pool hibernation!

1. Why Winterize?
Winterizing isn’t just a suggestion; it’s a necessity. Freezing water expands, which can lead to damaged pool components. The process also makes reopening your pool a breeze and reduces potential repair costs.

2. The Steps to Pool Serenity in Winter:

  • Balanced Act: Begin with balancing the water chemistry (pH, alkalinity, and calcium hardness levels). Balanced water protects the pool’s finish from staining and etching.
  • The Last Clean: Thoroughly clean your pool. Remove leaves, debris, and dirt. Use a pool vacuum if necessary. Don’t forget to clean the skimmer and pump baskets.
  • Chlorinate Before Hibernate: Shock your pool to eliminate lingering bacteria and algae. However, don’t shock right before covering; doing so can damage the cover.
  • Water Levels: For areas with harsh winters, drain the water below the skimmer mouth but not entirely. This prevents water from freezing inside the skimmer and causing cracks. For milder climates, you can typically keep the water level unchanged.
  • Drain and Protect: Empty water from the pumps, heaters, chlorinators, and filters to prevent freezing damage. Also, blow out any excess water from the pipes using a shop vac.
  • Safety First: Install a safety cover. Not only does this keep debris out, but it also ensures that children and pets can’t fall into the pool. Remember to use winter cover seals to wrap around the pool and prevent wind from getting under the cover, keeping it snug and safe.
  • Winter Chemical Kit: These kits contain a combination of chemicals that ensure clear water for the reopening. They help control algae growth, maintain pH level, and prevent staining and scale buildup.
  • Secure Loose Objects: Store away all pool toys, ladders, rails, and other accessories that can get damaged in the cold or potentially harm the pool.

3. Extra Tips for the Chilly Season:

  • Peek-A-Boo: Periodically check on your pool during winter, ensuring the cover is secure, and there are no ice formations.
  • Avoiding Temptation: No matter how magical it looks, never walk on a frozen pool.
  • Pool Pillows: For vinyl liner pools, consider inflatable air pillows. They help distribute ice pressure evenly, reducing the risk of liner damage.

Conclusion:
The process of winterizing your inground pool might seem daunting at first, but with a systematic approach and a sprinkle of diligence, you can ensure your pool sleeps soundly through the cold months. Come spring, you’ll be grateful for the time and effort spent, as you dive into crystal-clear waters. Until then, keep dreaming of those sunny pool days, and stay warm!

???? Recommended Products

Based on the topics covered in this article, here are our top product picks to help you maintain a healthy, sparkling pool:

As an Amazon Associate, we earn from qualifying purchases. Prices are approximate and may vary.

Heating Up Troubleshooting: Mastering the Mysteries of Your Pentair Pool Heater

Ah, the luxury of a warm pool, the envy of swimmers on chilly days, all thanks to the wonders of your Pentair pool heater! But what happens when that trusted device starts acting up, leaving you with a cold, unwelcoming pool? Fear not, for this guide is here to demystify the art of troubleshooting your Pentair pool heater. Let’s dive in!

1. The Basics: Understanding Your Pentair Pool Heater Before diving deep into troubleshooting, it’s essential to have a basic understanding of how your heater operates. Pentair heaters, renowned for their efficiency and durability, primarily work by drawing water from your pool, heating it, and then returning it to the pool. This cycle continues until your pool reaches your desired temperature.

2. Common Issues and How to Address Them:

  • The Heater Won’t Turn On:
    • Power Issues: Check if the heater is properly connected to a power source. Ensure circuit breakers are not tripped, and there are no visible damages to power cords.
    • Thermostat Settings: Sometimes, the heater’s thermostat may be set to a temperature lower than the current pool temperature, causing it not to activate. Adjust it to a higher setting.
  • The Heater Shuts Off Unexpectedly:
    • Ventilation: Ensure that the heater’s exhaust vents are not blocked. Poor ventilation can cause the heater to overheat and shut off.
    • Water Flow: A blockage or obstruction in the pool’s circulation system can reduce water flow to the heater. Check and clean the pool’s skimmer baskets and filters.
  • Insufficient Heating:
    • Dirty Filters: A dirty filter can reduce the efficiency of your heater. Clean or replace filters as necessary.
    • Gas Supply: For gas-powered heaters, ensure that there’s a steady supply of gas and that the gas valves are fully open.
  • Error Codes:
    Modern Pentair heaters come equipped with digital displays that show error codes when something’s amiss. It’s essential to refer to your specific model’s user manual for error code definitions and recommended solutions.

3. Maintenance Tips for Longevity:
While troubleshooting can solve many issues, regular maintenance ensures your Pentair heater remains in optimal condition:

  • Regular Cleaning: Clean the heater’s exterior and remove any debris blocking the vents.
  • Professional Check-ups: Consider an annual inspection by a pool professional to catch and address any potential issues early.
  • Winterizing: If you live in an area with freezing temperatures, make sure to winterize your heater properly to prevent any damage.

Your Pentair pool heater is a marvel of modern engineering designed to give you countless hours of warm swimming pleasure. Like any piece of machinery, however, it can encounter hiccups along the way. By equipping yourself with the knowledge to troubleshoot common issues, you’ll be better prepared to address them head-on and get back to enjoying your pool in no time. Remember, when in doubt, it’s always a good idea to consult a pool professional to ensure the safe and efficient operation of your heater. Dive in and stay warm!

???? Recommended Products

Based on the topics covered in this article, here are our top product picks to help you maintain a healthy, sparkling pool:

As an Amazon Associate, we earn from qualifying purchases. Prices are approximate and may vary.

How to Keep Bees and Wasps Out of Your Swimming Pool: Tips and Strategies

Discover effective strategies for keeping bees and wasps away from your swimming pool, ensuring a safer and more enjoyable environment for you and your family.

Bees and wasps are essential for maintaining a healthy ecosystem, but they can pose a threat to swimmers if they invade your swimming pool area. Not only can their stings be painful and potentially dangerous, but their presence can also make it difficult to fully enjoy your pool. In this article, we will share some tips and strategies on how to keep bees and wasps out of your swimming pool, so you can relax and enjoy a safer, pest-free environment.

  1. Remove Attractants

Bees and wasps are attracted to sweet scents, standing water, and blooming flowers. To reduce their presence around your pool, consider the following:

  • Keep food and beverages covered: Use tightly-sealed containers to store food and drink when not in use, and avoid leaving any spilled beverages or crumbs behind.
  • Maintain proper pool chemistry: A well-maintained pool with balanced water chemistry is less likely to attract insects.
  • Avoid flowering plants nearby: Opt for non-flowering plants or ornamental grasses in the landscaping around your pool area to reduce attraction to bees and wasps.
  1. Create a Water Source Away from the Pool

Bees and wasps are often attracted to pools due to their need for water. By providing an alternative water source away from the pool, you can divert their attention:

  • Set up a birdbath or shallow dish filled with water in a location far from your pool.
  • Add rocks or marbles to the water source so that bees and wasps have a place to land and drink safely without drowning.
  1. Use Repellents

Various natural and commercial repellents can help deter bees and wasps from your pool area:

  • Essential oils: Mix a few drops of essential oils like peppermint, eucalyptus, or lemongrass with water in a spray bottle, and spray the solution around the pool area. Bees and wasps dislike the strong scent of these oils.
  • Commercial repellents: Several over-the-counter bee and wasp repellents are available that can be applied to your pool area. Follow the manufacturer’s instructions for proper use.
  1. Install Traps

Bee and wasp traps can be a useful tool for reducing the number of insects near your pool:

  • Purchase commercial traps or create DIY traps using soda bottles, sugary liquid, or a mixture of vinegar, sugar, and salt.
  • Place the traps around the perimeter of the pool area, but not too close, as this may attract more insects to the pool itself.
  • Regularly clean and replace the traps to ensure their effectiveness.
  1. Remove Nests

If you notice a bee or wasp nest near your pool, it’s essential to remove it to prevent future infestations:

  • For small nests, use a pesticide spray designed for bees and wasps. Follow the manufacturer’s instructions and apply the spray at night when the insects are less active.
  • For larger nests or nests in hard-to-reach places, contact a professional pest control company to safely remove the nest.

Keeping bees and wasps out of your swimming pool area is crucial for ensuring a safe and enjoyable environment for you and your family. By following these tips and strategies, you can effectively reduce the presence of these insects and maintain a more peaceful and inviting pool area. As always, prioritize safety when dealing with bees and wasps, and don’t hesitate to consult a professional pest control service for assistance when necessary.

???? Recommended Products

Based on the topics covered in this article, here are our top product picks to help you maintain a healthy, sparkling pool:

As an Amazon Associate, we earn from qualifying purchases. Prices are approximate and may vary.

Understanding Chlorine Levels in Swimming Pools and Spas: The Ultimate Guide

Chlorine plays a vital role in keeping swimming pools and spas clean, safe, and free of harmful microorganisms. Maintaining the proper chlorine levels is essential for ensuring a comfortable swimming experience and preventing issues such as algae growth and waterborne illnesses. In this article, we will discuss the optimal chlorine levels for swimming pools and spas and why it is crucial to monitor and maintain them consistently.

Ideal Chlorine Levels for Swimming Pools and Spas

  1. Free Chlorine

Free chlorine is the active, sanitizing form of chlorine in pool water. It eliminates bacteria, viruses, and organic contaminants, keeping the water clean and safe. The ideal free chlorine level for swimming pools and spas should fall within the following ranges:

  • Swimming Pools: 1.0 – 3.0 ppm (parts per million)
  • Spas: 3.0 – 5.0 ppm
  1. Combined Chlorine

Combined chlorine, also known as chloramines, forms when free chlorine reacts with organic contaminants, such as sweat, urine, and body oils. Chloramines are less effective sanitizers and can cause eye and skin irritation, as well as a strong chlorine smell. The combined chlorine level should be as close to 0 ppm as possible, but no higher than 0.5 ppm.

  1. Total Chlorine

Total chlorine is the sum of free chlorine and combined chlorine. Ideally, the total chlorine level should be equal to the free chlorine level, indicating that there is no combined chlorine present. If the total chlorine level is significantly higher than the free chlorine level, it may be necessary to shock the pool or spa to eliminate chloramines.

Why Monitoring and Maintaining Chlorine Levels is Important

  1. Swimmer Comfort and Health

Proper chlorine levels prevent the growth of harmful bacteria and algae, ensuring a safe and enjoyable swimming environment. High chlorine levels can cause skin, eye, and respiratory irritation, while low levels increase the risk of waterborne illnesses.

  1. Pool and Spa Surface Protection

Maintaining the appropriate chlorine levels helps protect pool and spa surfaces from staining and deterioration caused by algae and bacteria growth.

  1. Equipment Longevity

Proper chlorine levels help prevent the buildup of organic material and scale deposits on pool and spa equipment, such as filters and pumps, ensuring their longevity and efficiency.

  1. Water Clarity

Maintaining optimal chlorine levels helps keep pool and spa water clear and inviting. Low chlorine levels can lead to cloudy water and algae blooms, while high levels may cause the water to turn green or develop a strong chlorine odor.

How to Monitor and Maintain Chlorine Levels

  1. Test Regularly

Use a reliable pool water test kit or test strips to measure chlorine levels at least once a week for swimming pools and twice a week for spas. More frequent testing may be necessary during periods of heavy use, after rainstorms, or when water chemistry is unbalanced.

  1. Adjust Chlorine Levels

If chlorine levels are too low, add a chlorine product, such as tablets, granules, or liquid, following the manufacturer’s recommendations for the appropriate dosage. If chlorine levels are too high, you can lower them by adding a chlorine neutralizer or allowing the sun to naturally dissipate the excess chlorine.

  1. Shock Treatment

Performing a shock treatment, which involves adding a large dose of chlorine, can help eliminate chloramines and restore water clarity. Shock your pool or spa as needed, typically once a week for pools and after every use for spas.

Understanding and maintaining proper chlorine levels in swimming pools and spas is essential for creating a safe, clean, and enjoyable environment for swimmers. By regularly monitoring chlorine levels and making necessary adjustments, you can prevent potential health risks and protect your pool and spa surfaces and equipment. Make sure to invest in a reliable water test kit or test strips and follow the manufacturer’s guidelines for adjusting chlorine levels and performing shock treatments. With consistent attention and care, you can ensure crystal-clear water and a healthy swimming experience for all.


Recommended Products

As an Amazon Associate, we earn from qualifying purchases.

???? Calculate Perfect Pool Chemistry Instantly

Stop guessing — use our free Pool Chemical Calculator to get exact dosing for your pool size.

▶ Google Play
???? App Store
???? Web Calculator


A New Homeowner’s Guide to Using Muriatic Acid in Swimming Pools

Discover the purpose of using muriatic acid in swimming pools and learn how to safely and effectively apply it as a new homeowner.

Introduction

As a new homeowner with a swimming pool, you might be wondering about the different chemicals and treatments required to maintain clean and safe pool water. One such chemical, muriatic acid, is commonly used to adjust pH levels and remove stains in swimming pools. In this article, we will explain why muriatic acid is essential and provide a step-by-step guide on how to safely and effectively use it in your swimming pool.

Why Use Muriatic Acid in Your Swimming Pool?

Muriatic acid, also known as hydrochloric acid, serves two main purposes in pool maintenance:

  1. Adjusting pH levels: Maintaining balanced pH levels (between 7.4 and 7.6) is crucial for ensuring the comfort of swimmers, as well as the effectiveness of sanitizing chemicals such as chlorine. If your pool’s pH level is too high (above 7.6), it can reduce the efficacy of sanitizers, cause cloudy water, and lead to scaling on pool surfaces. Muriatic acid is an effective solution for lowering the pH level in your pool.
  2. Removing stains and cleaning pool surfaces: Muriatic acid can be used to remove stains and deposits from pool surfaces, including plaster, tile, and concrete. The acid dissolves the deposits, allowing them to be scrubbed away easily.

How to Use Muriatic Acid in Your Swimming Pool Safely

Before using muriatic acid, it’s essential to understand the risks associated with handling this potent and potentially dangerous chemical. Always wear protective gear, including gloves, goggles, and a mask, and follow these steps for safe and effective use:


Step 1: Test Your Pool Water

Before using muriatic acid, test your pool’s pH levels using a reliable pool water testing kit. If the pH is above 7.6, you may need to add muriatic acid to lower it. Follow the manufacturer’s recommendations for the ideal pH range for your pool.

Step 2: Determine the Required Amount of Muriatic Acid

Refer to the muriatic acid packaging or consult a pool professional to determine the appropriate amount of acid needed to adjust the pH in your pool. The required quantity will depend on the size of your pool, the current pH level, and the desired pH level.

Step 3: Dilute the Muriatic Acid

In a well-ventilated area, carefully pour the muriatic acid into a large bucket of water, following a 1:10 ratio (1 part acid to 10 parts water). Always add the acid to the water, not the other way around, to avoid a dangerous chemical reaction. Stir the solution gently using a non-metallic object, such as a plastic or wooden rod.

Step 4: Add the Diluted Acid to Your Pool

Turn on your pool’s circulation system to ensure the muriatic acid is evenly distributed throughout the pool. Slowly pour the diluted acid solution into the deep end of the pool, avoiding contact with the pool walls and surfaces.

Step 5: Monitor the pH Levels

Wait for at least 4 hours after adding the muriatic acid, and then test the pH levels again. If the pH is still too high, repeat the process until the desired pH is reached. If the pH is too low (below 7.4), use a pH increaser to raise the pH to the appropriate level.

Conclusion

Muriatic acid is a useful tool for maintaining the proper pH levels in your swimming pool and removing unsightly stains and deposits from pool

surfaces. As a new homeowner, it’s essential to understand the importance of balanced pool water and how to safely handle and use chemicals like muriatic acid.

Always remember to wear protective gear and follow proper safety precautions when handling muriatic acid. By doing so, you can effectively maintain the health and cleanliness of your pool, ensuring a safe and enjoyable swimming experience for you and your family.

In addition to using muriatic acid, maintaining a regular pool maintenance routine, including skimming, vacuuming, and monitoring sanitizer levels, will help keep your pool in pristine condition. By investing time and effort in pool care, you can enjoy the benefits of a sparkling and inviting swimming pool in your new home.

???? Recommended Products

Based on the topics covered in this article, here are our top product picks to help you maintain a healthy, sparkling pool:

As an Amazon Associate, we earn from qualifying purchases. Prices are approximate and may vary.

Pool Clarifier vs. Flocculant: Understanding the Differences and Their Applications

Learn about the differences between pool clarifiers and flocculants, their specific uses, and when to choose one over the other to maintain a clear and sparkling pool.

Maintaining crystal clear water is an essential aspect of pool maintenance. Two common chemical treatments used to achieve this are pool clarifiers and flocculants. Both products serve to remove particles and impurities from your pool water, but they function in different ways and have distinct applications. In this article, we’ll explore the differences between pool clarifiers and flocculants and help you determine which one is best suited for your pool maintenance needs.

Pool Clarifier: Function and Use

A pool clarifier is a chemical product designed to help your pool’s filtration system work more effectively. It works by binding tiny particles, such as dirt, algae, and other debris, into larger clumps called flocs. These flocs are more easily captured by your pool’s filter, resulting in clearer water.

Clarifiers are typically used when the water is slightly cloudy or when there is a higher level of particulate matter present. They are a gentle, gradual solution to improving water clarity, and it may take several days for the clarifier to show significant results.

To use a pool clarifier, simply follow the manufacturer’s instructions for dosage and application. Generally, you will add the recommended amount of clarifier to the pool water, and the circulation system will help disperse the product evenly.

Pool Flocculant: Function and Use

A pool flocculant, also known as a coagulant or floc, is another chemical product designed to clear cloudy pool water. However, it works differently than a clarifier. Flocculants bind particles together into larger flocs, similar to clarifiers, but these flocs become heavy and sink to the pool’s bottom.

Once the particles have settled, they can be vacuumed up manually using a pool vacuum. This process allows for a more rapid and aggressive solution to clearing the water, making it an excellent choice for severely cloudy water or when a quick fix is necessary.


To use a pool flocculant, follow the manufacturer’s instructions for dosage and application. Typically, you will add the recommended amount of flocculant to the pool water, allow the particles to settle overnight, and then vacuum the pool bottom to remove the debris.

Choosing Between Pool Clarifier and Flocculant

When deciding whether to use a pool clarifier or flocculant, consider the following factors:

  1. Severity of Cloudiness: If your pool water is only slightly cloudy, a clarifier may be the best option as it works gently over time. However, if your pool water is extremely cloudy or murky, a flocculant may be more effective for rapid results.
  2. Filtration System: Since clarifiers rely on the pool’s filtration system to remove particles, they work best when your filter is functioning properly. If your filter is not operating optimally or is undersized, a flocculant may be a better choice.
  3. Time and Effort: Using a pool clarifier requires less hands-on effort, as the filtration system does most of the work. On the other hand, using a flocculant requires manual vacuuming after the particles have settled. Consider your availability and willingness to put in the extra effort when choosing between these two products.

Conclusion

Both pool clarifiers and flocculants are effective at removing impurities and improving water clarity, but they have different applications and uses. Consider the severity of the cloudiness, the effectiveness of your pool’s filtration system, and your personal time and effort commitment when deciding which product is best suited for your pool maintenance needs. By choosing the right product for your specific situation, you can efficiently maintain clear and sparkling pool water for a more enjoyable swimming experience.

Remember, maintaining proper water balance, regularly cleaning your pool’s filter, and practicing good pool hygiene will help reduce the need for clarifiers and flocculants. By incorporating these practices into your regular pool maintenance routine, you can minimize the use of chemical treatments and ensure a healthy, clean pool for you and your family to enjoy.

???? Recommended Products

Based on the topics covered in this article, here are our top product picks to help you maintain a healthy, sparkling pool:

As an Amazon Associate, we earn from qualifying purchases. Prices are approximate and may vary.

Inground vs. Above Ground Pools: Comparing Costs and Considerations for a 10,000-Gallon Pool

Discover the average costs of installing a 10,000-gallon inground pool vs. an above ground pool, and explore the pros and cons of each option to make an informed decision.

When planning to install a 10,000-gallon swimming pool, one of the most significant decisions you’ll need to make is whether to choose an inground or an above ground pool. Both options have their pros and cons, and costs can vary significantly. In this article, we will break down the average costs of installing a 10,000-gallon inground pool vs. an above ground pool, and provide insight into the advantages and disadvantages of each type.

Comparing Costs: Inground vs. Above Ground Pools

  1. Inground Pool Installation

The cost of installing a 10,000-gallon inground pool can vary widely based on factors such as materials, location, and customization options. On average, homeowners can expect to spend between $35,000 and $65,000 for a 10,000-gallon inground pool. This cost includes excavation, pool materials (concrete, fiberglass, or vinyl liner), pool equipment, and labor. Additional features, such as waterfalls, lighting, and heating systems, can increase the total cost.

  1. Above Ground Pool Installation

Installing a 10,000-gallon above ground pool is typically less expensive than an inground pool. On average, the cost of an above ground pool ranges from $1,500 to $5,000, depending on the materials and quality of the pool. This cost includes the pool kit, installation, and basic pool equipment. However, it does not cover the cost of additional features or decking, which can add several thousand dollars to the overall expense.

Inground Pools: Pros and Cons

Pros:

  • Greater customization options: Inground pools offer more flexibility in terms of design, shape, and size.
  • Enhanced aesthetic appeal: Inground pools often look more attractive and blend seamlessly into the landscape.
  • Increased property value: In many cases, inground pools can increase the value of your home, making them a more appealing option for potential buyers.
  • Longer lifespan: Inground pools, especially those made from concrete, tend to last longer than above ground pools.


Cons:

  • Higher installation and maintenance costs: Inground pools require a more significant upfront investment and can be more expensive to maintain.
  • More complex installation: Installing an inground pool often requires more time and labor compared to above ground options.
  • Permitting and zoning requirements: Inground pool installations may be subject to stricter local regulations, requiring permits and adherence to specific zoning rules.

Above Ground Pools: Pros and Cons

Pros:

  • Lower installation and maintenance costs: Above ground pools are generally less expensive to install and maintain than inground pools.
  • Easier installation: Most above ground pools can be installed more quickly and with less disruption to your property.
  • More accessible for relocation or removal: If you decide to move or no longer want a pool, above ground pools are easier to disassemble and relocate or remove entirely.
  • Fewer permitting and zoning issues: Above ground pools typically have fewer local regulations to navigate, making the installation process smoother.

Cons:

  • Limited customization options: Above ground pools usually come in standard shapes and sizes, offering fewer customization choices.
  • Less aesthetic appeal: Some homeowners may find above ground pools less visually appealing than their inground counterparts.
  • Shorter lifespan: Above ground pools generally have a shorter lifespan, especially if they are made from lower-quality materials.
  • Potential for lower resale value: In some cases, an above ground pool may not add to the property value and may even detract from it in the eyes of potential buyers.

The decision between installing a 10,000-gallon inground pool or an above ground pool depends on your budget, preferences, and long-term plans. In general, inground pools offer greater customization options, a more attractive appearance, and a longer lifespan, but they come with higher installation and maintenance costs. On the other hand, above ground pools are more budget-friendly, easier to install and remove, but may have a shorter lifespan and limited design choices.

When considering which type of pool is best for you, carefully weigh the pros and cons of each option, and factor in the installation and maintenance costs. Consult with pool installation professionals to get a clearer understanding of the specific costs and requirements involved in your area. By doing thorough research and understanding the implications of your decision, you can make the best choice for your home and lifestyle, and enjoy your new pool for years to come.

???? Recommended Products

Based on the topics covered in this article, here are our top product picks to help you maintain a healthy, sparkling pool:

As an Amazon Associate, we earn from qualifying purchases. Prices are approximate and may vary.

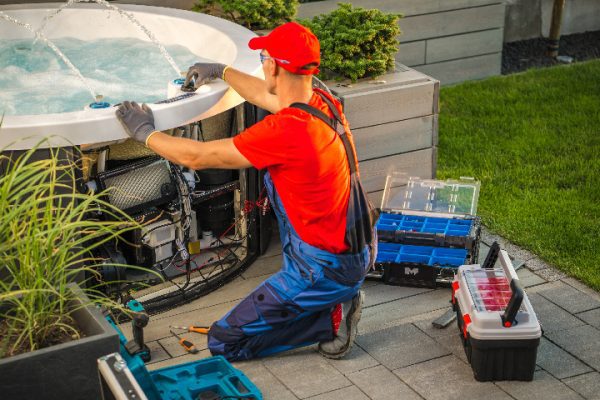
A Step-by-Step Guide to Maintaining Your Chlorine Generator Cell for Salt Water Pool Owners

A salt water pool system offers a luxurious and gentle swimming experience for pool owners, but it also requires regular maintenance to keep it working efficiently. One of the essential components of a salt water pool system is the chlorine generator cell. It is responsible for converting salt into chlorine, keeping your pool water clean and free of harmful bacteria. In this article, we will walk you through how to check, clean, and replace your chlorine generator cell to ensure the longevity and effectiveness of your salt water pool system.

Step 1: Checking the Chlorine Generator Cell

  1. Turn off the pool system: For safety purposes, always turn off the power to your pool system before inspecting or working on the chlorine generator cell. This will help avoid any accidents caused by electrical shock.
  2. Locate the cell: The chlorine generator cell is usually installed near the pool equipment pad. It is a cylindrical component connected to the plumbing system and may have a clear housing that allows you to see inside.
  3. Inspect for damage or wear: Look for any signs of damage, such as cracks in the cell housing, broken wires, or corrosion. If you notice any issues, you may need to replace the cell.
  4. Check for scale buildup: Inspect the cell plates or electrodes for signs of calcium scale buildup. A small amount of buildup is normal, but excessive buildup can reduce the efficiency of the chlorine generator cell and may require cleaning.

Step 2: Cleaning the Chlorine Generator Cell

  1. Remove the cell: Turn off the power and disconnect the cell from the plumbing system. Be sure to follow the manufacturer’s instructions for removing the cell, as the process may vary by model.
  2. Mix a cleaning solution: Prepare a solution of 1 part muriatic acid to 4 parts water in a large, well-ventilated area. Always add the acid to the water, not the other way around. Make sure to wear proper protective gear, such as gloves, goggles, and a mask, when handling muriatic acid.
  3. Soak the cell: Submerge the cell in the cleaning solution for 5-15 minutes or until the scale dissolves. Do not leave the cell in the solution for too long, as it may cause damage to the cell plates.
  4. Rinse the cell: After soaking, remove the cell from the solution and rinse it thoroughly with fresh water. Ensure that all acid residue is removed from the cell before reinstalling it.
  5. Reinstall the cell: Once the cell is clean and dry, follow the manufacturer’s instructions to reconnect it to the pool system. Turn the power back on and monitor the cell to ensure it is working correctly.

Step 3: Replacing the Chlorine Generator Cell

If you have determined that your cell needs to be replaced due to damage, wear, or poor performance, follow these steps:

  1. Purchase a new cell: Choose a cell that is compatible with your salt water pool system. Consult the manufacturer’s documentation or seek advice from a pool professional to ensure you are buying the correct model.
  2. Turn off the power: Before removing the old cell, turn off the power to the pool system.
  3. Remove the old cell: Follow the manufacturer’s instructions to disconnect the old cell from the plumbing system.
  4. Install the new cell: Carefully connect the new cell to the pool system, ensuring all connections are secure and the cell is properly oriented. Consult the manufacturer’s instructions for specific installation guidelines.
  5. Turn on the power: Restore power to the pool system and monitor the new cell’s performance to ensure it is working as expected.

Maintaining your chlorine generator cell is crucial for the longevity and effectiveness of your salt water pool system. Regularly checking for signs of wear and scale buildup, as well as cleaning the cell as needed, can help keep your pool water clean and safe for swimming. Replacing a damaged or worn-out cell when necessary is essential to maintaining your pool’s overall health.

By following the steps outlined in this guide, you can extend the life of your chlorine generator cell and keep your salt water pool system running smoothly. As always, consult your pool system’s manufacturer for specific guidance and recommendations tailored to your unique setup. Don’t hesitate to reach out to a pool professional if you need further assistance or advice on maintaining your salt water pool.

???? Recommended Products

Based on the topics covered in this article, here are our top product picks to help you maintain a healthy, sparkling pool:

As an Amazon Associate, we earn from qualifying purchases. Prices are approximate and may vary.

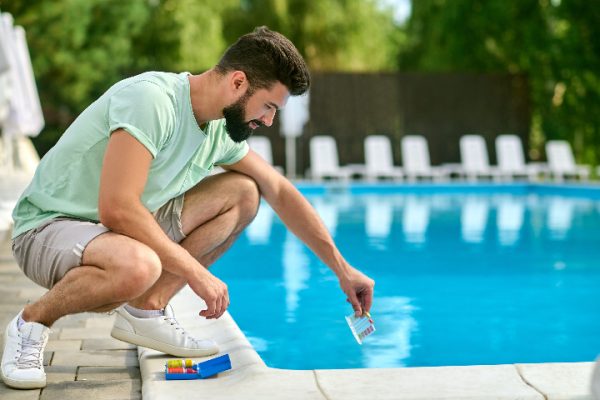
Above Ground Pool Top Rails: An Overview and Replacement Guide

Above ground pools are a popular and affordable option for homeowners looking to add a swimming pool to their property. One essential component of an above ground pool is the top rail, which provides support and stability to the pool structure. In this article, we’ll explain what above ground pool top rails are, when they might need replacement, and how to replace them to maintain a safe and functional swimming pool.

What Are Above Ground Pool Top Rails?

Top rails are horizontal beams that run around the perimeter of an above ground pool at the top edge. They are typically made of metal or resin materials and are designed to provide support and stability to the pool walls. These rails also serve as a finished edge for the pool’s vinyl liner, ensuring a smooth and secure fit.

In addition to their structural role, top rails can also be a decorative element of your pool, with various styles and finishes available to suit your aesthetic preferences.

When to Replace Above Ground Pool Top Rails

There are several reasons why you might need to replace the top rails of your above ground pool:

  1. Damage: Top rails can become damaged due to harsh weather conditions, corrosion, or accidents. Visible signs of damage, such as bending, warping, or rust, may indicate that replacement is necessary to maintain the structural integrity of your pool.
  2. Aging: Over time, top rails may weaken or deteriorate due to exposure to pool chemicals, sunlight, and water. If your pool is more than a few years old, it’s a good idea to inspect the top rails regularly and replace them if necessary.
  3. Aesthetic reasons: If you’re updating the look of your pool, replacing the top rails can be a simple and effective way to improve its appearance.


How to Replace Above Ground Pool Top Rails

Step 1: Gather the necessary tools and materials

Before starting the replacement process, gather the necessary tools and materials, including:

  • Replacement top rails: Ensure they are the correct size and style for your pool.
  • A screwdriver or drill: To remove and install fasteners.
  • A rubber mallet or soft hammer: To help position the new top rails.

Step 2: Drain the pool

Before replacing the top rails, you’ll need to drain the pool water to a level below the top edge of the pool walls. This helps reduce the pressure on the pool walls and prevents water from spilling over during the replacement process.

Step 3: Remove the old top rails

Using a screwdriver or drill, remove the fasteners that secure the top rails to the pool structure. Carefully remove each rail, taking care not to damage the pool walls or liner. Set aside the old rails for disposal or recycling.

Step 4: Inspect the pool walls and liner

With the top rails removed, inspect the pool walls and liner for any signs of damage or wear. If necessary, repair or replace any damaged components before installing the new top rails.

Step 5: Install the new top rails

Position the new top rails on the pool walls, aligning them with the existing holes for the fasteners. Use a rubber mallet or soft hammer to gently tap the rails into place, ensuring a snug and secure fit. Attach the rails using the provided fasteners, tightening them with a screwdriver or drill.

Step 6: Refill the pool

With the new top rails installed, refill the pool to the appropriate water level. Check for any leaks or other issues and address them as necessary.

Conclusion

Above ground pool top rails play a crucial role in maintaining the structural integrity and appearance of your swimming pool. By understanding when and how to replace these components, you can keep your pool safe, functional, and looking its best. Always consult your pool manufacturer’s guidelines and instructions for the specific top rail replacement process and materials, as well as any local regulations that may apply. Regular inspection and maintenance of your above ground pool, including the top rails, will help extend its lifespan and ensure a pleasant swimming experience for you and your loved ones all season long.

???? Recommended Products

Based on the topics covered in this article, here are our top product picks to help you maintain a healthy, sparkling pool:

As an Amazon Associate, we earn from qualifying purchases. Prices are approximate and may vary.