Winter Pool Wonders: How to Keep Algae and Murky Waters at Bay

Ah, winter! While the snow-covered landscapes and cozy nights by the fireplace are quite the charm, pool owners know there’s another side to the tale: the challenge of keeping your pool clean and algae-free during the cold months. Fortunately, it doesn’t have to be a Herculean task. Let’s dive deep into the steps to minimize algae growth and maintain crystal-clear pool water during winter.

1. Why Winter Pool Care Matters:

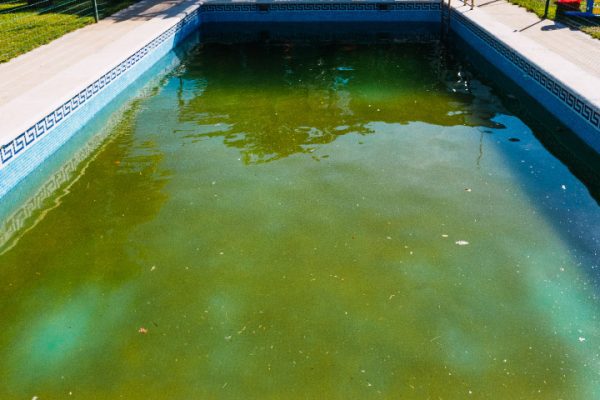
Though your pool might not be the hub of activity during winter, neglecting it can lead to bigger problems come spring. Algae, particularly green algae, can take advantage of the situation, and before you know it, your pool can turn from clear to green.

2. Steps to Ensure a Clean Winter Pool:

a. Balance Before You Close: Before you winterize your pool, ensure that the water chemistry is perfectly balanced. This involves checking the pH, alkalinity, and calcium hardness.

b. A Solid Shock Treatment: Shock your pool before you close it. This treatment will kill any existing bacteria or algae and prevent new growths during the initial phase of winter.

c. Keep It Covered: Use a high-quality pool cover. This helps keep out debris, which can provide a nutrition source for algae. Make sure the cover fits well and has no tears or holes.

d. Algaecide to the Rescue: After shocking the pool, add an algaecide. This serves as an extra layer of protection against potential algae blooms.

e. Circulate Occasionally: On milder winter days, consider running the pool pump for a few hours. This will circulate the water, ensuring even distribution of chemicals and deterring algae growth.

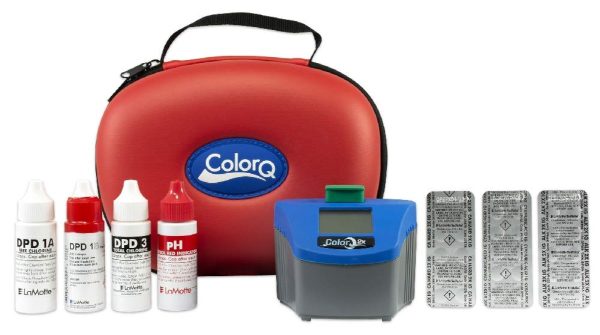
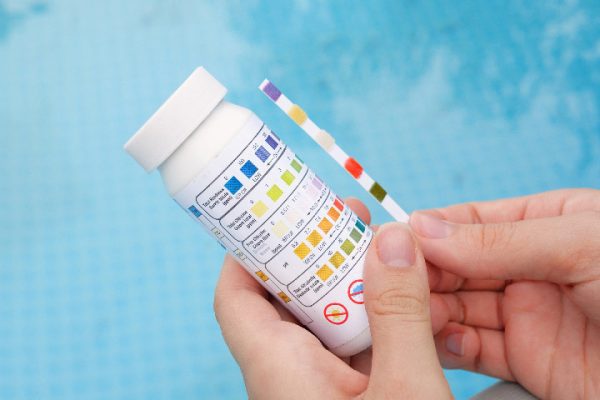
f. Check the Chemistry: Even during winter, periodically check your pool’s chemistry. This ensures that pH and sanitizer levels remain in the optimal range.

g. Clear Out Debris: Even with a pool cover, some debris might find its way into your pool. Regularly remove leaves, twigs, and other debris to minimize organic materials in the water.

h. Keep an Eye on the Water Level: A lower water level can expose parts of your pool to the elements, causing damage and making it easier for algae to establish a foothold. Ensure your pool maintains an appropriate water level throughout the winter.

3. The Early Spring Inspection:

As winter recedes, and before you officially open your pool for spring, inspect the water. If it’s clear, you’re in a good position. If it’s started to turn cloudy or green, consider another shock treatment and algaecide application to get ahead of the problem.

Conclusion:

Winter pool care is all about proactive measures. By ensuring your pool is clean, chemically balanced, and well-protected before winter hits, you set the stage for a smooth, algae-free transition into spring. With a bit of care, your pool will remain a clear oasis, even in the heart of winter, ready for those sunny days ahead! ❄️????‍♂️????

???? Recommended Products

Based on the topics covered in this article, here are our top product picks to help you maintain a healthy, sparkling pool:

As an Amazon Associate, we earn from qualifying purchases. Prices are approximate and may vary.

Battling the Slip & Slide: Tackling Slimy Pool Walls

You step into your pool, hoping for a relaxing swim, but instead, you’re met with a slippery sensation under your fingers. Slimy pool walls can quickly turn your refreshing oasis into a less-than-inviting space. Let’s dive into what causes these slimy invaders and how to effectively show them the exit.

1. Why Are My Pool Walls Slimy?

The prime culprits behind slimy pool walls are:

  • Algae Growth: The most common reason. Algae spores can find their way into your pool through wind, rain, or even contaminated pool tools. Once they take hold, they can quickly multiply, forming a slimy layer.
  • Improper Chemical Balance: A pool with imbalanced chemicals, particularly low chlorine levels, can become a breeding ground for algae and bacteria.
  • Biofilm: This is a collection of microorganisms that stick to each other on a surface. It can be a precursor to algae and, if not treated, might lead to persistent algae problems.

2. Curing Slimy Pool Walls:

a. Scrub-A-Dub-Dub: Grab a pool brush and scrub the walls. This physical agitation breaks up the algae or biofilm, making it easier for pool chemicals to act on them.

b. Shock Treatment: Using a good quality pool shock, preferably with a high concentration of chlorine, can effectively kill off algae and bacteria. Follow the manufacturer’s instructions for dosing and ensure the pool pump is running to distribute it evenly.

c. Adjust Your Chemical Levels: Regularly test and adjust the chemical levels in your pool. Ensure chlorine levels are within the recommended range, typically between 1-3 parts per million (ppm).

d. Use an Algaecide: If algae are the primary problem, consider adding an algaecide to your pool maintenance routine. This will help prevent future outbreaks.

e. Filter Maintenance: A clean filter is critical. Backwash or clean the filter regularly to ensure it’s catching all the debris and dead algae.

f. Consider Phosphate Removers: Algae feed on phosphates. Using phosphate removers can starve and reduce algae growth.

3. Preventing Future Slippery Encounters:

a. Regular Maintenance: Consistent pool maintenance, including brushing the walls and floor at least once a week, can keep algae and biofilm at bay.

b. Balanced Chemicals: Regularly test the pool water and adjust chemical levels as necessary. Keeping the water balanced prevents the growth of unwanted microorganisms.

c. Pool Circulation: Ensure your pool pump and filter are running efficiently. Good water circulation helps distribute sanitizing chemicals evenly and prevents algae growth.

d. Check Surroundings: Overhanging trees or shrubs can drop leaves into the pool, providing organic matter for algae to feed on. Regularly clear out leaves and debris from the pool.

Conclusion:

Slimy pool walls might feel like a huge setback, but with the right knowledge and tools, it’s an issue that can be addressed head-on. Remember, prevention is the best cure. By maintaining a clean, chemically balanced pool, you can ensure that every swim is a smooth experience, free from the unexpected slimy surprise!

???? Recommended Products

Based on the topics covered in this article, here are our top product picks to help you maintain a healthy, sparkling pool:

As an Amazon Associate, we earn from qualifying purchases. Prices are approximate and may vary.

Backwash Basics: When and How to Clean Your Swimming Pool Filter

A refreshing dive into your pool is the best way to beat the summer heat. But for that pristine water, a lot happens behind the scenes – especially within your pool filter. One of the vital maintenance routines for any pool owner is backwashing. Let’s dive into the hows and whens of this essential pool chore.

1. What is Backwashing?

Backwashing is the process of cleaning your pool’s sand or DE (diatomaceous earth) filter by reversing the flow of water to wash away contaminants and debris. In short, it’s like giving your filter a mini spa day to rejuvenate and work efficiently again.

2. Why is Backwashing Important?

Just as we need regular showers, your filter also needs a periodic clean-up. Over time, filters trap debris and particles which can restrict the water flow and decrease the filter’s efficiency. Backwashing:

  • Ensures clean water by removing debris from the filter.
  • Enhances the efficiency of the filtration system.
  • Extends the life of your filter.

3. Spotting the Right Time:

While many recommend backwashing on a set schedule, it’s best to be guided by the pressure gauge on your filter:

  • Monitor the Pressure: Most filters have an optimal operating range (often between 10-20 psi). When the pressure rises 8-10 psi over the baseline, it’s time to backwash.
  • Visual Checks: Some pools have a see-through glass or plastic “sight glass” which can be used to check the clarity of the water being backwashed. Once the water runs clear, the backwashing process is complete.
  • Regularly Scheduled Maintenance: Even if the pressure hasn’t increased significantly, consider backwashing once a month during peak usage.

4. The Backwashing Process:

a. Turn Off the Pump: Safety first! Always turn off the pump before moving the multiport valve or backwash valve.

b. Adjust the Valve: Rotate your filter’s multiport valve to the “backwash” position. If you have a slide valve, simply push or pull the handle to initiate backwash.

c. Turn On the Pump: With the valve in the backwash position, turn the pump back on. You’ll see water flow out through the waste line.

d. Rinse After Backwashing: Once water runs clear in the sight glass or after 2-3 minutes, turn off the pump, switch the valve to the “rinse” position, and turn the pump on again for about 20-30 seconds. This settles the sand and removes any remaining debris.

e. Return to Normal: Turn off the pump, move the valve back to “filter,” and then turn the pump back on.

5. A Few Tips:

  • Avoid Over-backwashing: Overdoing it can actually wash away the beneficial bacteria and useful particles that help trap contaminants.
  • Replace Lost DE: If you have a DE filter, you’ll need to replace the DE powder after backwashing.
  • Consult the Manual: Always refer to your filter’s manual for specific backwashing instructions and recommendations.

Conclusion:

Backwashing may sound technical, but once you get the hang of it, it’s just another easy step in your pool maintenance routine. With regular backwashing, your filter will continue to serve you efficiently, ensuring that every swim is a pleasure! ????‍♂️????

???? Recommended Products

Based on the topics covered in this article, here are our top product picks to help you maintain a healthy, sparkling pool:

As an Amazon Associate, we earn from qualifying purchases. Prices are approximate and may vary.

Mastering the pH of Your Swimming Pool

Having a swimming pool in your backyard is undeniably one of the most satisfying feelings, especially during a hot summer day. But like all good things, a pool comes with responsibilities. One of the critical aspects of pool maintenance is managing the pool’s pH level. Let’s embark on a journey to understand the pool’s pH and the chemicals essential for its equilibrium.

1. What is pH, and Why Should You Care?

In simplest terms, pH measures how acidic or basic water is on a scale from 0-14. A pH of 7 is neutral. Anything below 7 is acidic, while anything above is basic or alkaline. For swimming pools, the ideal pH range is between 7.2 and 7.8.

A balanced pH is crucial because:

  • It ensures that chlorine and other sanitizers work effectively.
  • It prevents skin and eye irritation for swimmers.
  • It protects your pool equipment from potential damage.

2. The Yin and Yang of Pool Chemicals:

a) To Raise pH (pH is too low or acidic):

  • Soda Ash (Sodium Carbonate): This is the most common chemical to raise pH. It’s quick, efficient, and relatively easy to apply.
  • Baking Soda (Sodium Bicarbonate): While primarily used to raise alkalinity, it can also increase pH, albeit slowly.

b) To Lower pH (pH is too high or alkaline):

  • Muriatic Acid (Hydrochloric Acid): Highly effective and acts quickly. However, it’s caustic, so handle with care and always read the label.
  • Dry Acid (Sodium Bisulfate): It’s a granular form and a safer alternative to muriatic acid. It’s easier to store and handle.

3. Factors Affecting Pool pH:

Several factors can sway your pool’s pH:

  • Rain and Tap Water: Depending on your region, both might be acidic or alkaline, affecting your pool’s balance.
  • Swimmers: Oils, sweat, lotions, and other contaminants from swimmers can alter pH levels.
  • Chemicals: Algaecides, chlorine, and other pool additives can influence pH.

4. Testing and Adjusting Regularly:

Regular testing is the key to maintaining balanced water. Using test kits or test strips, check pH levels at least once a week, more if the pool is used heavily.

When adjusting pH:

  1. Test first and determine how much of a chemical you need.
  2. Add chemicals in small amounts, retest, and then add more if necessary.
  3. Always follow the manufacturer’s instructions when adding chemicals.

Conclusion:

Understanding and managing your pool’s pH is an art as much as it is a science. By staying vigilant, testing regularly, and using the right chemicals, you can ensure that your pool remains a safe and pleasant oasis for everyone. Dive in with confidence, knowing you’ve mastered the balancing act!

???? Recommended Products

Based on the topics covered in this article, here are our top product picks to help you maintain a healthy, sparkling pool:

As an Amazon Associate, we earn from qualifying purchases. Prices are approximate and may vary.

Dancing with the Chlorine Duo: Understanding and Managing Combined Chlorine

If you’re a pool owner, chances are you’re familiar with the term “chlorine.” It’s our trusty ally in keeping pools sparkling clean and free from harmful bacteria. However, did you know that not all chlorine in your pool is doing the heavy lifting? Enter: Combined Chlorine. It’s essential, sneaky, and sometimes a little problematic. Let’s dive deep into what combined chlorine is and how to tackle it when its levels rise.

1. What is Combined Chlorine?

At its core, chlorine’s job is to sanitize – to neutralize organic material like bacteria, algae, sweat, and urine. Once chlorine has done its job, it combines with these contaminants, forming what is known as “chloramines” or “combined chlorine”. Unlike free chlorine, which is fresh and active, combined chlorine is “used up” chlorine. It’s the reason behind that strong chlorine smell many people associate with pools. Contrary to popular belief, a strong chlorine smell doesn’t mean there’s too much chlorine; it’s an indication of too much combined chlorine or chloramines.

2. Why is High Combined Chlorine a Problem?

  • Irritation: Combined chlorine can cause skin, eye, and respiratory irritations.
  • Ineffectiveness: It’s less effective as a sanitizer compared to free chlorine.
  • Odor: As mentioned earlier, it gives off that unpleasant “chlorine” smell.

3. How Do You Measure Combined Chlorine?

To determine combined chlorine levels, you’ll first need to measure both your total chlorine and your free chlorine. Subtracting your free chlorine level from your total chlorine level gives you your combined chlorine.

For example: If your total chlorine is 3 ppm (parts per million) and your free chlorine is 1 ppm, your combined chlorine is 2 ppm.

4. Managing High Combined Chlorine:

If your combined chlorine level exceeds 0.5 ppm, it’s time to take action.

Shocking or Superchlorination: This process involves adding a large amount of chlorine (usually 10 times the combined chlorine level) to the pool to break down the unwanted chloramines. Remember to test your pool’s pH before shocking and adjust if necessary.

Non-chlorine Shock: For those who want to avoid adding more chlorine, a non-chlorine shock (based on potassium peroxymonosulfate) can oxidize the contaminants without increasing chlorine levels.

5. Prevention is Better than Cure:

The best way to handle combined chlorine is to prevent its levels from rising in the first place.

  • Regular Testing: Keep an eye on your combined chlorine levels.
  • Maintain Proper pH: A balanced pH (between 7.4 to 7.6) helps chlorine work more effectively.
  • Shower Before Swimming: Encourage swimmers to shower, reducing the organic material introduced into the pool.

Conclusion:

While chlorine is a fantastic tool in our pool maintenance toolkit, it’s essential to understand and manage all its forms. By keeping an eye on combined chlorine and understanding how to address it, you ensure a healthier, happier swimming environment. Dive in, and don’t let chloramines rain on your pool parade!

???? Recommended Products

Based on the topics covered in this article, here are our top product picks to help you maintain a healthy, sparkling pool:

As an Amazon Associate, we earn from qualifying purchases. Prices are approximate and may vary.

Canine Splash: Is It Okay to Let Your Dog Dive into the Pool?

Picture this: It’s a warm, sunny day, and you’re lounging by the pool with a refreshing beverage in hand. Suddenly, a burst of energy in the form of your four-legged friend dashes past you and takes a flying leap into the water. The question pops into your mind, “Is it okay for my dog to swim in the pool?” Let’s dive into this!

1. Health Benefits for Fido:

Swimming is an excellent exercise for dogs. It offers:

  • Low-impact exercise, perfect for aging or arthritic dogs.
  • A great way to burn off excess energy.
  • Mental stimulation and a chance to learn new skills.

2. Pool Water and Dog’s Health:

Chlorine: While the chlorine levels in most pools aren’t dangerously high for dogs, it can dry out their skin and fur. Make sure to rinse your dog off with fresh water after each swim.

Saltwater Pools: The salt content in most saltwater pools is not harmful to dogs. However, as with chlorine pools, it’s a good idea to rinse them off after swimming to prevent skin irritation.

3. Protecting Your Pool:

Fur and Filters: Dog hair can be troublesome for your pool’s filtration system. Ensure you groom your dog regularly and check and clean the pool filter more frequently if your dog is a frequent swimmer.

Nails: Dogs’ nails can potentially damage vinyl pool liners. It’s essential to keep their nails trimmed.

4. Training and Safety First:

If you decide to introduce your dog to swimming, make sure they know how to get in and out of the pool safely. Invest in a doggie life vest, especially if your dog isn’t a natural swimmer or if you have a deep pool.

5. Watch for Pool Chemicals:

Never let your dog swim right after you’ve added chemicals to the pool. Wait until the chemicals have fully dispersed and are at safe levels.

6. Hydration Station:

Ensure your dog has access to fresh drinking water. You don’t want them drinking chlorinated pool water, as consuming large amounts can lead to stomach upset.

7. Know Your Breed:

While many dogs love water, not all breeds are natural swimmers. Breeds like Bulldogs may have difficulty swimming due to their body structure. Always supervise your dog while swimming.

Conclusion:

With the right precautions, there’s no reason your furry friend can’t enjoy the pool alongside you. It’s a great way for them to stay cool, have fun, and get some exercise. Always prioritize their safety, keep an eye on pool cleanliness, and have fresh water and shade available for post-swim relaxation. Happy swimming!

???? Recommended Products

Based on the topics covered in this article, here are our top product picks to help you maintain a healthy, sparkling pool:

As an Amazon Associate, we earn from qualifying purchases. Prices are approximate and may vary.

Slithering Surprise: How to Handle a Snake in Your Swimming Pool

Discovering a snake in your pool can be an alarming experience. Whether it’s a harmless garden snake or a more dangerous species, no one wants to share their swim with a slithery intruder. But fear not! Here’s a step-by-step guide on what to do if you find a snake in your swimming pool.

1. Stay Calm and Keep a Safe Distance: It’s important to remember that most snakes are not aggressive unless threatened. If you notice a snake, stay calm, ensure everyone exits the pool safely, and maintain a safe distance.

2. Identify the Snake (if possible): If you live in an area with venomous snakes, try to identify the snake from a distance. Familiarize yourself with local snake species. Remember, many harmless snakes can look similar to their venomous counterparts. If in doubt, treat the snake as if it’s venomous.

3. Safely Remove the Snake: For non-venomous, smaller snakes:

  • Using a long pool skimmer or a similar tool, gently guide the snake towards the edge of the pool.
  • Carefully lift the snake out and let it go in a safe area away from the pool.

For larger or potentially venomous snakes:

  • It’s safer to not handle the snake yourself. Instead, call local animal control or a professional snake removal service to deal with the situation.

4. Prevent Future Unwanted Guests: To minimize the chances of another snake taking a dip:

  • Install a mesh pool fence or barrier around your pool. Ensure the mesh is fine enough to prevent snakes from entering.
  • Regularly trim grass and bushes around the pool area, eliminating hiding spots.
  • Keep the area around the pool free from clutter, food scraps, and trash which can attract rodents – a primary food source for many snakes.

5. What if a Snake Bites Someone? While rare, it’s essential to know what to do in case of a snakebite:

  • Call emergency services immediately.
  • Keep the bitten person calm and still to slow the spread of venom.
  • Do not suck out the venom or cut the bite area.
  • Try to remember the snake’s appearance to help medical personnel determine the best treatment.

6. Snakes are Important Too! It’s essential to remember that snakes play a vital role in our ecosystem, controlling pests and maintaining a balance in nature. If you find a snake in your pool, it’s likely just as scared as you are and is looking for a way out.

Conclusion: While finding a snake in your swimming pool can be startling, with a bit of knowledge and preparation, you can handle the situation calmly and safely. Embrace the beauty of nature, but always prioritize safety first!

???? Recommended Products

Based on the topics covered in this article, here are our top product picks to help you maintain a healthy, sparkling pool:

As an Amazon Associate, we earn from qualifying purchases. Prices are approximate and may vary.

Mastering the Salt Dance: Understanding PPM and Balancing Salt in Chlorine Generator Pools

Dip your toe into the world of saltwater pools, and you’ll soon encounter the term ‘parts per million’ or PPM. While it might sound scientific and daunting, understanding PPM and its relation to salt in swimming pools is essential for optimal pool maintenance. Let’s dive in!

1. What is PPM? Parts Per Million (PPM) is a unit of measure that describes the concentration of one substance within another. In the context of a saltwater pool, PPM refers to the concentration of salt in the water. To visualize this, imagine a million tiny boxes of water. If your pool’s salt concentration is 3000 PPM, then 3000 of those boxes would contain salt, and the rest would contain only water.

2. Why is PPM Important in Saltwater Pools with Chlorine Generators? Saltwater pools utilize chlorine generators, often called salt chlorinators. These devices convert salt (sodium chloride) into chlorine, which disinfects the water. For the generator to work efficiently, the salt concentration in the pool must be maintained within a specific range, usually between 2700 to 3400 PPM. Too low, and the generator can’t produce enough chlorine; too high, and it may damage the equipment or lead to overly saline water.

3. How to Measure the Salt PPM in Your Pool: To determine your pool’s salt PPM:

  • Use a salt test kit, which can be purchased at most pool supply stores. These kits are designed to provide quick and accurate readings of salt concentration.
  • Some advanced digital saltwater chlorinators display the salt PPM on their control panels, providing real-time data for pool owners.

4. Balancing the Salt in Your Swimming Pool: If salt PPM is too low:

  • Determine how much salt your pool needs by consulting your chlorine generator’s manual. There are also online calculators that can help.
  • Add the recommended amount of pool-grade salt (not table salt!) evenly across the pool. Use a pool brush to help dissolve and distribute the salt.
  • Wait for 24 hours and then recheck the salt PPM.

Use our salt calculator for easy balancing. https://poolchemicalcalculator.com/Pool-Salt-PPM-Calculator.html

If salt PPM is too high:

  • The only effective way to reduce salt PPM is to dilute the pool water. This means partially draining the pool and refilling it with fresh water.
  • Once refilled, run the pool pump for at least 24 hours to circulate the water and then recheck the salt PPM.

5. Maintaining the Perfect Balance: Regularly check the salt PPM, especially after heavy rainfall, large amounts of fresh water added, or after backwashing a sand filter, as these can dilute the salt concentration.

Conclusion: Understanding and maintaining the correct salt PPM in your chlorine generator pool is crucial for its efficiency and longevity. With regular checks and the right balance, you can enjoy a pristine pool with the perfect hint of saltiness, offering an ocean-like experience right in your backyard!

???? Recommended Products

Based on the topics covered in this article, here are our top product picks to help you maintain a healthy, sparkling pool:

As an Amazon Associate, we earn from qualifying purchases. Prices are approximate and may vary.

Seal the Deal: A Flawless Guide to Winterizing Your Swimming Pool Filter

Introduction:

As the summer waves goodbye, the swimming pool season wraps up, paving the way for a critical task – winterizing. Amidst the numerous winterization tasks, giving special attention to your swimming pool filter is paramount. Let’s delve into the crucial steps, ensuring that when spring awakens, your pool filter is ready to dive back into action without a hitch.

1. The Weight of Winterizing:

The core function of your swimming pool filter in maintaining a crystal-clear oasis during swimming months is pivotal. Winterizing it is about safeguarding this valuable component from potential freezing damage and prolonging its lifespan, ensuring that it’s ready and raring to go when swim season returns.

2. Step-by-Step to Winter-Proof Your Pool Filter:

  • Shut It Down: Ensure all power to the pump and filter is switched off at the breaker to prevent accidental startups.
  • Disassemble Components: Based on your filter type (cartridge, sand, or DE filter), remove any internal components such as cartridges or grids, and thoroughly clean them. Store these elements in a dry, safe place.
  • Drain It Right: Water left inside the filter can freeze and expand, leading to cracks and damage. Ensure that all the water is thoroughly drained from the filter, pump, and any associated piping.
  • Antifreeze for Plumbing: Utilize a pool antifreeze (non-toxic) for the plumbing lines to prevent any residual water from freezing and causing damage.
  • Add a Winter Plug: Utilize winter plugs for the inlet and outlet ports of the filter to keep water out of the system.
  • Cover and Shield: If the filter is stationed outdoors, consider using a durable, weather-resistant cover to shield it from the harsh winter elements.

3. A Stitch in Time:

  • Gaskets and O-Rings: While the filter is offline, take the opportunity to check all gaskets and O-rings. Replace them if any wear or damage is evident.
  • Lubrication: Apply a suitable lubricant to the O-rings to preserve their elasticity and ensure a good seal for the next season.
  • Physical Check: Make sure there are no visible cracks or damage on the filter body and connections.

4. A Ponder on Replacement:

Winterizing is an apt time to ponder upon the condition of your filter. If it’s reaching the end of its expected service life or has given you trouble during the season, it may be time to consider a replacement.

5. A Note on Professional Assistance:

While many pool owners undertake winterization themselves, obtaining professional assistance is never a bad idea. A professional can spot potential issues that may be missed by the untrained eye.

Conclusion:

Winterizing your pool filter might be a procedure wrapped in meticulous care, but it’s a labor of love that pays dividends when the sun shines high again. Safeguard your pool, its components, and get ready to uncover a problem-free system when the warm days beckon. Your future self, ready for a dive, will thank you!

???? Recommended Products

Based on the topics covered in this article, here are our top product picks to help you maintain a healthy, sparkling pool:

As an Amazon Associate, we earn from qualifying purchases. Prices are approximate and may vary.

Shutting Down in Style: Winterizing Your Chlorine Generator with Grace

The last summer splash has happened, the colorful leaves signal autumn’s embrace, and every swimming pool owner knows it’s time to wrap things up for the winter season. The chlorine generator, your trusty sidekick in keeping pool waters pristine, also needs to winterize. Here’s how you can show it some appreciation and get it winter-ready.

1. The Importance of Winterizing Your Chlorine Generator:
The chlorine generator (often referred to as a salt cell) is a master at converting salt to chlorine, ensuring your pool stays algae-free and sanitized. However, even these tough devices can fall prey to the perils of freezing temperatures, potentially cracking or getting damaged. Winterizing is all about avoiding such mishaps.

2. Step-by-Step Guide to Winterizing Your Chlorine Generator:

  • Turn It Off: Before diving into the winterizing process, always turn off the chlorine generator at the circuit breaker. Safety first!
  • Clean It Out: Just like a season’s end deep house clean, your chlorine generator also benefits from a good cleaning. Detach the salt cell and give it a gentle acid wash as per the manufacturer’s guidelines.
  • Drain All Water: Freezing water expands, and you don’t want that happening inside your generator. Ensure that you’ve drained out every drop of water from the unit.
  • Disconnect & Store: If you’re living in an area with severe winter conditions, consider disconnecting the chlorine generator and storing it indoors. While many units are frost-proof, storing them inside adds an extra layer of protection.
  • Protect External Units: If your generator system comes with an external control unit, protect it from the elements. Use a weatherproof cover to prevent moisture, snow, or ice accumulation.
  • Reset to Default: Before shutting it down for the season, reset your chlorine generator to its default settings. This ensures that when you start it up again, it’s at the manufacturer’s recommended settings.

3. A Few Expert Tips:

  • Avoid Last-Minute Rush: Winterizing is best not left to the last minute. Keep an eye on the weather forecast and begin the process before the first frost strikes.
  • Documentation is Your Friend: Always keep the manufacturer’s manual handy. Different models might have unique winterizing requirements.
  • Keep a Check: Even during the off-season, it’s a good idea to occasionally inspect your generator and other pool equipment for any signs of damage or wear.

Conclusion:
Bidding adieu to swimming sessions might feel bittersweet, but with the proper steps, you ensure that your chlorine generator is all set for a grand reopening next season. Winterizing is more than just a chore; it’s a sign of care. And with these guidelines in hand, you’re not only safeguarding your investment but also promising yourself a hassle-free, sunny start when the pool days return!

???? Recommended Products

Based on the topics covered in this article, here are our top product picks to help you maintain a healthy, sparkling pool:

As an Amazon Associate, we earn from qualifying purchases. Prices are approximate and may vary.