
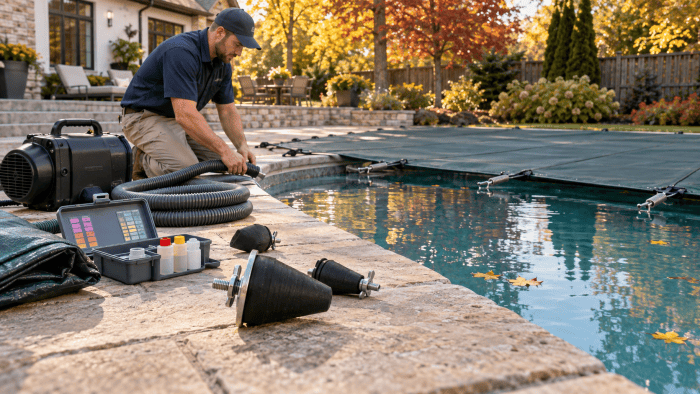
How to Close an Inground Pool: A Practical Fall Winterization Guide
Water Chemistry Targets for Winter Closing
Get your water balanced before you close — this protects your pool surfaces and equipment all winter. Here are your targets:
Quick answer
How to Close an Inground Pool: A Practical Fall Winterization Guide: Water Chemistry Targets for Winter Closing Get your water balanced before you close — this protects your pool surfaces and equipment all winter. Here are your targets: pH: 7.2-7.6 (aim for 7.4) Total Alkalinity: 80-120.
- pH: 7.2-7.6 (aim for 7.4)
- Total Alkalinity: 80-120 ppm
- Calcium Hardness: 200-400 ppm (vinyl: 175-225 ppm)
- Free Chlorine: 1-3 ppm before adding shock
- After shocking: 10-12 ppm (it’ll fade over winter)
Why these numbers matter: Low pH and alkalinity create corrosive water that etches plaster and eats metal components. High calcium causes scaling. And inadequate sanitizer lets algae colonize before your cover even settles.
Your pool’s volume determines exactly how much of each chemical you need. A 15,000-gallon pool requires roughly twice the chemicals of an 8,000-gallon pool. Use our pool volume calculator to get your exact number, then dial in your chemistry with these tools:
- Free chlorine calculator — determine shock dose
- pH calculator — adjust pH safely
- Alkalinity calculator — raise or lower TA
- Calcium hardness calculator — prevent scaling or etching
The Pool Chemical Calculator app runs all these calculations from your phone, poolside. Punch in your test results and volume, and it tells you exactly what to add.
Pool closing supplies
Disclosure: As an Amazon Associate, Pool Chemical Calculator may earn from qualifying purchases.
Step-by-Step Inground Pool Closing Instructions
Step 1: Clean the Pool Thoroughly
Start with a spotless pool. Any debris left behind becomes food for bacteria and stains surfaces over months of sitting.
Tasks:
- Skim the surface completely
- Brush walls, steps, and the waterline tile
- Vacuum the entire floor (don’t rely on the automatic cleaner)
- Empty all baskets — skimmer and pump
- Clean the waterline with tile cleaner to remove oils and scale
Spend 45-60 minutes here. A clean pool closes better and opens easier.
Step 2: Test and Balance Water Chemistry
Test your water with fresh strips or a liquid kit. Don’t trust strips older than 6 months — they degrade.
Adjustment order matters:
- Total alkalinity first (it affects pH readings)
- pH second
- Calcium hardness third
- Sanitizer last
Make adjustments over 2-3 days if possible. Big chemical swings stress pool surfaces. If you’re closing this weekend, at least wait 4 hours between major additions and retest before the next one.
Step 3: Shock the Pool
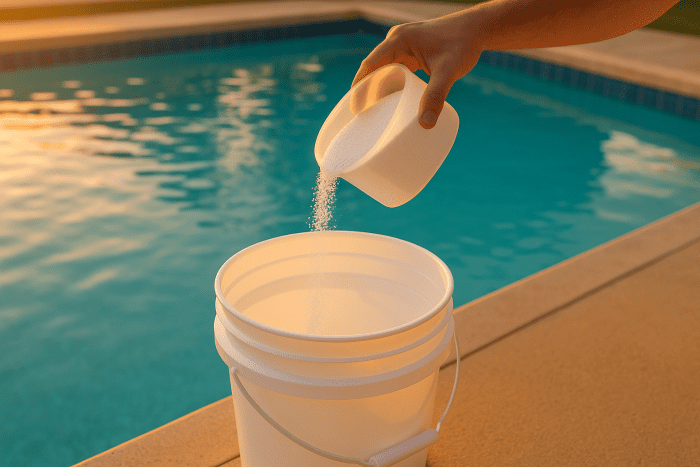
Add granular shock to reach 10-12 ppm free chlorine. For a 20,000-gallon pool, that’s typically 2-3 pounds of calcium hypochlorite shock, depending on your starting chlorine level.
Important: Shock at dusk. Sunlight destroys unstabilized chlorine within hours. You want maximum sanitizer contact time before you close.
Run the pump overnight after shocking to distribute chemicals evenly.
Step 4: Add Winter Closing Chemicals
The day after shocking (chlorine should be back to 3-5 ppm), add your winter chemical kit. A good pool closing kit includes:
- Winter algaecide (prevents growth under the cover)
- Stain and scale preventer (protects surfaces and equipment)
- Enzyme treatment (digests oils and organic buildup)
Follow the kit’s dosing instructions based on your pool volume. Kits are typically sized for 15,000 or 20,000 gallons — if your pool is larger, buy two.
Step 5: Lower the Water Level
How far you lower the water depends on your cover type and climate:
- Solid cover: 4-6 inches below the skimmer mouth
- Mesh cover: 12-18 inches below the skimmer (accounts for rainwater accumulation)
- Mild climate, solid cover: 4 inches below is fine
- Heavy freeze climate: 6+ inches provides extra safety margin
Use your filter’s “waste” setting to drain directly out (backwash hose to a drain area). Don’t drain through the filter — you’re about to winterize it.
Never drain an inground pool completely. Groundwater pressure can actually pop a vinyl liner or float a concrete shell. Always leave most of the water in place.
Step 6: Blow Out the Plumbing Lines
This is the critical step that prevents freeze damage. You need to force all water out of every line.
Equipment options:
- Shop vac set to blow (works for simple setups)
- Cyclone blower (pool-specific, highly effective)
- Air compressor with regulator set to 25-30 PSI max
Process for each line:
- Remove the pump drain plugs and filter drain plug
- Attach blower to skimmer line
- Blow air until you see strong bubbles at the main drain (30+ seconds of steady bubbles)
- Move to each return line — blow until air rushes from that jet for 30+ seconds
- Immediately plug each return/skimmer as you finish
Use winter expansion plugs designed for freeze protection. They’re rubber with a wingnut that compresses the plug tight. The expansion design allows slight movement if any residual water freezes.
Step 7: Add Pool Antifreeze to Lines (When Needed)
Do you need pool antifreeze after blowing lines? Here’s the honest answer:
Yes, add antifreeze if:
- You couldn’t blow lines thoroughly (weak blower, complex plumbing)
- Your area sees temperatures below 20°F regularly
- You have a main drain line that can’t be completely cleared
- Any line has low spots that trap water
You can skip antifreeze if:
- You used a powerful blower and verified 30+ seconds of air from every opening
- Your climate rarely drops below 25°F
- All lines run with consistent slope toward the pool
Pool antifreeze is non-toxic (propylene glycol) and safe for pools. Use 1 gallon per line in cold climates. Pour it into the skimmer and lines after blowing but before plugging.
Step 8: Drain and Store Equipment
Remove drain plugs from:
- Pump housing (usually two plugs — bottom and front)
- Filter tank (bottom drain)
- Heater (check manufacturer instructions — some have multiple drains)
- Chlorinator or salt cell
- Any booster pumps (cleaner pump, water feature pump)
Store drain plugs in the pump basket so you find them in spring.
If you have a cartridge filter, remove the cartridge, hose it clean, and store it indoors. Sand filters should be backwashed before closing and left with the valve in the “winterize” position (if available) or between settings.
Multiport valve: Leave the handle between settings so internal springs don’t stay compressed all winter.
Step 9: Install the Winter Cover
Safety covers (mesh or solid with anchors) offer the best protection. They’re secure, keep debris out, and prevent accidents.
Solid floating covers require a cover pump to remove rainwater and snowmelt. Without one, water weight will sink and damage the cover — or dump all that dirty water into your pool.
Cover installation tips:
- Remove any sharp objects from the coping that could tear the cover
- For safety covers: use the included hardware; don’t skip anchors
- Tension should be snug but not drum-tight
- For solid covers: add the cover pump immediately; set it on a crate to keep it above the cover surface
When to Stop and Hire a Professional
DIY closing works great for straightforward setups: skimmer, 2-4 returns, simple suction-side cleaner, no heater or spa. But some configurations genuinely need professional attention.
Call a pro if you have:
- Attached spa with separate jets and dedicated plumbing
- In-floor cleaning system (pop-up heads with buried manifolds)
- Multiple valves and you’re not 100% sure what each one controls
- Heat pump or gas heater and you’ve never drained it before
- Slide, waterfall, or water feature with hidden plumbing
- Any lingering doubt about whether you’ve cleared all lines
A professional closing costs $200-400 depending on your region and pool complexity. Compare that to $600+ for a cracked return line repair or $1,500+ for a destroyed heater heat exchanger.
Troubleshooting Common Closing Problems
Problem: Can’t get air to blow from a return
Likely cause: Valve partially closed, debris blockage, or line routing you don’t know about.
Solution: Check all valves are fully open. Try blowing from the return side back toward the equipment. If still stuck, add extra antifreeze to that line or call a technician.
Problem: Water keeps refilling the skimmer after draining
Likely cause: You’re draining below a suction line or the main drain is feeding water back.
Solution: Close the main drain valve if accessible. You may need to add antifreeze to the skimmer line and plug it quickly.
Problem: Cover pump runs constantly
Likely cause: Low spot in cover pooling water, or pump can’t keep up with rain.
Solution: Add air pillows under the cover to create a center peak. Upgrade to a higher-capacity pump. Check pump intake isn’t clogged with debris.
Problem: Pool turned green under the cover during a warm spell
This happens. A mesh cover allows sunlight through, and warm fall weeks promote algae growth.
Solution: If it’s still above freezing, remove the cover, shock heavily, run the pump until clear, and re-close with additional algaecide.
Frequently Asked Questions
What chemicals do I need to close an inground pool?
You need pH adjuster (up or down), alkalinity increaser if needed, calcium hardness increaser (for plaster/concrete pools), granular chlorine shock, winter algaecide, and stain/scale preventer. A complete closing kit contains the last three. Figure 2-3 pounds of shock for a typical 15,000-20,000 gallon pool.
How far below the skimmer should I lower an inground pool?
Lower water 4-6 inches below the skimmer mouth for solid covers. For mesh covers, go 12-18 inches below since rainwater will accumulate. In extremely cold climates, err toward the deeper drain for extra freeze protection.
Can I close an inground pool myself?
Yes, if your pool has a simple plumbing setup (skimmer, 2-4 returns, no heater, no attached spa). You need a way to blow out lines — a shop vac on reverse, a rented blower, or a compressor. If you have complex plumbing, a heater, in-floor cleaners, or an attached spa, hire a professional for your first closing, then decide if you can handle future years.
Do I need pool antifreeze after blowing out lines?
Not always. If you successfully blew strong air through every line for 30+ seconds, and your climate stays above 20°F, you can skip it. But antifreeze is cheap insurance — use 1 gallon per line in cold climates or any line you couldn’t fully clear.
When should I close my inground pool for winter?
Close when water temperature consistently stays below 65°F. Closing too early (water still warm) encourages algae growth under the cover. In most northern climates, that’s mid-October to early November.
Sources
- CDC Pool Chemical Safety Guidelines — Safe handling practices for pool chemicals
- CDC Home Pool Water Treatment and Testing — Water quality standards and testing guidance
- Lowe’s Winterization Guide — Step-by-step closing overview
- This Old House: How to Winterize a Pool — Detailed winterization walkthrough
Get Your Chemistry Right Before Closing
Don’t guess on chemical doses. Wrong amounts waste money and leave your pool vulnerable. The Pool Chemical Calculator gives you exact measurements based on your pool’s volume and current test results. Balance your water correctly this fall, and you’ll thank yourself when spring arrives.
Open the Pool Chemical Calculator →
Recommended pool supplies
As an Amazon Associate, Pool Chemical Calculator earns from qualifying purchases.

Raises calcium hardness to reduce corrosive water risk in plaster, concrete, and equipment.
View on Amazon
Accurate readings make every chlorine, pH, alkalinity, calcium, and CYA dose safer.
View on Amazon
Raises total alkalinity so pH is less likely to bounce around after treatment.
View on AmazonGet exact pool chemical doses
Pool Chemical Calculator turns your test readings, pool volume, and target levels into exact treatment amounts for chlorine, pH, alkalinity, calcium, stabilizer, salt, and more.
Open the Pool Chemical Calculator app for iOS, Android, or web.