
Pool Timer Replacement: When to Replace, DIY Steps, and Keeping Your Water Safe
Signs Your Pool Timer Needs Replacement
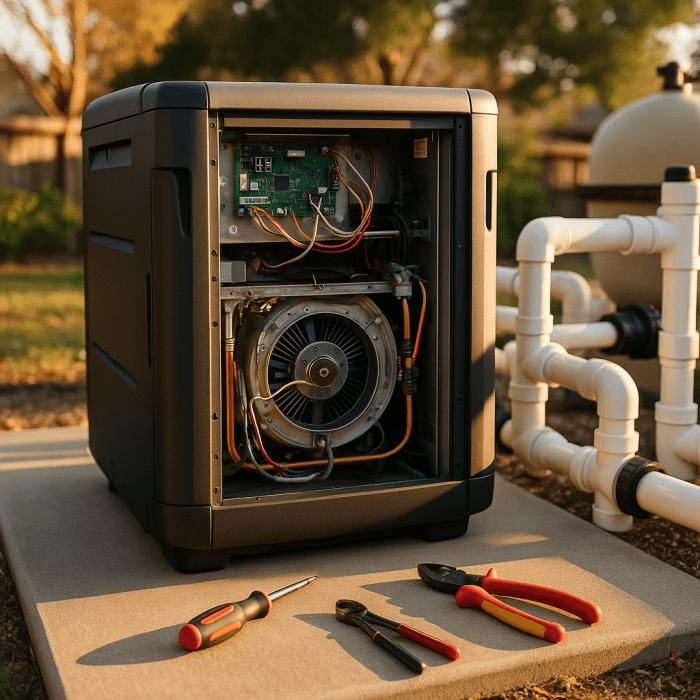
Not every timer problem requires a full replacement. Sometimes a tripped breaker or a stuck tripper (those little tabs on mechanical timers) is the culprit. Here’s how to tell the difference:
Quick answer
Pool Timer Replacement: When to Replace, DIY Steps, and Keeping Your Water Safe: Signs Your Pool Timer Needs Replacement Not every timer problem requires a full replacement. Sometimes a tripped breaker or a stuck tripper (those little tabs on mechanical timers) is the culprit. Here's how to tell.
Definitely Replace If:
- Burned or corroded contacts — Open the timer box and look at the copper contacts. Black marks, melting, or heavy corrosion mean the timer’s done.
- Motor runs but clock won’t turn — The timer motor hums, but the dial doesn’t rotate. Internal gears are shot.
- No power to the timer at all — Breaker’s on, wires are connected, but the timer shows no signs of life. Could be a failed motor.
- Erratic on/off cycles — Your pump turns on at random times or runs for wrong durations despite correct settings.
- Visible damage — Cracks in the housing, water intrusion, or sun-bleached plastic that’s become brittle.
Try Troubleshooting First:
- Pump won’t turn on — Check that the tripper tabs (mechanical) are positioned correctly or that programming (digital) is set right.
- Timer seems stuck — Mechanical timers occasionally need a manual nudge. Turn the dial clockwise gently.
- Intermittent operation — Could be loose wire connections rather than a bad timer. Tighten all terminals.
If troubleshooting doesn’t solve it, replacement is your path forward.
Mechanical vs. Digital Pool Timers: Which Should You Choose?
When you’re replacing your timer, you’ve got a choice to make. Both work fine — the right pick depends on how much control you want.
Mechanical Timers
The classic choice. That round dial with push-in or pull-out tripper tabs has been around for decades.
Pros:
- Dead simple to program — push in tabs for “on” periods
- No batteries to replace
- Cheap: $40-80 for a quality unit
- Easy to see at a glance when the pump will run
- Works indefinitely without software glitches
Cons:
- Limited to 15-30 minute increments (depending on tab spacing)
- Manual adjustment twice yearly for daylight saving time
- Only one on/off cycle per day on basic models
- Audible ticking (some people find it annoying)
Best for: Homeowners who want set-it-and-forget-it simplicity. If your pump runs 8 hours straight daily, mechanical handles that perfectly.
Digital Timers
The modern upgrade. LCD screens, multiple programs, and precise scheduling.
Pros:
- Program multiple on/off cycles per day (run pump 4 hours morning, 4 hours evening)
- Minute-level precision
- Some models include countdown modes and override options
- Automatic daylight saving adjustment on premium units
- Often includes battery backup to retain programming during power outages
Cons:
- Higher cost: $80-200
- More complicated setup
- Batteries eventually die (you’ll lose programming)
- Electronics can fail in extreme heat or humidity
Best for: Homeowners with variable-speed pumps, those wanting to run the pump during off-peak electricity hours, or anyone who hates daylight saving time adjustments.
Popular Timer Options
For a straightforward mechanical replacement, the Intermatic T104 series has been the industry standard for decades. It handles up to 40 amps at 240V — plenty for any residential pool pump.
If you want digital control, consider the Intermatic P1353ME or similar units that offer 3-circuit control for pump, lights, and auxiliary equipment.
Pool Timer Replacement Cost Breakdown
What will this project actually cost you? Here’s the honest breakdown:
DIY Replacement
| Item | Cost Range |
|——|————|
| Mechanical timer (Intermatic T104 or equivalent) | $50-80 |
| Digital timer (basic model) | $80-150 |
| Digital timer (multi-circuit, smart features) | $150-300 |
| Wire nuts, electrical tape (if needed) | $5-10 |
| Total DIY Cost | $55-310 |
Professional Installation
| Item | Cost Range |
|——|————|
| Timer unit | $50-300 |
| Electrician labor (1-2 hours) | $100-200 |
| Total Professional Cost | $150-500 |
When to hire a pro: If you’re not comfortable working with 240V electricity, your timer box is corroded and needs replacement along with the timer, or local codes require licensed electrical work.
Safety First: Working with 240V Pool Electrical
Stop reading the step-by-step until you understand this.
Pool timers typically run on 240V — the same voltage as your dryer or electric stove. This isn’t like changing a light switch on a 120V circuit. A mistake here can kill you or start a fire.
Non-Negotiable Safety Rules:
- Turn off the breaker at the main panel. Not just the timer box — the breaker that feeds the timer.
- Use a non-contact voltage tester to confirm power is off before touching any wires.
- Lock out the breaker or tape it in the off position so nobody accidentally flips it while you’re working.
- Take a photo of the existing wiring before disconnecting anything.
- If wires look damaged, burned, or confusing — call an electrician. A $150 service call beats a $50,000 house fire.
Many pool systems also include a separate disconnect box between the panel and the timer. Make sure both are off.
How to Replace a Pool Timer: Step-by-Step
Ready to do this yourself? Here’s the complete process for replacing a standard mechanical pool timer like the Intermatic T104.
Step 1: Turn Off Power and Verify It’s Dead
Go to your main electrical panel. Find the breaker labeled “pool” or “pool pump” — it’s usually a double-pole 20-30 amp breaker. Flip it to the OFF position.
Walk back to your timer box and open it. Use a non-contact voltage tester on the incoming wires (usually the top terminals). The tester should show no voltage. Test between both hot wires and between each hot wire and ground.
If you get any voltage reading, stop. You’ve got the wrong breaker or multiple circuits feeding the box.
Step 2: Document Your Existing Wiring
Take clear photos of every wire connection before removing anything. Get close-ups of which wire goes to which terminal. This is your insurance policy.
Most pool timer wiring follows this pattern:
- Line side (incoming power): Two hot wires (usually black and red) from the breaker
- Load side (outgoing to pump): Two wires going to the pump
- Ground: Green or bare copper wire connected to the box and ground terminal
Note which terminals each wire connects to. Write it down in addition to taking photos.
Step 3: Remove the Old Timer Mechanism
On most Intermatic-style timers, the timer mechanism (the part with the clock dial) pulls out from the enclosure box. There’s usually a small screw or clip holding it in place.
Loosen any set screws and gently pull the timer mechanism straight out. The wires will still be attached — don’t yank it.
Now you can clearly see the wire terminals. Using a screwdriver, loosen each terminal and remove the wires one at a time. As you remove each wire, note its position or refer to your photos.
Step 4: Prepare the New Timer
Unbox your new timer. If it’s the same brand and model as the old one, the terminals will be in identical positions — this makes your job easy.
If you’re switching brands or styles (say, going from mechanical to digital), carefully read the new timer’s wiring diagram. It’s usually printed inside the door or in the manual. The terminals may be in different positions, but the logic is the same: line in, load out, ground.
Step 5: Connect the Wires to the New Timer
Connect wires to the new timer mechanism in this order:
- Ground wire first — Connect the green or bare copper wire to the ground terminal.
- Line wires (incoming power) — Connect to the LINE terminals (usually marked L1 and L2).
- Load wires (to pump) — Connect to the LOAD terminals (usually marked T1 and T2 or LOAD).
Tighten each terminal firmly. Give each wire a gentle tug to make sure it’s secure. Loose connections cause arcing, heat, and fires.
Step 6: Mount the Timer Mechanism and Set the Clock
Slide the timer mechanism back into the enclosure box. Secure it with the mounting screw or clip.
For mechanical timers:
- Pull out the dial slightly and rotate it until the current time aligns with the time marker.
- Push in the tripper tabs for the hours you want the pump to run. Each tab typically represents 15-30 minutes.
- Most pools need 8-12 hours of pump runtime depending on size and usage.
For digital timers:
- Install the backup battery (usually a 9V or AA).
- Follow the programming instructions to set current time and on/off schedules.
Step 7: Close Up and Restore Power
Close the timer box door. Make sure the gasket (if present) seats properly to keep water out.
Go back to your electrical panel and flip the pool breaker to ON.
Return to the timer. You should see the clock motor running (mechanical) or the display lit (digital). Manually override the timer to turn on the pump and verify it runs.
Listen for unusual sounds. The pump should start smoothly without buzzing or struggling.
Congratulations — you just saved $100-200 in labor costs.
What to Do for Pool Chemistry While Your Pump Is Offline
Here’s what most timer replacement guides skip: your pool doesn’t pause while you’re at Home Depot or waiting for Amazon delivery.
Without circulation, your chlorine isn’t distributing. Debris is settling. And algae spores are getting comfortable.
If Your Pump Will Be Down Less Than 24 Hours:
- Don’t panic. A healthy pool can handle a day without circulation.
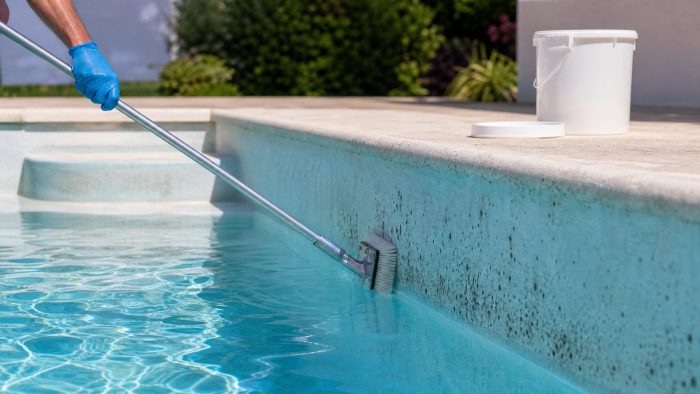
- Brush the walls and floor manually to prevent settling.
- Test your chlorine level using the Pool Calculator app before the pump goes down. If it’s below 3 ppm, add enough chlorine to hit 4-5 ppm as a buffer.
- Skim floating debris by hand so it doesn’t sink.
If Your Pump Will Be Down 24-72 Hours:
This is where problems start.
- Raise chlorine to 5-6 ppm before the downtime using our chlorine calculator.
- Brush the pool daily — this is critical.
- Consider a manual pump run — even 30 minutes of circulation helps. Wire the pump directly if you must (carefully), or use a portable pump.
- Test water daily and adjust chlorine as needed.
If Your Pump Will Be Down Over 72 Hours:
Now you’re in serious territory.
- Check your pool’s specific chlorine demand using the Pool Calculator based on your pool volume.
- Shock the pool (bring chlorine to 10+ ppm) to give yourself more runway.
- Plan for algae treatment as a possibility. Green water recovery costs time and chemicals.
- Consider renting or borrowing a pump if yours requires a multi-day repair wait.
The weather forecast feature can help you anticipate how temperature and sun exposure will affect chlorine demand during your pump downtime.
Intermatic Timer Replacement: Model-Specific Tips
Since Intermatic timers dominate the residential pool market, here are specifics for the most common models:
Intermatic T104 (Mechanical, 240V)
The workhorse. If your existing timer says “T104” anywhere, replacement is straightforward — just buy another T104 and swap the mechanism. Search Intermatic T104 on Amazon.
Common issues: Worn trippers (the tabs fall out) and failed clock motors. You can often replace just the trippers for $10-15 without replacing the whole timer.
Intermatic T101 (Mechanical, 120V)
Less common for pools, but used for some above-ground pool pumps and auxiliary equipment. Verify your voltage before ordering — putting a 120V timer on a 240V circuit will destroy it instantly.
Intermatic P1353ME (Digital, Multi-Circuit)
Premium option that controls pump, lights, and a third circuit (heater, cleaner, etc.) with one unit. Complex to program but extremely capable. Worth the $150-200 if you want precise scheduling.
Frequently Asked Questions
How long do pool timers last?
Mechanical timers typically last 10-20 years with minimal maintenance. Digital timers average 7-12 years — the electronics eventually fail, especially in hot, humid pump house environments. If your timer is over 15 years old and acting up, replacement makes more sense than repair.
Can I upgrade from a mechanical to a digital timer?
Absolutely. The wiring is the same — you’re just swapping the timer mechanism. The enclosure box can usually stay in place. Just match the voltage (most pools use 240V) and amperage rating (at least 20 amps for residential pumps). Read the new timer’s installation instructions carefully since terminal positions may differ.
Do I need a permit to replace a pool timer?
This varies by jurisdiction. Most areas allow homeowners to replace “like for like” equipment without a permit. However, if you’re upgrading the electrical system (adding circuits, changing amperage) or your local code is strict about pool electrical work, check with your building department. When in doubt, a quick call saves headaches later.
Why does my new timer buzz or click but the pump won’t start?
This usually indicates one of three problems: the timer’s internal switch is engaging (clicking) but the load wires aren’t connected properly, the pump itself has a separate issue (bad capacitor, stuck impeller), or the timer’s amperage rating is too low for your pump. Verify all connections first, then test the pump by wiring it directly to power (with the breaker off while connecting). If the pump runs when wired directly, the timer is the issue.
Can a faulty pool timer damage my pump?
Yes. A timer with burned contacts can deliver inconsistent power, causing your pump motor to overheat or fail prematurely. Stuck contacts (where the timer doesn’t turn off) can run your pump continuously — fine for a day, but extended runtime without rest shortens motor life and wastes electricity. If you notice your pump running at odd times, investigate the timer promptly.
Time to Take Control of Your Pool System
A functioning timer keeps your pump running on schedule, your water circulating, and your chemistry balanced. When that timer fails, don’t wait. Every day without proper circulation is a day closer to algae, cloudiness, and expensive recovery.
Whether you tackle the replacement yourself or hire an electrician, replace the timer promptly, verify the pump runs on schedule, and test the water again after circulation is restored. Use the Pool Chemical Calculator app to recalculate chlorine, pH, alkalinity, and stabilizer adjustments based on your actual readings instead of guessing after a pump outage.
Recommended pool supplies
As an Amazon Associate, Pool Chemical Calculator earns from qualifying purchases.
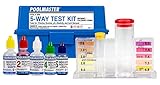
Accurate readings make every chlorine, pH, alkalinity, calcium, and CYA dose safer.
View on Amazon
Useful for algae cleanup, cloudy water, high bather load, and weekly oxidation routines.
View on Amazon
Raises free chlorine quickly without adding stabilizer, which is useful when CYA is already high.
View on AmazonGet exact pool chemical doses
Pool Chemical Calculator turns your test readings, pool volume, and target levels into exact treatment amounts for chlorine, pH, alkalinity, calcium, stabilizer, salt, and more.
Open the Pool Chemical Calculator app for iOS, Android, or web.